This is the story of the Dwarftastic Four, 4 brave dwarves conquering Azeroth's most dangerous opponents and roaming the lands of Azeroth from 2005 till 2006. Orignally written during their adventures, this page is a testament to their endeavours (A true vanilla experience, with everything 4-manned on the Stormreaver EU PvP server), now brought back alive, in a slightly upgraded form.
Before you continue
The read is a bit long, the storytelling isn't anything to write home about and the English might be wonky. From what I recall we missed out screencapping some stuff and for the story, I rearranged some images (so gear might sometimes swap). But still... it's a place where the story can be told, now the Character Armory has forgotten the characters, especially since some of them are forever stuck in a digital limbo. I hope you enjoy the story, and if you like what you see and read, do feel free to send me a message!
But now, without further ado, let's go!


Starting out, our first travels will take us through the Dwarven lands of Dun Morogh and Loch Modan.
Introducing the defenders of Khaz Modan
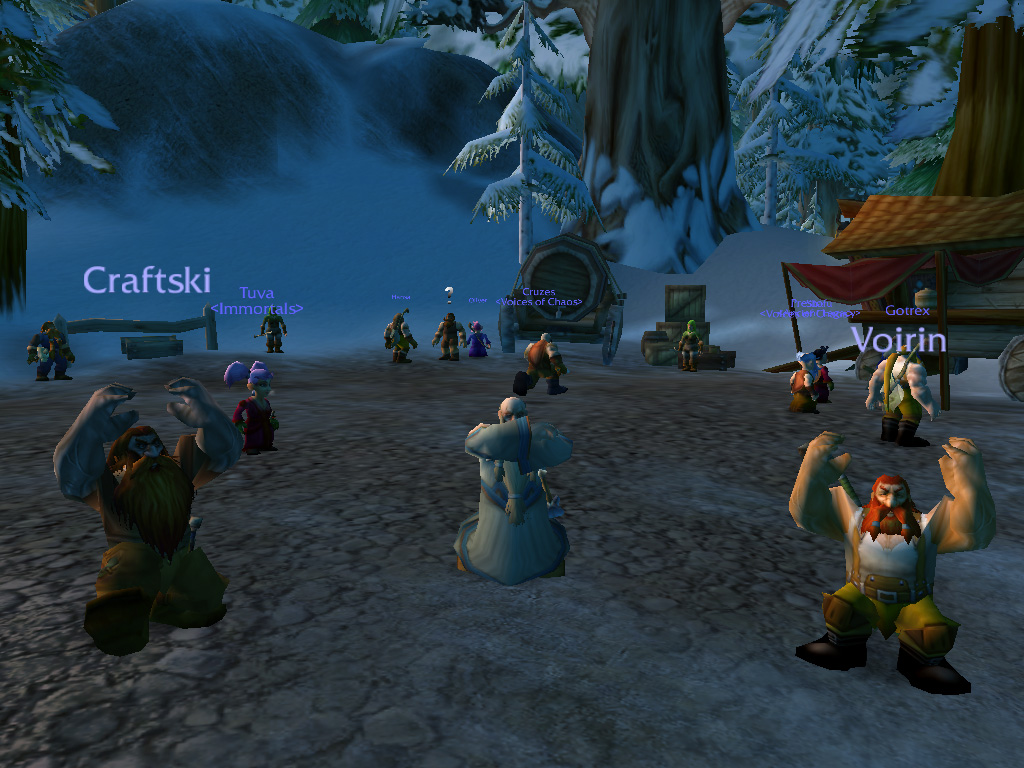
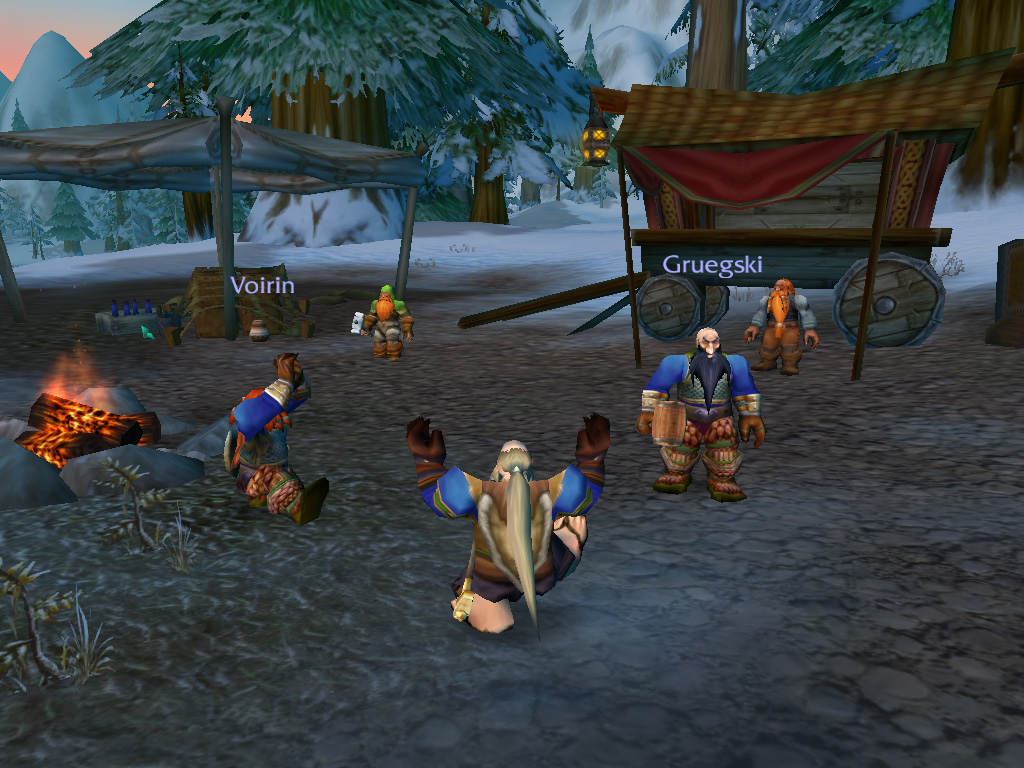
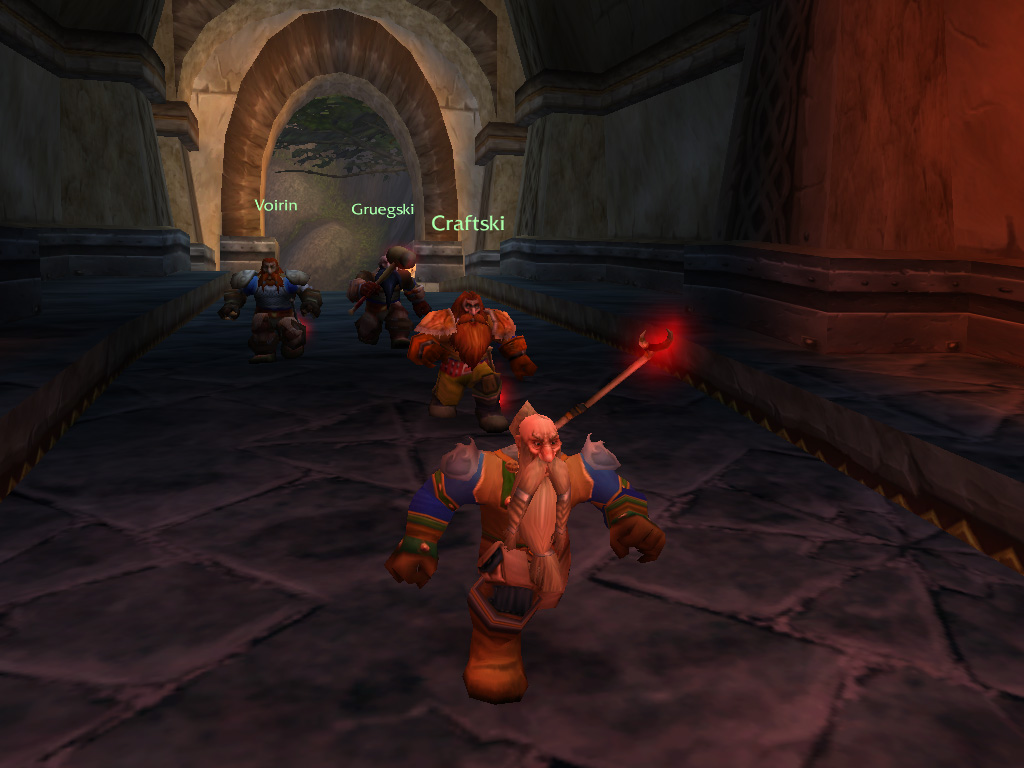
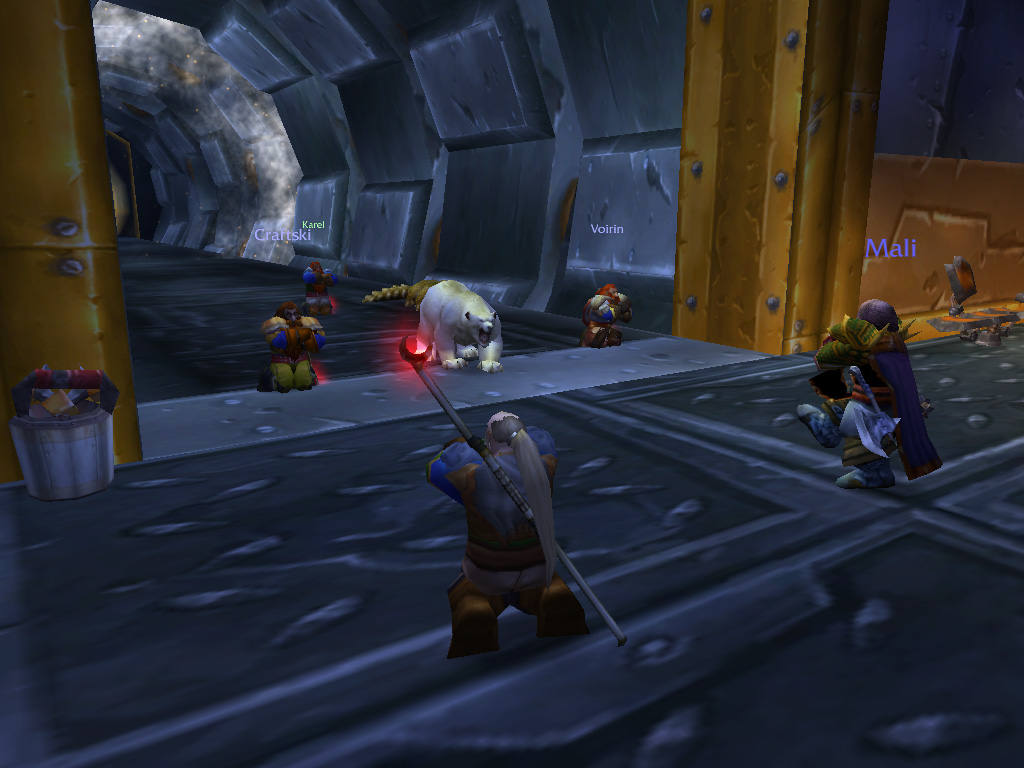
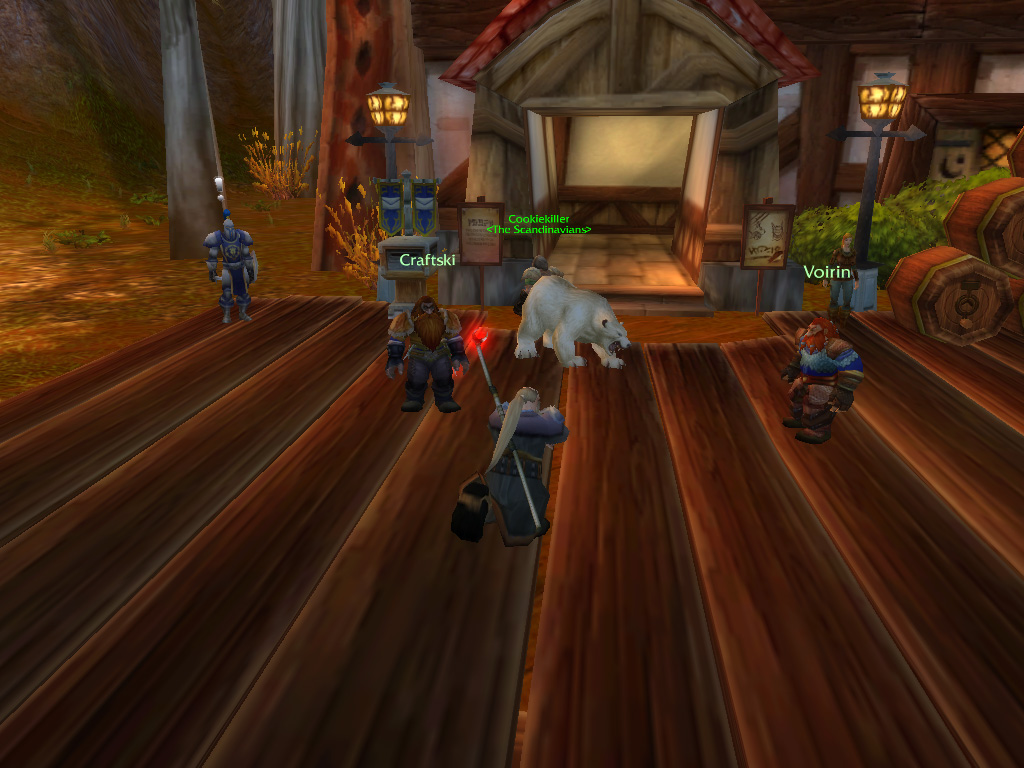
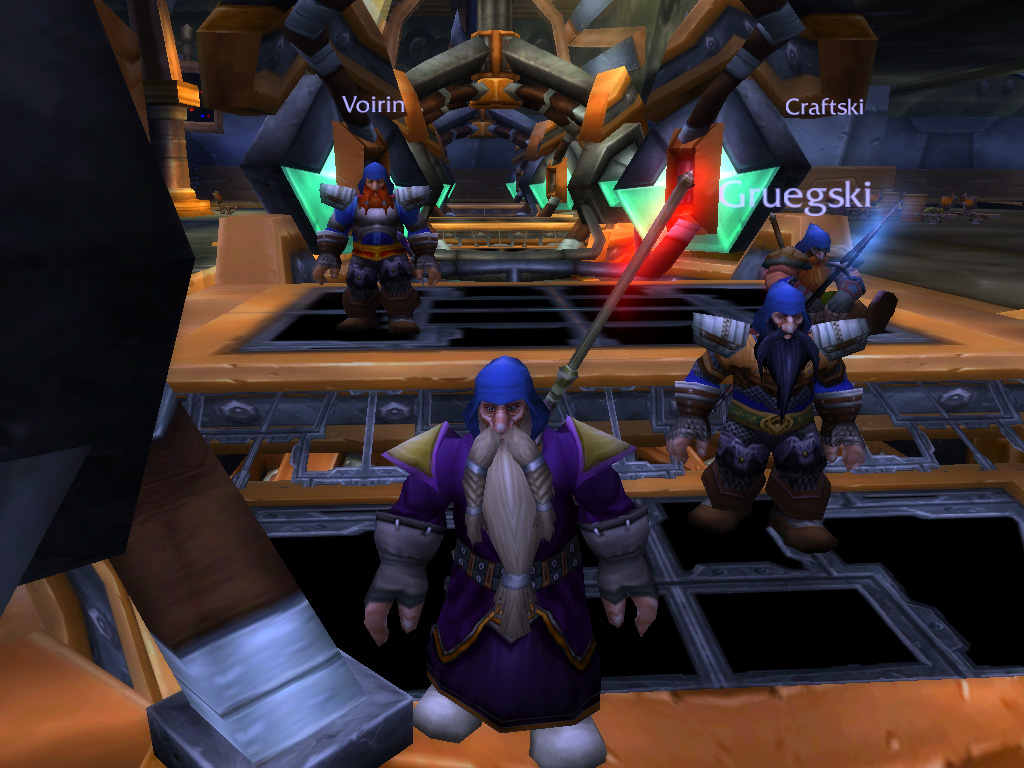
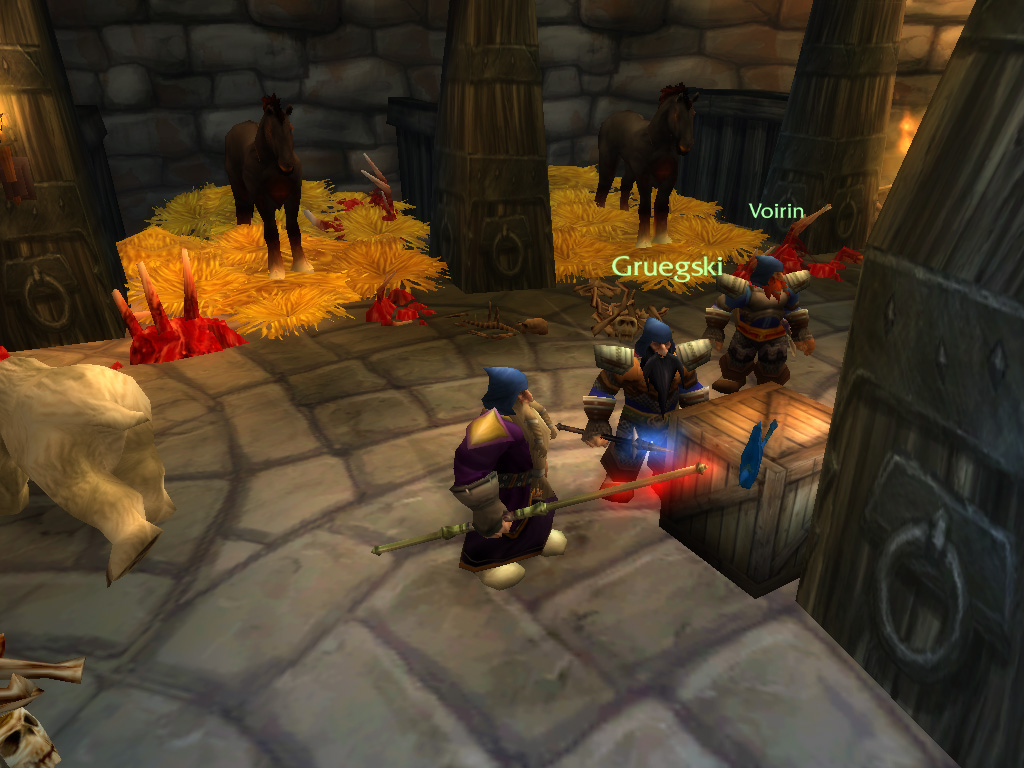
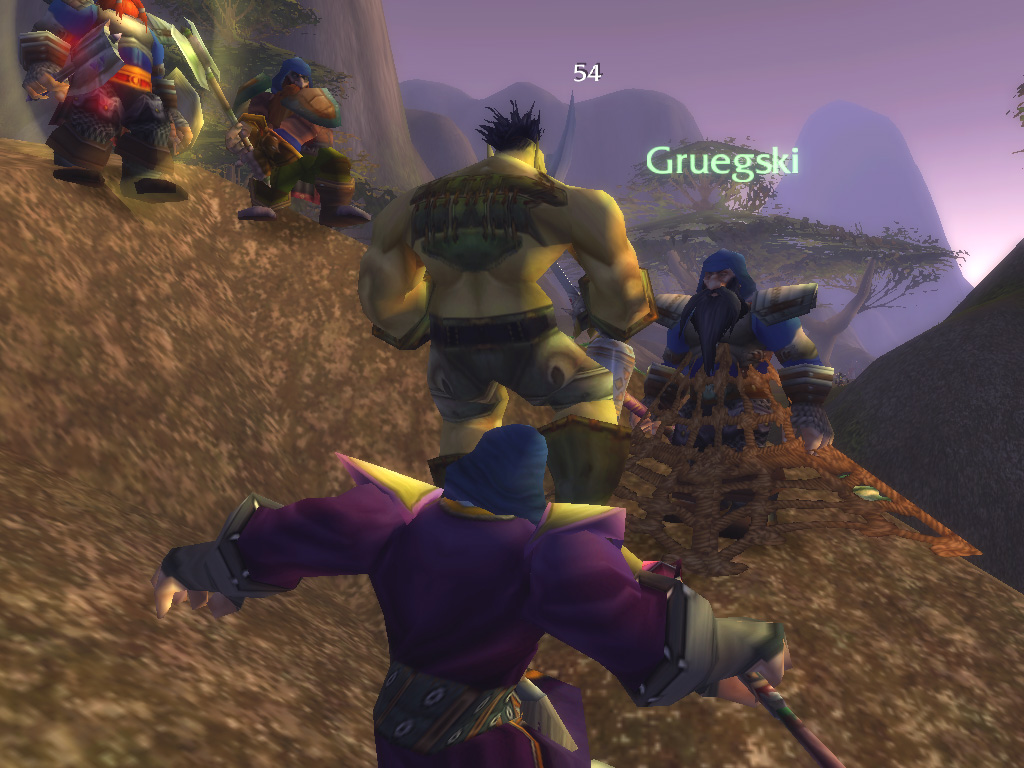
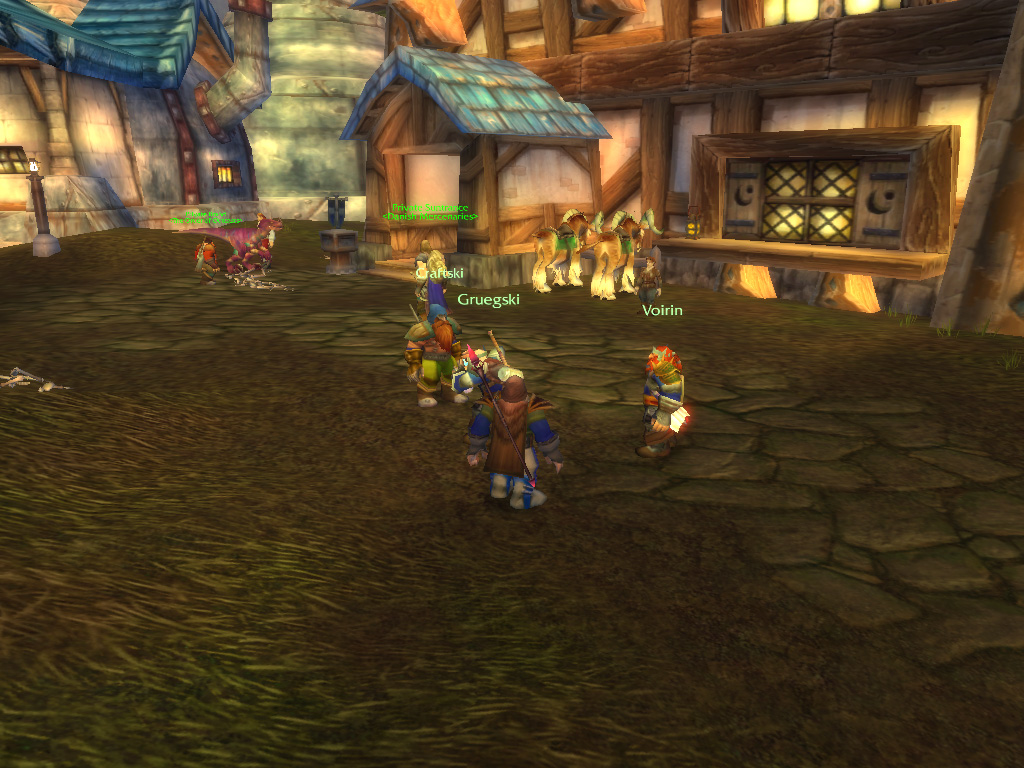
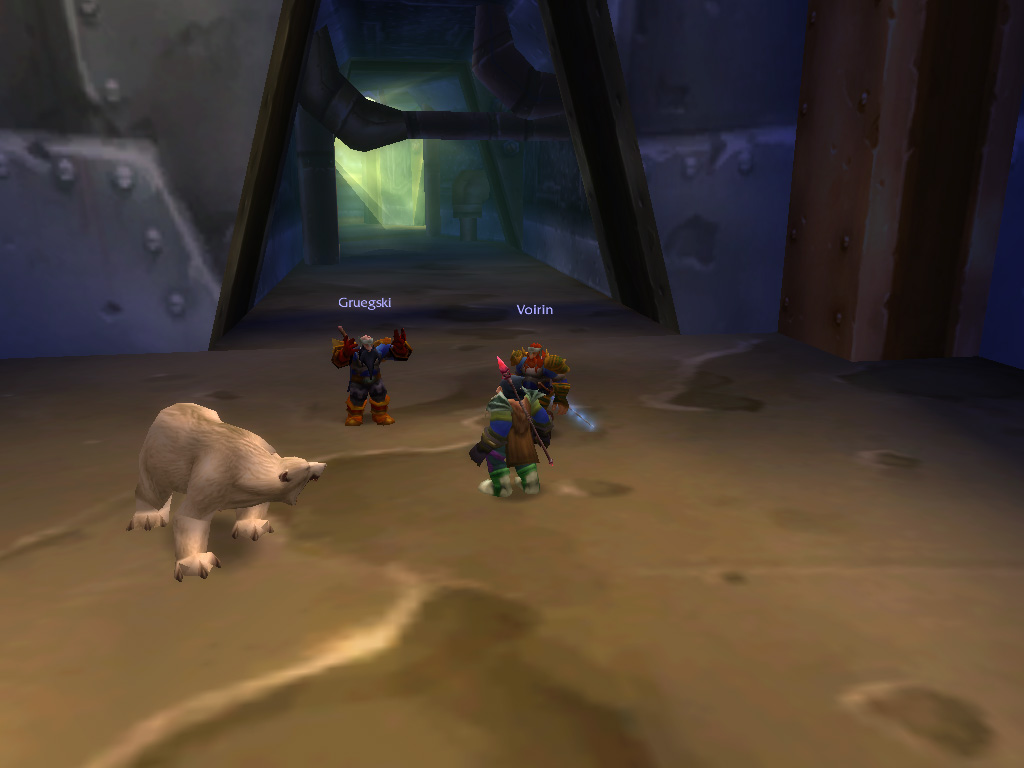
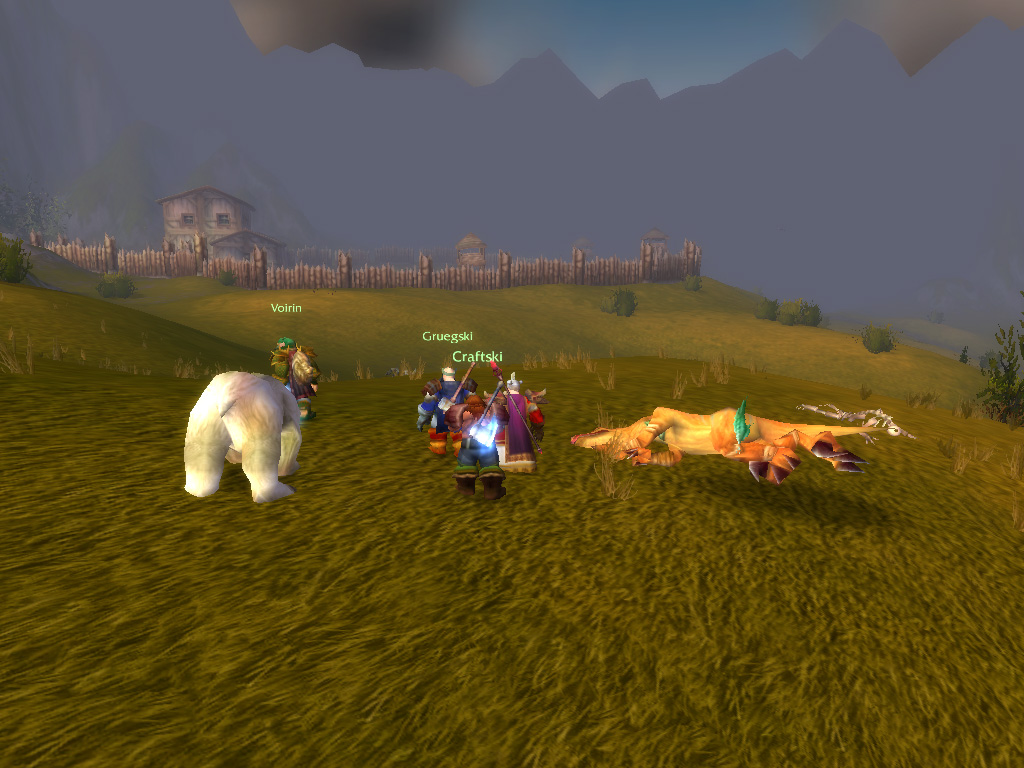
Far away, deep in the cold mountains of Dun Morogh, the story starts. From the hold of Anvilmar four dwarves march forth, bound together by a single purpose: To explore the highest peaks and deepest dungeons of Azeroth. The group consist of Craftski the hunter, Orangz the priest, Voirin the warrior (having the shortest beard, he sacrifices some armour) and Gruegski the paladin (who is missing from the picture, as he sits in the nearby inn quaffing generous amounts of ale).
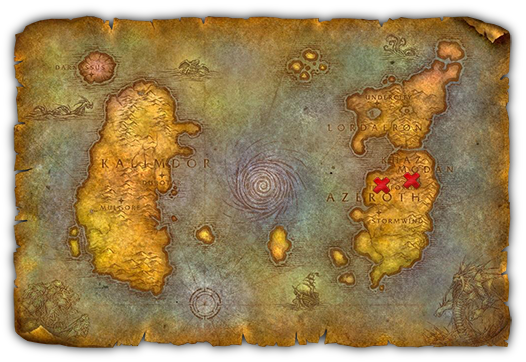
As defenders of Khaz Modan we had our job cut out for us, as there were evil things afoot in the world! In the far north, undead stirred in the frozen lands of Northrend and closer to home, the Horde loomed near our borders, launching attacks from the now forsaken-ruled capital of Lordaeron. And the Dwarven lands weren't safe anymore either, as Troggs and Frostmane trolls sieged Dwarven mines, camps and cities. It would be up to us to play part in stemming the tide.
Far away, deep in the cold mountains of Dun Morogh, the story starts. From the hold of Anvilmar four dwarves march forth, bound together by a single purpose: To explore the highest peaks and deepest dungeons of Azeroth. The group consist of Craftski the hunter, Orangz the priest, Voirin the warrior (having the shortest beard, he sacrifices some armour) and Gruegski the paladin (who is missing from the picture, as he sits in the nearby inn quaffing generous amounts of ale).
As defenders of Khaz Modan we had our job cut out for us, as there were evil things afoot in the world! In the far north, undead stirred in the frozen lands of Northrend and closer to home, the Horde loomed near our borders, launching attacks from the now forsaken-ruled capital of Lordaeron. And the Dwarven lands weren't safe anymore either, as Troggs and Frostmane trolls sieged Dwarven mines, camps and cities. It would be up to us to play part in stemming the tide.
T
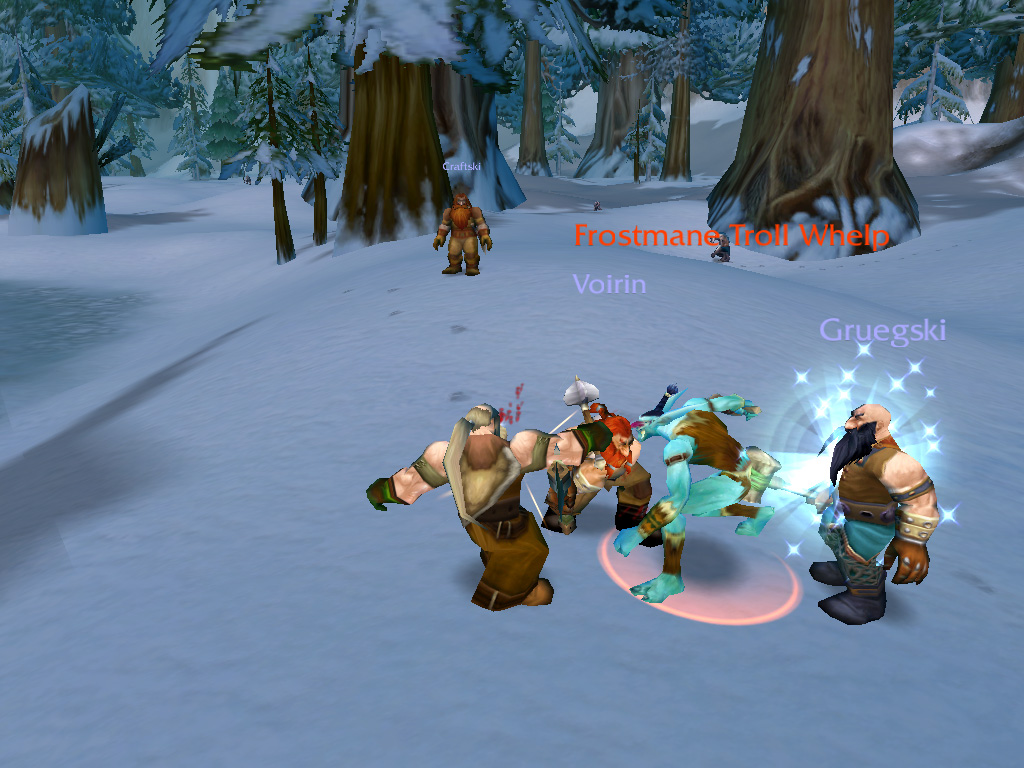
he adventure starts in Coldridge valley, an area having problems with Troggs, Trolls and other things vile. The four of us offer help to our troubled kin: gathering thick fur pelts for a leatherworker, taking care of the Trogg presence outside the Anvilmar hold and even making a mail delivery route around the valley! Being so diligent, we were trusted with one more task: We were sent out to take care of the Frostmane Trolls, which eventually led us to tracking their leader to one of the caves, scattered throughout the valley.
With the four of us, taking him out proved to be an easy task, as it was proven that Trolls were no match for Dwarven might! Returning victorious to Anvilmar, we completed the rites of initiation from our class leaders and continued onwards, on an errand to transport our gathered supplies to the nearby settlement of Kharanos, at the foot of Ironforge mountain.
With the four of us, taking him out proved to be an easy task, as it was proven that Trolls were no match for Dwarven might! Returning victorious to Anvilmar, we completed the rites of initiation from our class leaders and continued onwards, on an errand to transport our gathered supplies to the nearby settlement of Kharanos, at the foot of Ironforge mountain.
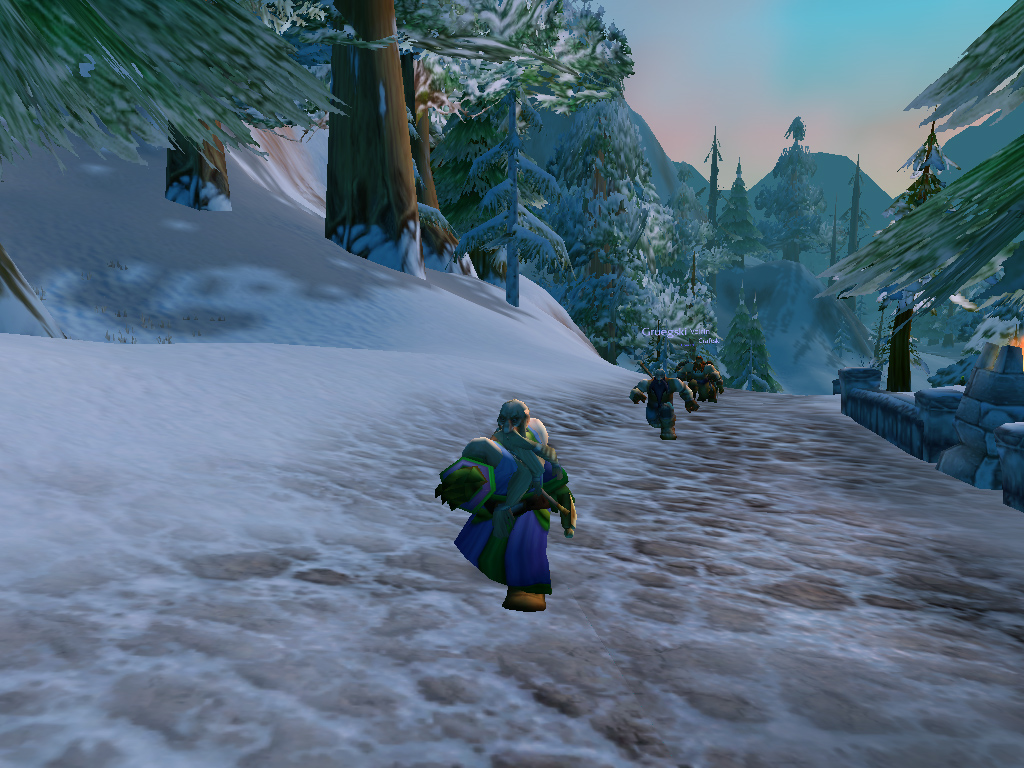
The trip would take us through a few mountain passages, and past the finest of Ironforge: Guards practicing on a shooting range. After helping their commander with reclaiming ammunition for their training, we were finally able to reach Kharanos and deliver the much-needed supplies: multiple caskets of ale and ram jerky! The town folk gave us further assignments, taking us to a Wendigo cave to collect their manes and the surrounding woods to gather supplies for the tank garrison.
An errand to deliver a keg of beer took us to the small encampment of Brewnall Village. Here we were asked to take care of a tribe of dangerous Trolls nearby, taking out their leader and gathering special herbs (which proved to be ingredients for a very fine brew!). Nearby we also found the ruins of Gnomeregan, where we were able to salvage mechanical items a Gnome in Kharanos wanted us to reclaim.
An errand to deliver a keg of beer took us to the small encampment of Brewnall Village. Here we were asked to take care of a tribe of dangerous Trolls nearby, taking out their leader and gathering special herbs (which proved to be ingredients for a very fine brew!). Nearby we also found the ruins of Gnomeregan, where we were able to salvage mechanical items a Gnome in Kharanos wanted us to reclaim.
With our assignments done, we were sent to the capital of Ironforge to deliver a report of our endeavors. After receiving training from craftsmen (during which Orangz made some blue, warm shirts for everyone) and our class masters we turned in our letters, and happy with our results, the commanders in Ironforge sent us onwards. Our orders were to investigate the Gol'Bolar Quarry, a nearby digsite where strange things were afoot.
While traveling, we were hailed at the Amberstill Ranch, where a Wendigo called Vagash was terrorizing their ram herd. The beast proved to be a match for our group, having great strength and endurance, but in the end, we were victorious and received a fine reward. Arriving at Gol'Bolar, it proved to be overrun by Troggs, an infestation which we cleared by descending into the depths of the quarry. After a short run-in with Dark Iron Dwarves we traveled through the mountain passages and found ourselves descending into a lusher area.
While traveling, we were hailed at the Amberstill Ranch, where a Wendigo called Vagash was terrorizing their ram herd. The beast proved to be a match for our group, having great strength and endurance, but in the end, we were victorious and received a fine reward. Arriving at Gol'Bolar, it proved to be overrun by Troggs, an infestation which we cleared by descending into the depths of the quarry. After a short run-in with Dark Iron Dwarves we traveled through the mountain passages and found ourselves descending into a lusher area.


From Dun Morogh and Loch Modan we visit the Wetlands in the North
Mysteries of the Loch
The area surrounding Loch Modan had the same problems as Dun Morogh, as we once again have to deal with those fiendish Troggs. An understaffed garrison captain asked us to take care of the nearby Troggs, testing our strength, as the creatures proved to be stronger the further we traveled into the mountains. Returning, the captain sent us to the cavern where their leader was hiding, which we had to assassinate. We took care of this Trogg called "Grawmug" and his two guards, Gnasher and Brawler, and were rewarded handsomely for our work.
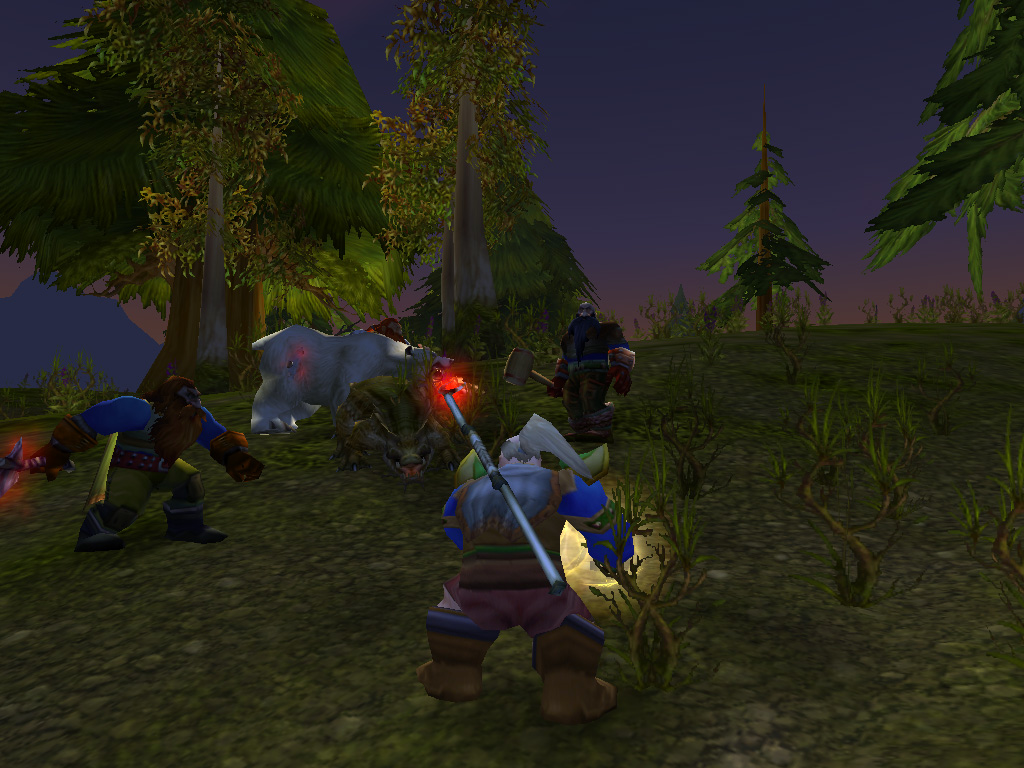
In the meantime, Craftski had honed his hunter skills and managed to tame a wild bear from the Dun Morogh mountains. The bear, called "Beard", proved to be a welcome addition to our gang of four, making us finally a full party of five!
The area surrounding Loch Modan had the same problems as Dun Morogh, as we once again have to deal with those fiendish Troggs. An understaffed garrison captain asked us to take care of the nearby Troggs, testing our strength, as the creatures proved to be stronger the further we traveled into the mountains. Returning, the captain sent us to the cavern where their leader was hiding, which we had to assassinate. We took care of this Trogg called "Grawmug" and his two guards, Gnasher and Brawler, and were rewarded handsomely for our work.
In the meantime, Craftski had honed his hunter skills and managed to tame a wild bear from the Dun Morogh mountains. The bear, called "Beard", proved to be a welcome addition to our gang of four, making us finally a full party of five!
Also, Kobolds, rodent-type creatures, had popped up in Dwarven mines, stealing supplies and precious ore. The last got Voirin quite worked up, as he had just started to train his skills mining it. Inhabitants of the town of Thelsamar supplied us with some information about nearby cave, where mining work had to be abandoned due to these Kobolds. Investigating the mine, we reclaimed stolen supplies and cleared the mine of the Kobold presence. Returning these the supplies to the local sergeant, he was so impressed by our work, that he trusted us to bring a special envelope to the Human capital of Stormwind. That would have to wait though!
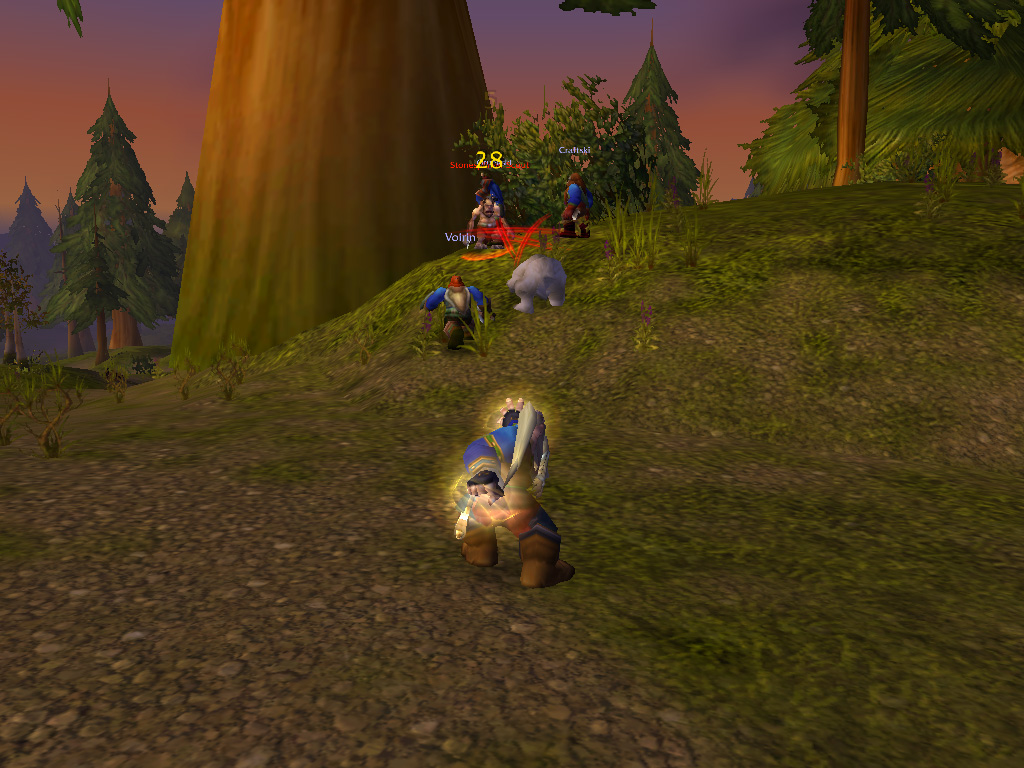
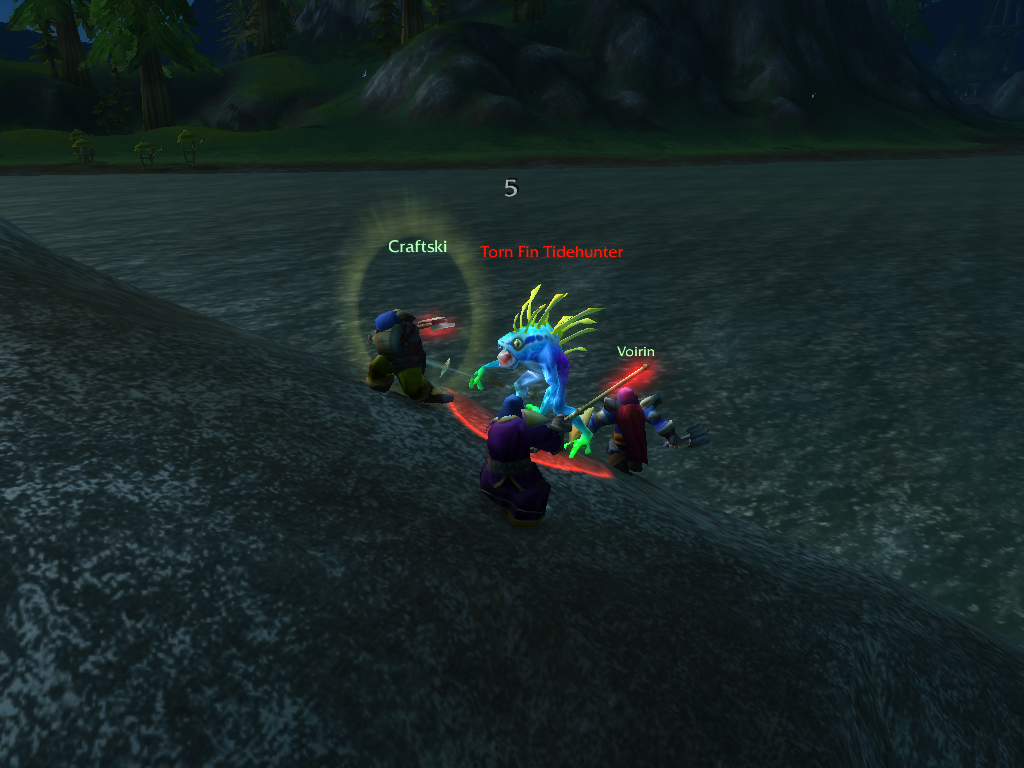
Of all the dangers along the road, the Horde opponents were one of the most troublesome. But traveling together gave us an edge, even over higher trained enemies!
Wandering around the lake we found various Dwarves and Gnomes in need. We were able to trace a crashed gyrocopter pilot and helped him by finding his stolen tools (those Troggs seem to meddle with everything!). We escorted a shipment of explosives and after being ambushed, uncovered a Dark Iron Dwarf traitor and finally helped a hunter with revenge on a dangerous bear called "Ol' Sooty".
On top of the dam which blocked the gigantic "Loch" we found a stressed engineer who feared the dam might be under threat by our darker kin, the Dark Iron Dwarves. Sending us to investigate, we intercepted a small casket which held an odd substance and returned it to him.
On top of the dam which blocked the gigantic "Loch" we found a stressed engineer who feared the dam might be under threat by our darker kin, the Dark Iron Dwarves. Sending us to investigate, we intercepted a small casket which held an odd substance and returned it to him.
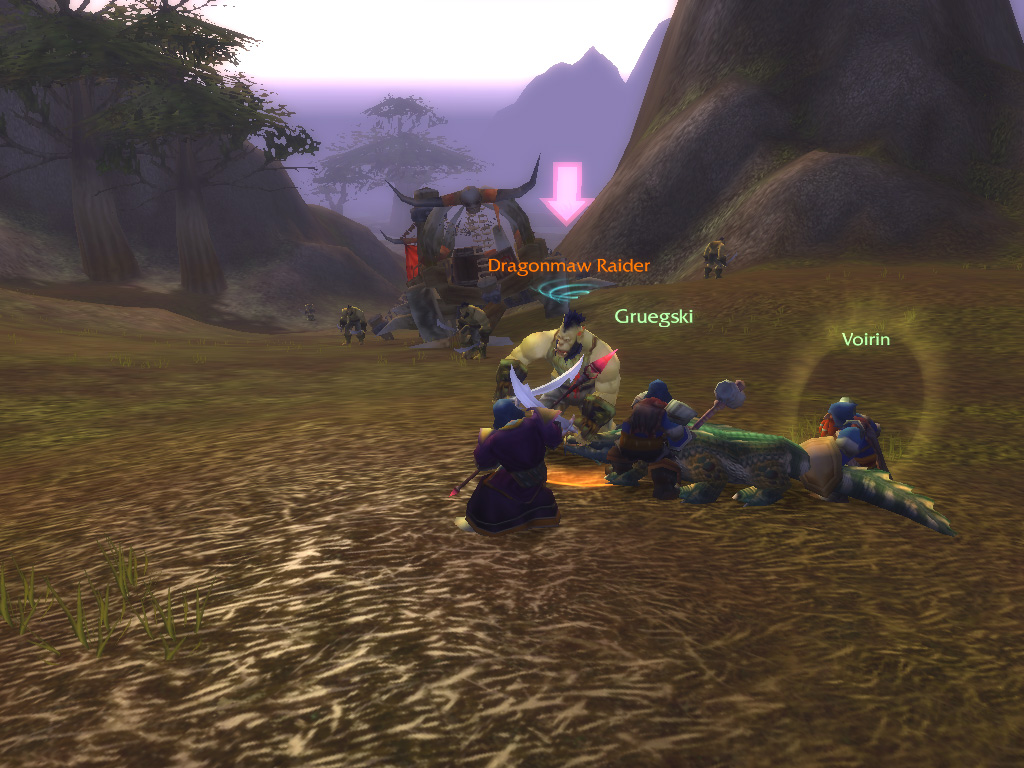
TThe engineer found the substance most interesting, and sent us to the nearby Wetlands. There, in the Dwarven hold of Dun Modr, we could find an expert who could tell more about this substance. Traveling there was not easy, we marched through the various mountain passages of Dun Algaz, and ran into Dragonmaw Orcs that defended a small stronghold along the way. Fighting our way through and slaying their commander, we continued our journey. The damp conditions of Wetlands did not make the rest of the trip easier, but we eventually reached Dun Modr, with soaked robes and rusty mail.
The explosives expert told us the substance was Seaforium, a powerful explosive which reacts with water, quite dangerous for a dam! But he also mentioned Seaforium could be rendered useless, and gave us a list of ingredients we had to gather. With a recipe for the reagent on note, we were sent back to Loch Modan.
The explosives expert told us the substance was Seaforium, a powerful explosive which reacts with water, quite dangerous for a dam! But he also mentioned Seaforium could be rendered useless, and gave us a list of ingredients we had to gather. With a recipe for the reagent on note, we were sent back to Loch Modan.
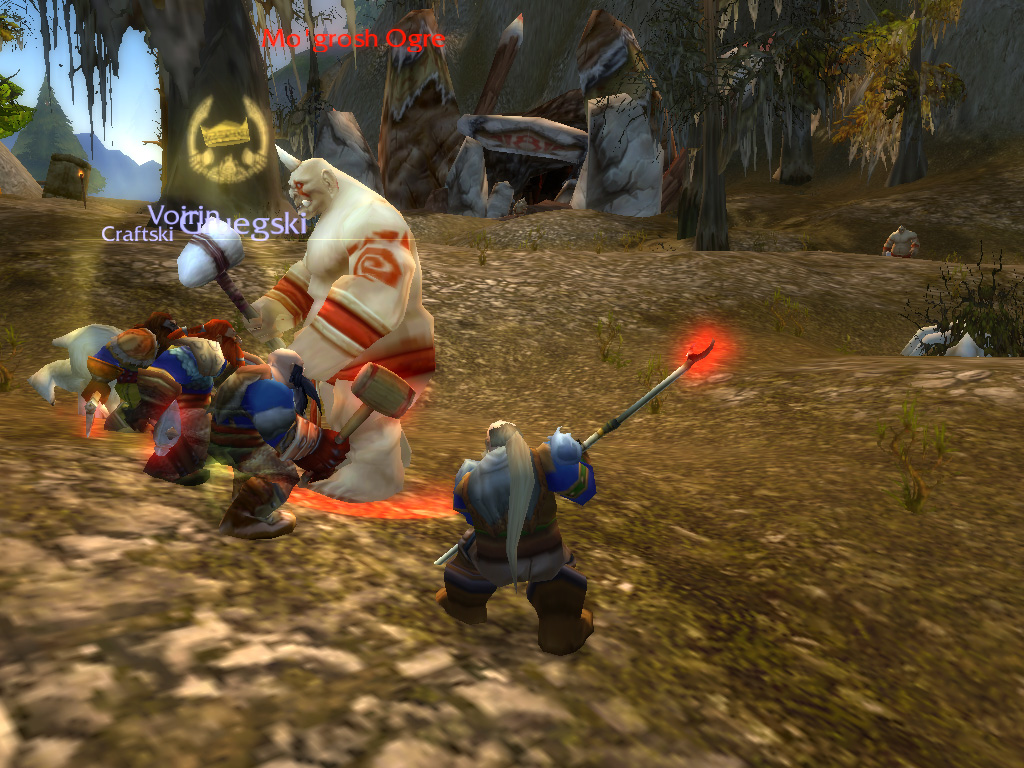
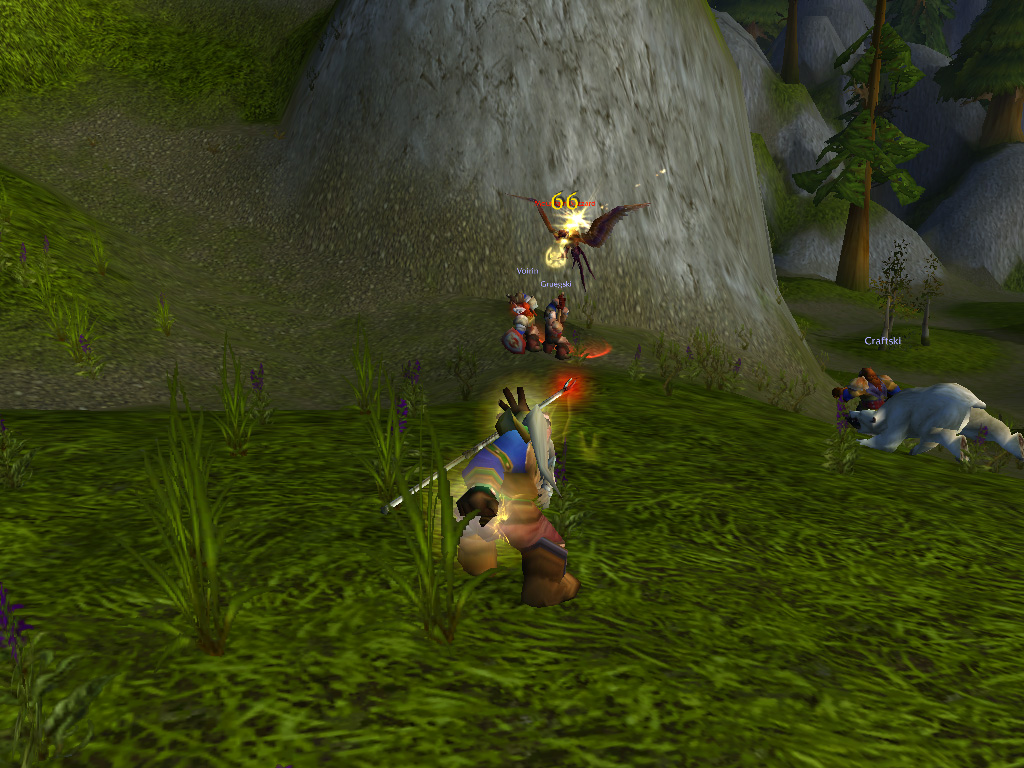
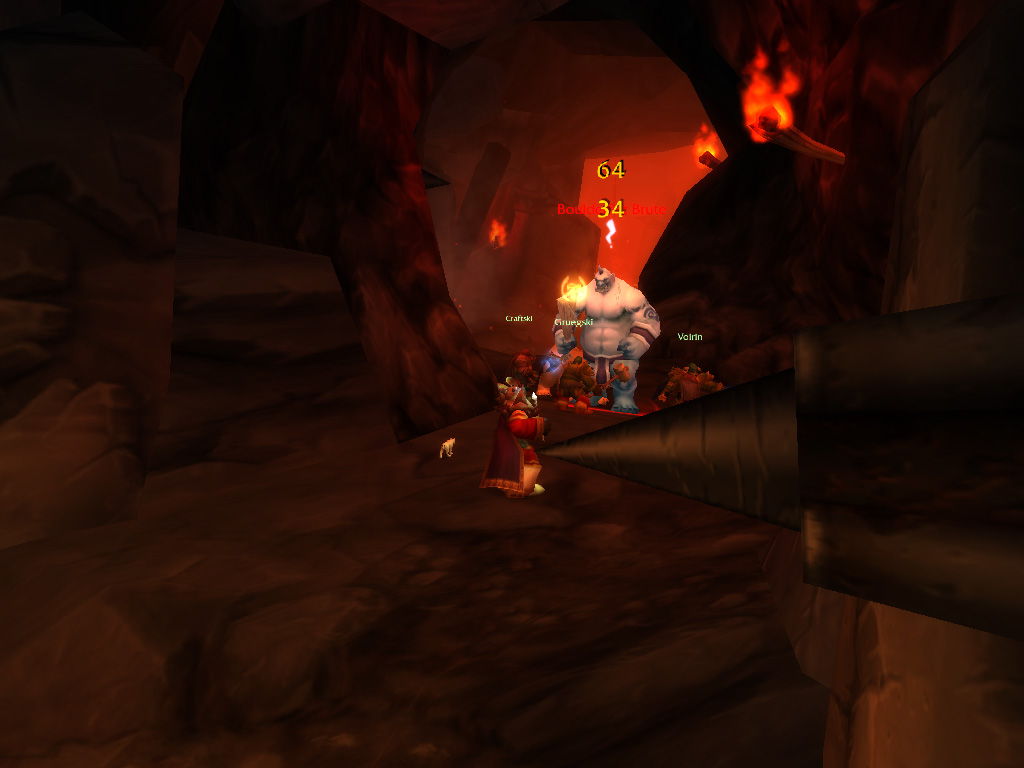
Upon returning we started to collect the needed ingredients. Most were simple, but one of the ingredients was a rare crystal, mined by a tribe of Ogres to the east. As we set out to claim one of these crystals for ourselves, Gruegski noticed a poster outside of the inn: There was also a bounty for slaying ogres and bringing back the head of the leader, Chok'sul! The Ogres had been raiding settlements through the area and had be brought to justice.
The Ogres were stronger than any creature we had fought before, skilled in steel and dangerous magic. But they could not stand before us, and we ventured deeper into their caverns. Here we found and confronted their leader, who was dealt with through our combined efforts. On our way out Voirin found one of the crystals we were looking for, which we brought to the engineer to make the neutralizing reagent. Finding and disarming Seaforium kegs near the dam, we returned to town and told of our endeavors. Wearing rewards, or with them sold or disenchanted, we left the area, hopefully safer than it was before.
The Ogres were stronger than any creature we had fought before, skilled in steel and dangerous magic. But they could not stand before us, and we ventured deeper into their caverns. Here we found and confronted their leader, who was dealt with through our combined efforts. On our way out Voirin found one of the crystals we were looking for, which we brought to the engineer to make the neutralizing reagent. Finding and disarming Seaforium kegs near the dam, we returned to town and told of our endeavors. Wearing rewards, or with them sold or disenchanted, we left the area, hopefully safer than it was before.
Traveling south
We returned to Ironforge, where we learned new skills from our class and tradeskill trainers. The auction house was checked for new materials, new cloth was sewn and new mail was forged. Wearing new items (Voirin and Orangz boasting new shoulder pads!) and resupplied with potions and sharpening stones, we headed out, going for a gryphon flight to the Wetlands.
But then we found the envelope from the sergeant from Loch Modan in our backpacks. We forgot the delivery! This would not do, and with the Gnomish-created Deeprun Tram, we headed for Stormwind, the Human capital.
Upon arrival we were greeted by fellow Dwarven travelers, and with the tram exit being in the center of the Dwarven District of the city, it immediately made us feel at home. We delivered the envelope to the local blacksmith, who revealed the it was an order for a custom made shield. If a Dwarf would order an item from so far away, then it must be excellent craftsmanship indeed!
This is also a good time to add some extra information:
Voirin learned mining/blacksmithing
Guegski is a herbalist/alchemist
Orangz is a tailor/enchanter
And Craftski is a skinner/leatherworker
This is also a good time to add some extra information:
Voirin learned mining/blacksmithing
Guegski is a herbalist/alchemist
Orangz is a tailor/enchanter
And Craftski is a skinner/leatherworker
As we already were in the Dwaven district, Voirin used the time to improve his blacksmithing skills. With his new knowledge, he was able to clad himself and Gruegski in bronze chainmail armour, our frontline was starting to look quite impressive!
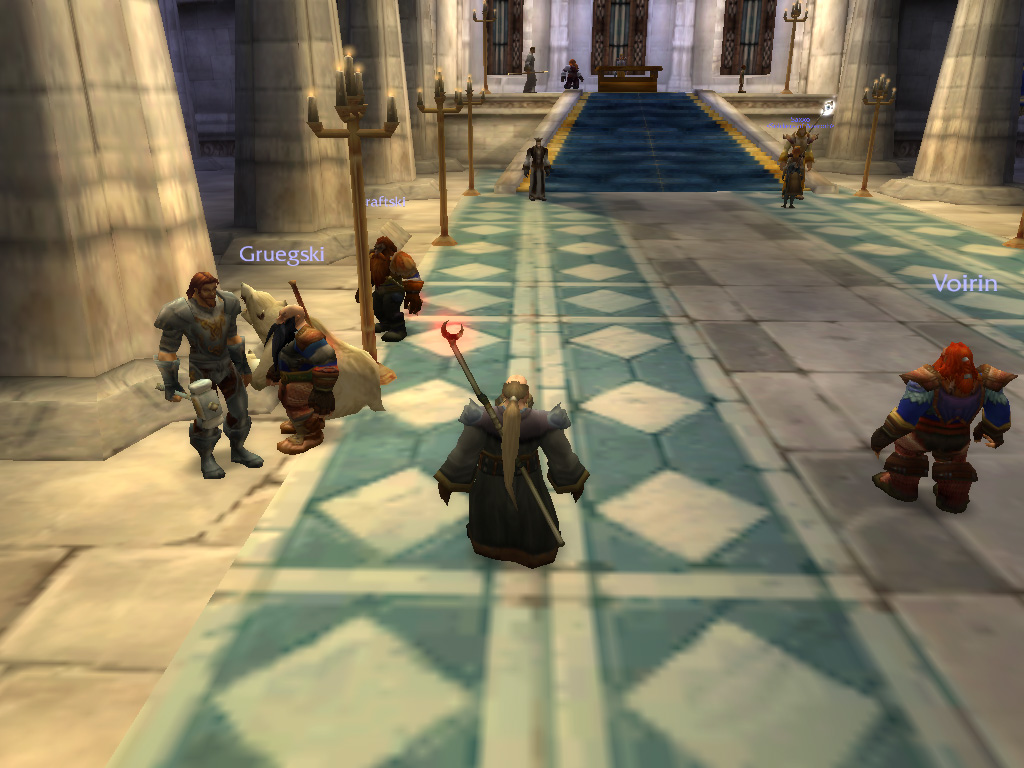
Gruegski and Orangz, as Dwarves of faith, of course had to pay a visit to the Stormwind Cathedral. Here Gruegski revealed he had accepted a special mission for paladin initiates. Normally these missions were for the paladin to undertake alone, but we didn't think Gruegski minded us coming along. This mission would first send us to Westfall, where he would have to protect a farmstead from threatening bandits.
Gruegski and Orangz, as Dwarves of faith, of course had to pay a visit to the Stormwind Cathedral. Here Gruegski revealed he had accepted a special mission for paladin initiates. Normally these missions were for the paladin to undertake alone, but we didn't think Gruegski minded us coming along. This mission would first send us to Westfall, where he would have to protect a farmstead from threatening bandits.
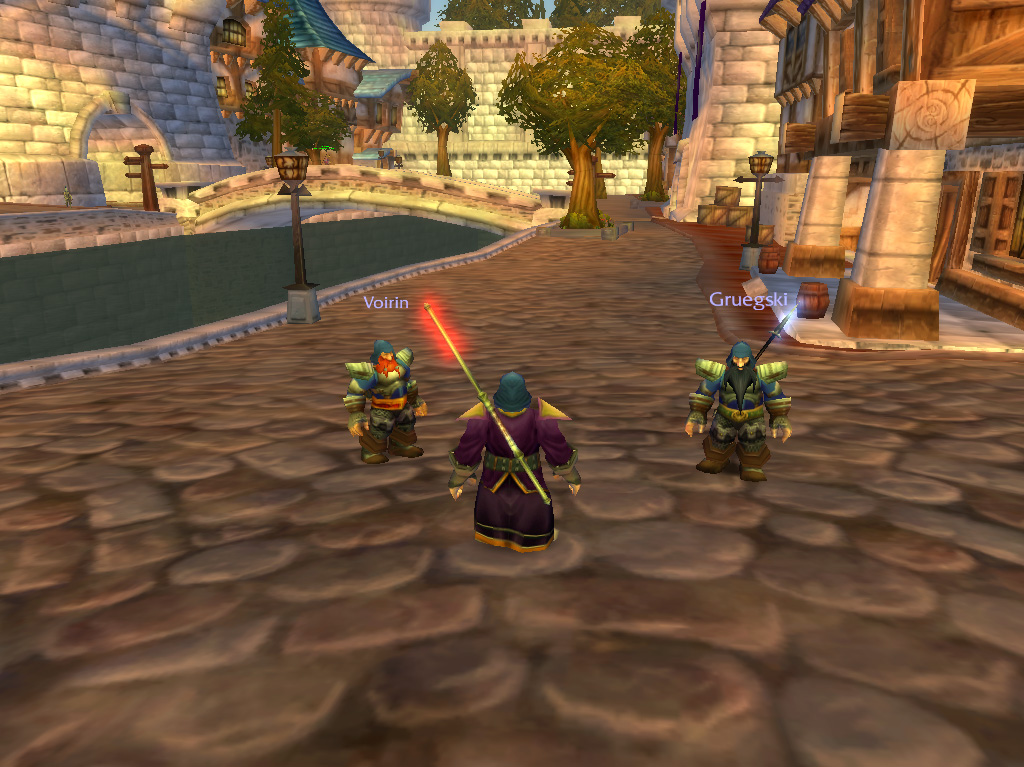
T
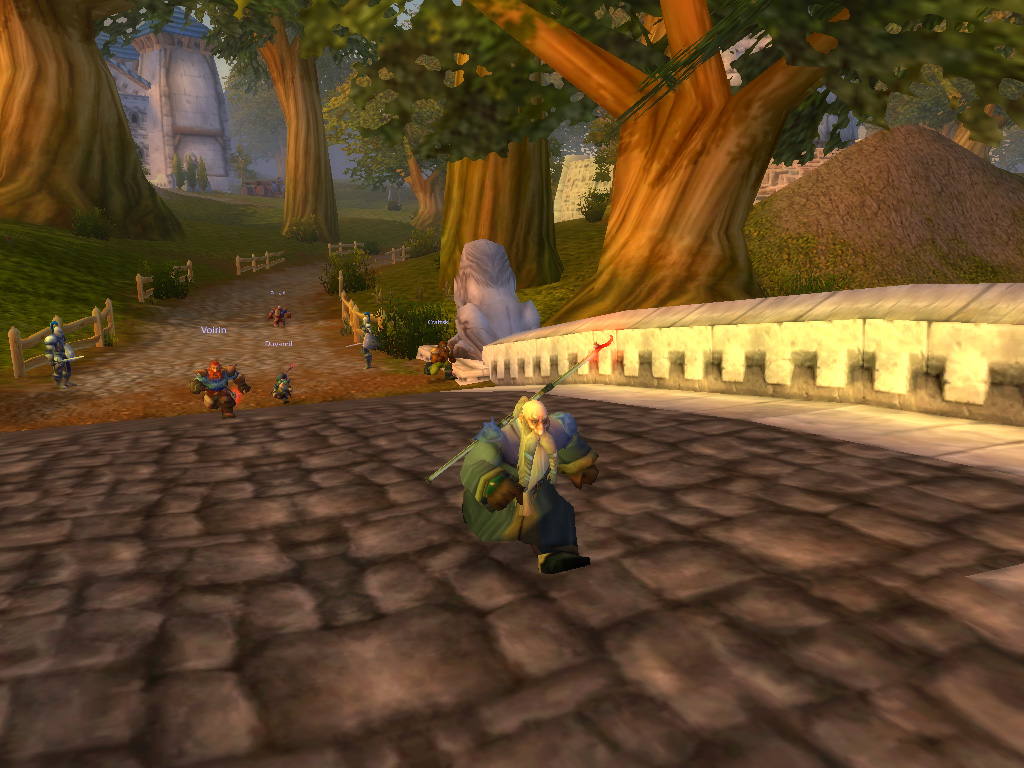
o reach Westfall we had to travel through Elwynn, a forest filled with small human settlements and farms. Here the threat wasn't Troggs and Trolls, but the foul hyena-like Gnolls and a bandit group known as the Defias Brotherhood. But the infiltrators sent to Elwynn were only initiates, and we did not meet much resistance.
Nearing the bridge leading into Westfall, we ran into a wanted poster, offering a bounty for killing the Gnoll chieftain, Hogger. Following the river, and the bodies of fallen human adventurers, we found the small camp, led by this creature. With a loud yelp it charged into us, hoping it would be overpower us as easily as it had other warriors. But we would not be taken down this easily! The Gnoll overestimated its power, and with a swift slam of his hammer, Gruegski sent Hogger tumbling to the ground. Returning his paw for a reward, we relieved Elwynn Forest from its scourge, and continued onwards, into Westfall.
Nearing the bridge leading into Westfall, we ran into a wanted poster, offering a bounty for killing the Gnoll chieftain, Hogger. Following the river, and the bodies of fallen human adventurers, we found the small camp, led by this creature. With a loud yelp it charged into us, hoping it would be overpower us as easily as it had other warriors. But we would not be taken down this easily! The Gnoll overestimated its power, and with a swift slam of his hammer, Gruegski sent Hogger tumbling to the ground. Returning his paw for a reward, we relieved Elwynn Forest from its scourge, and continued onwards, into Westfall.

From Loch Modan we travel to the capital of Stormwind and it's surrounding area's: Elwynn Forest, Westfall and the Redridge Mountains. We also visit some more dangerous locations.
A
s we entered Westfall, we were immediately met with a caravan, asking for assistance. The caravan's horse was weak from starvation, and the nearby farms did not offered only threats from bandits lurking there. Next to this, dangerous mechanical constructs shaped like scarecrows walked through the wheat fields, making it impossible to cross.
With little effort, we were able to clear the first farmstead of its threats, but this only proved to be the beginning. Almost all farms we passed afterwards were abandoned or taken over by bandits. There was surely some insidious force at work! The mechanical constructs turned out to get more powerful as well, discharging strong electrical currents, or flailing razor-sharp claws with frenzied intensity.
With little effort, we were able to clear the first farmstead of its threats, but this only proved to be the beginning. Almost all farms we passed afterwards were abandoned or taken over by bandits. There was surely some insidious force at work! The mechanical constructs turned out to get more powerful as well, discharging strong electrical currents, or flailing razor-sharp claws with frenzied intensity.
A rumble in Redridge
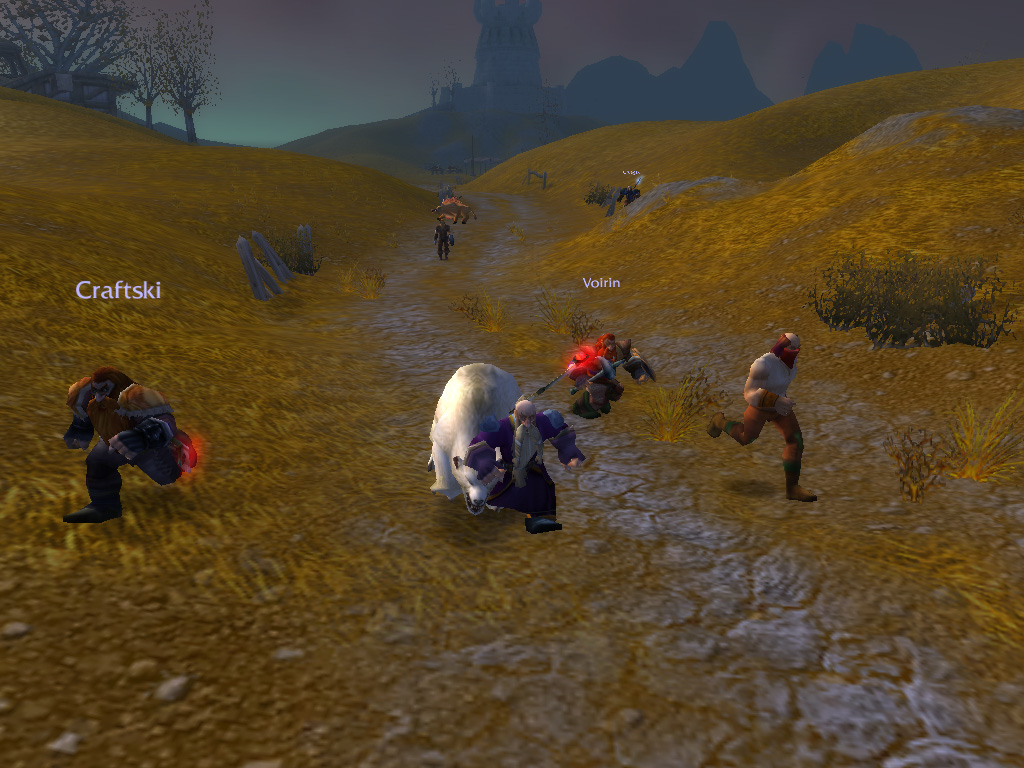
We eventually reached by Sentinel Hill, the main Human outpost in the area. Here, the captain of the outpost sent us on an errand requesting reinforcements, as he believed the Defias Brotherhood bandits we had run into were a threat to the kingdom. This errand took us past the many towns in the Kingdom, such as Darkshire in Duskwood and Lakeshire in Redridge. But none had soldiers to spare and had threats lurking at every border.
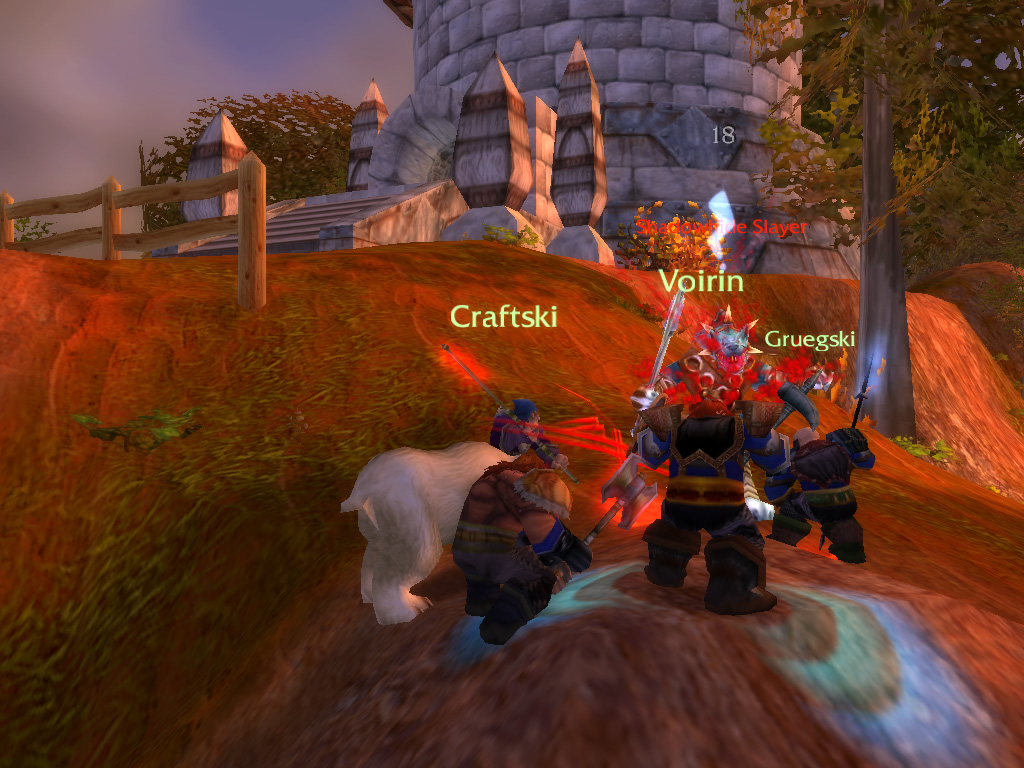
In Lakeshire, nestled between the Redridge mountains, we were thankfully able to get more information about the Defias Brotherhood from an informant, giving us a lead. Before traveling back to Westfall, we chose to help out the locals, as adventurers were in high demand. The Gnolls seemed to have infested the hills of Redridge, launching attacks on travellers and militia patrols. The situation was dire, and a bounty had been placed on the head of their leader. We never would turn our back to a reward, so we scoured the hills, where we eventually found the camp by the so-called Lieutenant Fangore, and razed it to the ground.
We eventually reached by Sentinel Hill, the main Human outpost in the area. Here, the captain of the outpost sent us on an errand requesting reinforcements, as he believed the Defias Brotherhood bandits we had run into were a threat to the kingdom. This errand took us past the many towns in the Kingdom, such as Darkshire in Duskwood and Lakeshire in Redridge. But none had soldiers to spare and had threats lurking at every border.
In Lakeshire, nestled between the Redridge mountains, we were thankfully able to get more information about the Defias Brotherhood from an informant, giving us a lead. Before traveling back to Westfall, we chose to help out the locals, as adventurers were in high demand. The Gnolls seemed to have infested the hills of Redridge, launching attacks on travellers and militia patrols. The situation was dire, and a bounty had been placed on the head of their leader. We never would turn our back to a reward, so we scoured the hills, where we eventually found the camp by the so-called Lieutenant Fangore, and razed it to the ground.
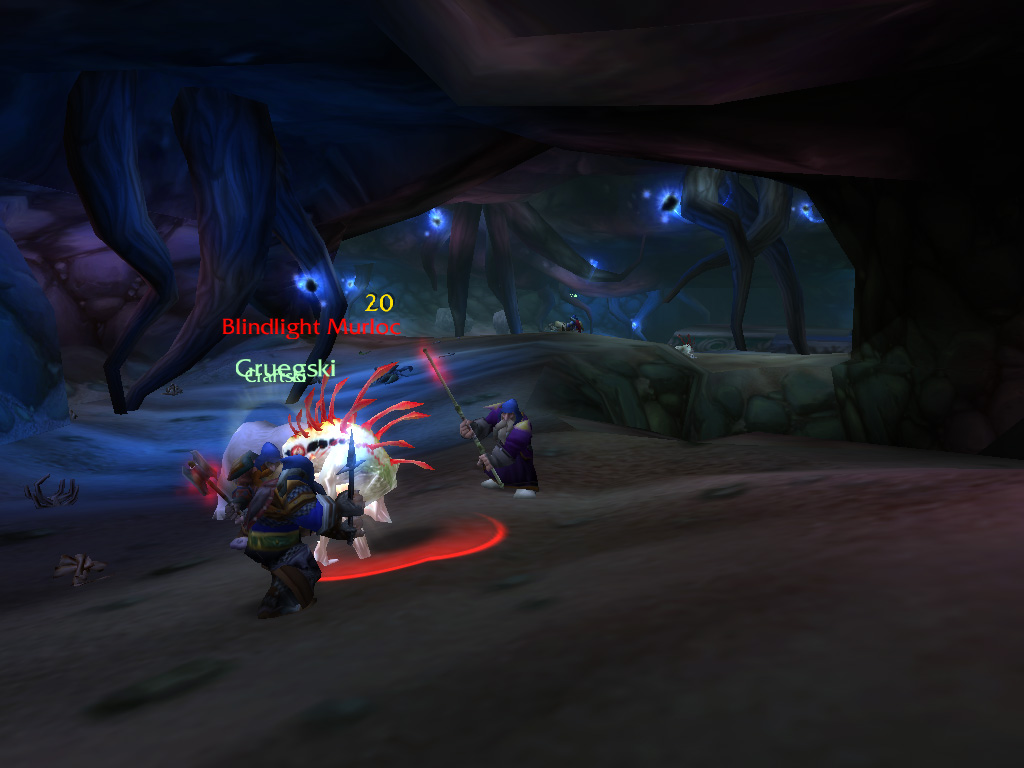
With the Gnolls in disarray, we could focus on the other threats looming near the borders of Lakeshire: Murlocs and dragons! The dragons were only whelps, but still dangerous! The creatures blasted anyone nearby with their flame breath, so we had to be careful. Dragon scales were worth a fortune though, so we were more than happy take the risk.
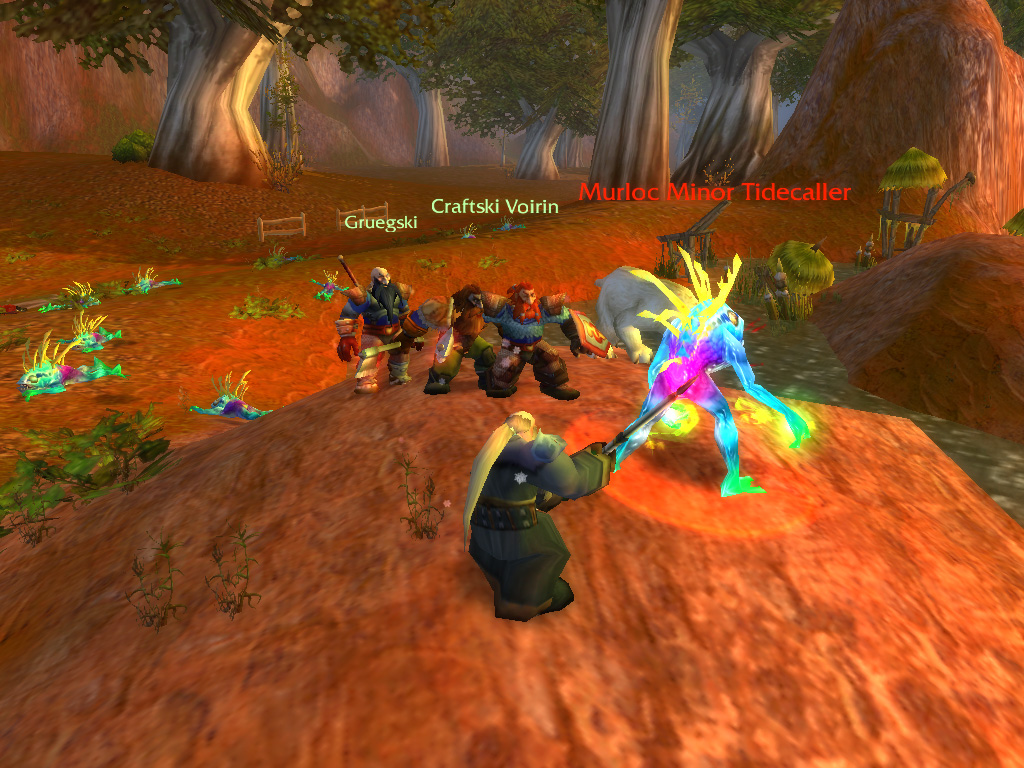
The Murlocs (foul, aquatic creatures you can hear from a mile away) had made small camps all along Lake Everstill, hounding adventurers, fishermen and stealing supplies. Their huts were made of wheat and reeds, and tightly packed, making it almost impossible to launch a surprise attack. Thankfully the teamwork of the four of us easily outmatched even the mightiest Murloc, ending the threat. At least for now.
The Murlocs (foul, aquatic creatures you can hear from a mile away) had made small camps all along Lake Everstill, hounding adventurers, fishermen and stealing supplies. Their huts were made of wheat and reeds, and tightly packed, making it almost impossible to launch a surprise attack. Thankfully the teamwork of the four of us easily outmatched even the mightiest Murloc, ending the threat. At least for now.
BBut there was more we could do to help, such as diving into the lake! We went looking for a lost necklace, and dredged up construction materials for the unfinished bridge, while at the same time keeping the remaining Murlocs at bay! We also went after a humongous pig called Bellygrub. With the simple tasks finished, our focus shifted to the true danger in Redridge: The Blackrock Orcs. Our next orders were to search the area for a lost soldier, who we found captured in a cave held by Orcs. After various ambushes were able to escort this "Corporal Keeshan" back to Lakeshire. only to be sent out again!
This time we had to assault Stonewatch Keep, a fort held by the Blackrock Orc Gath'Ilzogg and his bodyguards. These Orcs proved to be worthy foes, testing our skills and proving to be a worthy foe. Slowly driving them back, we managed to enter the keep and silence Gath'Ilzogg and his pet dragon once and for all! On the way out, we even managed to run into the other Orc captain, Tharil'zun, taking him by surprise! Bringing an assortment of heads back to the mayor, we were duly rewarded and went on our way.
This time we had to assault Stonewatch Keep, a fort held by the Blackrock Orc Gath'Ilzogg and his bodyguards. These Orcs proved to be worthy foes, testing our skills and proving to be a worthy foe. Slowly driving them back, we managed to enter the keep and silence Gath'Ilzogg and his pet dragon once and for all! On the way out, we even managed to run into the other Orc captain, Tharil'zun, taking him by surprise! Bringing an assortment of heads back to the mayor, we were duly rewarded and went on our way.
It was time to return to Westfall with the information learned about the Brotherhood, and after informing the captain, we were sent to capture a messenger who was rumoured to transport information between Defias hideouts. While we were hunting this messenger, the guards at Sentinel Hill had managed to capture a Defias Brotherhood thief, who in exchange for his life would show us where their hideout was located.
Escorting this traitor, we entered the town of Moonbrook, where we were suddenly ambushed by Brotherhood soldiers! While keeping them at bay, the traitor showed us the entrance to the hideout: A barn in the centre of the town. We descended a spiraling staircase, where we found an extensive network of tunnels, this barn was more than it seemed! Return to Sentinel Hill, we informed the captain of our findings.
Escorting this traitor, we entered the town of Moonbrook, where we were suddenly ambushed by Brotherhood soldiers! While keeping them at bay, the traitor showed us the entrance to the hideout: A barn in the centre of the town. We descended a spiraling staircase, where we found an extensive network of tunnels, this barn was more than it seemed! Return to Sentinel Hill, we informed the captain of our findings.
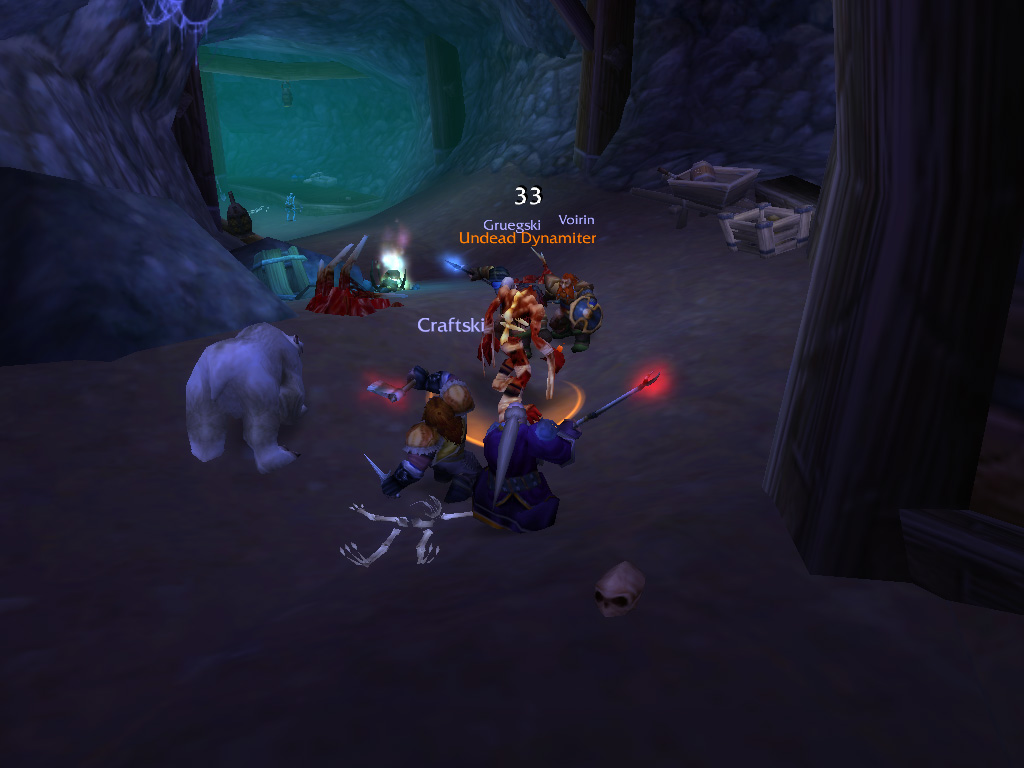
We were ordered to assassinate the Brotherhood leader, Edwin van Cleef. But before we headed for his hideout, the so-called "Deadmines", we first searched for more information about these tunnels. A Dwarf miner in Stormwind, proved to be a good informant, He told us he had helped excavating the tunnel system, and lost family and friends during a cave in. He requested us to find his brothers Explorers' League Badge and find out if the rumors of the miner's ghosts haunting the tunnels were true.
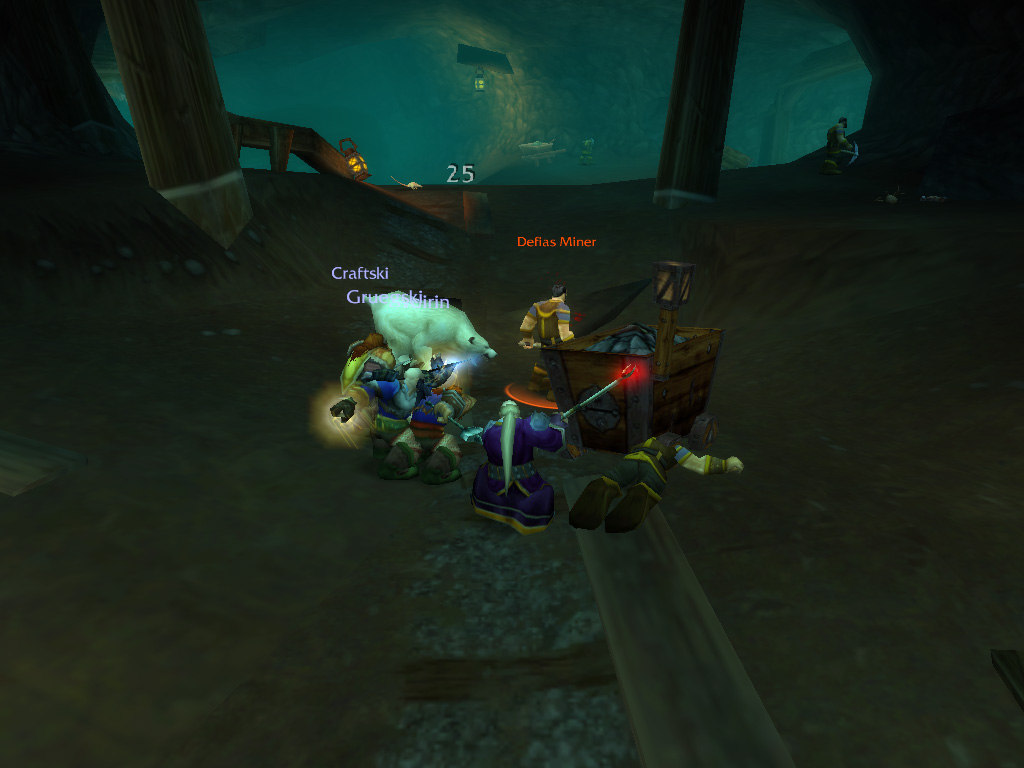
Returning to Westfall, entering the Deadmines and exploring the hallways, we mostly found miners hired by the bandits, with overseers threatening them into action. A system of pipes adorned the walls, and much to Voirin's pleasure there was plenty of ore to find. But finally, while exploring a seemingly dead end, we did find undead creatures roaming the tunnels. Putting them to rest with holy fury, we were able to reclaim his brother's badge.
Returning to Westfall, entering the Deadmines and exploring the hallways, we mostly found miners hired by the bandits, with overseers threatening them into action. A system of pipes adorned the walls, and much to Voirin's pleasure there was plenty of ore to find. But finally, while exploring a seemingly dead end, we did find undead creatures roaming the tunnels. Putting them to rest with holy fury, we were able to reclaim his brother's badge.
Entering the Deadmines
We ventured further, thinking we were almost at the end. But surprisingly we ran into more and more tunnels. The bandits became much tougher too, with magicians and hidden swashbucklers joining the fight. This was becoming one surprising adventure... Next we found an Ogre guarding a large door, creatures not seen often in Human lands! Thankfully we had plenty of experience with Ogres, so we were able to make short work of this "Rhahk'Zor". After he fell, we found out his bags held an impressive two-handed axe, an excellent reward for Craftski!.
Opening the door the Ogre was guarding, we were met with Goblins! It was a mystery how Goblins would have found their way into Moonbrook, but it probably had something to do with big coin.

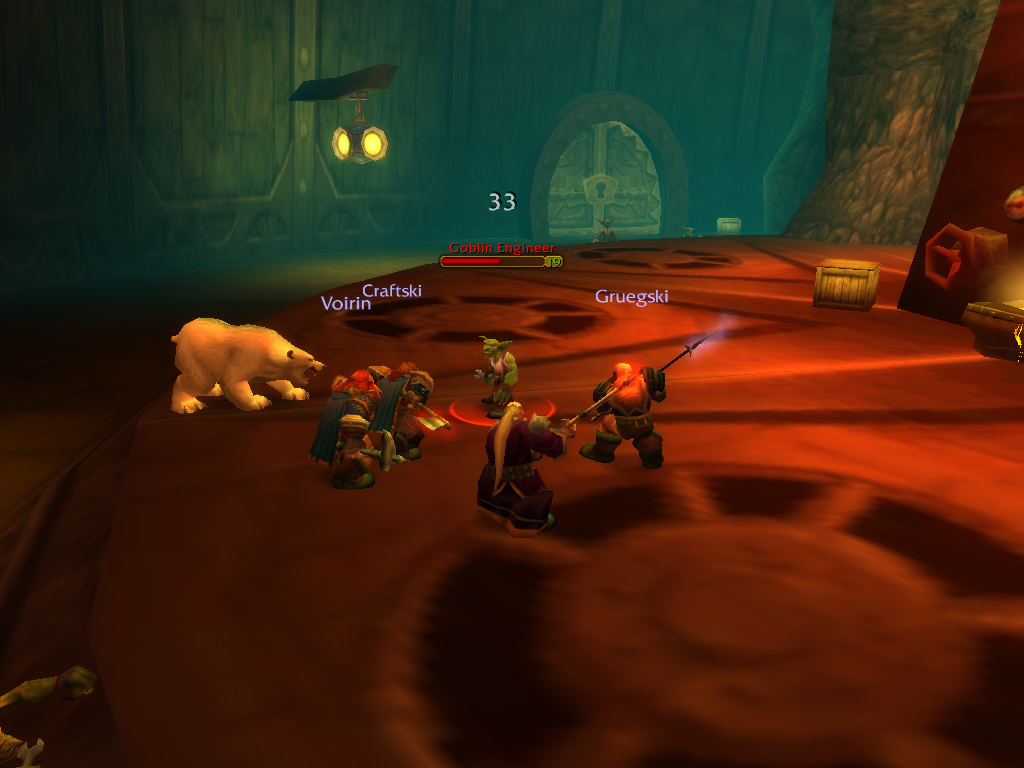
Continuing, the turning and twisting tunnels took us further, past the crafting and mining goblins. We ended up in a workshop where a large Goblin Shredder was parked, it's driver jumping to attention the moment we were spotted. Throwing all we had at the machine, we were able to take it down in an explosion of bolts and springs. Its driver tried a last ditch effort to take us out, jumping out of the machine and attacking us. But after the machine, a single Goblin was a piece of cake! Although the remains of the mechanical machine proved to be useless to us, it did appear the workshop had a stash of special wood. Gruegski seemed quite happy, bundling some of the wood together for a crafting assignment he had received from his paladin order.
The door guarded by the Shredder had opened in the meantime, and we were ambushed by Defias henchmen sneaking into the room! While caught unaware, we easily managed to overcome them, only to be surprised from the rear as well! When the dust settled we stood victorious, but only just. The Defias Brotherhood are a sneaky bunch!
The door guarded by the Shredder had opened in the meantime, and we were ambushed by Defias henchmen sneaking into the room! While caught unaware, we easily managed to overcome them, only to be surprised from the rear as well! When the dust settled we stood victorious, but only just. The Defias Brotherhood are a sneaky bunch!
We continued exploring ahead, but with more care this time, on the lookout for another ambush. Our care was rewarded when Craftski managed to spot a Defias rogue sneaking in the shadows, so this time we had the jump, and made it count! The next tunnel ended with a smelting room so high, you could fit an entire guard tower inside! We met the smelting master at the bottom of the forge, which was an unusually large Goblin. This "Gilnid" immediately charged Voirin the moment he started to smelt some of his own ore! We made short work of his attacks, with Voirin proclaiming to never come between a Dwarf and a forge.
The next path took us to a hallway with a heavily fortified and locked door at its end. After taking care of all Defias thugs nearby, we were unable to find a key to the door on any of them. So how could we continue? Then Craftski showed us some of his findings, he had found gunpowder! Together we were able to swivel a large cannon around, and aimed it right at the locked door. With a cannonball loaded and power ready, Craftski lit the fuse.
The next path took us to a hallway with a heavily fortified and locked door at its end. After taking care of all Defias thugs nearby, we were unable to find a key to the door on any of them. So how could we continue? Then Craftski showed us some of his findings, he had found gunpowder! Together we were able to swivel a large cannon around, and aimed it right at the locked door. With a cannonball loaded and power ready, Craftski lit the fuse.
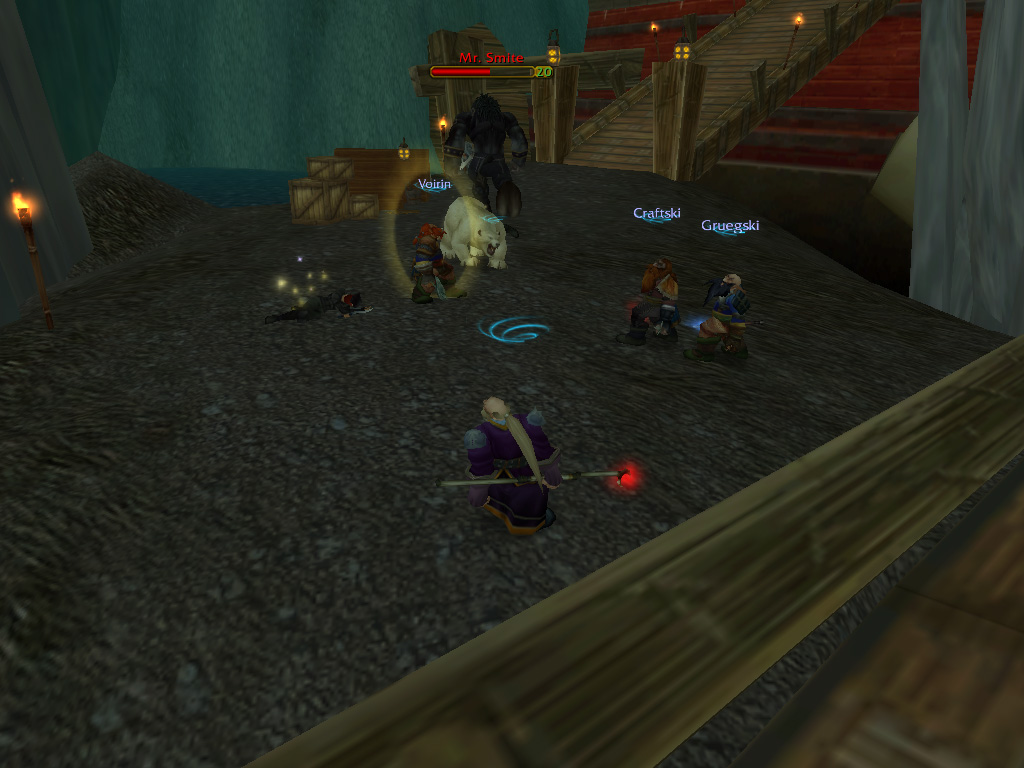
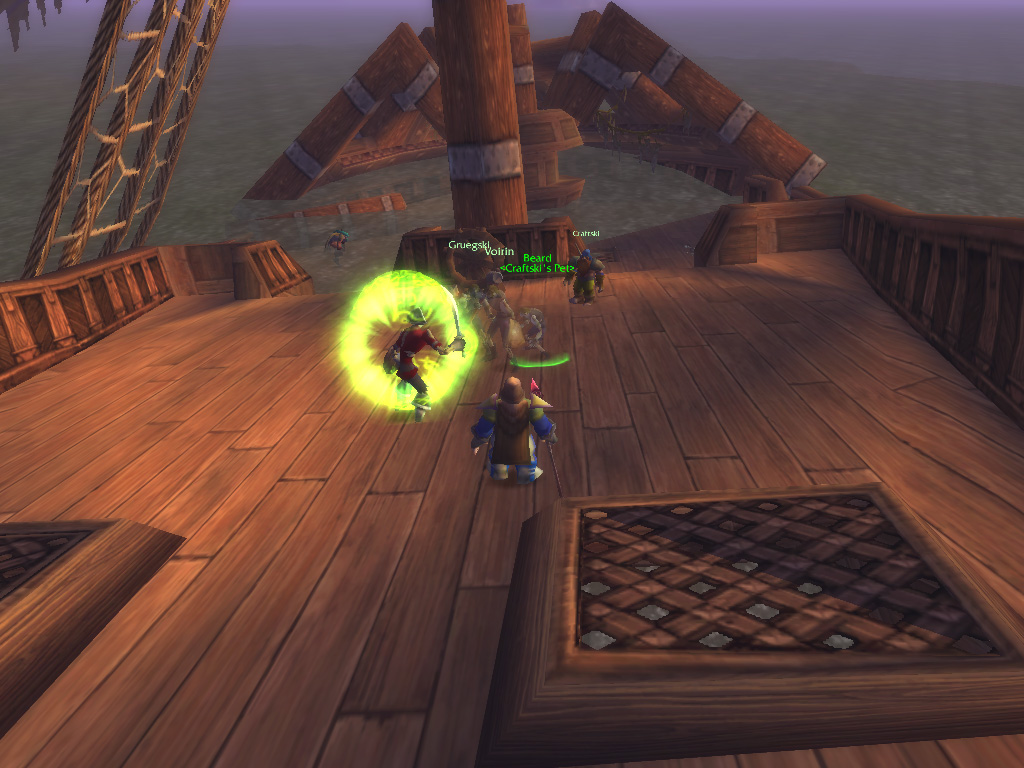
A huge "BOOM" echoed through the hallways, and when the smoke had cleared we found ourselves in a huge cavern, containing a... ship? It seemed the Brotherhood had big plans indeed: A cavern with doors, and a fully armored Juggernaught inside. Approaching the ship, we noticed a Tauren guarding the boarding ramp, Tauren are rarely seen on these shores, and this was our first time meeting one. This "First Mate" jumped into action, and called up some guards to fight alongside him. Taking care of everything he threw at us, we cornered the Tauren and swiftly dealt with him. Now able to board the ship, we worked our way upwards to the captain's cabin.
Here, we met Edwin van Cleef, who had been preparing for our arrival. Calling out to his guards, Van Cleef swiftly attacked us, cornering us and testing our tenacity. But even though the Brotherhood had superior numbers, we stood victorious in the end. Rummaging through his belongings, Craftski was able to find a fine cloak to wear, this proved to be a worthwhile endeavor! We left the ship, and in doing so ran into the ship's cook, a Murloc called Cookie. We and filleted the creature and managed to find a passage that lead back to Westfall. Bringing back the news of van Cleef's demise to Sentinel Hill, we were rewarded with an impressively with new armor and a fine staff.
Here, we met Edwin van Cleef, who had been preparing for our arrival. Calling out to his guards, Van Cleef swiftly attacked us, cornering us and testing our tenacity. But even though the Brotherhood had superior numbers, we stood victorious in the end. Rummaging through his belongings, Craftski was able to find a fine cloak to wear, this proved to be a worthwhile endeavor! We left the ship, and in doing so ran into the ship's cook, a Murloc called Cookie. We and filleted the creature and managed to find a passage that lead back to Westfall. Bringing back the news of van Cleef's demise to Sentinel Hill, we were rewarded with an impressively with new armor and a fine staff.
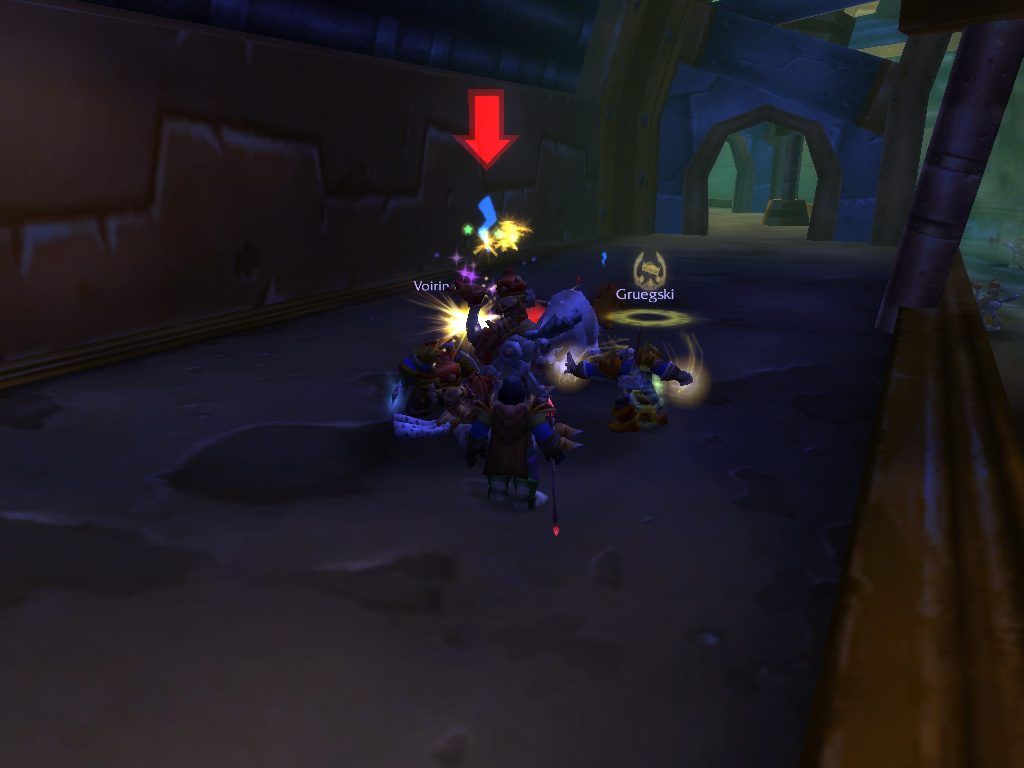
Gruegski and Orangz, as holy emissaries, have the power to resurrect others from the dead. As long as one them lives, the Dwarftastic Four can, once again, be up and running and no time!
Locked in the Stockades
Searching through Van Cleef's cabin, we found a letter addressed to the Architect of Stormwind, Baros Alexston. With this clue, we returned to Stormwind and managed to locate Baros in the Cathedral square. Handing over the note, we were told the contents were worrisome, and to investigate the threat further, he sent us to the prison of Stormwind. Here we would have to interrogate the Defias "second in command", who was being held prisoner there. While in town, Orangz took a brief detour to visit the tailoring shop and craft blue hoods for all of us while Voirin forged new shoulderguards for himself and Gruegski.
Upon arriving at prison, we ran into some problems, as there seemed to be a uprising in process! Asked by the guards to restore order, we went in. With the guards locking the doors behind us, Voirin let it slip that there were bounties from the towns of Lakeshire and Darkshire on the heads of various convicts held here, so our cuts needed to be clean.
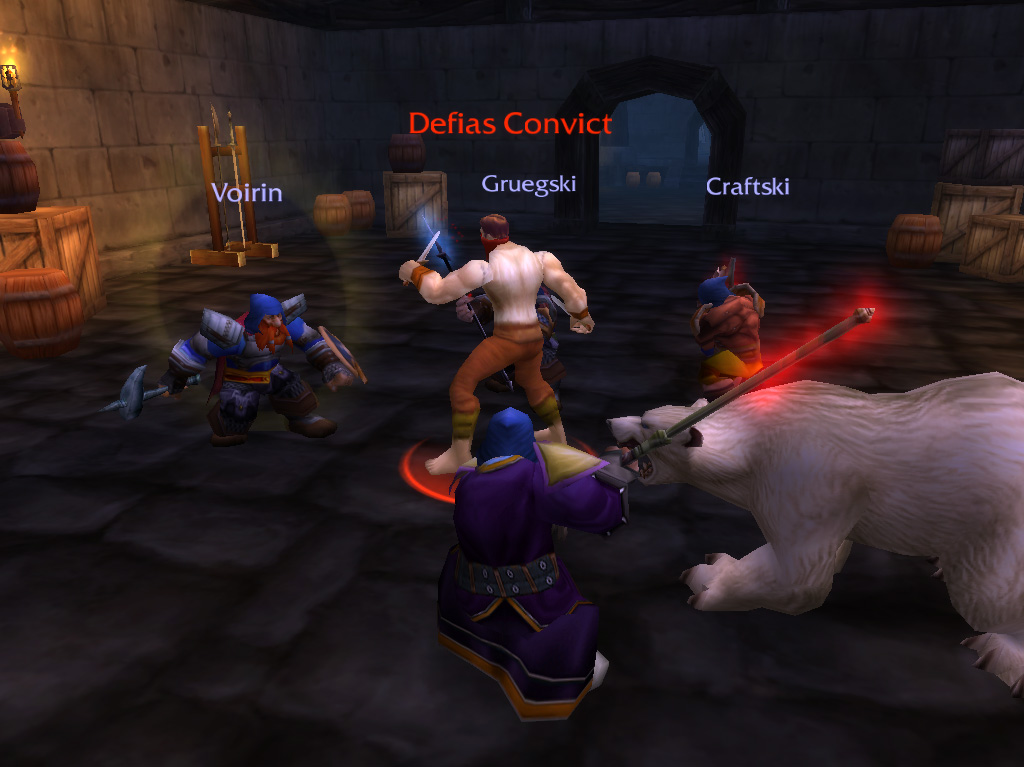
We didn't expect starving prisoners to be able to truly give us a fight, but they were quite a handful, we even wonder if the guards gave them some food supplements. Many of the prisoners were of the Defias brotherhood, and through them we are able to learn the identity of this "second in command" we seek: A Human named "Bazil Thredd". Sweeping the rooms of the prison, we run into various convicts who do not lay down their arms when asked to, forcing our hand. For some reason Voirin is eying the "wanted" posters he has taken along between each room, making sure we are not missing out on coin.
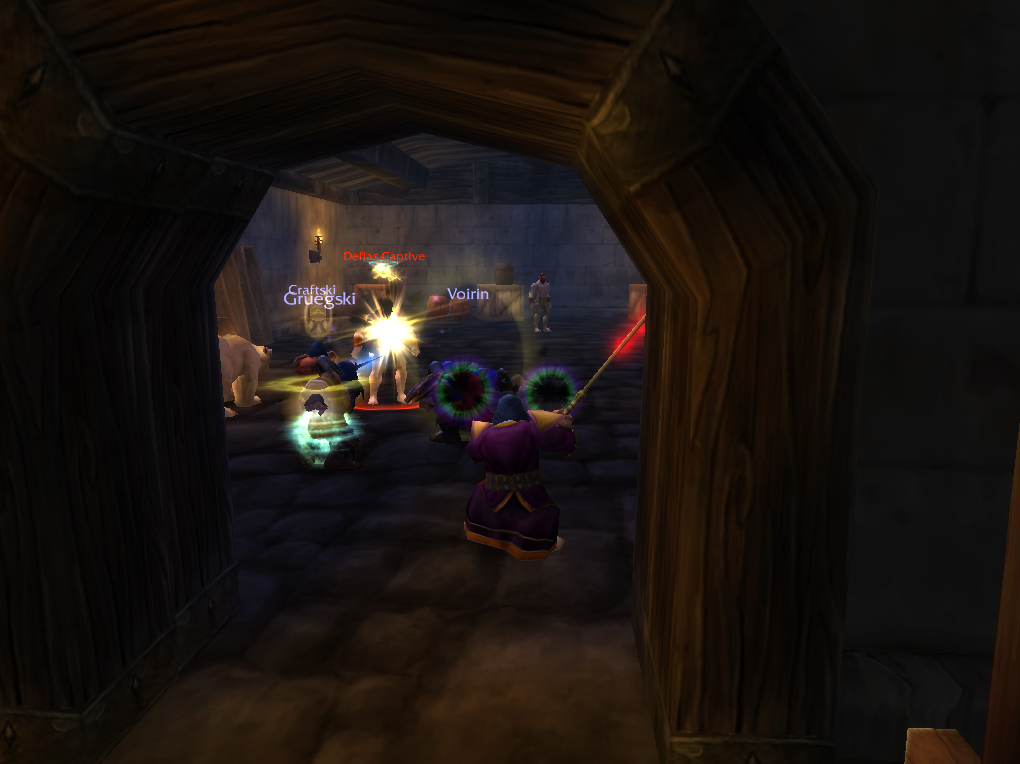
But we quickly are able to make short work of the wanted convicts we find, who turn out not to be your everyday inmates, a Blackrock orc, a two-headed Ogre and a Dark Iron Dwarf! Entering the last wing of the complex, we meet Thredd, who lunges at us, before we can try to parley for information. Returning the favour, we afterwards remember that we were sent inside to gain information about the brotherhood.
But we quickly are able to make short work of the wanted convicts we find, who turn out not to be your everyday inmates, a Blackrock orc, a two-headed Ogre and a Dark Iron Dwarf! Entering the last wing of the complex, we meet Thredd, who lunges at us, before we can try to parley for information. Returning the favour, we afterwards remember that we were sent inside to gain information about the brotherhood.
A
s we come out again, splattered with blood and dragging a bag full of heads, bandanna's and spoils, the Warden thankfully helps us. He recalled overhearing conversations and was able to give us some loads into connections the Defias Brotherhood still holds within the walls of Stormwind. A helpful cheese merchant helped us further, eventually leading the trail to one of the Stormwind Nobles! Aiding with a stakeout, we are able to play a part in unmasking the noble in the act, charging him, and, when they failed to give up. dumping his body and that of his Defias contact in the Stormwind moat. For our services, we were rewarded by the King of Stormwind, bless the lad, with shining jewellery. We are taking a liking to these Human lands!
The Kalimdor detour
Gruegski had been complaining about his polearm getting blunt, so we all went along to aid him in his quest for a new weapon, one fit for a true paladin. With our aid, he had had saved some lass back in Westfall, and she had sent him to her husband, a famed blacksmith. The man was more than happy to return a favour, and as a skilled crafter, he would make something special. It involved a lot of traveling though, but the first part was already complete! Gruegski had picked up a shipment of rare wood in the Deadmines, which made our job easier. But now we had to travel to Kalimdor!
Gruegski had been complaining about his polearm getting blunt, so we all went along to aid him in his quest for a new weapon, one fit for a true paladin. With our aid, he had had saved some lass back in Westfall, and she had sent him to her husband, a famed blacksmith. The man was more than happy to return a favour, and as a skilled crafter, he would make something special. It involved a lot of traveling though, but the first part was already complete! Gruegski had picked up a shipment of rare wood in the Deadmines, which made our job easier. But now we had to travel to Kalimdor!
W
e returned to Loch Modan, to pick up some unfinished business: There were still other Orc camps scattered along the roads leading into the Wetlands. Previously we taken out one of their commanders, but now we felt sufficiently powerful to rise to the full challenge. And we weren't wrong, the Orcs proved to be weak compared to their counterparts we had met in Redridge. And as we had previously broken the Dragonmaw Orc siege of Menethil harbour, their leaders were left with no reinforcements and proved to be easy pickings.
Returning to Thelsamar with word of victory, we flew by gryphon to Menethil, where we would take one of the boats to the west. According to Gruegski we would be able to find the next mystery ingredient for his fabled weapon in Elven lands.
Returning to Thelsamar with word of victory, we flew by gryphon to Menethil, where we would take one of the boats to the west. According to Gruegski we would be able to find the next mystery ingredient for his fabled weapon in Elven lands.

T
he boat took us to Darnassus, the Night Elf capital. Built upon an enormous tree, we were quite impressed, but still, it wasn't a mountain. In Darnassus, Gruegski improved his alchemy skills from Elven teachers: Something which would give us even more of an edge in the future! But Darnassus was not our goal, we would have to go south, to find the Blackfantom Deeps, a fabled cavern realm, ruled by Naga. However, first we would have to travel to the town of Auberdine, a small Elven village, built along the northern shores of Kalimdor.
From there we would travel through the forests of Darkshore and Ashenvale, mystical woods, stuck in an ever-lasting twilight. Large Elks and Striders grazed along the paths, sometimes disturbed by our presence: They weren't used to Dwarves! Following the path, we entered the ruins of Zoram, where we would have to search for the entrance to the Deeps.
From there we would travel through the forests of Darkshore and Ashenvale, mystical woods, stuck in an ever-lasting twilight. Large Elks and Striders grazed along the paths, sometimes disturbed by our presence: They weren't used to Dwarves! Following the path, we entered the ruins of Zoram, where we would have to search for the entrance to the Deeps.
We found the entrance quite easily, but ran into a problem: How were we ever going to get in? The entrance was submerged and how far the tunnel would go, we couldn't tell. But Gruegski told us the reward was worth the risk! And taking a deep breath, we plunged into a pool. Swimming against the currents, we were able to find a series of underground caves, which were populated with the creatures we were looking for: Various types of Naga, aquatic monsters, both skilled and cunning. Dealing with slithering Naga together, Gruegski was quickly able to find the item he required: a perfect, unblemished purified gemstone.
A
greeing to explore the caverns further, which led us to the remains of a vast Elven temple. Perhaps there we could find some of the precious artefacts the Night Elves were famed for. Navigating the caves, we were mostly met with powerful Murlocs, gigantic crab-like creatures and deamonic Satyrs, until we reached a series of ruined pillars. To continue, we would have to jump across, which was something Dwarven legs were not made for, and with their heavy mail armour, Voirin and Gruegski needed every ounce of strength to get across.
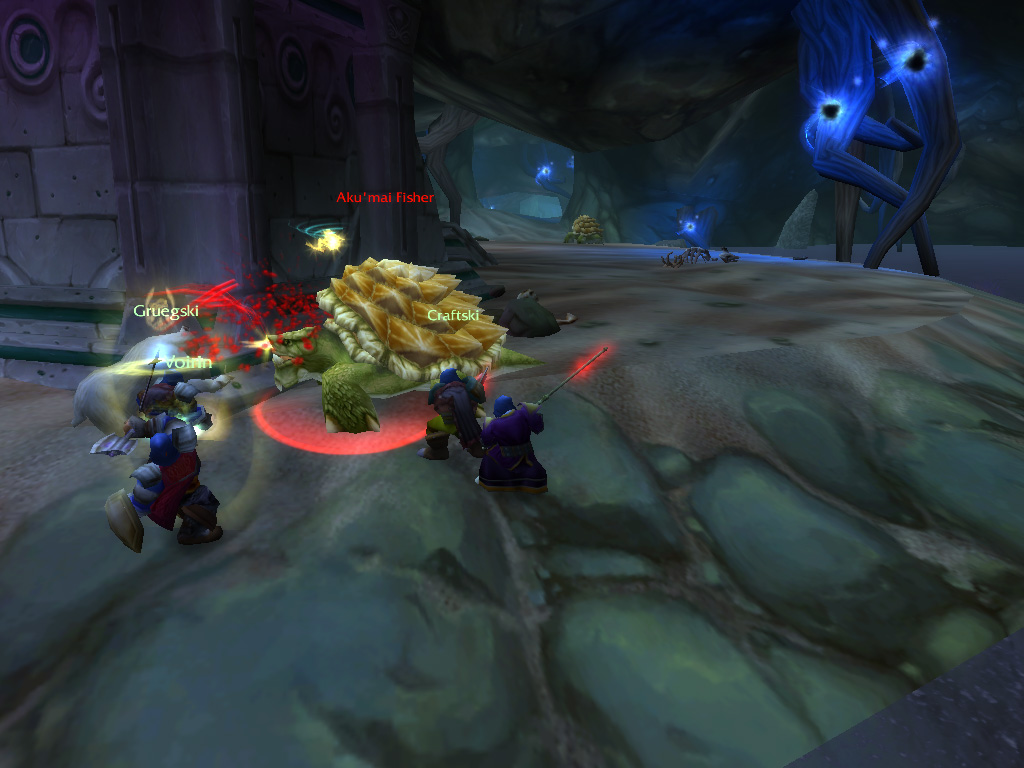
But now we could continue, and reached a domed chamber, filled with crawlers and giant turtles. The crawlers proved to be easily irritated, and lunged at us while we tried to pass them, but the turtles remained peaceful. That couldn't be said of the large, reddish turtle in the middle of the room, which engaged us when we came near. Its vast shell proved to be highly resistant to our attacks, and it took many eagle-eyed shots from Craftski to bring it down.
But now we could continue, and reached a domed chamber, filled with crawlers and giant turtles. The crawlers proved to be easily irritated, and lunged at us while we tried to pass them, but the turtles remained peaceful. That couldn't be said of the large, reddish turtle in the middle of the room, which engaged us when we came near. Its vast shell proved to be highly resistant to our attacks, and it took many eagle-eyed shots from Craftski to bring it down.
With the chamber clear, we could now see the tunnels branched into several directions, some even appearing to lead underwater. Taking a chance, we, once again, submerged and swam towards one of the shimmering lights in the distance. When we resurfaced, we found ourselves in a small cave, and received quite a surprise: It appeared others had come before us! Humans, other Dwarves and Night Elves in dark robes appeared to shuffle throughout the room, interacting with summoning circles along the walls and floor. We had heard of these people: This was the Twilight's Hammer cult! Foul cultists intent on bringing the Old Gods back alive!
Now we were unsure if we should continue, our robes and armour were soggy and damp and our beards full of seaweed. And now we would have to confront a new enemy, which might be beyond our might. We agree we deserved a rest, and activated our hearthstone to head back to one of the warm inns of Ironforge. If we would have continued Gruegski would have never heard the end of it!
Now we were unsure if we should continue, our robes and armour were soggy and damp and our beards full of seaweed. And now we would have to confront a new enemy, which might be beyond our might. We agree we deserved a rest, and activated our hearthstone to head back to one of the warm inns of Ironforge. If we would have continued Gruegski would have never heard the end of it!
Hearthstoning out is the most effective way to escape the depths of a dungeon, But they sometime have a back entrance!
The long trip to Lordaeron
However, we forgot our Hearthstones were set for Stormwind, so had to take a trip with the Deeprun tram and returned to Ironforge. After taking a proper rest, Gruegski returned the items he had gathered, and received his next order: We had to search Shadowfang Keep, a castle in Silverpine Forest, for a relic. This would be a challenging mission: Silverpine forest lies in the middle of Horde territory, not far from the old city of Lordaeron, not claimed and renamed by the Forsaken as the Undercity.
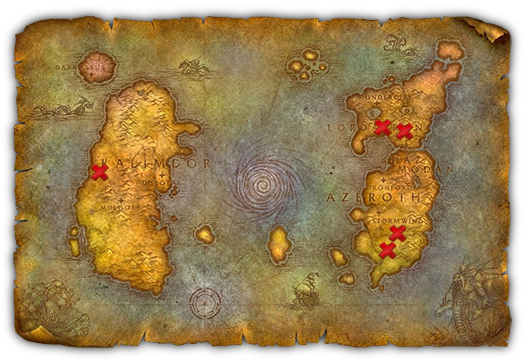
We needed to plan the safest route through the Horde controlled lands, and make sure we could resupply at Alliance encampments along the way. Inspecting the map, we concluded the safest route would be to swim around the Arathi Highlands, and head from the Wetlands to the township of Southshore. From here we could cross the Hillsbrad Foothills and enter Silverpine from the east.
However, we forgot our Hearthstones were set for Stormwind, so had to take a trip with the Deeprun tram and returned to Ironforge. After taking a proper rest, Gruegski returned the items he had gathered, and received his next order: We had to search Shadowfang Keep, a castle in Silverpine Forest, for a relic. This would be a challenging mission: Silverpine forest lies in the middle of Horde territory, not far from the old city of Lordaeron, not claimed and renamed by the Forsaken as the Undercity.
We needed to plan the safest route through the Horde controlled lands, and make sure we could resupply at Alliance encampments along the way. Inspecting the map, we concluded the safest route would be to swim around the Arathi Highlands, and head from the Wetlands to the township of Southshore. From here we could cross the Hillsbrad Foothills and enter Silverpine from the east.
Confident in our skills, we swam our way from the Wetlands, encountering packs of Naga and Murlocs along the way. Swimming past and taking care of the creatures that pursued us, we soon arrived and Southshore. Here, after a talk to the local flightmaster, we continued along the road with Gruegski pressing us forward, as he had spotted many rare herbs which he wanted to harvest.
Crossing the fields, we were soon able to cross into Silverpine Forest. Here we ran into a few members of the Horde, but they seemed to be minding their own business, especially as we seemed to outnumber the lone adventurers, and they were unable to group up in time to pose a threat. Reaching Pyrewood, we spotted the Keep overlooking the village and climbed the road that lead up the mountain. Reaching the gates, we found the drawbridge lowered, allowing us to enter the castle.
Crossing the fields, we were soon able to cross into Silverpine Forest. Here we ran into a few members of the Horde, but they seemed to be minding their own business, especially as we seemed to outnumber the lone adventurers, and they were unable to group up in time to pose a threat. Reaching Pyrewood, we spotted the Keep overlooking the village and climbed the road that lead up the mountain. Reaching the gates, we found the drawbridge lowered, allowing us to enter the castle.

The siege of Shadowfang Keep
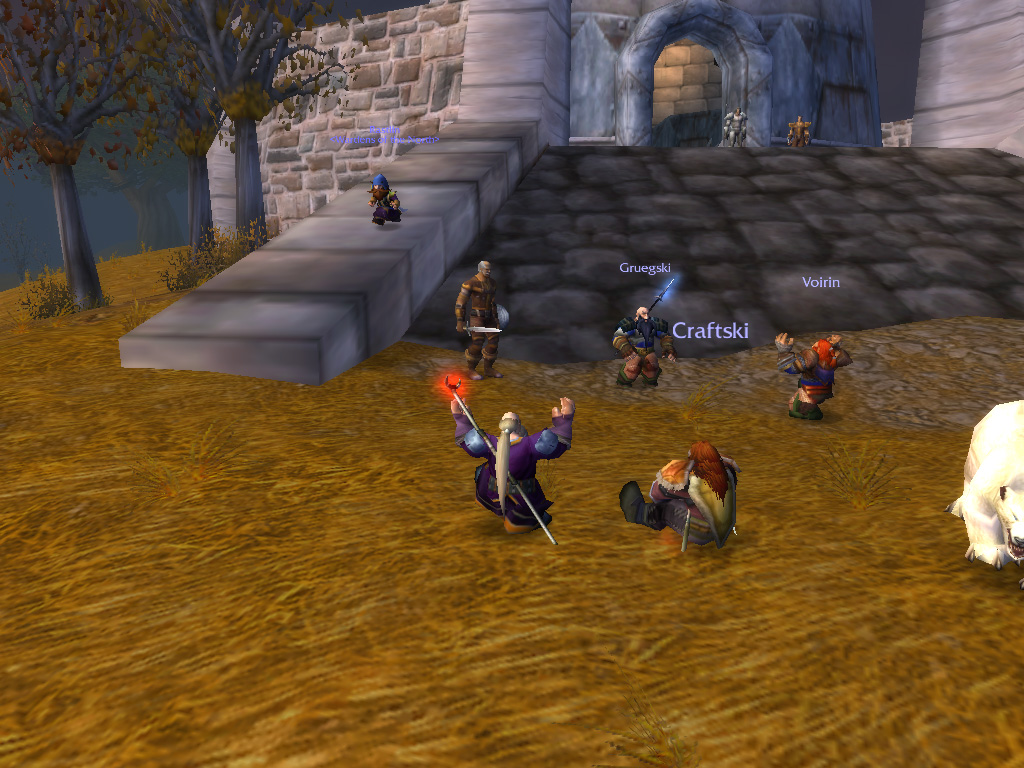
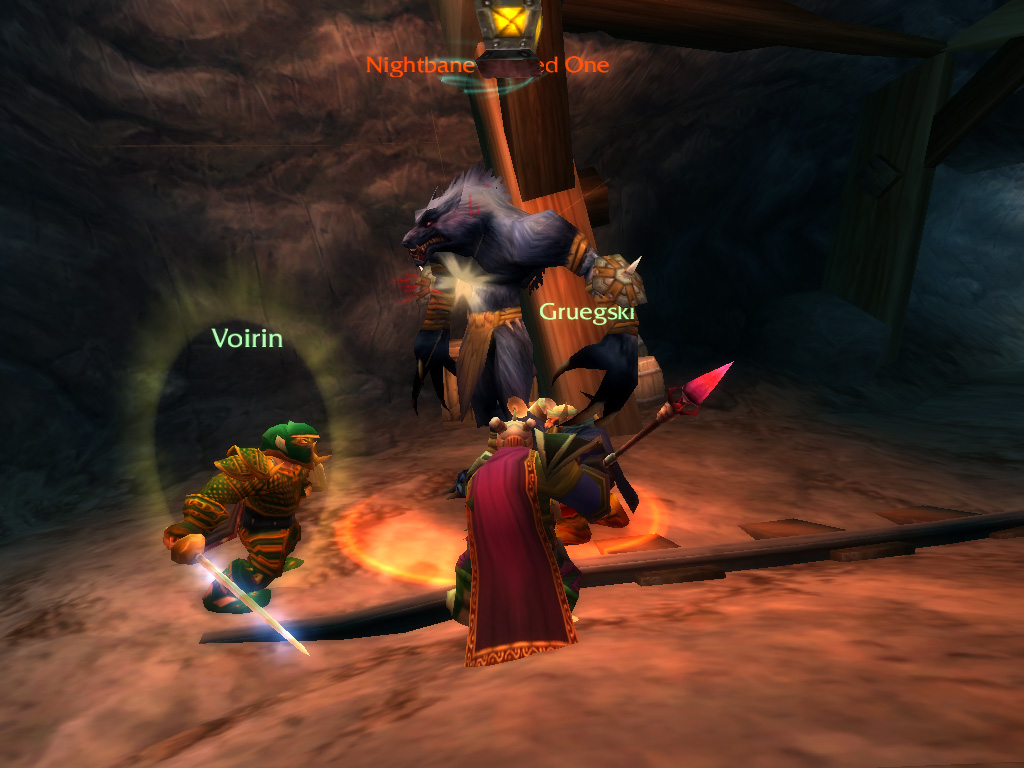
We were unable to enter the castle courtyard, as the gate was closed, but the servant entrance was unlocked, allowing us access. Venturing forwards, we found the Keep was full of hideous wolf-men, their giant pets and wandering ghosts. A large wolf-man jumped us while we were investigating a cell block, and while sapping us of our strength through dark magics, Voirin was able to stand strong and protect us all from farm.
Advancing, we were able to unlock a door that led to the courtyard, only to find it crawling with undead horrors. Here, Craftski showed his skill by luring creatures away, allowing us to take the monsters out in small packs. Hugging the walls, we inched closer to the castle stables, where according to Grugski the relic could be found.
Reaching the stables, and after a bit of digging, Gruegski was able to locate the relic he needed to recover, which turned out the be a lucky blacksmith hammer. So, we only just escaped a Horde attack and had to fight out way through an undead-infested castle, just to get someone's lucky hammer! That reward Gruegski would receive would better be good. It even appeared that Gruegski already had the final part, keeping a shipment of iron hidden from Voirin before he would use it in forging his own weapons and armour.
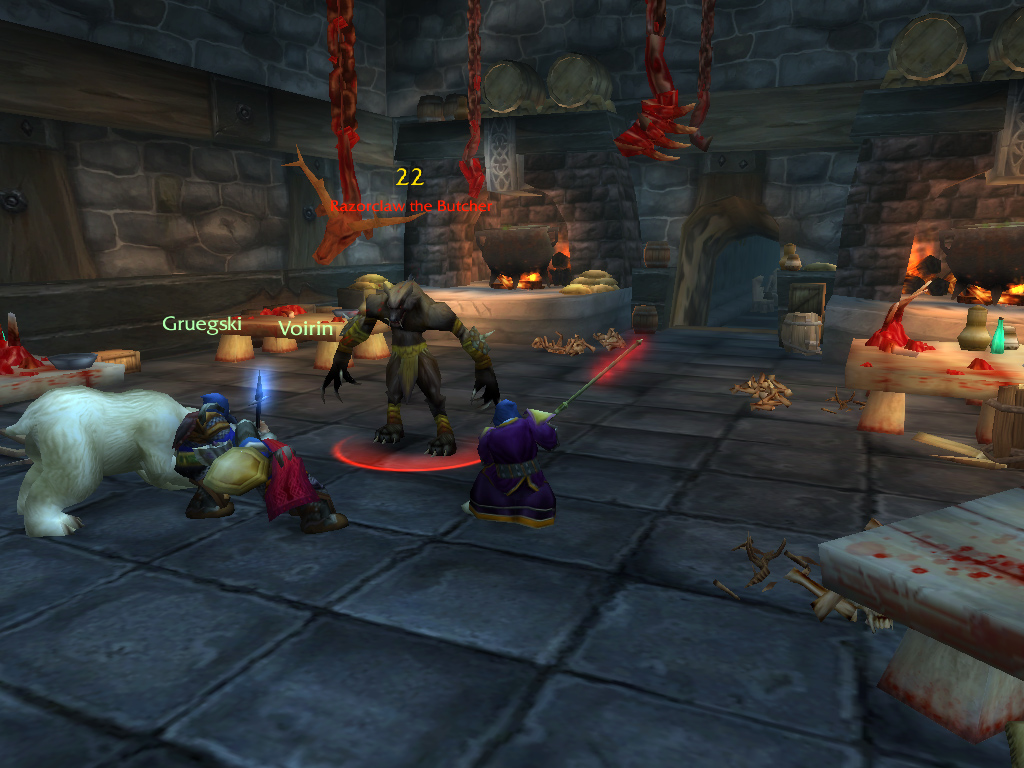
Taking care not to disturb the hellish horses close by, we crossed the courtyard, taking care to not alert the ghostly guards. Hugging the walls, we entered the castle's kitchen, where a large wolf-monster barred our way. This "butcher" was swiftly dealt with, allowing us to enter the adjoining dining hall. Here we found the ghost of the former master of the castle, Baron Silverlaine. Yelling at us to leave his home, this ghost certainly had more vocal strength left than brawn, as Gruegski and Orangz were able to exorcize the spirit with their holy light. Inspecting the pile of goo left behind, Gruegski found a nice ring for him to use.
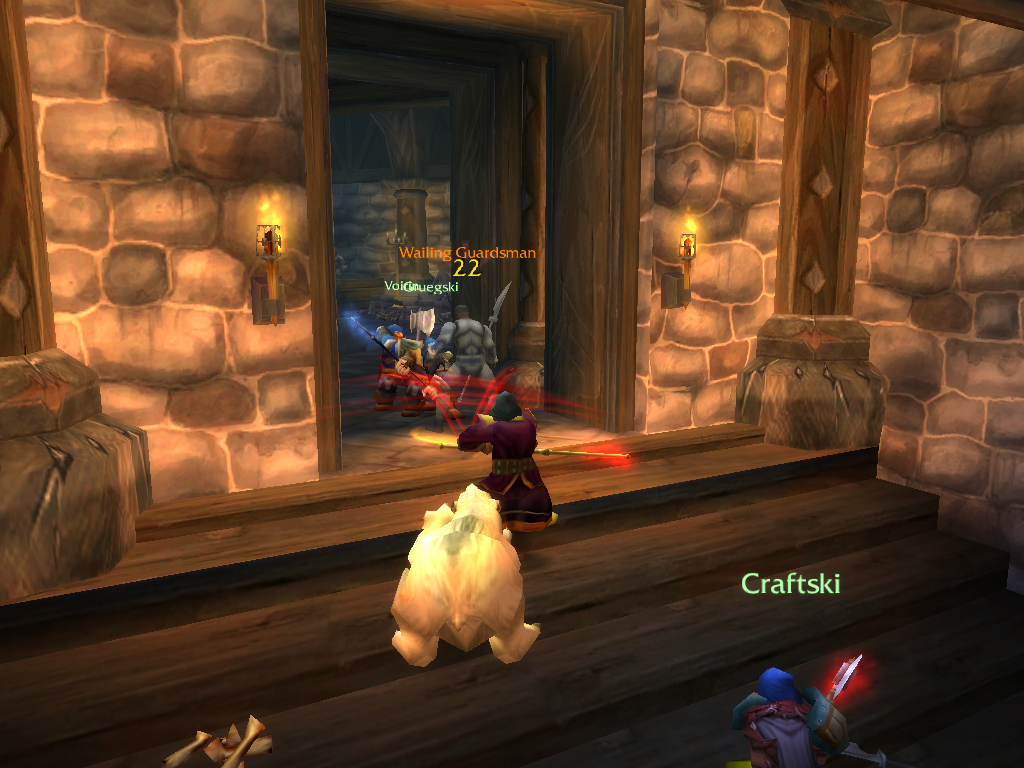
We ascended a pair of stairs and continued our advance through a hallway. Here we entered a guard chamber where the guard's commander held a ghostly watch accompanied by the rest of his subordinates. We charged in, and using the same methods as with the Baron, we were able to exorcize the spectral warriors with holy fury. Entering the battlements, we noticed darkness had fallen and with uncertainty and no rewards ahead, we agreed to return to Ironforge. We didn't return empty handed, as the quest was a success. Gruegski was finally able to get the reward of his paladin assigment forged, a finely crafted two handed hammer infused with holy strength.
Back to the Wetlands
Grugski wanted to try out his new toy, so we set our sights on the Wetlands, as the inhabitants of Menethil had asked us for some favors. Traveling by Gryphon, we arrived at the Harbor, and set out. We had to be on our toes, as there were dangers abound with large crocolisks, fen monsters and Murlocs lurking in the water and raptors hiding in the tall grass.
We discovered a dig site which had been overrun by raptors, driving the archaeologists into the surrounding mountains. They had unearthed many relics, but these could now not be retrieved, so the excavators asked us to clear the site of raptors, and look for artifacts. Heading into the dig, we were able to drive the creatures back and corner their pack leader, Sarltooth. Slaying the creature, the raptors fled, allowing us to rummage through the ruins. Digging through the dirt, we were able to retrieve and return various urns and statues to the archaeologists.
Returning the news about the excavation rescue mission certainly improved our standings with the soldiers stationed at Menethil Harbor. After our previous endeavours, they trusted us to take care of a larger threat: We had to investigate the danger posed by the Dragonmaw Orcs hiding in the surrounding mountains. The Orc's leader, Nek'rosh had been daring to raid closer and closer to Menethil and Orcish war machines had also been spotted in the vicinity. Our first explorations allowed us to take care of multiple Dragonmaw scouts, creating a weak point in the Orc camp defences.
Reporting back our first strike, we were sent back in again: This time we had to attack the stronger raiders and their spell caster support. Next to this we had to capture their war banners, breaking morale.
Reporting back our first strike, we were sent back in again: This time we had to attack the stronger raiders and their spell caster support. Next to this we had to capture their war banners, breaking morale.
The last incursion was a success, and cleared the path to strike at the leader of the orcs. Going after Nek'rosh, the Alliance commander in Menethil gave us torches to burn any Orc catapult we encountered, which allowed us to break the siege. After setting the last catapult on fire Nek'rosh himself appeared, supported by a group of guards. The Orc was a mighty foe, and seemed to shrug off many of our magic attacks, there was probably Dragon's blood in his veins! In the end, we stood victorious, breaking the Orc assault on Menethil and drove the Dragonmaw warriors from the hills.
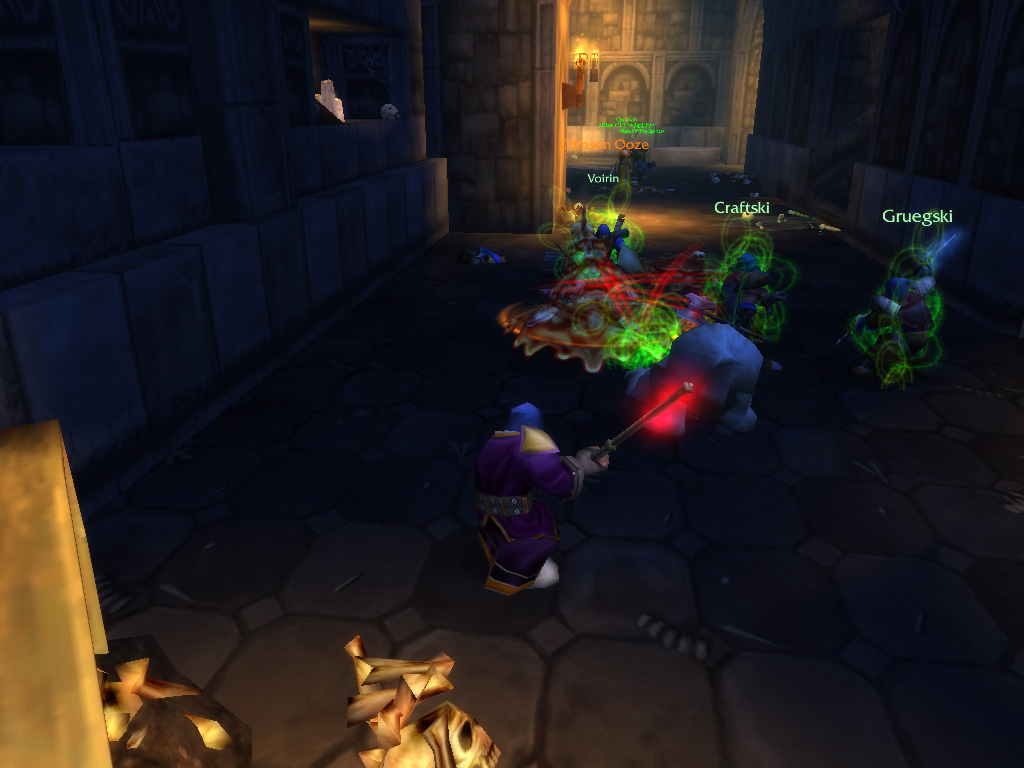
Returning victorious to town, we were once again enlisted to aid the townfolk. A Dwarf named Sida had lost her bag to ooze creatures while visiting a nearby tomb, and nearby Murlocs had been stealing cargo from ships docking at the harbour. Dredging through the morass, we searched any Murloc hovel we encountered, able to reclaim much of the lost cargo. We even found a silver statuette of a paladin, a find for which we were handsomely rewarded!
The tomb lay higher up in the hills, overrun with the slime monsters Sida had spoken of. Having no luck with finding her bag in an any of the creatures roaming outside, we entered and descended into the tomb. Thankfully the oozes were transparent, allowing us to spot our target in one of the hallways, the bag float inside the gooey creature. A short fight later, we returned the bag to Sida, who happily took the contents back. She didn't want the bag any more though, since it was totally drenched in slime.
The tomb lay higher up in the hills, overrun with the slime monsters Sida had spoken of. Having no luck with finding her bag in an any of the creatures roaming outside, we entered and descended into the tomb. Thankfully the oozes were transparent, allowing us to spot our target in one of the hallways, the bag float inside the gooey creature. A short fight later, we returned the bag to Sida, who happily took the contents back. She didn't want the bag any more though, since it was totally drenched in slime.
Gryphon traveling is the fastest way to reach far away areas, travel over lands with dangerous monsters or traverse mountains. But you need the proper flightmaster to lead the way.
A
not too sober sailor in the Harbor had sent us on our next quest: Visit the shipwrecks along the coast, and put the ghostly survivors that haunted the wrecks to rest. Investigating the wrecks, we exorcized the spectre sailors and their captain, who hit us a dark curse. Suddenly we appeared to each other as nightmarish undead creatures, with Gruegski almost exorcizing us all to the nether! Unable to lift the curse ourselves, we searched further, and found a cursed magical item in one of the ships. Perhaps this item was the cause of our appearance!
Running back to Menethil, we found the curse wearing off, and we returned back to normal before reaching the town gates. I'm sure the guards would not have let us in otherwise! The drunk sailor seemed to be sober for a moment, recognizing the magical item we found as the cause of the haunted ships. With Orangz still being a trainee, and unable to remove the curse, he sent us on an errand to the Stormwind Cathedral. Here Archbishop was able to lift the curse from the artefact, making sure it would never harm others again.
Running back to Menethil, we found the curse wearing off, and we returned back to normal before reaching the town gates. I'm sure the guards would not have let us in otherwise! The drunk sailor seemed to be sober for a moment, recognizing the magical item we found as the cause of the haunted ships. With Orangz still being a trainee, and unable to remove the curse, he sent us on an errand to the Stormwind Cathedral. Here Archbishop was able to lift the curse from the artefact, making sure it would never harm others again.
T
he Dwarven captains were happy with our assistance, and sent us Infiltrating the hold. Our Dark kin was more than a match for our strength, with dangerous warlocks and hardened warriors holding their ground. But we managed to break their defences and were sent to go after the leader, Balgaras the Foul, who coordinated the attacks from the nearby hills. This mastermind was accompanied by a dangerous Voidwalker demon, but with Voirin cornering Balgaras and Craftski ordering Beard to keep the demon at bay, we were able to gain the upper hand.
With the Dark Iron grip over Dun Modr broken, we investigated the nearby bridge, the Thandol Span. Rummaging through a guardpost on the bridge, we found attack plans: The Dark Iron Dwarves were planning to destroy the bridge! Intercepting the shipment of explosives, we managed to roll the cart full of gunpowder into the nearby river, rendering it harmless. Returning with good news, the captains surprised us with the order us to eliminate a Dark Iron Dwarf held in the Stockades! We told him we already had taken care of this thug, but he wouldn't believe us and wanted proof.
With the Dark Iron grip over Dun Modr broken, we investigated the nearby bridge, the Thandol Span. Rummaging through a guardpost on the bridge, we found attack plans: The Dark Iron Dwarves were planning to destroy the bridge! Intercepting the shipment of explosives, we managed to roll the cart full of gunpowder into the nearby river, rendering it harmless. Returning with good news, the captains surprised us with the order us to eliminate a Dark Iron Dwarf held in the Stockades! We told him we already had taken care of this thug, but he wouldn't believe us and wanted proof.

We delve into Duskwood and Strangethorn, visit the northern lands of Arathi, Hillsbrad and Alterac and cross abroad into the Stonetalon Mountains and Desolace.
The Gnomeregan assault
Returning Ironforge to resupply, our plans took a turn as a group of Gnomes from Tinkertown tried to recruit us. The Gnome leader, High Tinker Mekkatorque, had need for adventurers to venture into the irradiated city of Gnomeregan, and we fit the bill! We would have to retrieve various items such as mechanical devices, data punch cards and a mechanical brain, and finally bring justice to the Mekkatorque's old advisor: Thermaplugg. This would not be easy, as we would also have to spend quite some time in an irradiated area!
According to the gnomes the radiation would be pose no danger to us, but we still were in doubt. Then the High Tinker mentioned some special rewards and pointed to a large, heavy chest in the corner of the room, upon completion the contents would be all ours, which changed our minds. The Gnomes needed our help and would aid them!
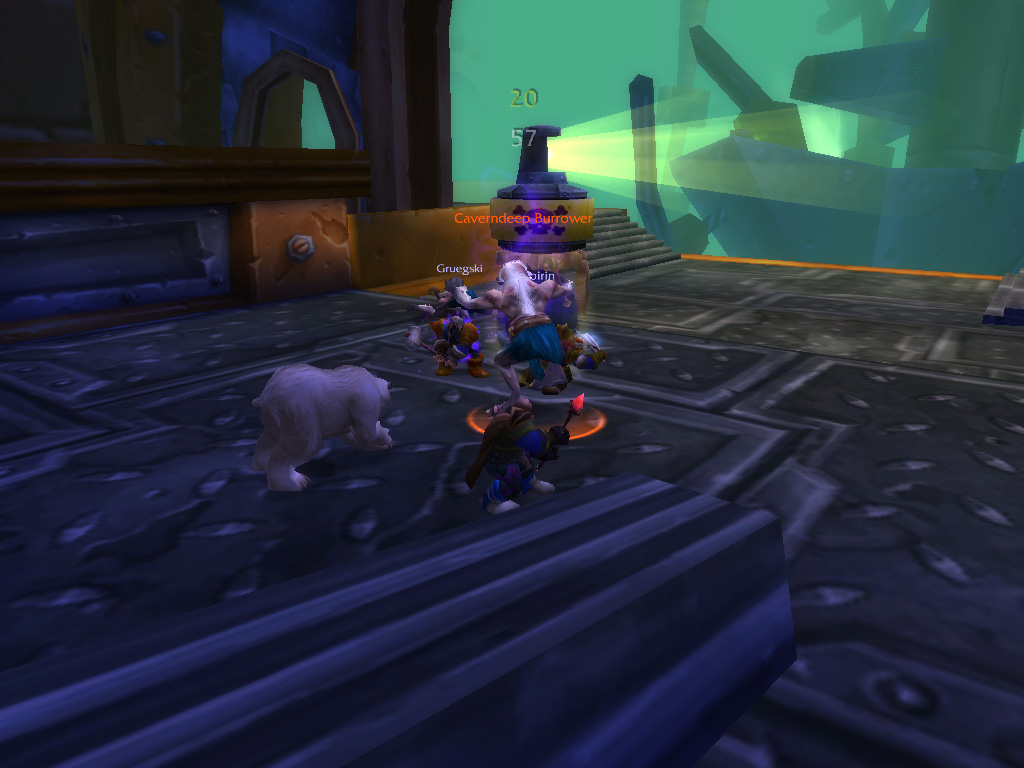
T
ravelling across Dun Morogh, we headed for gates of Gnomeregan. As we had already visited the area earlier in our adventures, the entrance hewn out of the mountainside was easy found. Descending a long escalator, we reached a large underground hall, full of Leper Gnomes and Troggs. Here we found our contacts, Gnomish technicians and warriors who had created a foothold in the overrun city. As we retrieved the mechanical core of a robot called "Techbot" and acquired special data cards, we continued and worked our way into the lower levels.
The catastrophe that irradiated the city was partly caused by a Trogg tunnelling invasion, so our first mission was to find the breach and close it. Exploring the city, we managed to locate the tunnels and confront the Trogg leader Grubbis, guarded by his pet basilisk. A short fight left the tunnels unprotected, allowing us to collapse them with aid from a Gnomish engineer.
The catastrophe that irradiated the city was partly caused by a Trogg tunnelling invasion, so our first mission was to find the breach and close it. Exploring the city, we managed to locate the tunnels and confront the Trogg leader Grubbis, guarded by his pet basilisk. A short fight left the tunnels unprotected, allowing us to collapse them with aid from a Gnomish engineer.
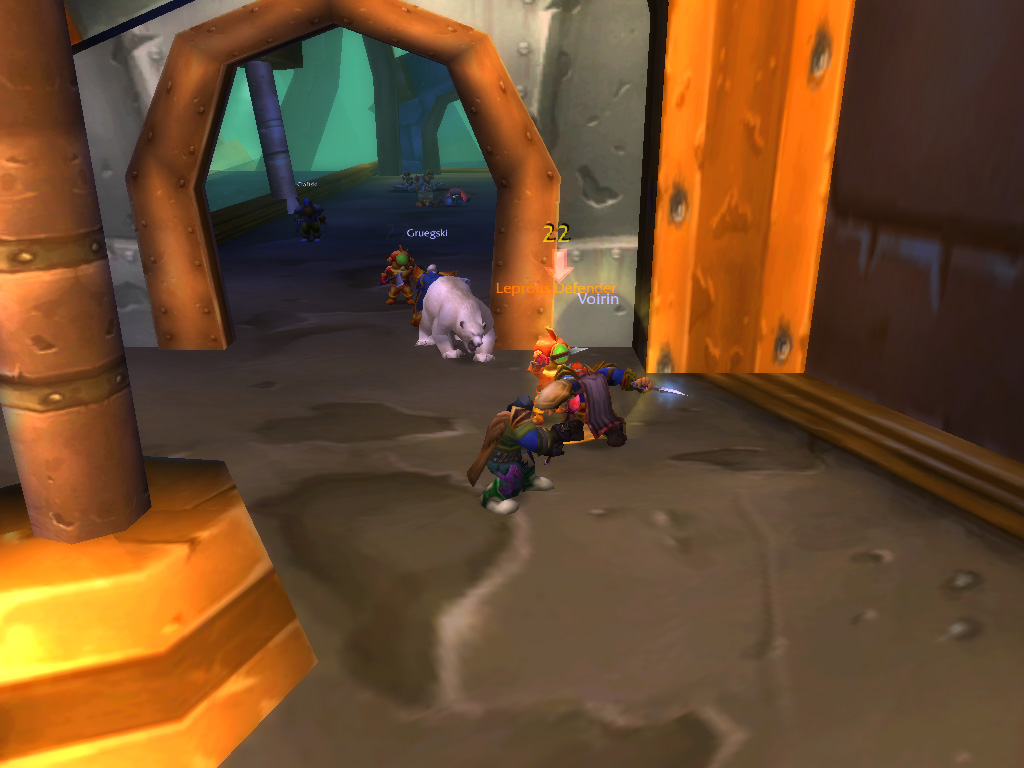
We made a short stop in the so-called "Safe Zone", where the remains of the Gnomeregan guard was holding back the sieging monsters and machines. As we were the first visitors since some time, the vendors were quite happy seeing some new clients. We continued, and the deeper we went, the stranger kinds of creatures we found. Entering a large circular room, we had to battle through creatures consisting of irradiated water and ooze. Here Orangz was able to pick up a special pair of boots that were previously suspended inside one of these creatures.
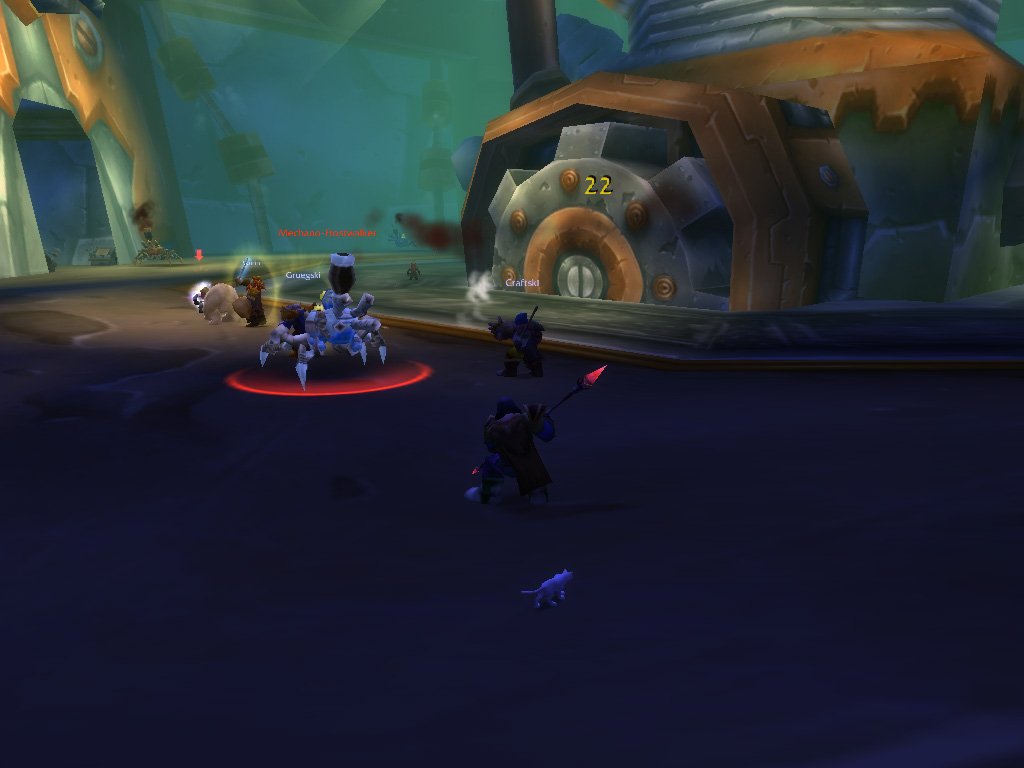
Following the hallways, we were met with the remaining Gnomeregan inhabitants, now driven mad by the radiation. Strange mechanical walkers and tanks barred our way, supported by armored Gnomes. While fighting these machines, we were surprised by a walking, blinking light that called in extra reinforcements with its speakers. Thankfully Voirin was on his toes, and managed to intercept the new attackers heading for Craftski and Orangz. After all cogs and other mechanical parts had settled, we stood bruised but victorious.
Following the hallways, we were met with the remaining Gnomeregan inhabitants, now driven mad by the radiation. Strange mechanical walkers and tanks barred our way, supported by armored Gnomes. While fighting these machines, we were surprised by a walking, blinking light that called in extra reinforcements with its speakers. Thankfully Voirin was on his toes, and managed to intercept the new attackers heading for Craftski and Orangz. After all cogs and other mechanical parts had settled, we stood bruised but victorious.
The hallway continued for some time until we reached a huge aircraft hold with a platform in the middle. Clearing the surrounding edges of the patrolling machines and Leper Gnomes, we were able to gather all the mechanical parts the Gnomes from Tinkertown had asked us to retrieve. Heading for the middle platform, we were met by a Gnomish Walker-tank, it's weapons sparking with lightning. Using Voirin and Gruegski as lightning conduits, we were able to make short work of this machine, allowing us to access the data card machine it was protecting.
Rummaging through the wreckage of this so-called "Electrocutioner 6000", Voirin was able to find and needle-sharp sword that crackled with electrical energy, quite dangerous indeed! Inspecting closer, we also found a key, leaving us with a mystery: What could this key open?
Rummaging through the wreckage of this so-called "Electrocutioner 6000", Voirin was able to find and needle-sharp sword that crackled with electrical energy, quite dangerous indeed! Inspecting closer, we also found a key, leaving us with a mystery: What could this key open?
D
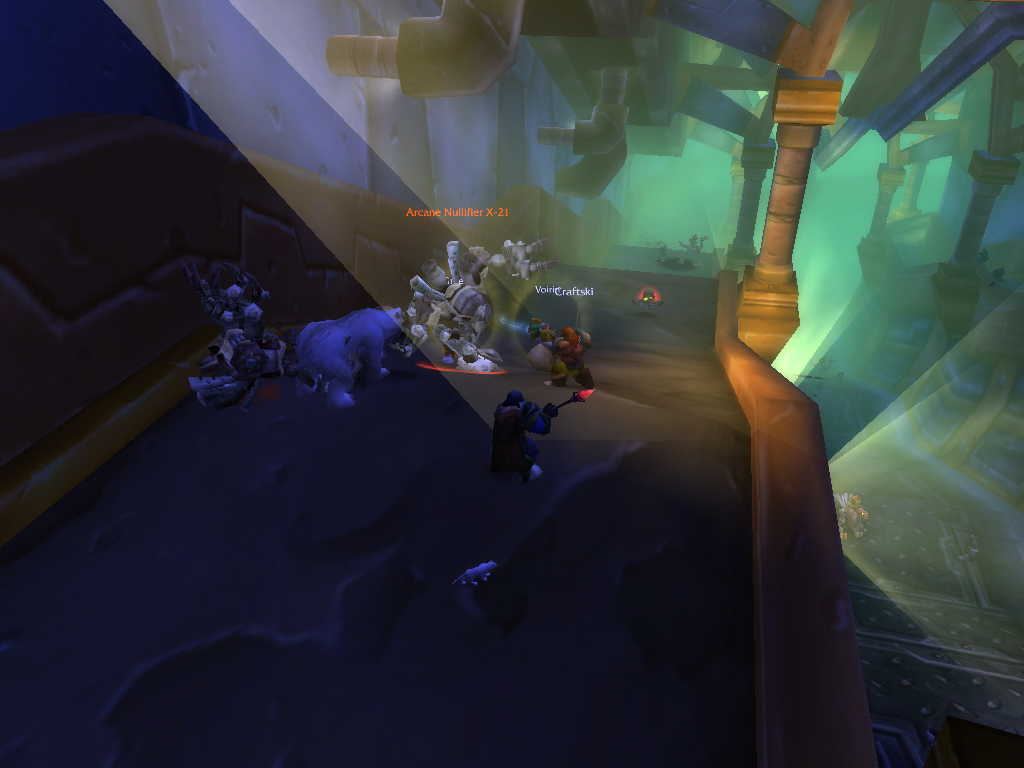
escending, we reached the large computer room of Gnomeregan, protected by various types of mechanostriders and mechanotanks. Clearing the way, we were able to retrieve the final data card, which according to the Gnomes, contained vital information! Continuing, we entered a Deeprun Tram-like passageway, where we ran into a surprise: There were Dark Iron Dwarves in Gnomeregan!
They had taken over the lower passages and were accompanied by even more intricate machines. These robots were even able to reflected our magical attacks back to us!
Trying to trap us while we were advancing, the Dark Iron infiltrators placed timed explosives around us, requiring us to take great care to avoid the blast. Thankfully Craftski was on his toes, and he was able to disable the deadly explosives out from a distance, while Beard and Voirin kept all enemies at bay. Reaching the end of the long passageway, we were surprised to find out it was actually a dead end! With all the guards abound, we had expected to find at least something of importance there!
Trying to trap us while we were advancing, the Dark Iron infiltrators placed timed explosives around us, requiring us to take great care to avoid the blast. Thankfully Craftski was on his toes, and he was able to disable the deadly explosives out from a distance, while Beard and Voirin kept all enemies at bay. Reaching the end of the long passageway, we were surprised to find out it was actually a dead end! With all the guards abound, we had expected to find at least something of importance there!
B
ut then something caught the eye of Craftski: There was a lock to the side of the door, with a keyhole. Remembering the key we had found earlier, we inserted it and gave it a turn. With the sound of gears and cogs turning, the huge wall that seemed to be a dead end lowered itself into the floor. Suddenly we stood face to face with the mastermind of the disaster that hit Gnomeregan: Mekgineer Thermaplugg. Sitting in a large mechanical battlesuit, we knew this would be a hard fight. Gruegski quickly gave each of us a set of power enhancing potions, and after taking those in, Voirin went charging.
Hammering the mechanical suit, we found it was possible to make a good dent, raising our spirits. But suddenly, from the sides, walking mechanical bombs appeared, dropping from the ceiling. Acting quickly, Beard intercepted these machines, while Craftski and Orangz ran around the room, short-circuiting the bomb dispensers. Unable to use the bombs, Thermaplugg posed a small challenge, and exploded together with his battlesuit into fragments. Rummaging through the scrap, Orangz found an interesting mechanical hat, with a rotating radar on top and a large button. Testing out the button, a charged bolt blasted into the wall, missing everyone by inches and leaving our beards singed. By agreement the button would be left off limits for now. With our work complete, we returned to Tinkertown to claim our rewards.
Hammering the mechanical suit, we found it was possible to make a good dent, raising our spirits. But suddenly, from the sides, walking mechanical bombs appeared, dropping from the ceiling. Acting quickly, Beard intercepted these machines, while Craftski and Orangz ran around the room, short-circuiting the bomb dispensers. Unable to use the bombs, Thermaplugg posed a small challenge, and exploded together with his battlesuit into fragments. Rummaging through the scrap, Orangz found an interesting mechanical hat, with a rotating radar on top and a large button. Testing out the button, a charged bolt blasted into the wall, missing everyone by inches and leaving our beards singed. By agreement the button would be left off limits for now. With our work complete, we returned to Tinkertown to claim our rewards.
Fishing is an adventurous tradeskill, allowing you to gather food, magical potions and sometimes valuable items!
A reunion in the dark
L eaving Ironforge, we travelled south to Stormwind, to continue our quests in Human lands. Earlier in our adventures we had made a short visit to Darkshire, but were unable to aid the townsfolk. With our improved skills, this would not be a problem, so we returned to help out. We found the area, Duskwood, crawling with dark horrors: Undead creatures and wolf-men, just like in the Shadowfang Keep haunted the dark forests. Helping out the local guard, the Night Watch, we cleared the area of these so-called Worgen and eventually found their lair in an abandoned mine. After securing the borders of Darkshire, we were sent to investigate the Raven Hill cemetery, where we helped a hermit in need of items and cleared the large catacombs of undead ghouls.
L eaving Ironforge, we travelled south to Stormwind, to continue our quests in Human lands. Earlier in our adventures we had made a short visit to Darkshire, but were unable to aid the townsfolk. With our improved skills, this would not be a problem, so we returned to help out. We found the area, Duskwood, crawling with dark horrors: Undead creatures and wolf-men, just like in the Shadowfang Keep haunted the dark forests. Helping out the local guard, the Night Watch, we cleared the area of these so-called Worgen and eventually found their lair in an abandoned mine. After securing the borders of Darkshire, we were sent to investigate the Raven Hill cemetery, where we helped a hermit in need of items and cleared the large catacombs of undead ghouls.
T
he area around Raven Hill seemed to hold the strongest opponents, as we ran into a dangerous necromancer called Morbent Fel and the wandering Undead warrior Mor'Ladim. Investigating both of these evils together with the Night Watch, we were able to discover their secrets, take them down and break the power they held over Duskwood. The hermit we helped earlier also appeared to have ill intent, as he had created an undead monster (using the items we collected for him, how dare he!), which was sent to destroy Darkshire. Returning in time, and working together with the guards, we managed to stop this undead abomination.
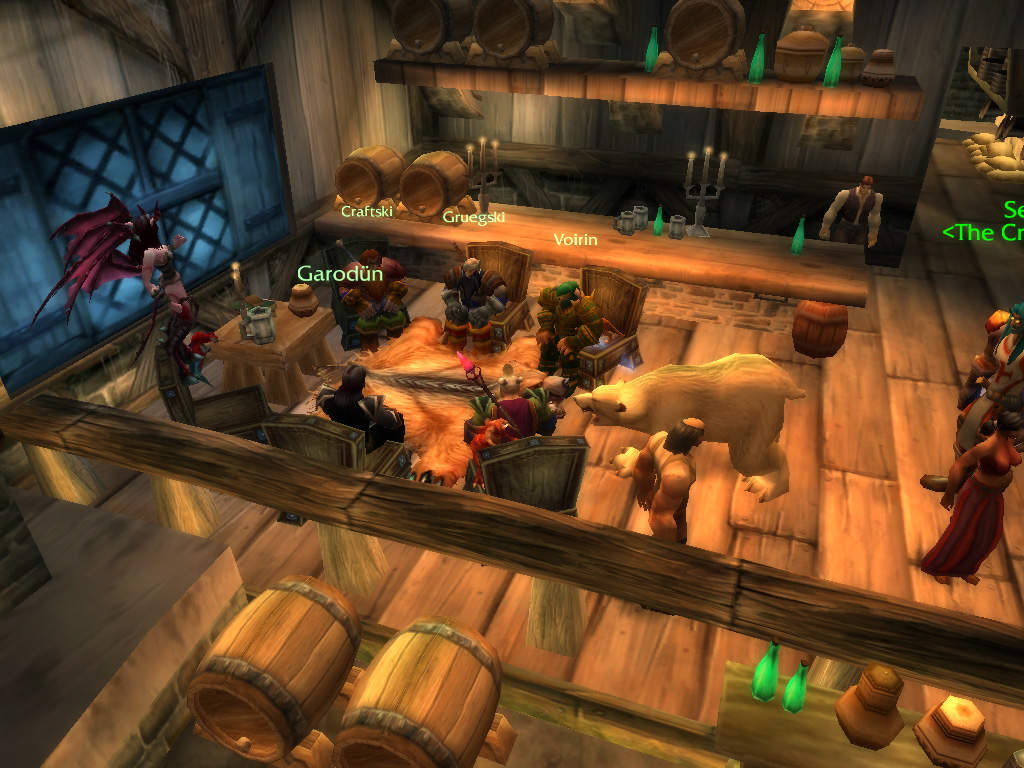
As the undead hulk collapsed, we found ourselves in company as Garodun, a Warlock friend of Voirin, had arrived. He was planning to explore the southern jungle of Stranglethorn, and as we were in for a new adventure, we agreed to go together.
As the undead hulk collapsed, we found ourselves in company as Garodun, a Warlock friend of Voirin, had arrived. He was planning to explore the southern jungle of Stranglethorn, and as we were in for a new adventure, we agreed to go together.
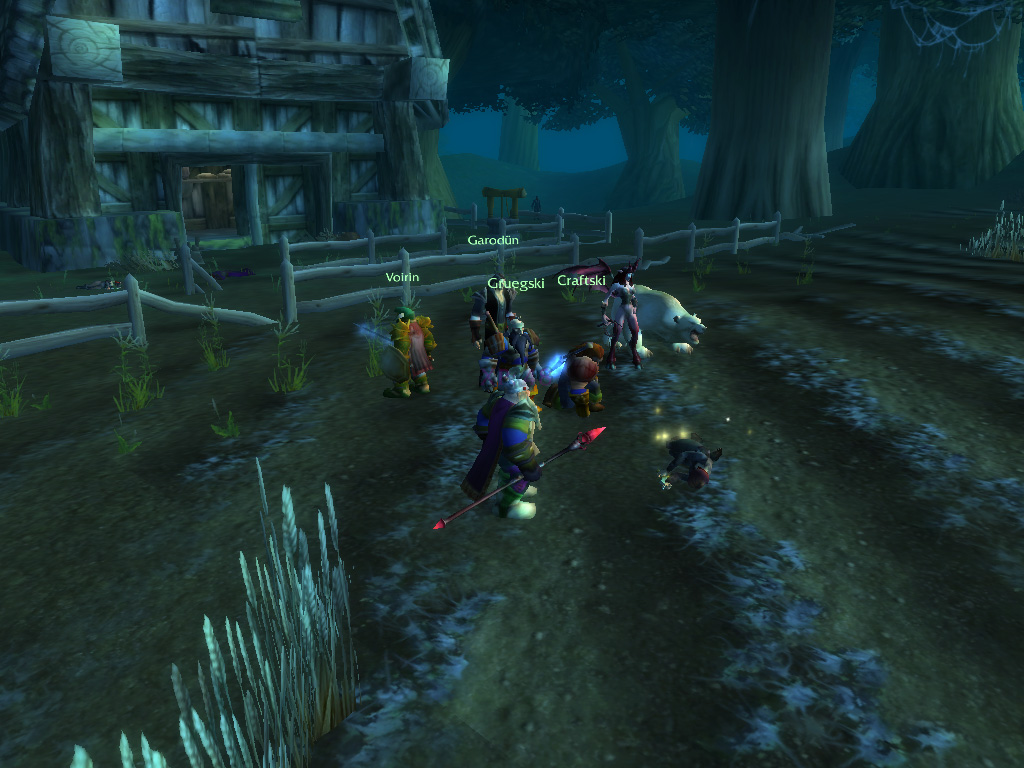
L
eaving Darkshire, we headed south, following the road that would lead to Stranglethorn. As we had cleared much of the monsters wandering the land, the road was clear and our trip was uneventful. We reached a camp held by Alliance adventurers, that turned out to be Stormwind soldiers that had rebelled from their captain. The captain, called Kurzen, appeared to have gone mad from jungle fever, and together with his soldiers, took over the settlement nearby. The rebels sent us to clear parts of the settlement and reclaim antidotes so they (and hopefully we as well!) wouldn't be hit by the fever as well.
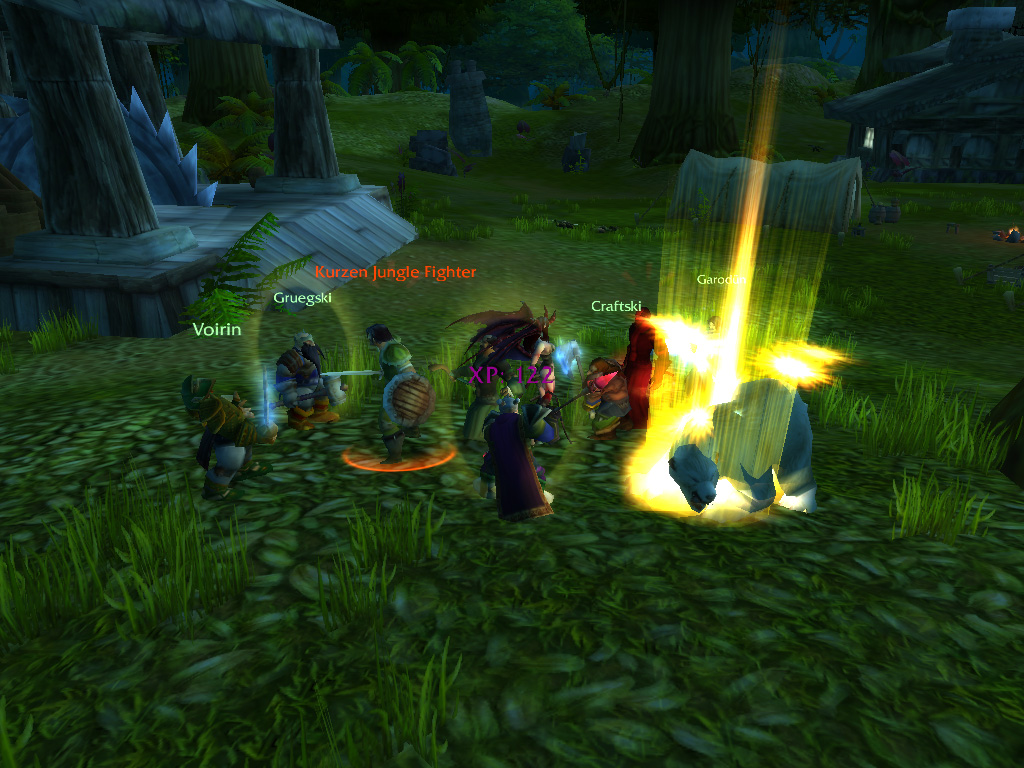
R
eturning with our bags full, we were sent back out again to explore the cave next to the settlement. There, Kurzen had made his hideout, and holed up with his elite guard. But together with our fifth party member, Garodun, we easily infiltrated into the cave and were able to take out the crazed captain, and allow the settlement to be retaken by the Stormwind army. With our mission complete, we headed deeper into the jungle, only to be met with different dangers.
But now it wasn't just monsters, but powerful members of the Horde that barred our way. While we were trying to investigate a Dwarven camp, and reach the Goblin town of Booty Bay, we had hide and run from Horde warriors, mounted on all kinds of beasts such as wolves, Raptors and Kodos. After finally reaching Booty Bay, we thought running might be the better part of valor, and returned to Ironforge to look for a safer adventuring spot.
But now it wasn't just monsters, but powerful members of the Horde that barred our way. While we were trying to investigate a Dwarven camp, and reach the Goblin town of Booty Bay, we had hide and run from Horde warriors, mounted on all kinds of beasts such as wolves, Raptors and Kodos. After finally reaching Booty Bay, we thought running might be the better part of valor, and returned to Ironforge to look for a safer adventuring spot.
Up in the Highlands
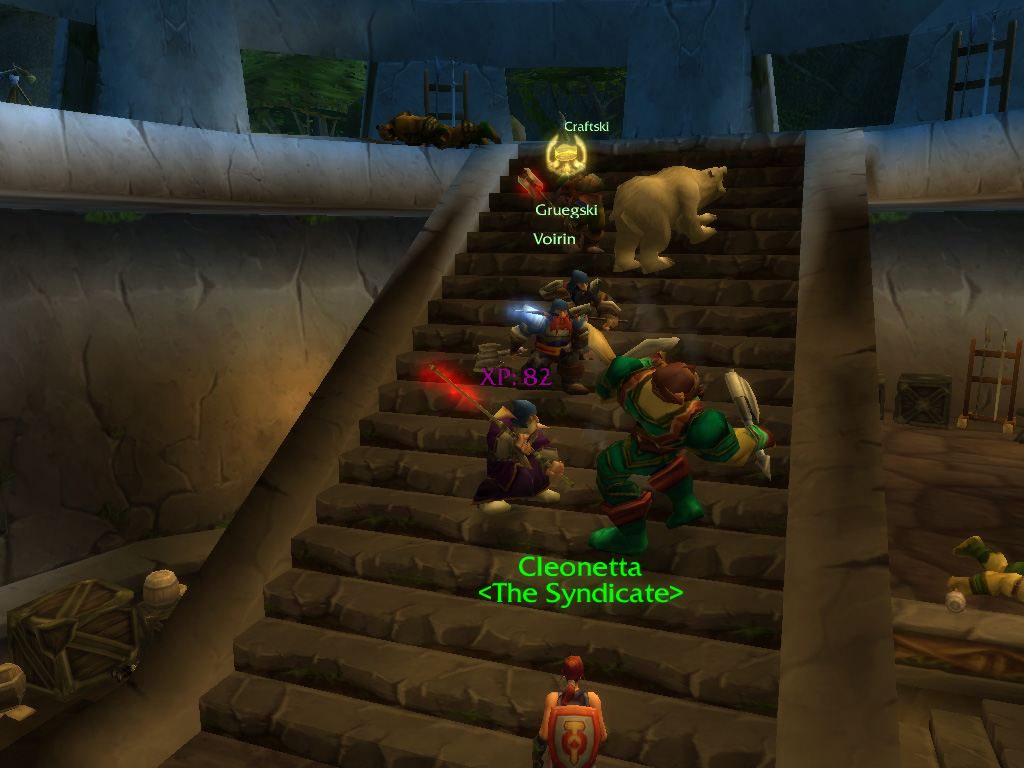
W e believed it would be safer to go north, so crossed the Thandol Span and headed into the Arathi Highlands. After a long walk, (during which we had to get all damp in the Wetlands once again!) we reached Refuge Pointe, the Alliance camp in the highlands. Upon arriving, we were quickly put to work, investigating various nearby, abandoned, farms. These farms had been taken over by the criminal Syndicate, who used these places to mount attacks on Refuge Pointe and Southshore in the Hillsbrad Foothills. While clearing out the various staging grounds, we ran into a strange, glowing obelisk...
W e believed it would be safer to go north, so crossed the Thandol Span and headed into the Arathi Highlands. After a long walk, (during which we had to get all damp in the Wetlands once again!) we reached Refuge Pointe, the Alliance camp in the highlands. Upon arriving, we were quickly put to work, investigating various nearby, abandoned, farms. These farms had been taken over by the criminal Syndicate, who used these places to mount attacks on Refuge Pointe and Southshore in the Hillsbrad Foothills. While clearing out the various staging grounds, we ran into a strange, glowing obelisk...
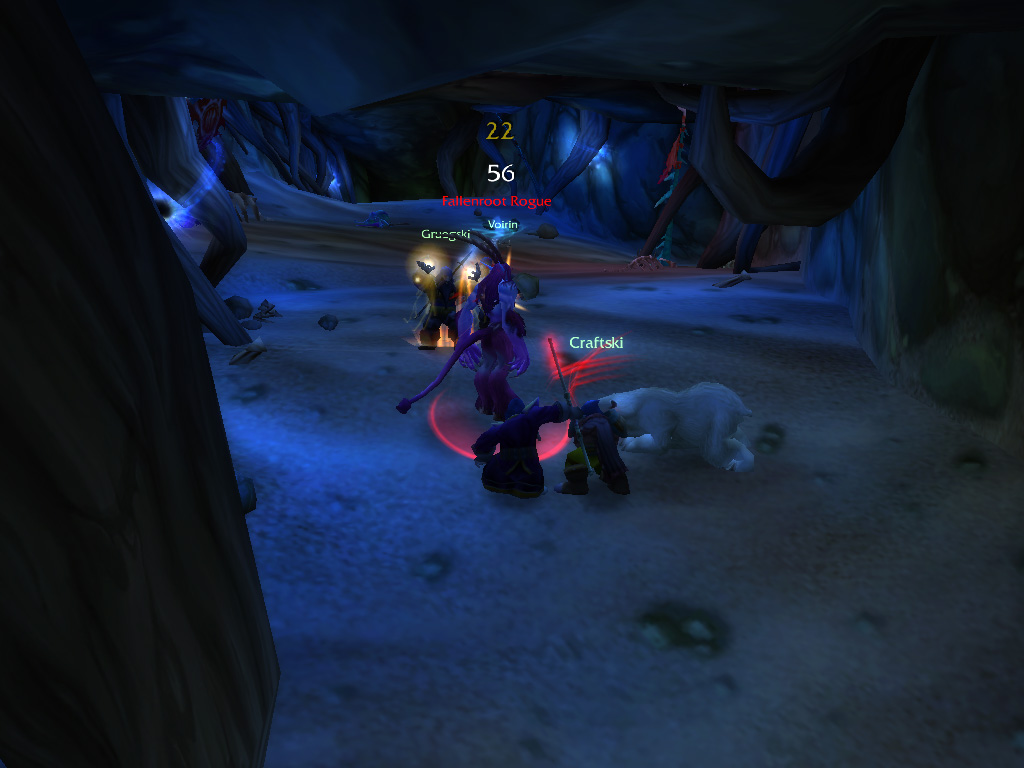
A
pproaching the obelisk, heard a voice reaching into our minds: some kind of unseen entity, imprisoned deep underground, was communicating with us. The entity wanted us to search a cavern nearby, and retrieve gemshards in possession by the rat-creatures living there. It seemed we had run into Kobolds once again! Exploring the cave, it took quite an effort to find the needed shards, but Voirin was more than happy to stay, as there was iron ore in abundance!
Returning the shards, we were sent out again to visit stone circles that dotted the highlands, and find the keystones that were buried there. Fighting past elemental creatures and Horde enemies, we retrieved the stones and return them to the obelisk. To break the prison that held this entity, which was named Myzrael, we needed the main key, which was protected by Fozruk. We had seen this huge stone giant wandering the hills, accompanied by its rat minions, and knew attacking the elemental would require us to be stronger.
Returning the shards, we were sent out again to visit stone circles that dotted the highlands, and find the keystones that were buried there. Fighting past elemental creatures and Horde enemies, we retrieved the stones and return them to the obelisk. To break the prison that held this entity, which was named Myzrael, we needed the main key, which was protected by Fozruk. We had seen this huge stone giant wandering the hills, accompanied by its rat minions, and knew attacking the elemental would require us to be stronger.
T
aking a short trip to Southshore, we were sent to check on two scouts who were investigating a possible Forsaken deadly plague. The trail led us back to Arathi, where the rumors were proven true, as a Forsaken alchemist was conducting various experiments at an abandoned farm. Intercepting a courier and bodyguards, we were able to find a sealed letter, and learn that the plans were close to completion. With no time to spare, we infiltrated the farm and confronted the alchemist. With the aid of one of the scouts, we were able to destroy the operation, escaping just before reinforcements from Hammerfall, the nearby Horde settlement, arrived.
A
side from suffering under the Syndicate presence, the Highlands were also in firm control by a band of Ogres, called the Boulderfist. The Ogres had allied themselves with Witherbark Trolls, and made a truce with the Syndicate, allowing them to fight both Alliance and Horde. Their leaders inhabited a Stromguard Keep, a ruined stronghold in the south, and had evaded all assassination attempts so far. To weaken their grip over the land, we were sent to clear hideouts, scattered throughout the Highlands, of the Ogre and Troll influence, and retrieve stolen magical items.
If we were to assault Stromgarde Keep, we would require help, so our next assignment was to retrieve a magical wand, stolen by Kor'gresh. We found the Ogre hidden deep inside a cave, and he seemed to learn how to use it! Evading icy blasts, we were able to reclaim the item. How the creature ever got hold of it, we would never know. Sent on another errand, we retrieved a magical gemstone, which was further enchanted using the wand. With this magical power, the gem could activate the magical defences of the Tower of Arathor, the mage tower in Stromgarde.
If we were to assault Stromgarde Keep, we would require help, so our next assignment was to retrieve a magical wand, stolen by Kor'gresh. We found the Ogre hidden deep inside a cave, and he seemed to learn how to use it! Evading icy blasts, we were able to reclaim the item. How the creature ever got hold of it, we would never know. Sent on another errand, we retrieved a magical gemstone, which was further enchanted using the wand. With this magical power, the gem could activate the magical defences of the Tower of Arathor, the mage tower in Stromgarde.
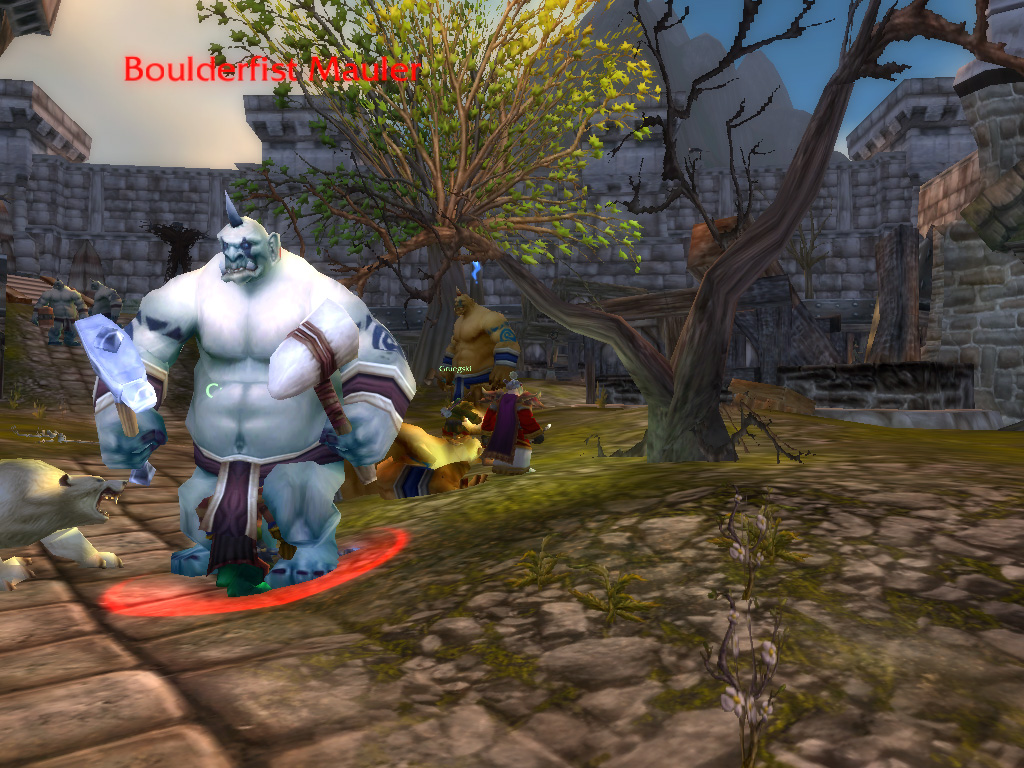
Syndicate Shut-down
A rmed with this extra power, we were sent to Stromgarde, to retrieve the magical artefacts of the wand's original owner: Trelane. The main gates to Stromgarde were heavily defended by Syndicate troops, with hidden rogues and powerful spellcasters supporting their troops. Pushing onwards, we found a ramp leading towards the tower, where the Ogres had made their home. Finding a pedestal, we inserted the gem. Suddenly, water elementals sprung to life from puddles on the ground. With this assistance, we could climb the tower, retrieving the items as we ascended. We were glad the magical constructs covered our backs while we rummaged through the strongboxes hidden throughout the tower, trying to find the items. The Ogres were also much easier to take down with assistance! With all the items in our possession, we quickly fled form the tower, making sure we were safe before the magic fueling the elementals ran out.
A rmed with this extra power, we were sent to Stromgarde, to retrieve the magical artefacts of the wand's original owner: Trelane. The main gates to Stromgarde were heavily defended by Syndicate troops, with hidden rogues and powerful spellcasters supporting their troops. Pushing onwards, we found a ramp leading towards the tower, where the Ogres had made their home. Finding a pedestal, we inserted the gem. Suddenly, water elementals sprung to life from puddles on the ground. With this assistance, we could climb the tower, retrieving the items as we ascended. We were glad the magical constructs covered our backs while we rummaged through the strongboxes hidden throughout the tower, trying to find the items. The Ogres were also much easier to take down with assistance! With all the items in our possession, we quickly fled form the tower, making sure we were safe before the magic fueling the elementals ran out.

B
ut our assault on Stromgarde was not done: The captain at Refuge pointe had asked us to break the chain of command of the Syndicate, and assassinate their leaders. Our first target was the Orcish warlock Marez Cowl, who acted as an advisor to the Syndicate. Navigating the narrow streets surrounding the keep, we pushed the Syndicate troops back, and advanced to a small courtyard where we spotted the Orc lurking nearby a well. Taking the Orc down, we made sure our cuts were clean: There was a reward for the head!

W
ith the advisor slain, it was time to go after the leader of the Syndicate troops in Arathi: Lord Falconcrest. He had holed up inside the keep itself, and SI:7 spies (the Stormwind secret intelligence service) had found out he was accompanied by his bodyguard, Otto. Infiltrating the keep, we cornered the remaining Syndicate thugs and confronted Falconcrest. Voirin charged in and kept Falconcrest at bay, while Craftski sent Beard to maul Otto. They proved to be tough opponents, but with the healing support of Orangz and Gruegski, endurance was on our side. After a long battle, we stood victorious and were able to return to Refuge Pointe with a bounty to claim. Happy with our work, the captain sent us to Southshore, to investigate the Syndicate further.
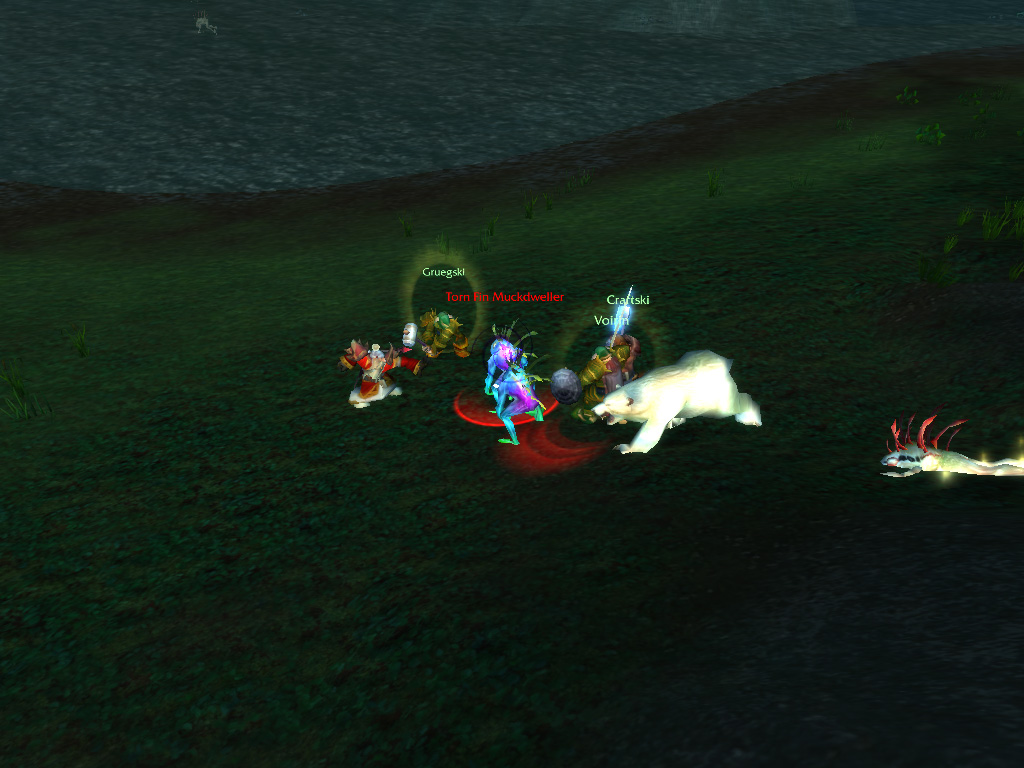
A
s we returned to Southshore once again, we informed the Magistrate of our deeds in Arathi and our investigation into the Syndicate. It appeared the magistrate had recently been targeted for assassination, and he ordered us to find out who the true leaders of the Syndicate were. Catching an assassin of guard, we found a bounty contract which led us to the Alterac mountains, north of Hillsbrad.
Taking a break in the Inn, a human guard approached us, asking us to take care of a few tasks in exchange of coin. It seemed this Guard, Farren, had been transferred to Southshore and disliked the harbour life, especially since it involved assignments chasing Murlocs and Naga. As we had fought these creatures many times before, and could use some silver, we agreed, and culled the beaches of the creatures. It appeared we had done a fine job as, thanks to our efforts, Farren received a recommendation letter for reassignment.
Taking a break in the Inn, a human guard approached us, asking us to take care of a few tasks in exchange of coin. It seemed this Guard, Farren, had been transferred to Southshore and disliked the harbour life, especially since it involved assignments chasing Murlocs and Naga. As we had fought these creatures many times before, and could use some silver, we agreed, and culled the beaches of the creatures. It appeared we had done a fine job as, thanks to our efforts, Farren received a recommendation letter for reassignment.
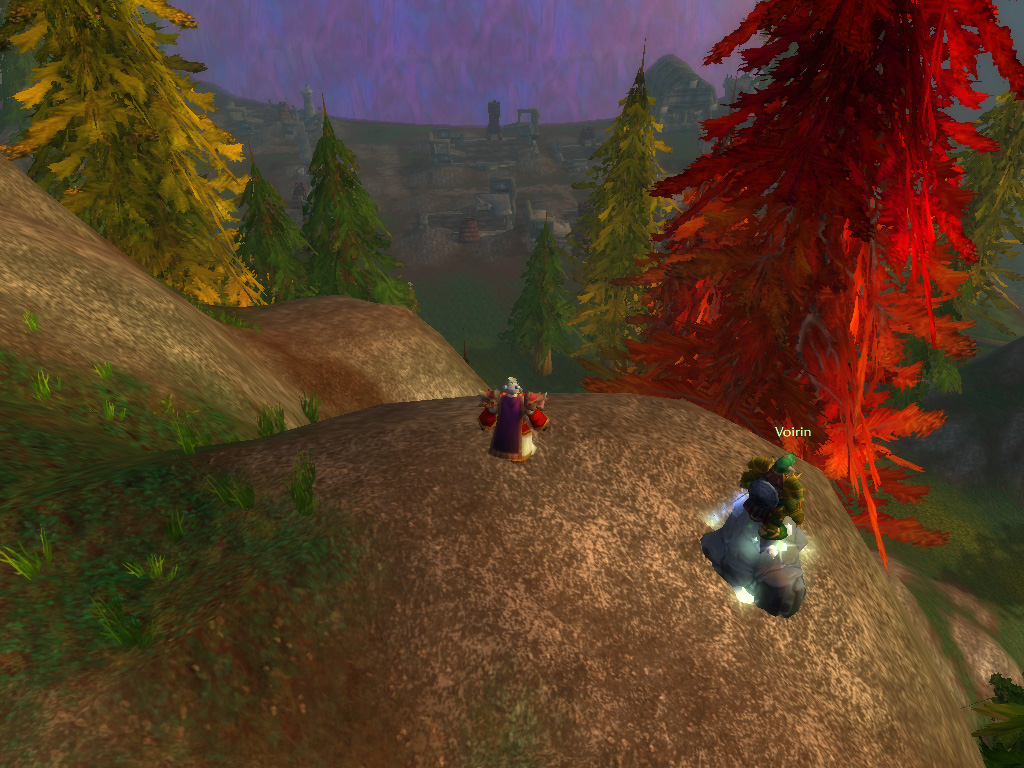
W
hile in town, Craftski found a local leatherworker who was paying good coin for the fur of Yetis that lived in a nearby cavern. The cave would be along our path to Alterac, so this made detour worthwhile. The greats beasts proved to be easy to take down, but to gather furs of a good quality was difficult, especially with Craftski using grapeshot. After we took on a more delicate approach, we were able to gather enough furs, and headed further into the mountains.
Voirin was happy to find plenty of iron along the mountains, and while mining one large seam, we suddenly found ourselves facing a large magical barrier. With Orangz knowing his history, he told us we had reached Dalaran, the great city of mages. After the Scourge had invaded the city and summoned Archimonde, the Eredar Lord laid waste to the glittering spires, leaving the city in rubble. The mages of the Kirin Tor had erected a magical shell, keeping themselves safe while they were rebuilding.
Voirin was happy to find plenty of iron along the mountains, and while mining one large seam, we suddenly found ourselves facing a large magical barrier. With Orangz knowing his history, he told us we had reached Dalaran, the great city of mages. After the Scourge had invaded the city and summoned Archimonde, the Eredar Lord laid waste to the glittering spires, leaving the city in rubble. The mages of the Kirin Tor had erected a magical shell, keeping themselves safe while they were rebuilding.
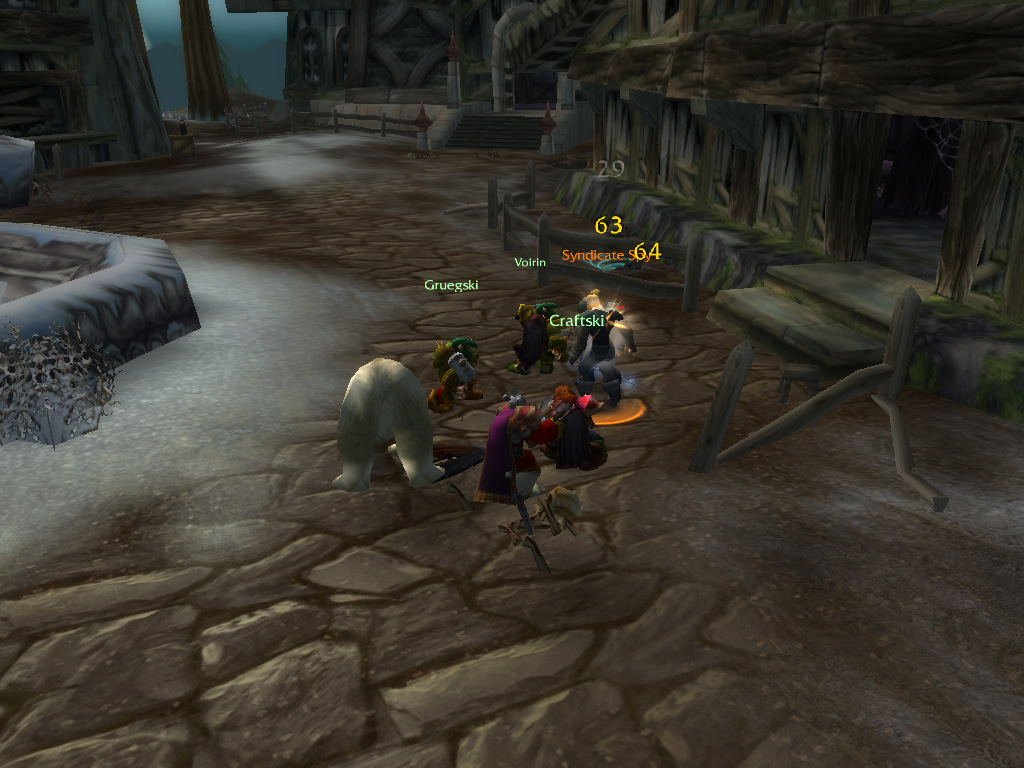
F
ollowing the path deeper into the mountains, we entered the abandoned town of Strahnbrad and found it overrun by Syndicate troops. As we cleared out the buildings, we noticed some of the slain Syndicate warriors wore sigil rings, marking them as nobles of Alterac, a kingdom destroyed during the second Orcish war. The Alterac rulers were best known for collaborating with the Horde, and it seemed the Syndicate followed in their footsteps, betraying the Alliance.
In Strahnbrad we intercepted an encrypted message, and returned to Hillsbrad to find someone who could read it. Helped by a scholar in Ironforge, we were able to find out the contents that proved to be an attack order, signed by the Syndicate ruler, Baron Vardus. With this information, we were sent back to the Alterac Mountains, and discovered the hideout of Vardus. It was a surprise, seeing the leader of such an organization living in a simple camp, but it made our work quite easy. With a swift strike, we raided the camp, and returned to Soutshore with Vardus' head on a pike.
In Strahnbrad we intercepted an encrypted message, and returned to Hillsbrad to find someone who could read it. Helped by a scholar in Ironforge, we were able to find out the contents that proved to be an attack order, signed by the Syndicate ruler, Baron Vardus. With this information, we were sent back to the Alterac Mountains, and discovered the hideout of Vardus. It was a surprise, seeing the leader of such an organization living in a simple camp, but it made our work quite easy. With a swift strike, we raided the camp, and returned to Soutshore with Vardus' head on a pike.
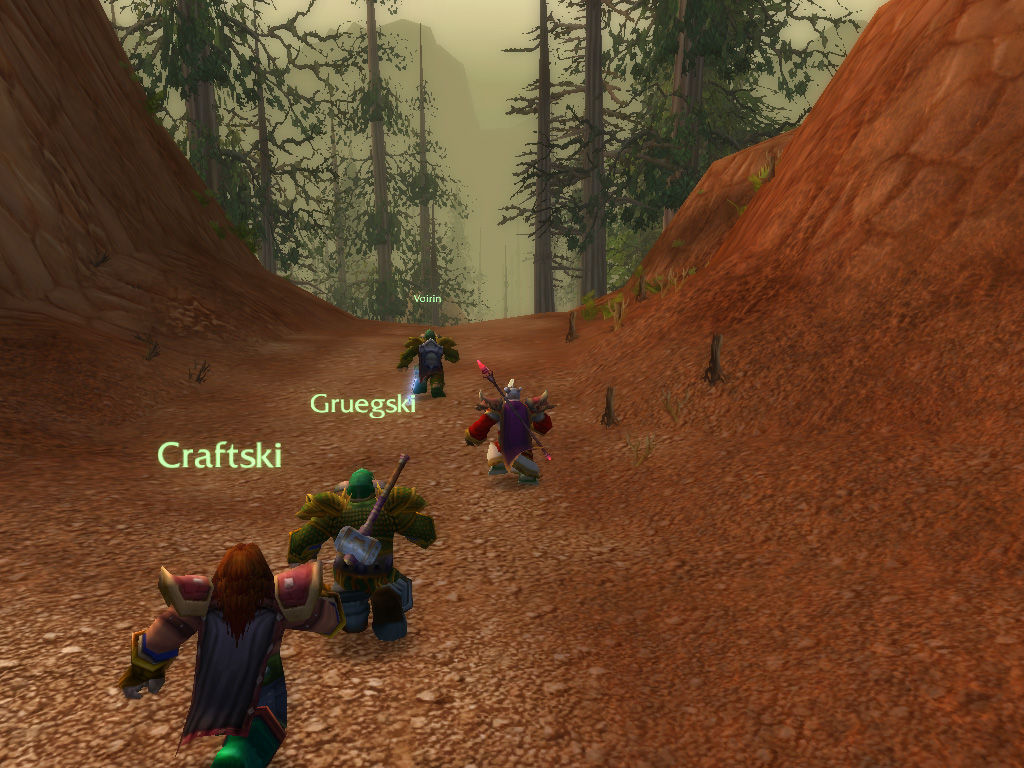
Passing through Horde territory
W ith our missions complete, we returned to Ironforge to visit our trainers, and to find a new adventure! While visiting Stormwind cathedral, Gruegksi had met a priest of the Scarlet Crusade, who recruited adventurers for a trip to Desolace, far away in Kalimdor. As we had only visited the Night Elven lands, we were interested what else we could find across the ocean. The trip required careful planning, since we would have to cross Horde controlled territory. Taking the boat from Menethil once again, we landed in Darkshore, and flew south to Astranaar, a Night Elf village in Ashenvale. From here we crossed to the south, entering to Stonetalon Mountains through a hidden underground passage. Stonetalon proved to be vast, but keeping away from the roads kept us safe from Horde patrols. We eventually crossed the charred vale, and reached Desolace.
W ith our missions complete, we returned to Ironforge to visit our trainers, and to find a new adventure! While visiting Stormwind cathedral, Gruegksi had met a priest of the Scarlet Crusade, who recruited adventurers for a trip to Desolace, far away in Kalimdor. As we had only visited the Night Elven lands, we were interested what else we could find across the ocean. The trip required careful planning, since we would have to cross Horde controlled territory. Taking the boat from Menethil once again, we landed in Darkshore, and flew south to Astranaar, a Night Elf village in Ashenvale. From here we crossed to the south, entering to Stonetalon Mountains through a hidden underground passage. Stonetalon proved to be vast, but keeping away from the roads kept us safe from Horde patrols. We eventually crossed the charred vale, and reached Desolace.
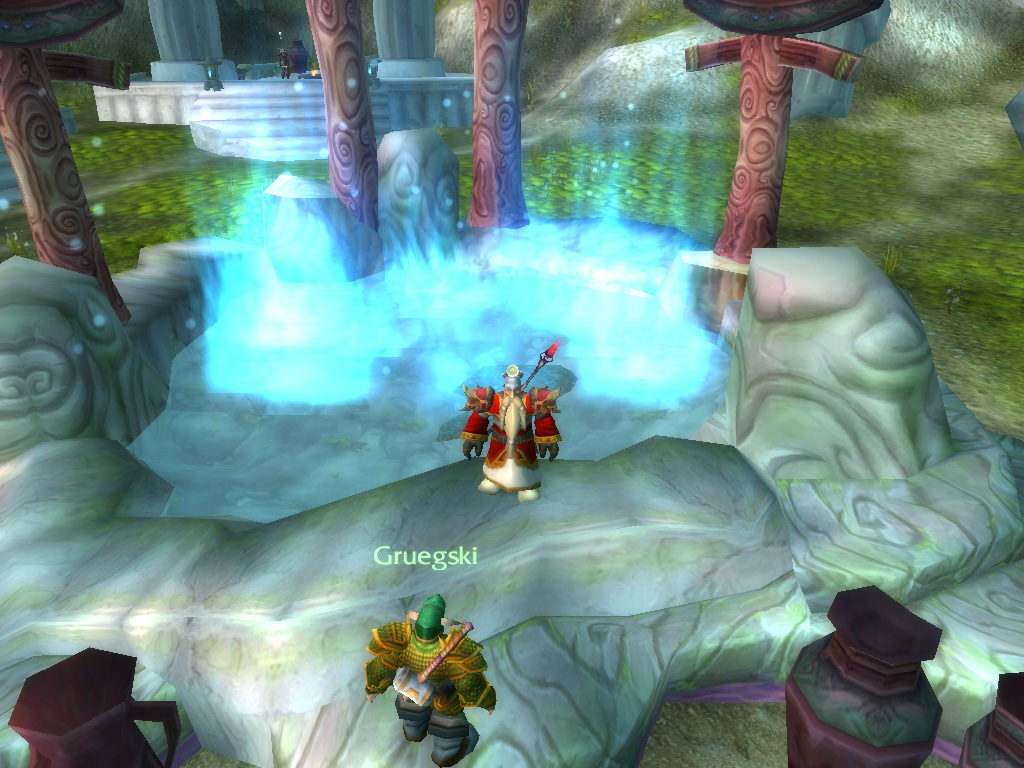
W
e arrived at the settlement of Nijel's point, and met the Scarlet Crusade emissary stationed there. Far in the ravines to the south of Desolace an undead force had been gaining strength, our mission was to cleanse this place of the taint. Speaking to the other inhabitants of the settlement, we found out that the undead were not the only dangers in this barren wasteland. We were asked to investigate two missing Night Elf nobles, approach the Centaurs that roamed the lands and search for the cargo of a missing ship.
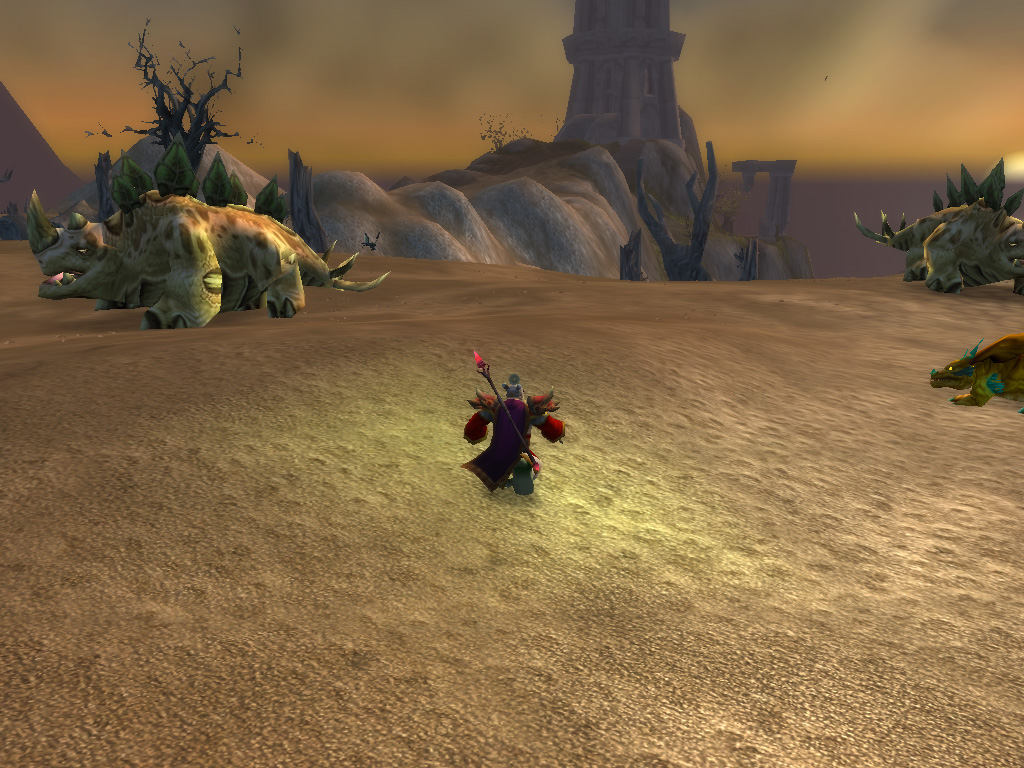
Desolation in distress
E xploring the surroundings, we headed out to search the missing elves first, and found their cart along the road from Stonetalon, with trails pointing to the Stronghold overlooking the area. This hold appeared to belong to the Burning Blade cult, and was well defended. Assaulting the gates, and searching the hold's chambers, we found one of the missing elves, who had been captured. Freeing her, she told us her brother had joined the cult, and had been unable to change his mind. Escorting her outside, we ran into her brother, who immediately lunged at his sibling. Protecting her, we dealt a fatal blow. We had no other choice but to continue, with more cultists in the vicinity, and returned the mourning Elf to Nijel's point, sending her back to Darnassus by Hippogryph.
E xploring the surroundings, we headed out to search the missing elves first, and found their cart along the road from Stonetalon, with trails pointing to the Stronghold overlooking the area. This hold appeared to belong to the Burning Blade cult, and was well defended. Assaulting the gates, and searching the hold's chambers, we found one of the missing elves, who had been captured. Freeing her, she told us her brother had joined the cult, and had been unable to change his mind. Escorting her outside, we ran into her brother, who immediately lunged at his sibling. Protecting her, we dealt a fatal blow. We had no other choice but to continue, with more cultists in the vicinity, and returned the mourning Elf to Nijel's point, sending her back to Darnassus by Hippogryph.
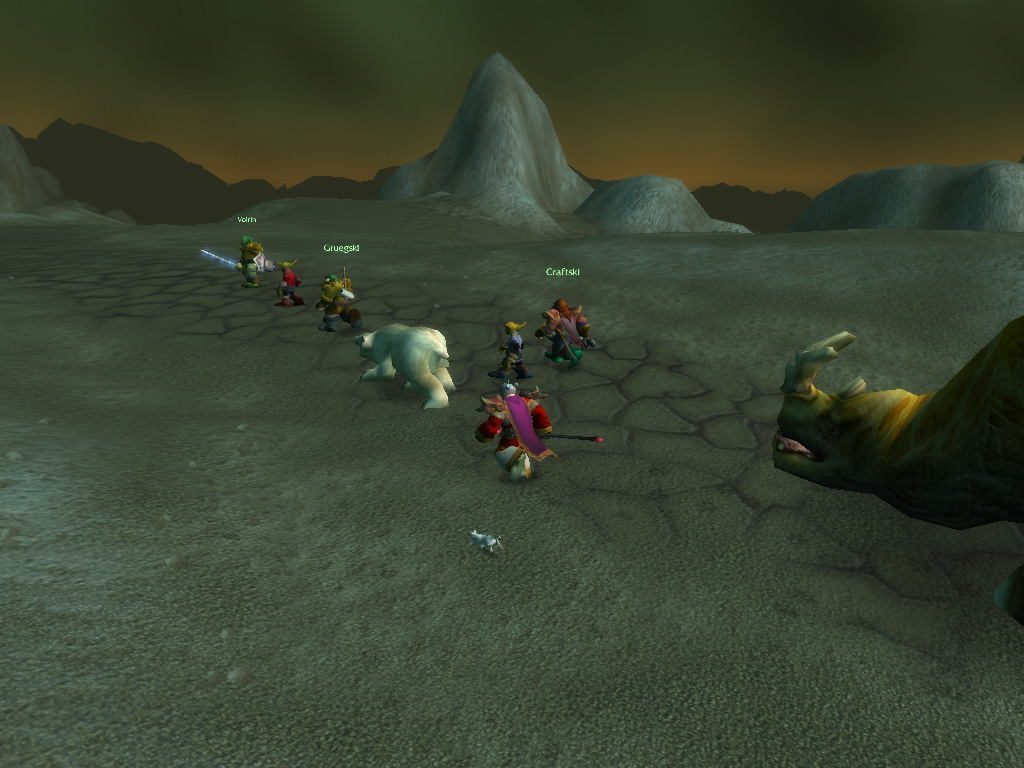
T
he captain of the guard at Nijel's point planned to use the animosity between the local Centaurs clans to relieve the settlement of their attacks, and sent us to ally with one these clans. Venturing south, we approached the Gelkis Centaurs, to aid their fight against the other clan in Desolace, the Magram. Their leader, Uthek the Wise, asked us for proof of our intent, so we carried out his favors such as stealing supplies and magical charms. We agreed with his orders until he gave us a quest to find a rare gem in the Swamp of Sorrows, all the way back in Azeroth! This was a bit much, so Uthek would have to wait to get this precious gemstone.
While traveling along one of the roads, we came across a Goblin merchant, and his Kodo caravan. The Goblin asked us to escort him past a Centaur village, and after taking good care that none of his goods came to harm, we were well rewarded after the last Centaur hit the dust (and we were also given a discount on sales!).
While traveling along one of the roads, we came across a Goblin merchant, and his Kodo caravan. The Goblin asked us to escort him past a Centaur village, and after taking good care that none of his goods came to harm, we were well rewarded after the last Centaur hit the dust (and we were also given a discount on sales!).
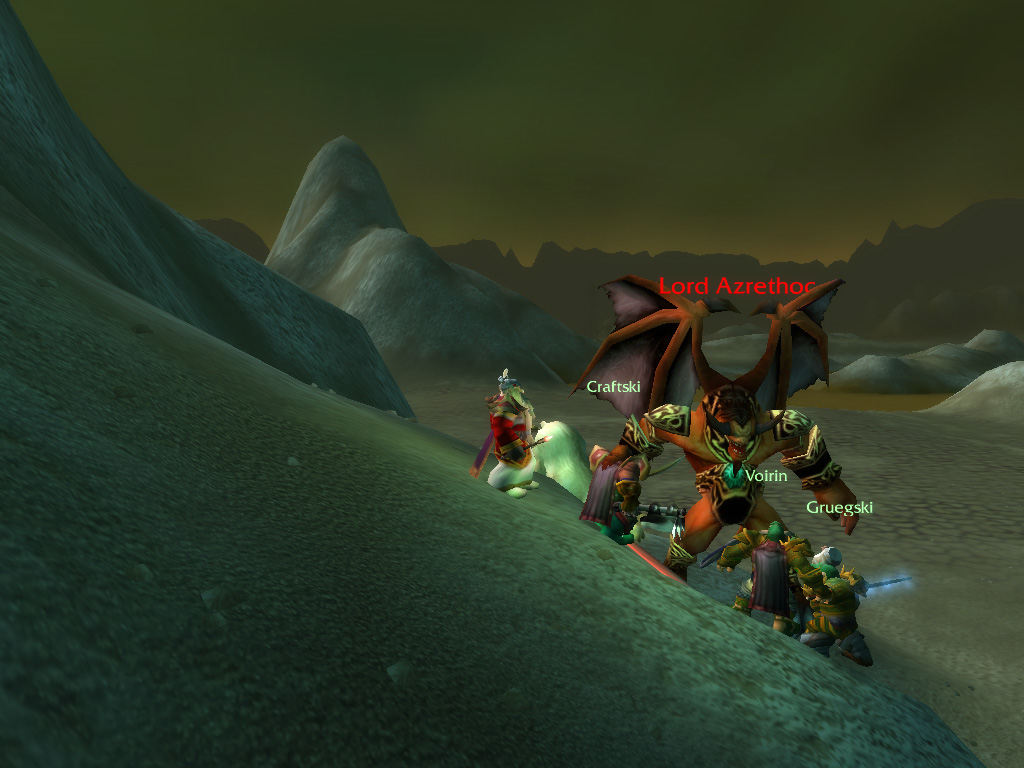
W
e headed to the coast, which was something to behold! A lush area in this desert, and Sea Giants walking the beaches! After taking good care to keep hidden from these giants, we found a strongbox that was cast ashore, probably by the missing ship, which was locked tightly shut. A tome had miraculously survived the ocean, and from it we learned the method to unlock it. As we cleared out the area of crawler creatures we were able to find one of the keys we required to do so. Swimming across the ocean, we found an island infested with naga, revering a large statue of Azshara, a Night Elf ruler, long forgotten. Here we found the second key we needed, and returning to the chest with both of them, we were able to claim the treasure for ourselves!
We returned to Nijel's point where a Dwarf asked us to gather rare reagents, for a magician back in Azeroth, which could be found all over Desolace. Sending us to Satyr camps and gather their claws and horns, and into the demon infested center of Desolace to acquire their potent energies (the power seemed to gather in the demon's brains and blood, making it not a pretty task!).
We returned to Nijel's point where a Dwarf asked us to gather rare reagents, for a magician back in Azeroth, which could be found all over Desolace. Sending us to Satyr camps and gather their claws and horns, and into the demon infested center of Desolace to acquire their potent energies (the power seemed to gather in the demon's brains and blood, making it not a pretty task!).
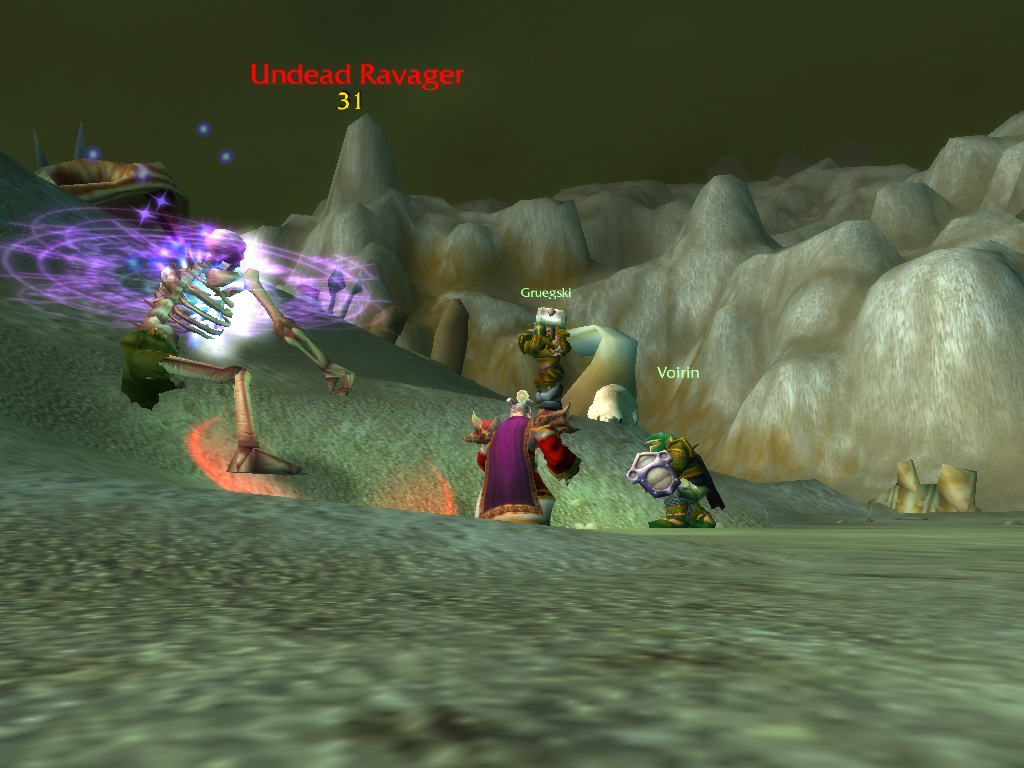
N
ow we had completed the lasts task from the settlers, so we could turn to the main reason we came to Desolace: The undead. The Scourge minions had infested ravines in the south, called the Valley of Bones, and it was swarming with the monsters. These skeletons also seemed a lot larger than any we had encountered before, but we would never know what kind of creatures were brought back to life. To impress the Scarlet Crusade emissary, Brother Anton, we had to destroy many of creatures, which was quite the task. But with our combined powers, we made short work of the Scourge monsters. After smiting, smashing and blasting our way through the valley, only scattered bones remained.
Returning to Nijel's point, we received a letter of recommendation from the emissary for our work, and he sent us to meet one of the order's crusaders in Southshore. This crusader would then escort us to the Scarlet Monastery in the Tirisfal Glades, which was Forsaken territory.
Returning to Nijel's point, we received a letter of recommendation from the emissary for our work, and he sent us to meet one of the order's crusaders in Southshore. This crusader would then escort us to the Scarlet Monastery in the Tirisfal Glades, which was Forsaken territory.
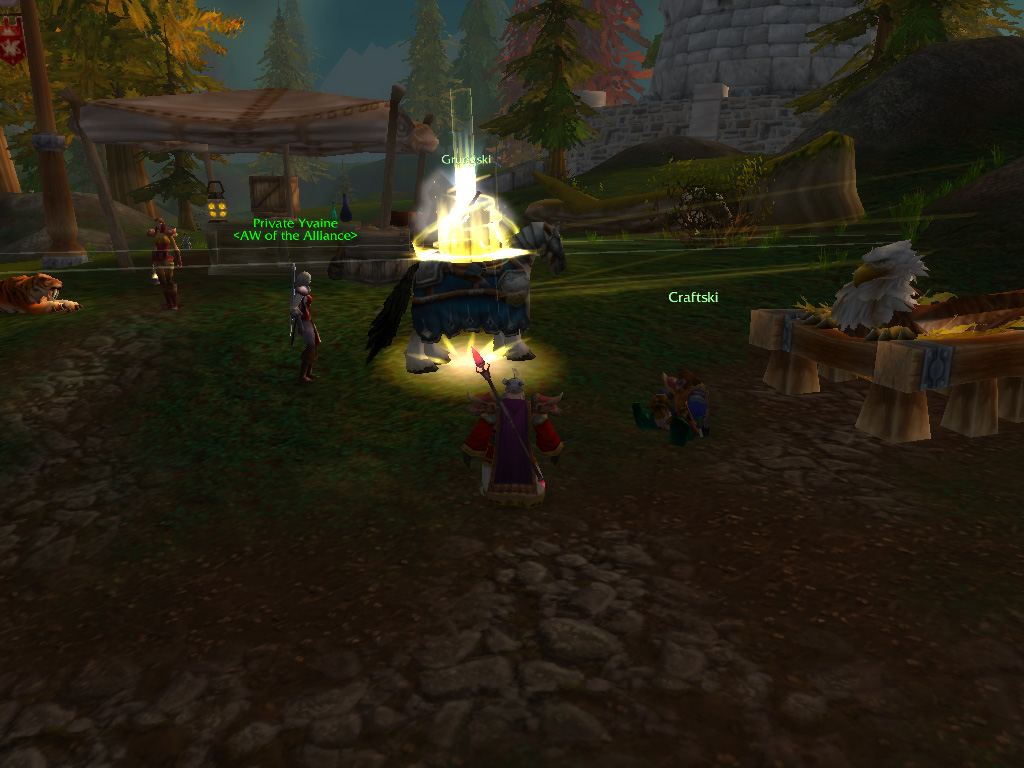
W
ith our work in Desolace done, we started the long trip back to the Eastern Kingdoms. Thankfully we could fly our way home this time, instead of having to travel through the areas held by the horde. We made a short stop in Ironforge where we resupplied and trained our skills, and continued to Hillsbrad. We found the member of the Scarlet Crusade in the Soutshore inn, giving him the letter and told him of our endeavours. He seemed to be shocked: Brother Anton hadn't returned to the monastery for a long time, and things had changed while he was away...
According to him, the leaders of Scarlet Crusade had gone insane, and saw everyone not part of their crusade as allies of the scourge. The Crusade posed a large threat to the Alliance, so it had to be destroyed, we would have to infiltrate the monastery and deal with their leaders, neutralizing the organization. As the Monastery was located in Tirisfal, we would, once again, have to travel through Horde-held territory. As we got ready to travel north, Gruegski had a little surprise: The Paladin order he was part of had gifted him, sparing no expense, a beautiful charger!
According to him, the leaders of Scarlet Crusade had gone insane, and saw everyone not part of their crusade as allies of the scourge. The Crusade posed a large threat to the Alliance, so it had to be destroyed, we would have to infiltrate the monastery and deal with their leaders, neutralizing the organization. As the Monastery was located in Tirisfal, we would, once again, have to travel through Horde-held territory. As we got ready to travel north, Gruegski had a little surprise: The Paladin order he was part of had gifted him, sparing no expense, a beautiful charger!

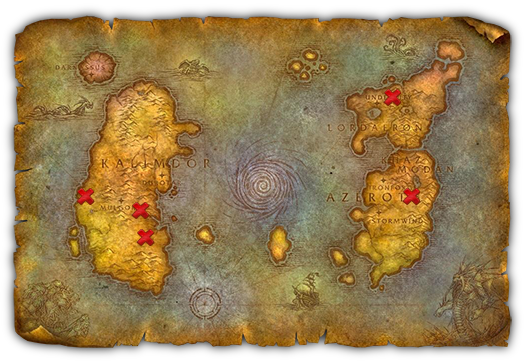
We delve deeper into the mysteries of Azeroth, exploring dungeons such as the Scarlet Monastary, Uldaman, Razorfen Downs, Zul'Farrak and Maraudon.
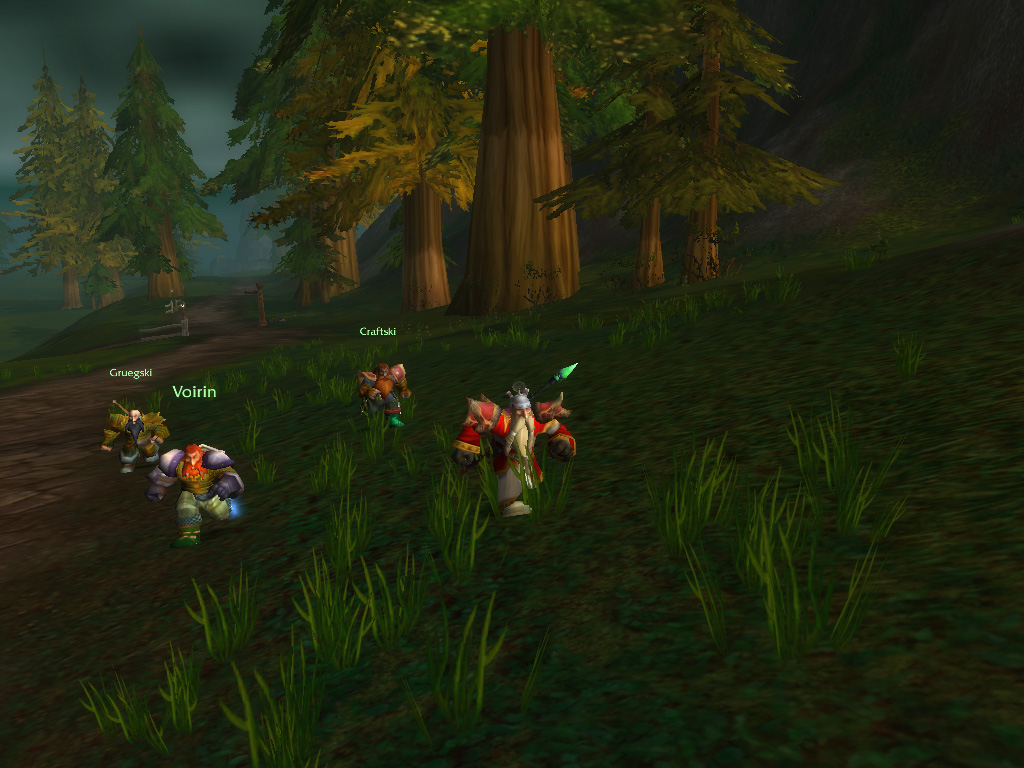
A trip to the monastery
S adly, the rest of us hadn't saved enough gold coin to be able to buy a ram mount, so we had to rely on Craftski's hunter tricks, instilling us with more vigour to walk at a faster pace. Taking care to keep away from the roads, we took a shortcut through the Plaguelands, the dangerous remains of the fallen kingdom of Lordaeron now held by the scourge. Craftski's animal tracking proved to be extremely valuable here, as he was able to spot dangerous monsters from afar and led us safely past them. Taking a small swim for safety, we managed to shrug off the chasing monsters, eventually leading us to the Horde-held Tirisfal Glades. From here on our travels proved to be uneventful, and soon we reached the vast gates of the Scarlet Monastery.
S adly, the rest of us hadn't saved enough gold coin to be able to buy a ram mount, so we had to rely on Craftski's hunter tricks, instilling us with more vigour to walk at a faster pace. Taking care to keep away from the roads, we took a shortcut through the Plaguelands, the dangerous remains of the fallen kingdom of Lordaeron now held by the scourge. Craftski's animal tracking proved to be extremely valuable here, as he was able to spot dangerous monsters from afar and led us safely past them. Taking a small swim for safety, we managed to shrug off the chasing monsters, eventually leading us to the Horde-held Tirisfal Glades. From here on our travels proved to be uneventful, and soon we reached the vast gates of the Scarlet Monastery.
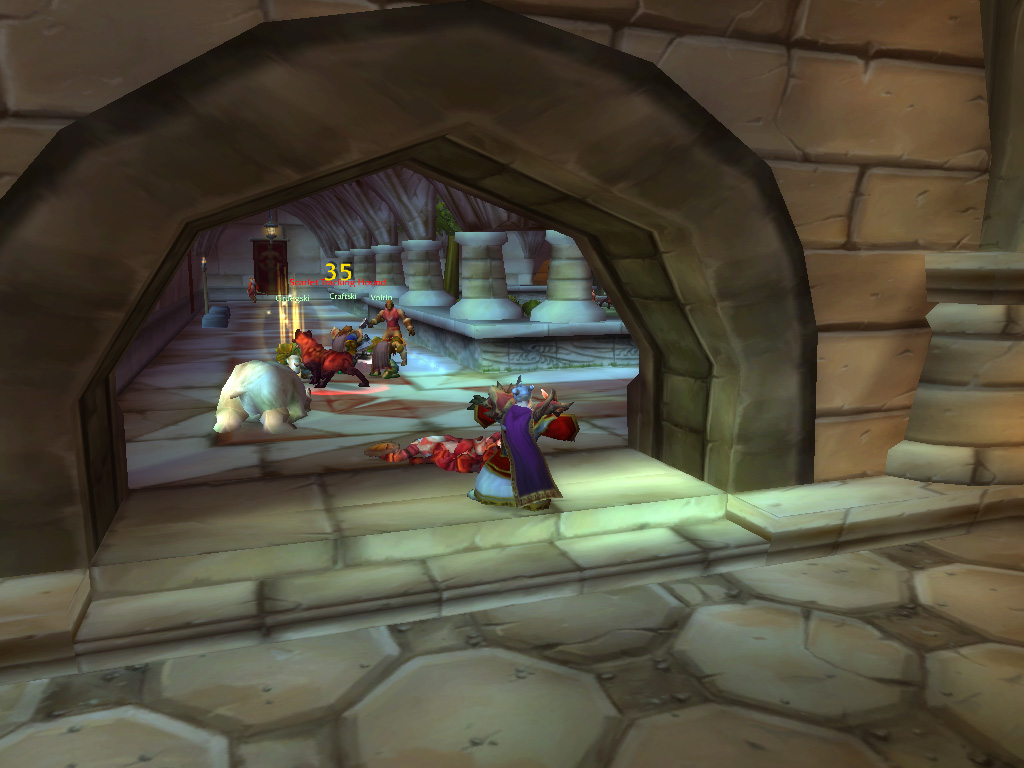
H
ere, finding all other doors locked, we entered the Monastery's library, where we were confronted by Scarlet Crusade initiates. It proved to be impossible to bargain, which meant we had to fight our way through. As we reached the library's courtyard, we met the first leader of the crusade: their houndmaster, Loksey. Drawing closer, he set his hounds upon us, giving us a suprise. Thankfully, Gruegski was able to catch the attention of the beasts, allowing the rest of us to confront the houndmaster himself. Without help from his dogs, Loksey had little resistance against us, and fell quickly. And without their master, the hounds were in disarray, allowing us to easily save Gruegski from their snapping jaws.
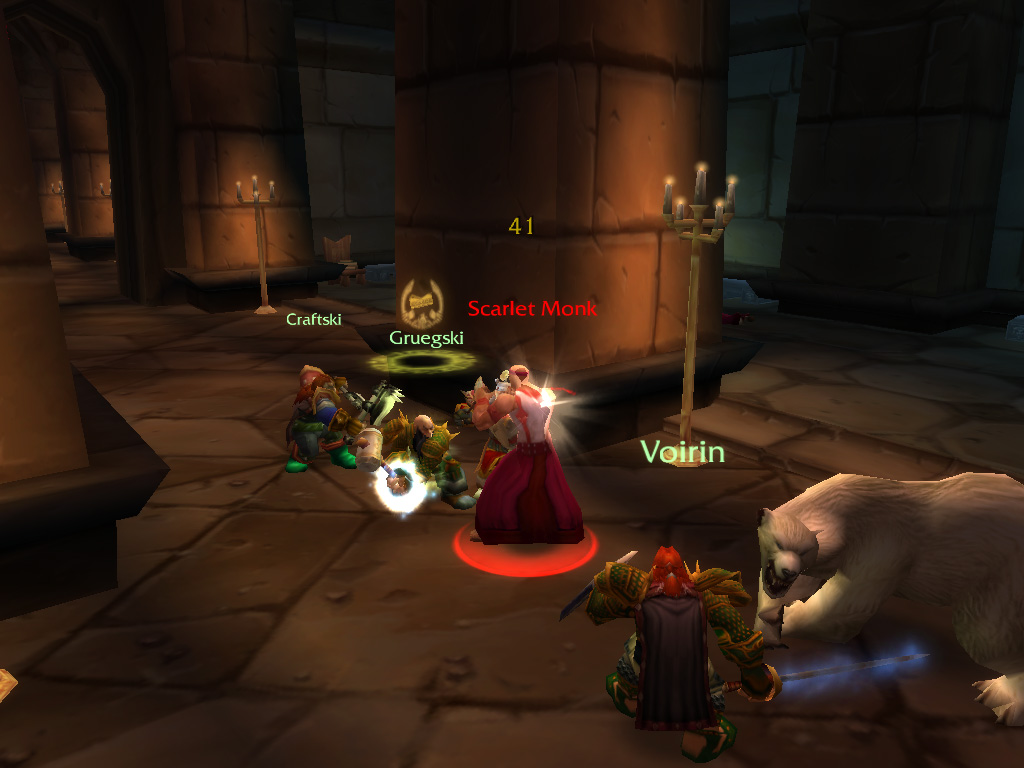
The way clear, we entered the impressive library, where we found cabinets upon cabinets filled with ancient tomes. Here we encountered the magically skilled members of the Scarlet Crusade, with priests and mages wandering the hallways. Gruegski reminded us we had to retrieve a tome called the "Mythology of the Titans" for the Ironforge library, instructing us to keep an eye out. Advancing further, we reached the inner sanctum of the library, where we were confronted by Loremaster Doan, another leader of the Scarlet Crusade.
As we entered his chamber, he accused us of being agents of the Scourge and assaulted us with his magic. Voirin charged in, drawing attention, while the rest of us started to whittled him down. His endurance proved to be impressive, and his magical arsenal varied. Gruegski's magical incantations were disrupted by his magic nullification, and he even turned Craftski shortly into a sheep! As he channelled his magical power into arcane explosions to drive us back, we knew we almost had him, and with a final slice of Voirins rapier, Doan dropped to tiled floor. Searching his belongings, Orangz was able to find a potent magical staff, and a key emblazoned with a scarlet seal, hopefully this would give us access to the rest of the Monastery!
On our way out, the keen eyes of Crafski spotted the tome we searched in an alcove, which he safely wrapped and stowed away in his backpack.
On our way out, the keen eyes of Crafski spotted the tome we searched in an alcove, which he safely wrapped and stowed away in his backpack.
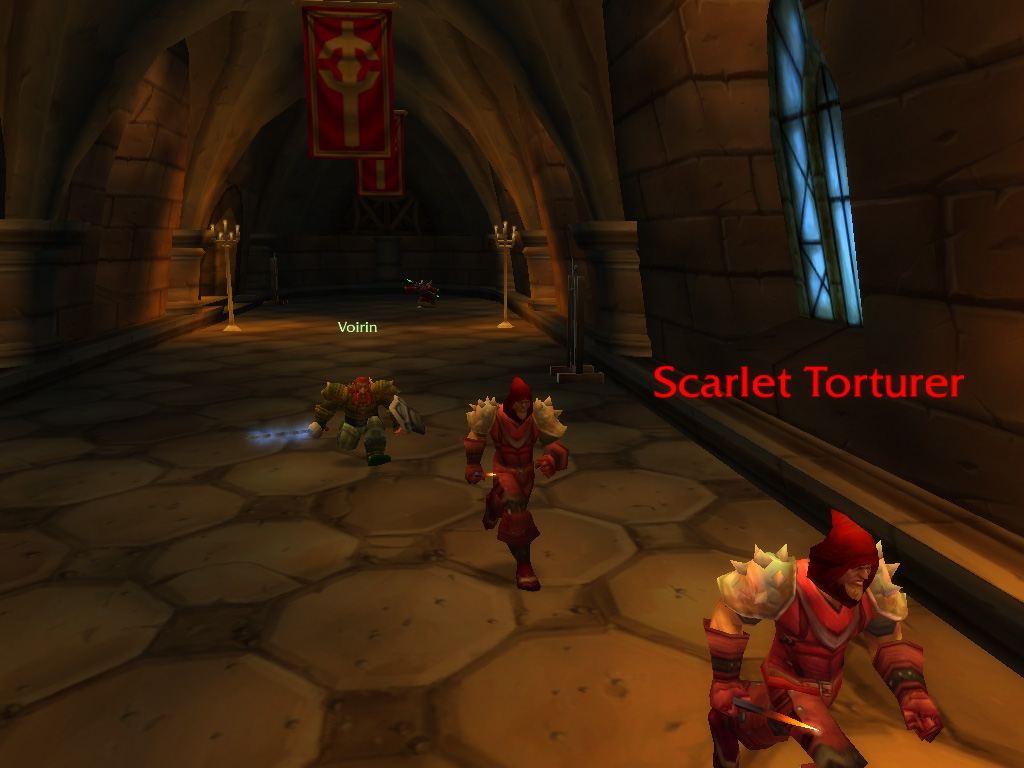
Reaching the central hall, we gave the found key a try: It was a perfect fit and the now unlocked doors swung open, leaving us a way into another wing of the monastery. Encountering racks of weapons and armour and hearing clashing of steel up ahead, we concluded we had entered the Crusade's armoury. Here we ran into tougher opposition: The guards were well trained & armed and patrolled in larger numbers. They were also more fanatic, not backing down from a fight, and resisting with great strength until we brought them down.
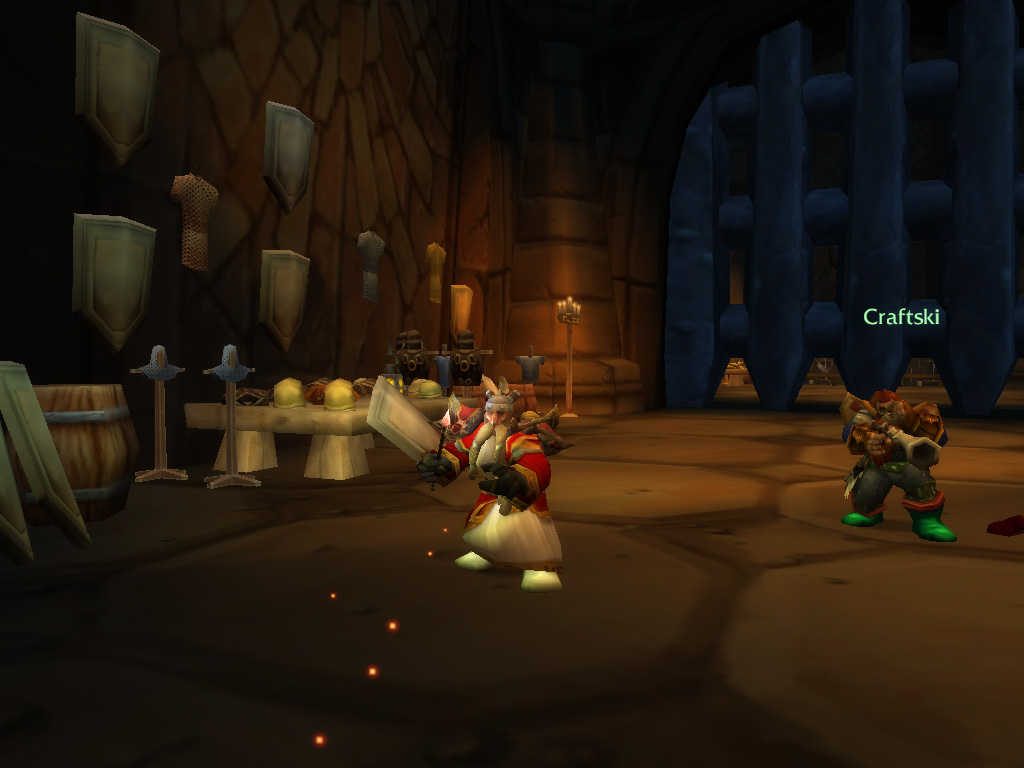
E
ntering the courtyard of the armoury, we sneaked past most of the patrols and Scarlet Crusade warriors honing their skills against training dummies. But we couldn't evade all, and had to take out some of the patrols: some of which were magicians accompanied by summoned fire elementals that singed our beards. We reached a staircase leading into the catacombs of the monastery, and form here on we could not evade the guards any more: The passages through the high-ceilinged rooms were closely watched, and we had to lure groups of guards away by catching their attention. (which often involved Craftski landing a shot right between their eyes).
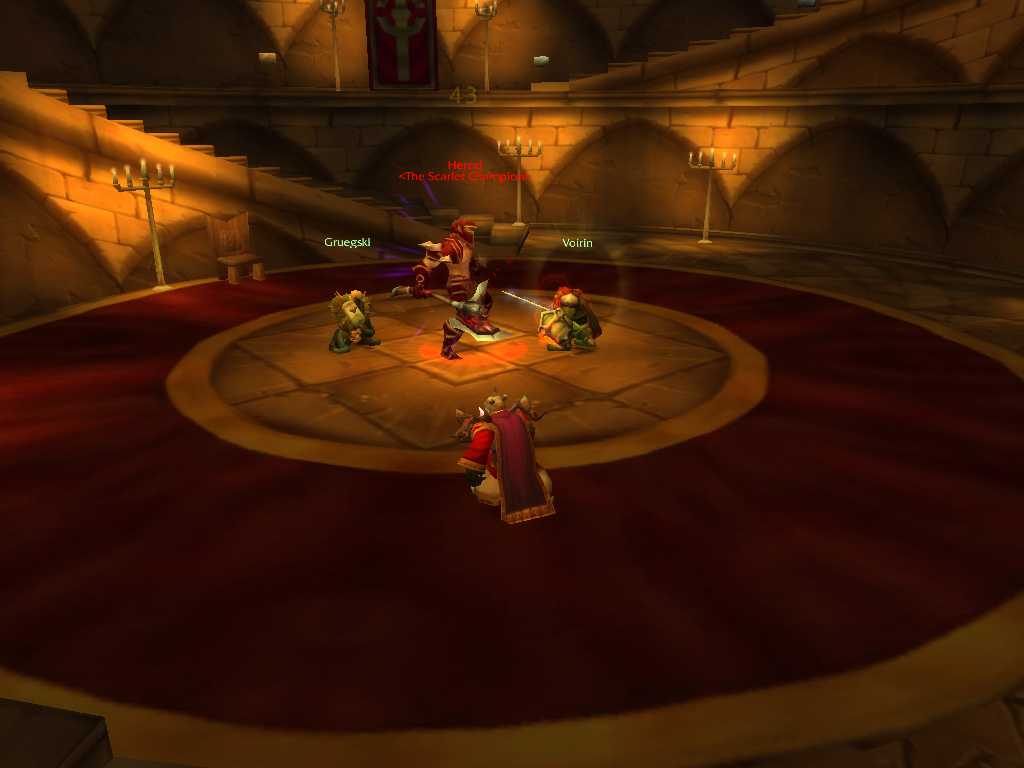
T
he final room of the armoury proved to be locked, but thankfully the key we had retrieved from the library did it's work here once again. The doors swung open, revealing a large circular room, lined with statues of heroes of the Scarlet Crusade along the walls. Two staircases led down, and in the middle, awaiting us, stood Herod, the Scarlet Champion. Gulping down some magical potions brewed by Gruegski, we skipped the stairs and jumped straight into the action, with Voirin as our loyal shield wall. Herod swung his large cleaver fiercely, putting his full weight behind it in jumping attacks and losing himself in a warrior's frenzy. Voirin's shield held true, but even he had to run out when Herod started to spin himself around on the spot, in a whirlwind of sharp steel. Thankfully, Craftski and Orangz were able to take him down from a distance, and with a loud thud he hit the floor. As he hit the ground we heard footsteps in the hallway, and it seemed Herod's trainees were running in to avenge their fallen master. A large group of initiates advanced upon us, and we got ready to stand our ground, until suddenly...
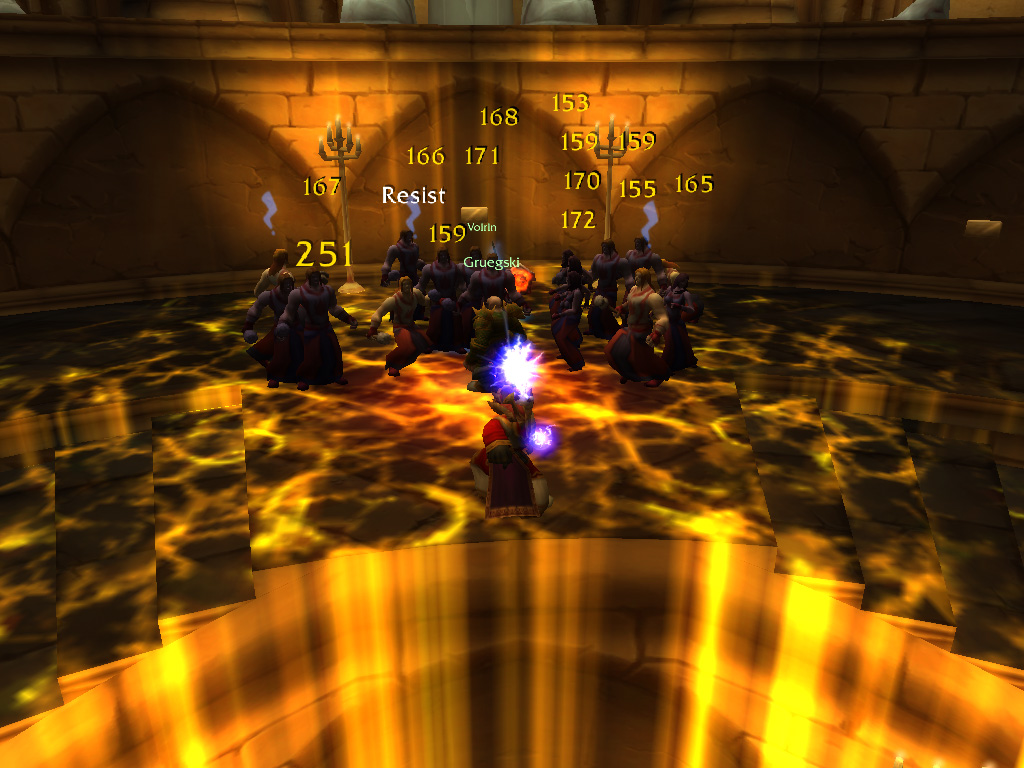
L
arge arcs of lightning jolted from Orangz, blasting the group of initiates with thousands of volts. As the black smoke cleared, it appeared he had pushed the button of his mechanical helmet once again. With the threat neutralized, we rummaged through Herod's belongings, and found a fine helmet for Craftski to use, who recently had taken the liking to use a chainmail armour. With another Scarlet Crusade leader down, we retraced our steps back to the central hall of the monastery, leaving one final door unopened. The door that would lead us to their cathedral.
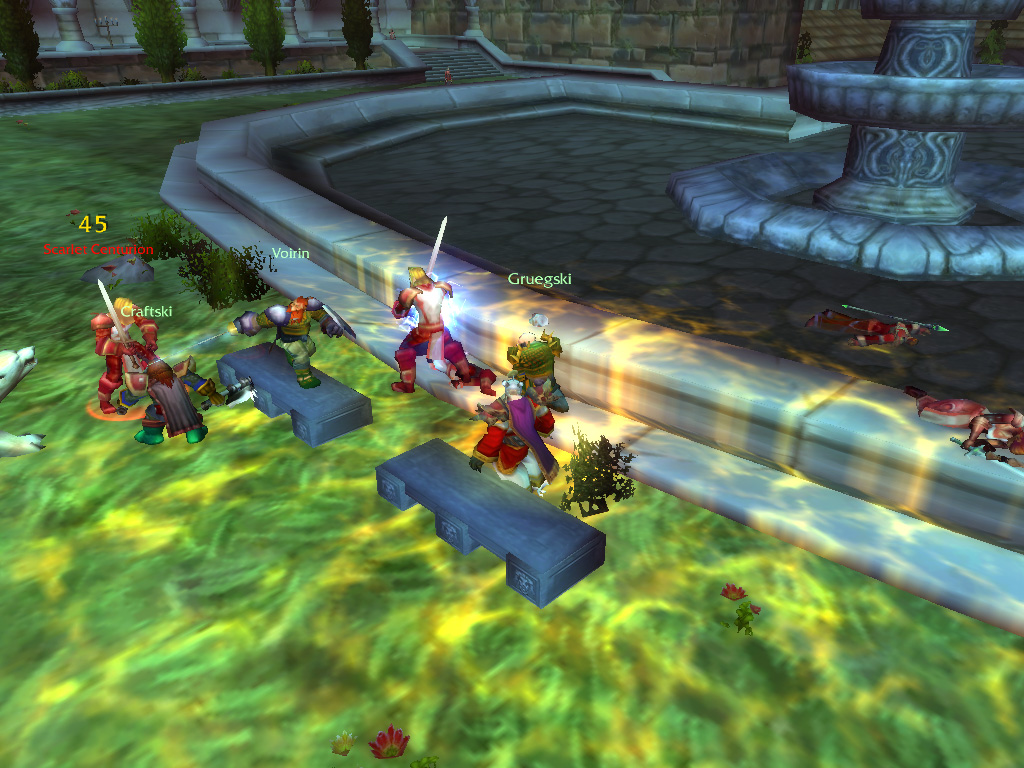
A
fter a short passage through a tunnel, we reached the cathedral, which stood in a large garden. Patrols walked the across the cloister, all made up from the elite of Scarlet Crusade. We sneaked our way along the large pond and fountain that stood in the middle of the lawn, making sure not to catch the attention of any crusaders nearby. As we reached the gates of the cathedral, the patrols intensified, and we had to take action and took out the guards. With the last crusaders slain, we found ourselves facing the vast doors, which opened outwards after we used the master key once more.
We would confront the last leaders of the Scarlet Crusade in the cathedral: their Commander, Mograine and the High Inquisitor, Whitemane.
We would confront the last leaders of the Scarlet Crusade in the cathedral: their Commander, Mograine and the High Inquisitor, Whitemane.
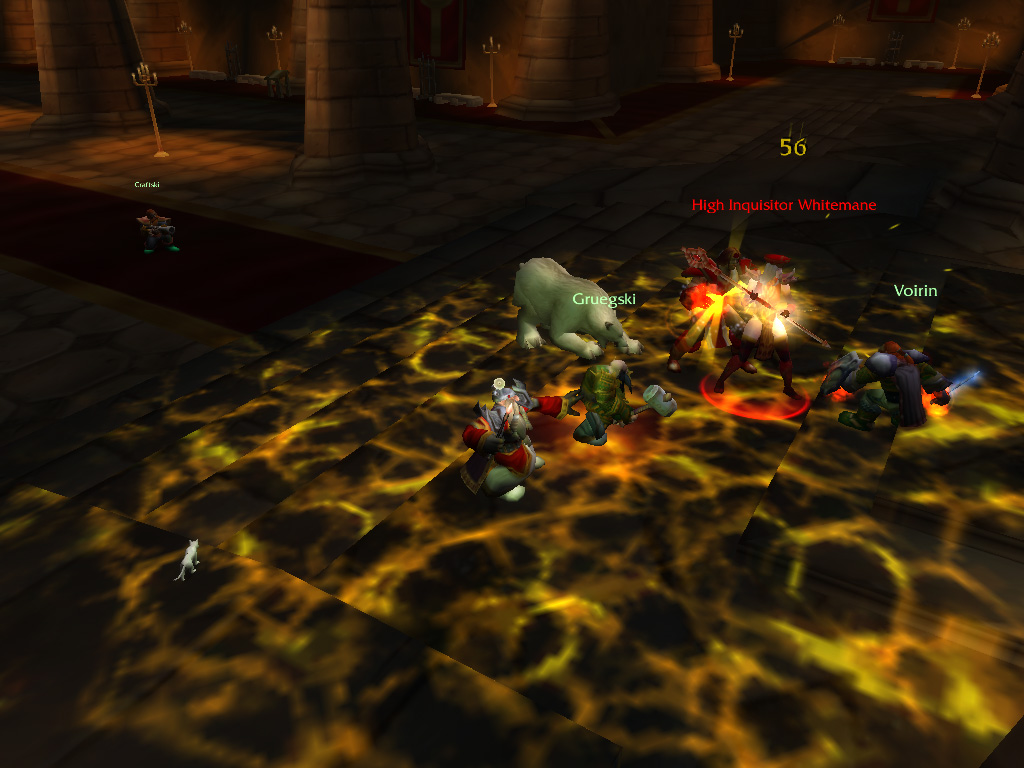
Clearing the chrurch
T he cathedral was filled with Crusaders, all in deep prayer, led by their commander at the altar. This left us with little choice: we would have to take out everyone. Using Craftski as bait, we were able to advance into the room, distracting and taking out the praying groups of priests, abbots and initiates reading in the alcoves. We progressed slowly, as we had no room for mistakes. Finally, as we cleared the last chambers in the wings of the cathedral, we were able to approach the Scarlet Commander from the rear.
Commanding Beard to charge in, Craftski opened the fight, startling Mograine, who seemed to have missed all the commotion behind him. Wielding a large hammer, Mograine slammed the beast to the side, and started to focus on Voirin. Eventually stunning him with a holy strike. Returning the favour, Gruegski used his holy strike to stun, but this had no effect. We slowly brought Mograine down, but our progress was stalled when he erected a holy barrier, which we could not break. Waiting for barrier to fade, we finally were able to land the final hit.
Our victory was short lived, as suddenly the chapel doors opened, and the crusade's High Inquisitor, Whitemane, stormed out. A new challenger had appeared.
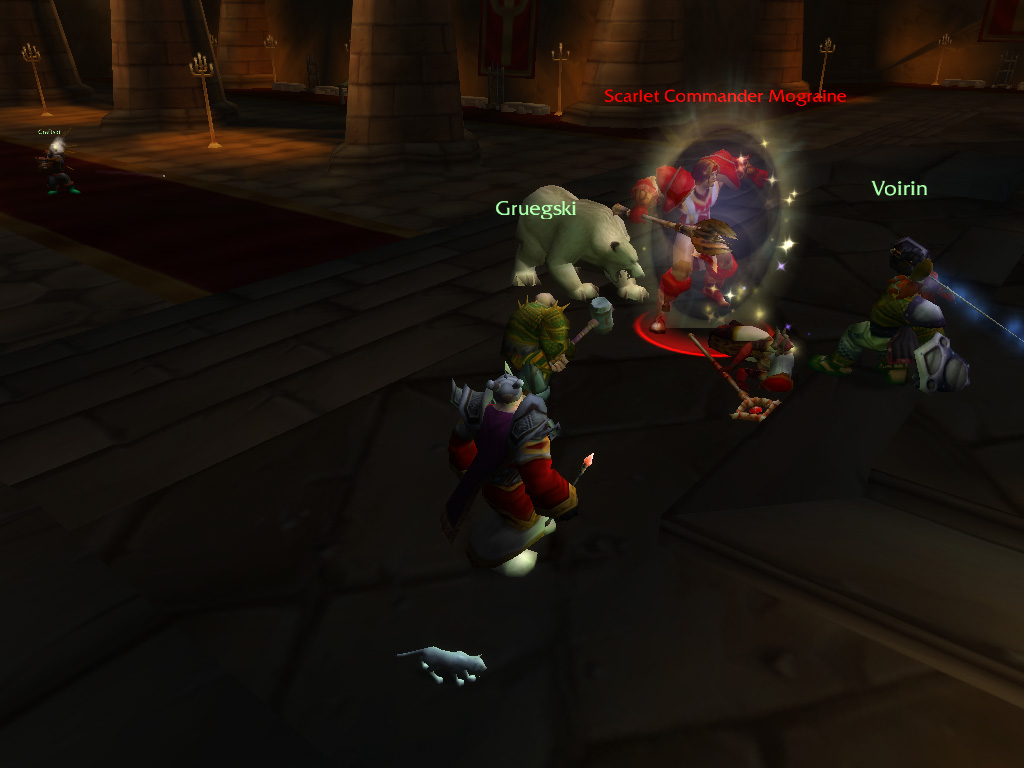
W
hitemane wielded strong powers, smiting us with holy fire, and healing her own wounds. But we had the advantage in numbers, and were sure she would fall eventually. We thought the fight was finally in our favour, until she turned the tables. With arcane magic, she drowned all of us in a magical sleep, leaving us unable to act. Calling upon divine aid, and with a loud "Arise my champion" she then resurrected the fallen Scarlet Commander back to his feet once more: We would have to fight the leaders of the crusade, once again. And now at the same time!
Focussing our attacks on Whitemane first, as Mograine would still magically shield himself, and her healing powers would stall the fight even more, we were able to overcome her quickly. As we had learnt the incantations she would utter for her healing spells, we would now disrupt her the moment she started her casting. With their powers nullified, and Mograine without healing assistance, we were able to take them down in a battle of attrition. Searching through their belongings afterwards, Voirin found a fine shield, adorned with the icon of Scarlet Crusade, while Orangz found an Inquisitor's hat that made a perfect fit with his robes.
Focussing our attacks on Whitemane first, as Mograine would still magically shield himself, and her healing powers would stall the fight even more, we were able to overcome her quickly. As we had learnt the incantations she would utter for her healing spells, we would now disrupt her the moment she started her casting. With their powers nullified, and Mograine without healing assistance, we were able to take them down in a battle of attrition. Searching through their belongings afterwards, Voirin found a fine shield, adorned with the icon of Scarlet Crusade, while Orangz found an Inquisitor's hat that made a perfect fit with his robes.
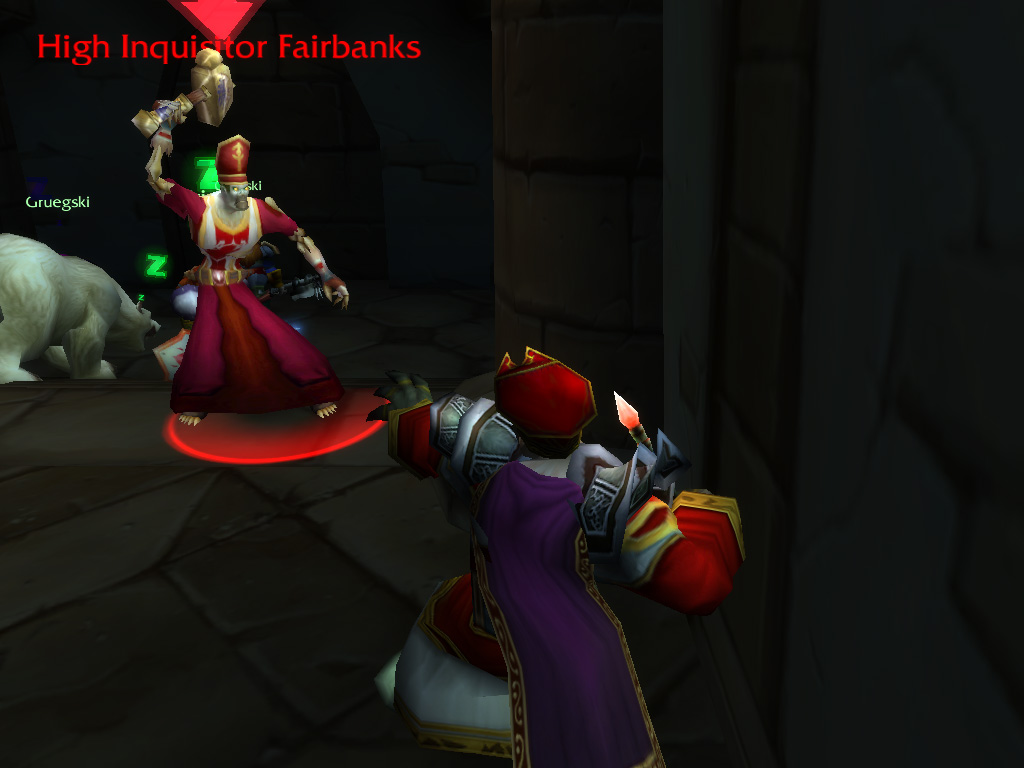
W
ith the doors to the chapel now open, we entered, but did not find any books or notes of interest. Searching one of the chambers, Craftski spotted a secret lever, hidden as a torch. Pulling it sideways, a doorway slid open, revealing a chamber where a corpse was lying on the ground. As we moved closer, the heap of bones suddenly stirred: The Scarlet Crusade had a member of the living dead in their cathedral! The undead creature provided little resistance, collapsing into dust through the combined smiting of Gruegski and Orangz. Given the regalia, we understood the undead creature must have been a high-ranking member of the crusade.
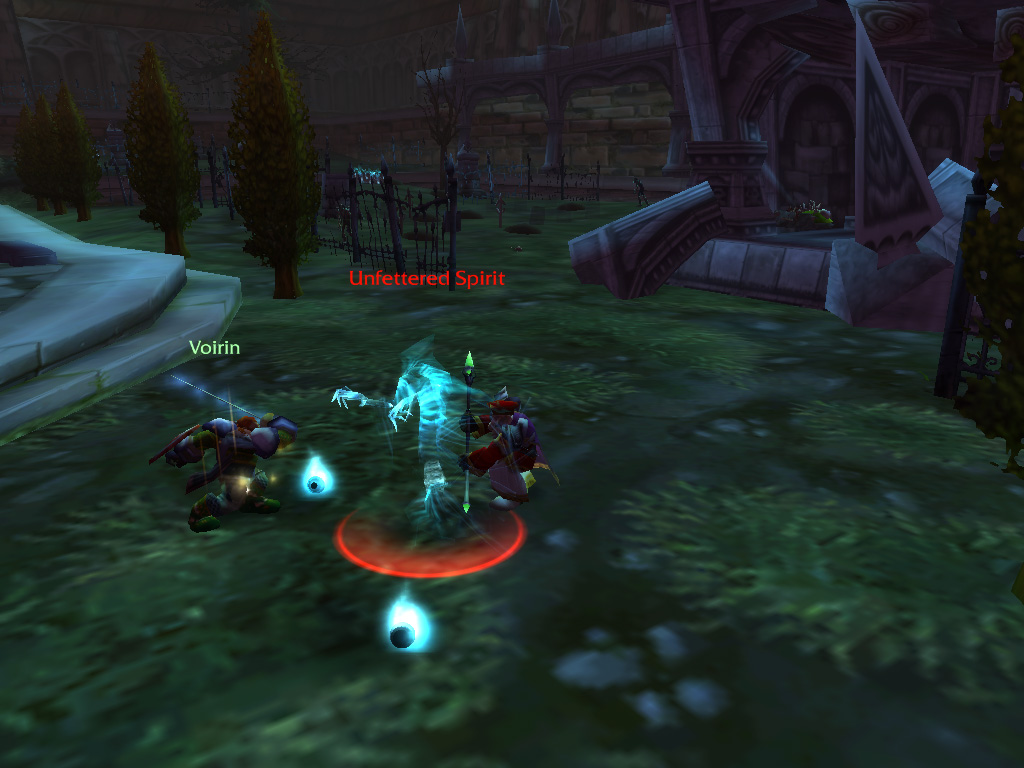
R
emembering there was a final doorway in the monastery's central hall that we had not entered yet, we retraced our steps entered what it seemed to be the Crusade's torture chambers. Here we ran into their Interrigator, Vishas, who seemed to be preoccupied with torturing a member of the forsaken. Jumping him, we took him easily by surprise. Moving further, we found ourselves in a graveyard: Here ghosts, zombies and other undead creatures shuffled over the broken stones and dead grass. This was unacceptable for Gruegski and Orangz: The creatures would have to be purged. The undead creatures gave us little resistance, and we soon reached the large crypt which stood at the end of the path.
Making our way down the stairs, and battling through the zombies wandering the halls, we found an armoured skeletal magician at the deepest chamber. This "Thalnos" greeted us with a yell for vengeance and a barrage of shadow magic, but with our combined strength we broke apart his skeletal form, leaving broken bones on the floor.
Finally, with the monastery clear and our missions complete, we could leave and claim our rewards: First we went to Southshore, where Voirin and Gruegski received fresh steel: A fine one-handed sword to go with Voirin's shield, and a heavy bladed axe for Gruegski.
The Inn is a place to drink,laugh and rest! Stay at the hearth for a while and you'll be fresh for new experiences.
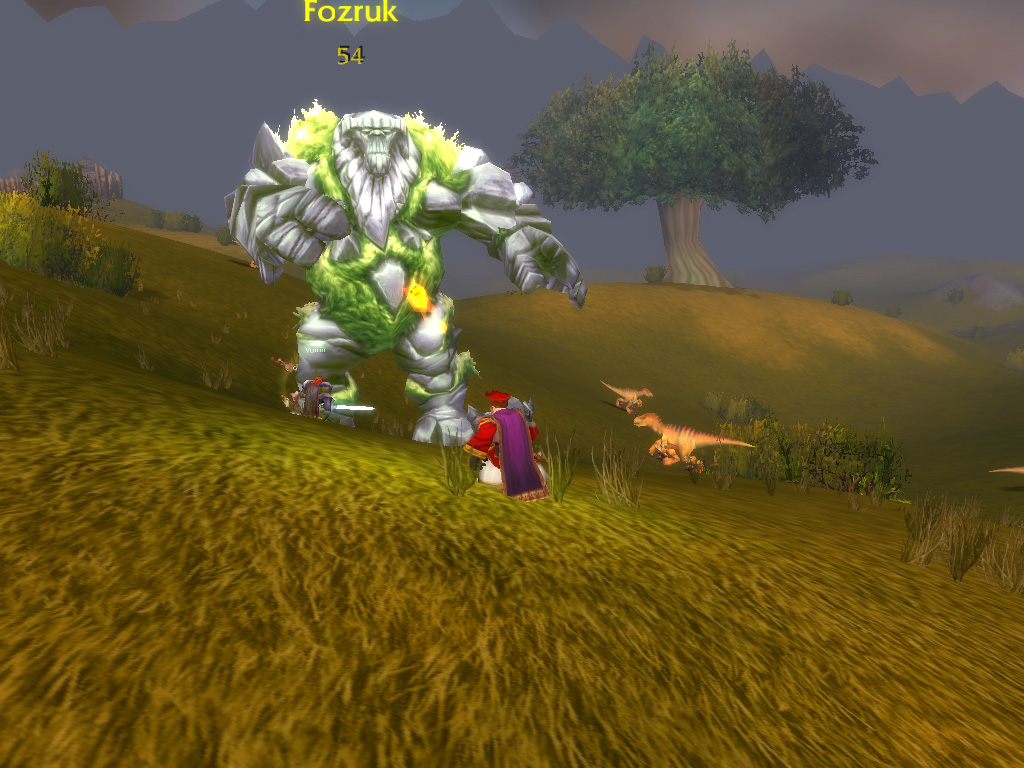
A giant task
T raveling from Hillsbrad, we remembered we had unfinished business with a certain stone giant in the Arathi Highlands, so we made a slight detour. Scanning the horizon as we walked, we were able to spot the Fozruk from far away, and were able to catch up with the creature. Starting our assault on the giant and its kobold companions, we were suddenly assaulted by members of the Horde! A powerful Orc warlock and less impressive Forsaken rogue joined the fray, focussing their assault on Orangz. Using his shadow magic, Orangz made the horde members run in fear for a short moment, while Craftski got his trap ready and froze the Warlock in a solid block of ice. With the Horde spellcaster under control, we quickly took down the rogue, while Voirin still kept Fozruk at bay! The three of us then turned our attention on warlock, with Gruegksi stunning the Orc with a holy charge. While the enemy tried to fight, our ability to heal proved to be too strong, and Craftski downed the Orc with a few solid shots from his rifle.
Now we could focus once again on Fozruk, and it seemed Voirin was quite glad to see us again. After such an intensive fight, the giant provided no challenge, and we were able to reclaim the Magical rod we searched. As we returned to the Circle of Inner Binding and used the rod on the central stone, another stone giant, but made out of reddish rock, awoke from its slumber and advanced upon us. Suddenly a Forsaken rogue appeared from behind, downed the large creature with a series of strikes, and vanished once again, leaving us puzzled behind. Unsure of what would happen, we quickly searched the stone circle, and were able to find the Stone of Inner Binding, which we required to free Myzrael.
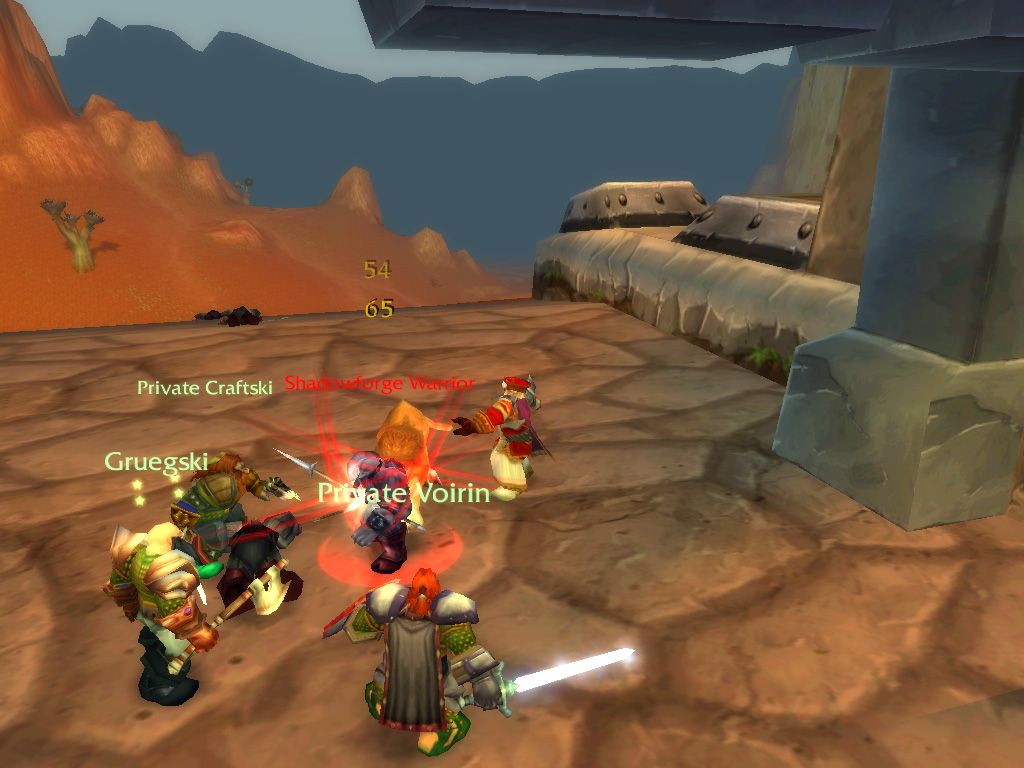
Our brothers in the Badlands
W e still had to return the tome we had retrieved from the monastery, so we returned to Ironforge. The librarians were happy we had been able to find the tome, and hoped it would help solve the mysteries of our world. Asking if we would be interested in another adventure, they sent us to the loremasters of the museum and members of the Explorer's League nearby: It seemed they needed a helping hand. It appeared that the nearby Ruins of Uldaman, which is rumoured to hold secrets about the Dwarf race, was overrun by the Dark Iron Dwarves and their Trogg allies.
We were sent to Loch Modan, to meet prospector Ironband, who had troubling news of missing dwarves: It appeared a prospector in the southern Badlands, Agmond, had gone missing. With no time to spare, we headed into the Badlands, to the south. Here we encountered a Dwarf prospector, Ryedol, who told us of problems at another digsite: and about their leader, Hammertoe, who had been abducted by the Dark Iron Dwarves. With first things first, Ryedol's asked us to clear a site and look for his lucky pick, which had been stolen!
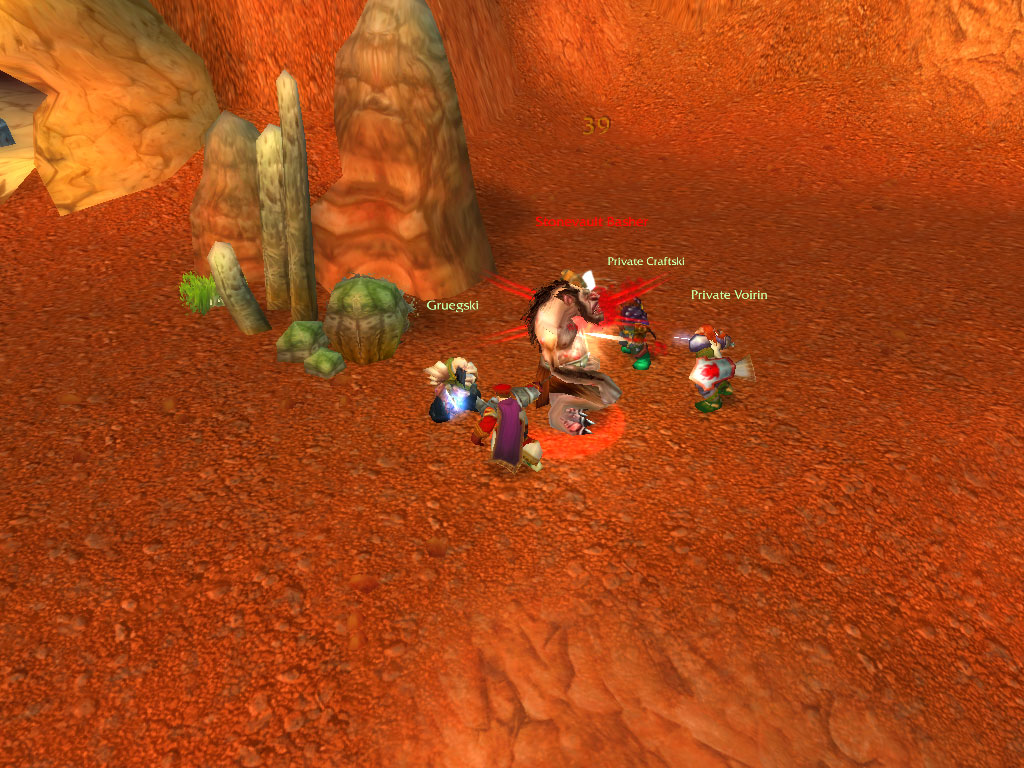
A
s we rummaged through the digsite, clearing it of every Dark Iron miner we encountered, we found a crumpled note from Hammertoe. And although it was written in a hurry, the message was clear: he had been taken to Uldaman. We made sure the entire excavation area was clear of our dark kin, and found the lucky pick in the process. It seems the Dark Iron Dwarves had hoped it would bring them luck as well! Returning the note and the pick, Ryedol requested us to infiltrate the overrun Uldaman site and find Hammertoe.
First however, we continued our search for Agmond, and continued south. As we reached the most south digsite, we found it empty of Dwarf presence, and feared for the worst. These fears soon confirmed themselves when we found a battered Dwarven skeleton close to the dig, it's skull fractured by a heavy blow. Just then we heard the shrill cries of Troggs in the air, and were sure: this was the work of Troggs. We followed the noise and found a band of Troggs, rummaging through an encampment, their leader towering over the smaller minions. We agreed Agmond would be avenged, and we broke our cover, charging in. These Troggs were able to overcome a single dwarf, but they would not have a chance with us! As we smashed their leader, the Troggs were unable to rally and proved to be easy pickings. Now we only had to return the sad news to Ironband.
First however, we continued our search for Agmond, and continued south. As we reached the most south digsite, we found it empty of Dwarf presence, and feared for the worst. These fears soon confirmed themselves when we found a battered Dwarven skeleton close to the dig, it's skull fractured by a heavy blow. Just then we heard the shrill cries of Troggs in the air, and were sure: this was the work of Troggs. We followed the noise and found a band of Troggs, rummaging through an encampment, their leader towering over the smaller minions. We agreed Agmond would be avenged, and we broke our cover, charging in. These Troggs were able to overcome a single dwarf, but they would not have a chance with us! As we smashed their leader, the Troggs were unable to rally and proved to be easy pickings. Now we only had to return the sad news to Ironband.
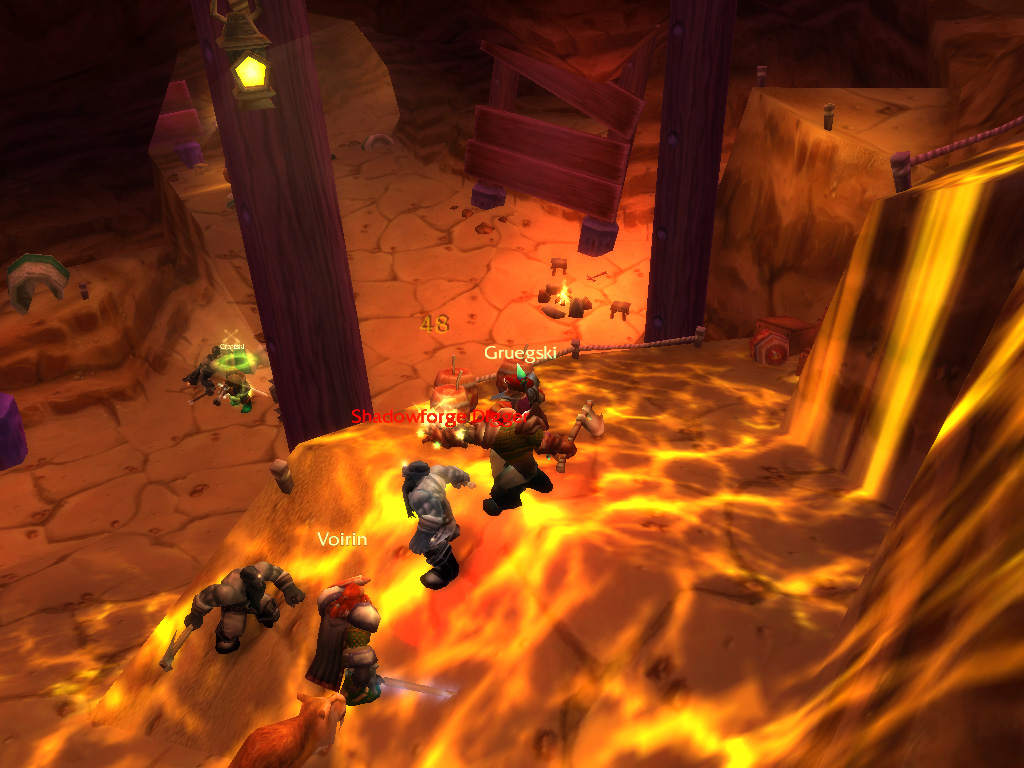
Ironband took the news hard, but ordered us to carry on Agmond's work: He had been researching mysterious vases around the Uldaman site, and their relation to the Troggs. It appeared the vases' imagery, or perhaps their materials incited the Troggs into a blind rage. With the surrounding dig sites cleared, we finally were able to enter the main Uldaman site, grouping up close in the winding caverns of the excavation. We encountered groups of Dark Iron Dwarves and Troggs, chiselling and clawing at the walls, hoping to find valuables. This helped us in finding various vases, which had been left unearthed across the dig.
Deeper down we found Hammertoe, who had been wounded gravely by the Dark Iron Dwarves in his struggle to escape. He told us the Dark Iron commander had stolen his amulet, a priceless artefact that was also the key to Uldaman secrets, and we would have to get it back. The Dark Iron's had made an encampment inside the largest cavern, where Craftski gave us a nice surprise: He had recently trained a swift cat (and left Beard in care of a kind animal handler) and wanted to show off. It pounced the commander, leaving only some shredded cloth. Thankfully the medallion was still intact, which we returned it to Hammertoe.
Deeper down we found Hammertoe, who had been wounded gravely by the Dark Iron Dwarves in his struggle to escape. He told us the Dark Iron commander had stolen his amulet, a priceless artefact that was also the key to Uldaman secrets, and we would have to get it back. The Dark Iron's had made an encampment inside the largest cavern, where Craftski gave us a nice surprise: He had recently trained a swift cat (and left Beard in care of a kind animal handler) and wanted to show off. It pounced the commander, leaving only some shredded cloth. Thankfully the medallion was still intact, which we returned it to Hammertoe.
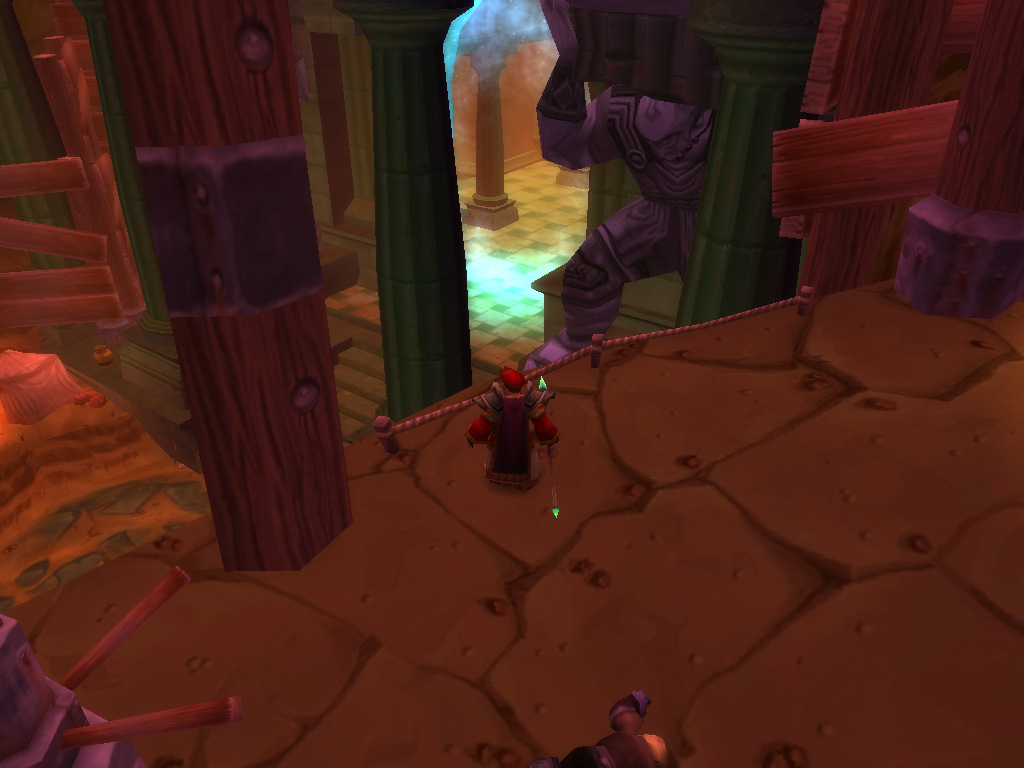
H
ammertoe confirmed we had found the right artefact, telling us to return it to Ironforge. But he was unable to join us in our escape from the digsite, as his wounds proved to be fatal and he collapsed right in front of us, with Orangz unable to save him. On our way out, we found a tarnished necklace in the pockets of a Dark Iron Dwarf miner, imprinted with the seal of Ironforge. Perhaps we would be able to get a reward for returning it?
We returned to the Explorer's ward in Ironforge, who immediately planned revenge for Hammertoe's demise. We would have to return to the Badlands and attack the Dark Iron base of operations to kill their leader, the fire elemental called Infernus. We proved to be lucky as it appeared we had gone straight to its crafter. The Gnome told us he made it for a Paladin not too long ago, that went missing while 'cleansing evil' in Uldaman. He also mentioned the necklace missed its most important parts, three expensive gemstones! If we would find them, he would repair the necklace for us. To keep track of our process, he gave us a scrying bowl through which we could contact him.
We returned to the Explorer's ward in Ironforge, who immediately planned revenge for Hammertoe's demise. We would have to return to the Badlands and attack the Dark Iron base of operations to kill their leader, the fire elemental called Infernus. We proved to be lucky as it appeared we had gone straight to its crafter. The Gnome told us he made it for a Paladin not too long ago, that went missing while 'cleansing evil' in Uldaman. He also mentioned the necklace missed its most important parts, three expensive gemstones! If we would find them, he would repair the necklace for us. To keep track of our process, he gave us a scrying bowl through which we could contact him.
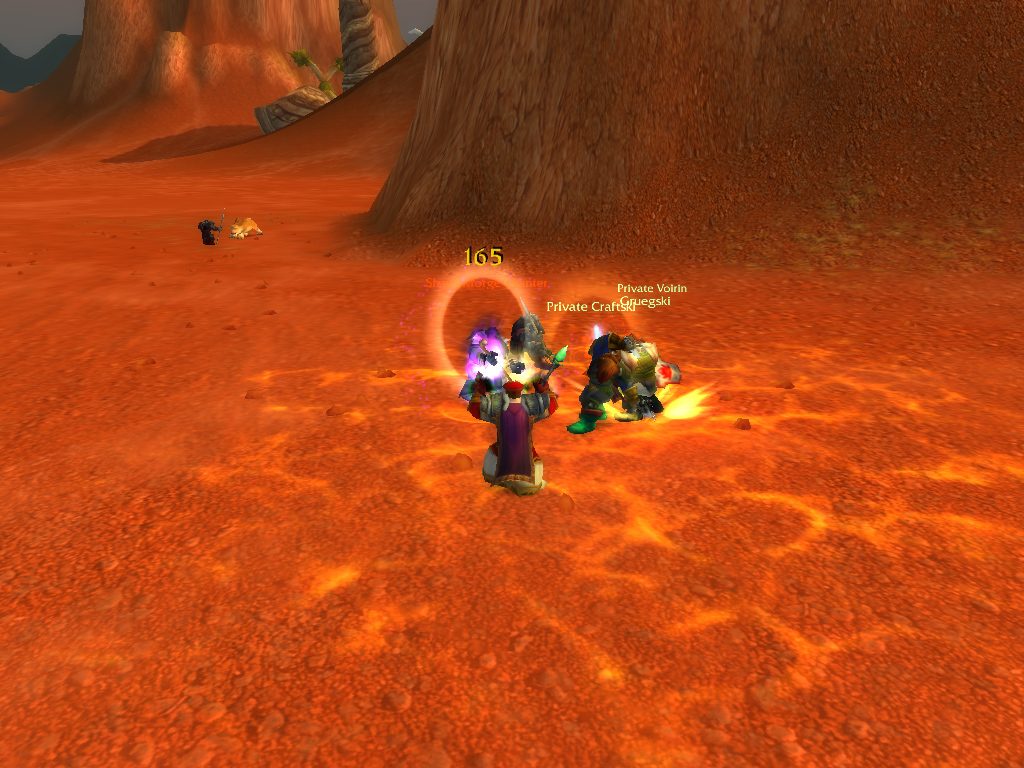
W
e returned to the Badlands, traveling past Uldaman and straight to Angor fortress. Here we found the Dark Iron Dwarves entrenched against an attack, and were faced by their elite troops. These proved to quite a challenge, and getting a foothold within the fort proved to be bloody. We advanced methodically, clearing alcoves from hidden guards and weary for reinforcements. Descending deeper into fortress, we met Ambassador Infernus in the main chambers. The fiery creature opened the fight, blasting us with fireballs, and called out for aid. But we were ready: Gruegski unleashed an aura that protected us blazing heat, while Craftski trapped the elemental in the freezing cold. Now, with the dangers of the scorching blaze reduced, we were able to strike true. Soon it's magic gave way, and the fire sizzled out, leaving on a red-hot pair of bracers on the floor.
We returned these to Ironforge as proof of our deed, but we were informed we were not finished yet, now our true challenge would come, as we were asked to complete Hammertoe's quest: To find the Lost Tablets of Will, rumoured to be lost in Uldaman. With our work in the Badlands complete, we agreed it was time to fully explore the mysteries of this dungeon.
We returned these to Ironforge as proof of our deed, but we were informed we were not finished yet, now our true challenge would come, as we were asked to complete Hammertoe's quest: To find the Lost Tablets of Will, rumoured to be lost in Uldaman. With our work in the Badlands complete, we agreed it was time to fully explore the mysteries of this dungeon.
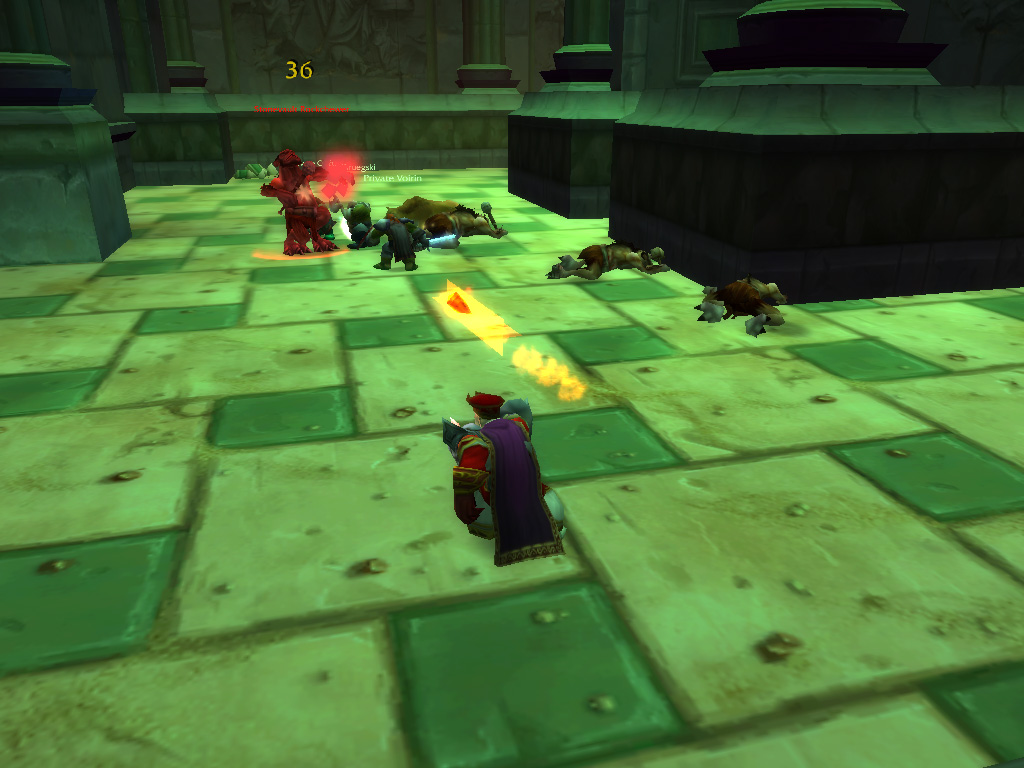
Uncovering Uldaman
O nce again, we delved into the Uldaman excavation, this time traveling past the leftovers of the Dark Iron encampment, passing through an archway flanked by large statues. Inside, the high marble walls made us feel tiny, making us wonder what kind of creatures we would find in such a place. The answer was easy but unexpected: Troggs! And plenty of them! Their brawlers and spellcasters barred our way, and slowed our progress. Keeping on the lookout for the missing Paladin, we ventured in a cavern, where, to our surprise, we found other Dwarves!
These "Lost Dwarves" as they called themselves, had held the cave valiantly from the sieging Troggs, and asked us for help. According to legend, a hidden room was located nearby, but before they had been able to investigate further, they had been driven away. It would be up to us to locate the chamber, and the Dwarves gave us one part of the key to open its doors: A magical staff. It required one other part to be completed, an amulet that had been stolen by a Trogg. As we went our way, Craftski spotted something glittering in a nearby vase, he had found one of the gems of the broken necklace! With two more to go, we continued our way.
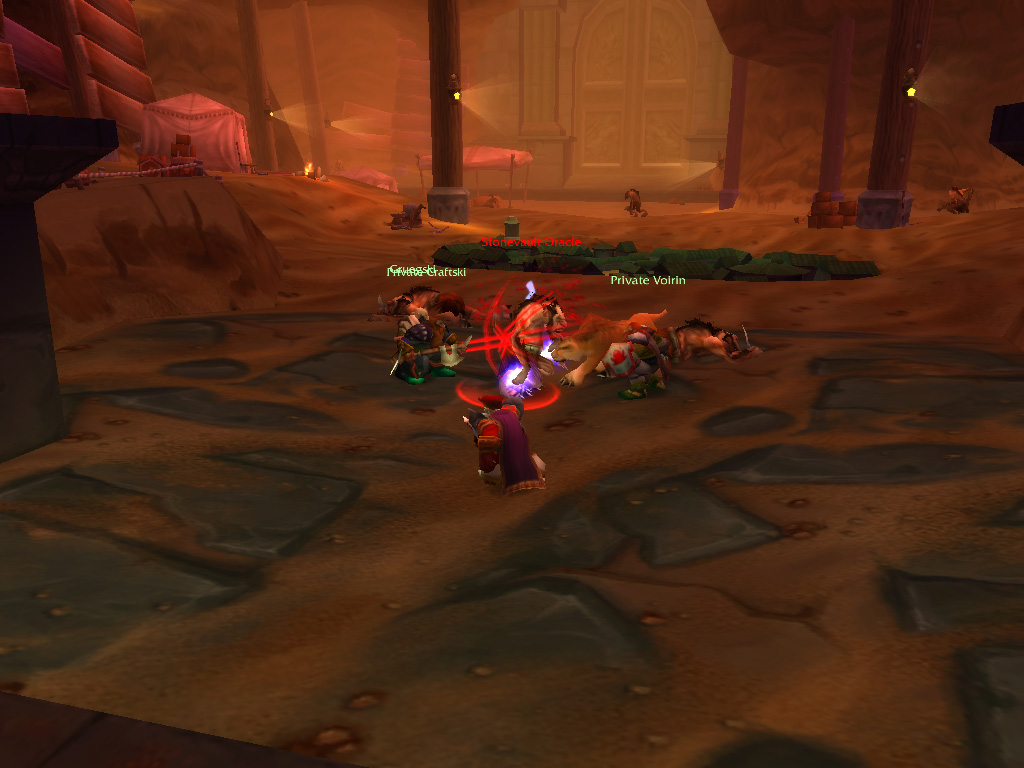
A
s we navigated the hallways, we were met with a large Trogg, the amulet we searched glittering around its neck. We didn't expect to find the Trogg this easily! And jumped right into the fray. During the fight, Gruegski seemed to be distracted, seeing a treasure chest in the corner of the room. This made our fight quite a bit harder, as the shamanistic magic of the Trogg proved to be powerful. But not long after we held the now blood-splattered amulet in our hands, and connected it to the staff, a perfect fit! At the same time, Gruegksi returned to us with what he had found, a large mug, inscribed with the name of Krom Stoutarm. It seems Gruegski had ventured into a deadly dungeon to rescue a Dwarf's mug! Gruegski also led us to the Paladin's corpse, which he had run into while getting the treasure. It seemed the Human got quite far alone! According to the Holy warrior's journal, he had lost the gems of his necklace while fleeing from some of Uldaman's inhabitants.
Continuing our adventure, we ended up in large cavern, where we found the remains of the Dwarven digsite. This must have been the place where the other Dwarves had fled from! Clearing the area of Troggs, we found a pillar which would make a perfect fit for the staff we had created. Was it worth a try?
Continuing our adventure, we ended up in large cavern, where we found the remains of the Dwarven digsite. This must have been the place where the other Dwarves had fled from! Clearing the area of Troggs, we found a pillar which would make a perfect fit for the staff we had created. Was it worth a try?
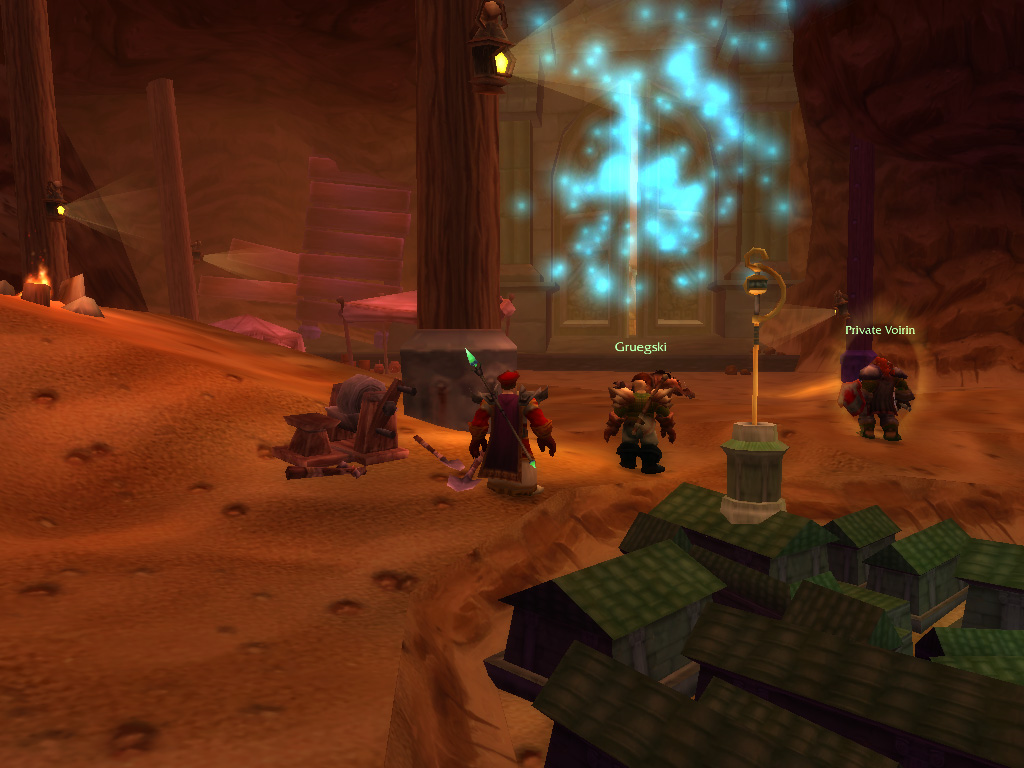
T
he staff slid in neatly, locking in place with a loud click, and suddenly light began to shimmer from small mirrors at the foot of the pillar. Scattering throughout the room, light started to gather through the crystal at the top of the staff, finally being focussed in a beam of light that shone across the room. The beam shone straight into a massive pair of doors, which slowly started to swing open as dust and dirt started to crumble away.

Unexpected encounters
As the doors opened, a gigantic walking statue lumbered out, calling out to us with a loud voice. It seemed she thought we were thieves. She also carried quite a large hammer... But Voirin defiantly jumped in her way, blocking the blow with his shield and holding fast. As Orangz shielded Voirin from further harm, Gruegski started swinging his axe with righteous fury, and Craftski started blasting from afar. This seemed to have effect, as chips of stone started to break off, and cracks started to appear. As we Dwarves know, all big things eventually come down, and after an exhausting fight, the statue crumbled to the floor. Investigating the now opened secret room, we found little of interest, but made sure to report our discovery in Ironforge. As we ventured further, we wondered what else would be in store for us.
The caverns ahead were filled with large, dangerous creatures, and it seemed even the Troggs stayed away from the big groups of scorpids, bats and basilisks that lurked in these caves. However, we managed to stay safe, being able to take down large groups of these creatures by the combined powers of Craftski and Gruegski. In one of the caves, Orangz asked for a small detour, leading us towards a small tent. Here, to our surprise, we were suddenly met with a Human adventurer! It appeared Orangz, being trained as an enchanter and looking to improve his arts, had searched out the only Master enchanter in Azeroth! And now we all had to wait, as Orangz, and the master, Annora, started discussing the art of enchanting.
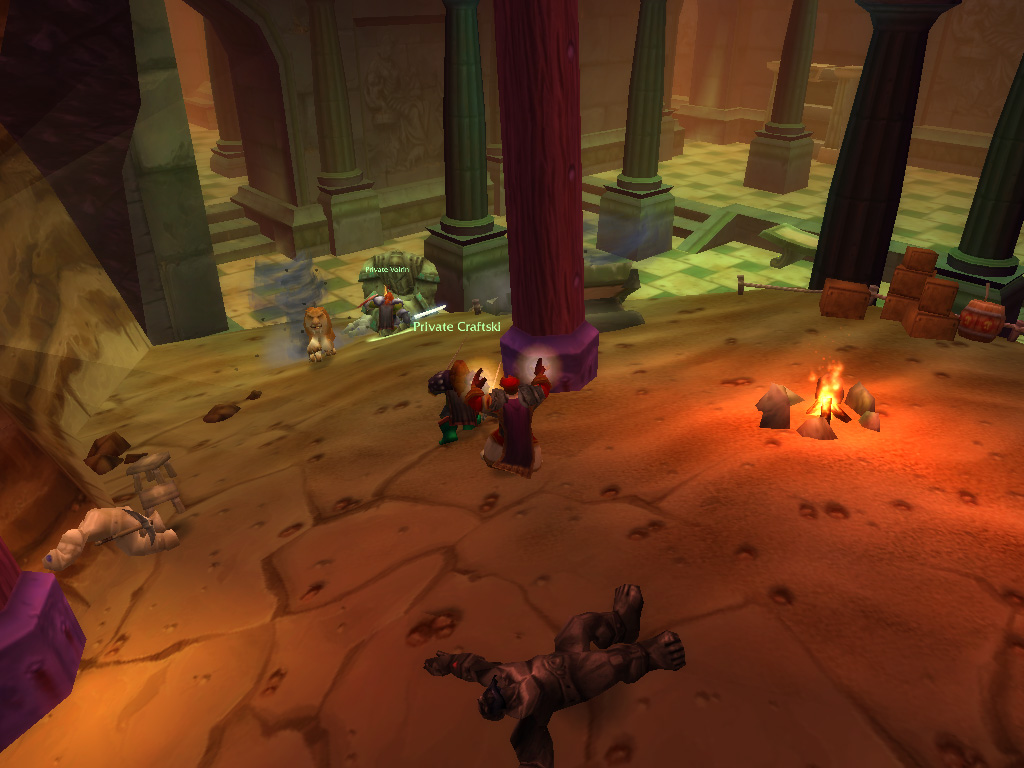
W
ith Orangz finally done, and new incantations added to our equipment, we were ready to venture deeper into the caverns. Here we reached the marble hallways from before again, but this time it's inhabitants were slightly different... Dwarf-like creatures, made out of black and white stone, wandered the halls, and they were not pleased to see their kin of flesh and blood. The white creatures proved to be skilled in magic, while the black creatures swung with heavy blows. This made our work much easier though, as Voirin could focus on the black creatures, while Craftski shot the white from afar.
The stone creatures seemed to be accompanied by a large construct, which proved to be harder to take down. The construct blasted the room it patrolled with gusts of wind, hampering our spellcasting and pushing us back. As we all gathered behind the shield of Voirin, we were able close the distance, and now engaged, it was up to Orangz to evade the small tornadoes that danced around the room. The construct crumbled not long after engaging, but left little treasure of value. As we wandered further, it seemed we had reached a dead end, and had looped back on our original path. We hoped we would have more luck with our quests up ahead.
The stone creatures seemed to be accompanied by a large construct, which proved to be harder to take down. The construct blasted the room it patrolled with gusts of wind, hampering our spellcasting and pushing us back. As we all gathered behind the shield of Voirin, we were able close the distance, and now engaged, it was up to Orangz to evade the small tornadoes that danced around the room. The construct crumbled not long after engaging, but left little treasure of value. As we wandered further, it seemed we had reached a dead end, and had looped back on our original path. We hoped we would have more luck with our quests up ahead.
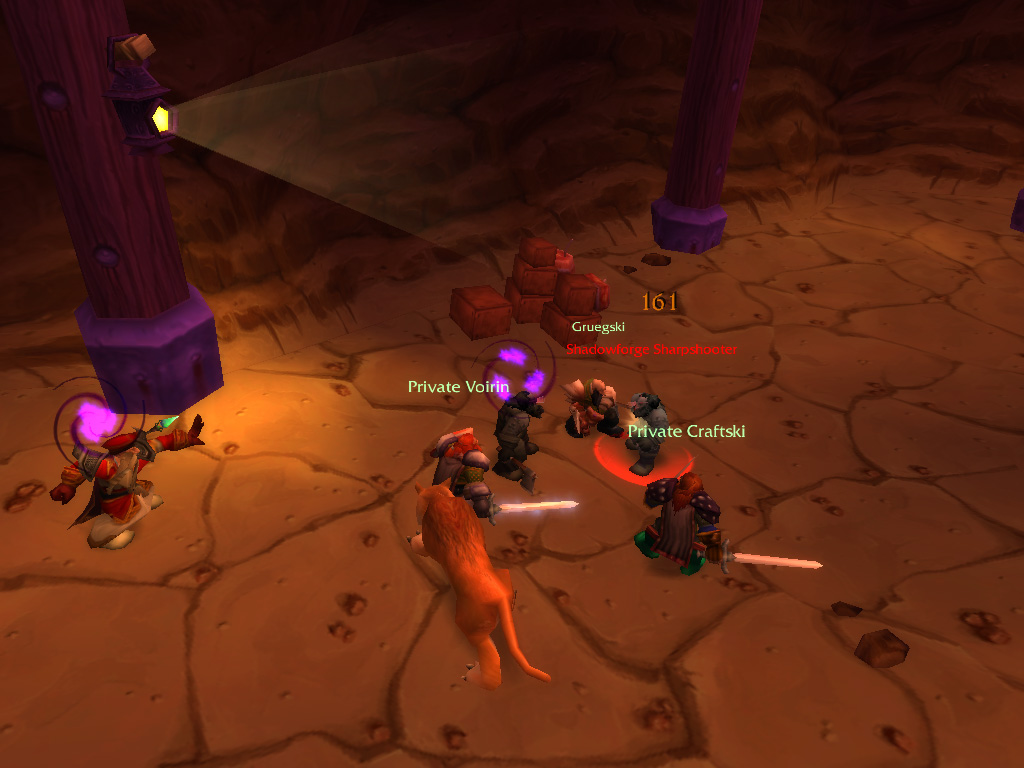
B
ut there were more unexpected turns up ahead: As we advanced through more of the wild beasts that crawled through the tunnels, we were met with gunfire from a barricade up ahead. It appeared our dark brothers had a small foothold within Uldaman, and were not likely to surrender. We knew the Dark Iron dwarves were after the same relics as we did, so evading them would not be an option: We would have to assault. We lured sentries away from their posts and ambushed their diggers, thinning their numbers. As we jumped the barricades, we discovered many uncovered artefacts, ready to shipped away by the Dark Iron Dwarves. These would have to be reclaimed!
Wandering further, we found a large doorway, guarded by a Dark Iron commander and his bodyguards. And as he spotted us, we quickly followed one simple plan: kill the bodyguards, kill the leader. Taking out the bodyguards first proved to be the correct choice, as they all started blasting us with fire magic. As Orangz shielded Voirin from the worst fire, Gruegski once again used his protective aura to diminish the heat. The bodyguards were quickly dispatched, which left us and the leader, which was still no easy feat. Blasts and shockwaves of fire shook the room, igniting our very skin. But as with all those skilled in magic, sharp steel is their big weakness, and without defensive incantations, the leader quickly slumped to the ground.
Wandering further, we found a large doorway, guarded by a Dark Iron commander and his bodyguards. And as he spotted us, we quickly followed one simple plan: kill the bodyguards, kill the leader. Taking out the bodyguards first proved to be the correct choice, as they all started blasting us with fire magic. As Orangz shielded Voirin from the worst fire, Gruegski once again used his protective aura to diminish the heat. The bodyguards were quickly dispatched, which left us and the leader, which was still no easy feat. Blasts and shockwaves of fire shook the room, igniting our very skin. But as with all those skilled in magic, sharp steel is their big weakness, and without defensive incantations, the leader quickly slumped to the ground.
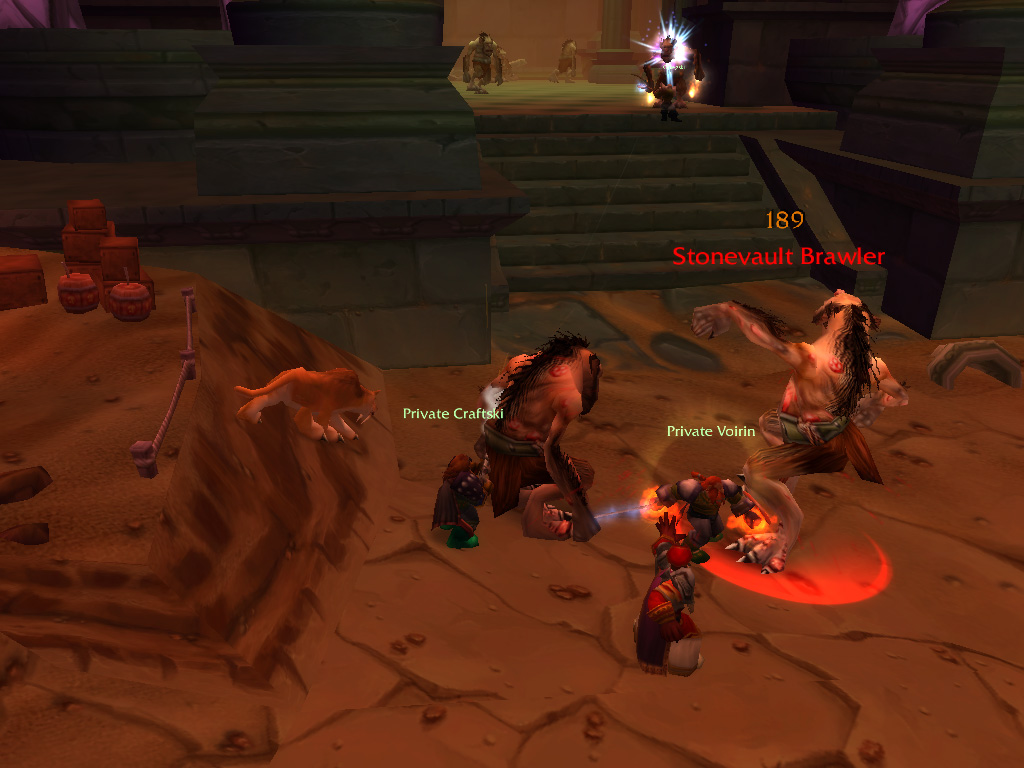
R
ummaging through the uncovered relics, we were able to find the fabled lost tablets of will, and one of the lost gemstones of the amulet. Craftski was also happy to find an intricately crafted blunderbuss, that probably had belonged to their leader.Passing through the doorway, we once again found it guarded, this time by an obsidian construct. This time, our battle proved to be more interesting, as the more we chipped and hacked at the construct, the smaller it became. Finally, it's magic ran out, and crumpled to the floor. With the way clear, we uncovered how the Dark Iron Dwarves had made their foothold: There was a secret back entrance into Uldaman! Turning back from the exit, we returned to our task at hand: To find the last missing gem, and claim the amulet for ourselves!
According to the Paladin's journal, the last gem was taken by the Chieftain of the Troggs, Grimlok. We had passed stronger Troggs while we were ambushing the Dark Iron Dwarves, so we hoped we would find their leader close by. The larger Troggs proved to be nothing like the smaller kin we had encountered before: Their brutal strength and raging frenzy proved to be more than a match for our strength, and they weren't short on numbers. Most of the Troggs seemed to guard a marble chamber, their cries echoing within.
According to the Paladin's journal, the last gem was taken by the Chieftain of the Troggs, Grimlok. We had passed stronger Troggs while we were ambushing the Dark Iron Dwarves, so we hoped we would find their leader close by. The larger Troggs proved to be nothing like the smaller kin we had encountered before: Their brutal strength and raging frenzy proved to be more than a match for our strength, and they weren't short on numbers. Most of the Troggs seemed to guard a marble chamber, their cries echoing within.
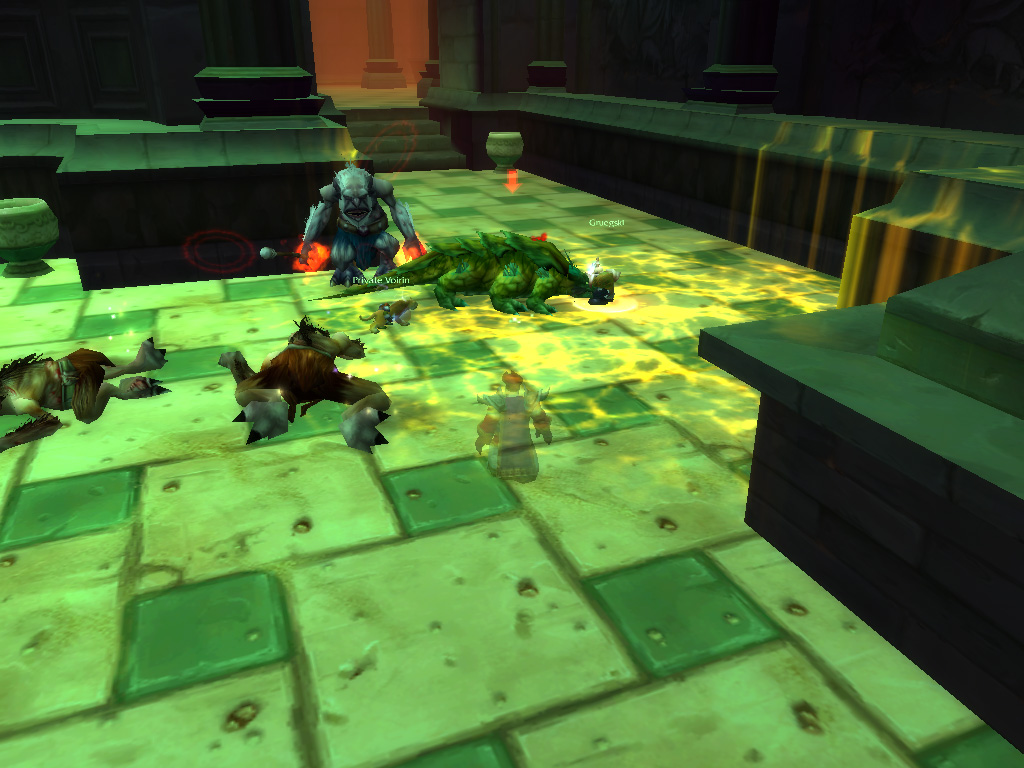
W
e fought our way inside, ascending and descending the staircases, until we finally met our target: Grimlok. Accompanied by a pet basilisk, this Trogg was hardened and more wizened than any we had seen before. Spotting us, it exclaimed a mighty "me Grimlok, king!", frenzied itself up and charged into us. Gruegski quickly intercepted the basilisk and kept it busy, keeping himself safe from its magical petrification by a holy stun. While Voirin lunged at Grimlok, and was blasted by an arc of lightning, sizzling through his armour. Craftski and Orangz used both magic and lead to shoot from a distance, slowly draining the Trogg Chieftain of its strength.
Just as Gruegski hammered the final blow home on the basilisk, Grimlok struck us with a curse, making us shrink there and then! The Trogg was now looming over us, threatening to squash us as insects. Thankfully our strength hadn't diminished, and now with Gruegski free to help, we were able to struck a final blow. As we searched Grimlok's belongings, we found the last missing gemstone: Our quest was complete! As we gathered around the scrying bowl, we told Gnome of our findings. But it seemed we weren't done yet, even though he thanked us for our work. We had to charge the amulet once again with a magical power, otherwise it would remain powerless. We would have to find one of the cores that powered the constructs we had encountered.
Just as Gruegski hammered the final blow home on the basilisk, Grimlok struck us with a curse, making us shrink there and then! The Trogg was now looming over us, threatening to squash us as insects. Thankfully our strength hadn't diminished, and now with Gruegski free to help, we were able to struck a final blow. As we searched Grimlok's belongings, we found the last missing gemstone: Our quest was complete! As we gathered around the scrying bowl, we told Gnome of our findings. But it seemed we weren't done yet, even though he thanked us for our work. We had to charge the amulet once again with a magical power, otherwise it would remain powerless. We would have to find one of the cores that powered the constructs we had encountered.
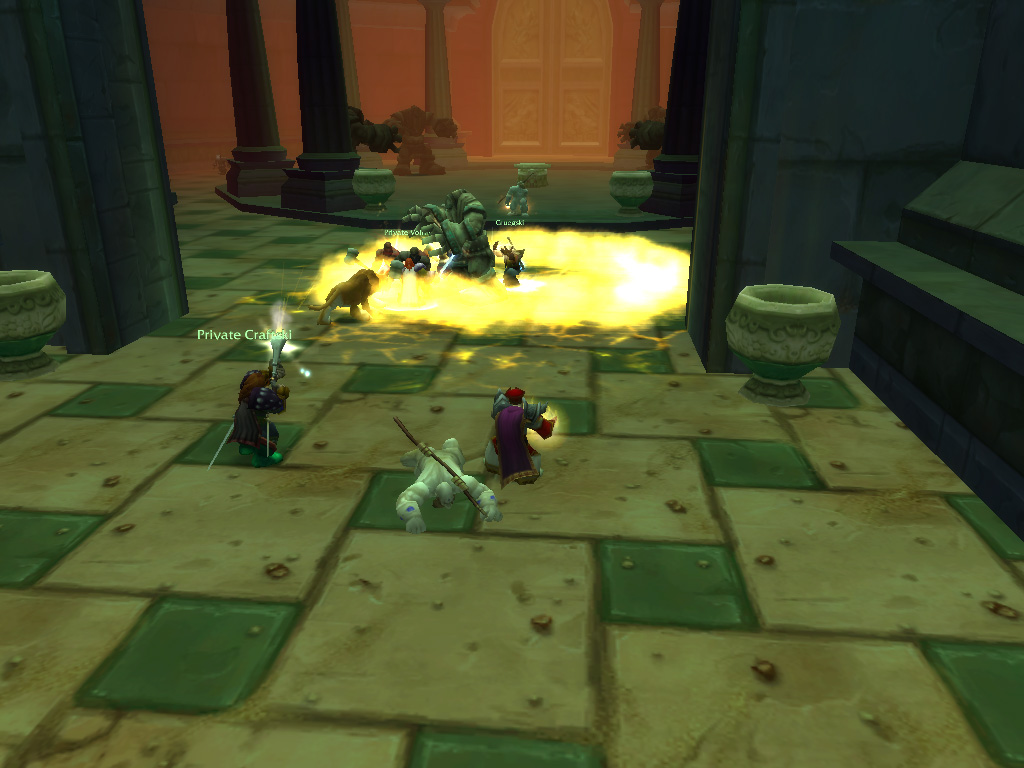
Combined strength!
W e had never encountered a power core before while rummaging through the remains of these constructs, so we didn't even know this request would be possible. But we hoped the rewards would be worth it, and continued exploring the caverns. The remaining Troggs seemed easier to overcome, knowing we had taken down their chieftain, and soon we reached another doorway we hadn't passed through yet. With our combined strength, we were able to open the doors, and entered an area of Uldaman that had been locked away for a long time.
We found ourselves in a large room, where we, once again, encountered groups of black and white stone creatures, accompanied by stone large constructs. Once again, these creatures proved to be hostile, and as we fought our way through them to reach the opposite side of the chamber, we were not able to find a power core. Finding the door on the opposite side locked, we returned our attention to the chamber itself.
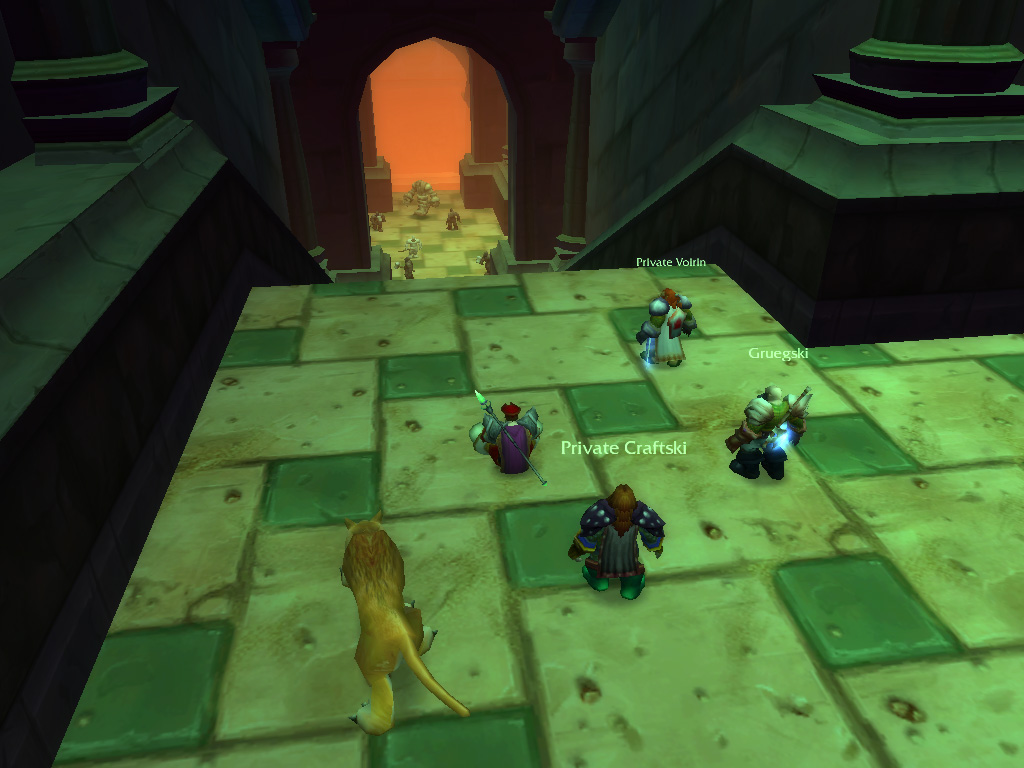
T
he room was lined with statues, and in the centre stood a large altar, adorned with runes. As we inspected it closer, we found out three sides could slide inwards, returning to their original place when not pressed. Taking the hint, we all pressed the different buttons together, hoping the doors would open. As we gazed towards the door, we were disturbed by the sound of crumbling stone and looked sideways. The statues were suddenly coming alive!
Jumping into action, we intercepted the first statue, which was rumbling towards us. Voirin held fast, and Gruegski chipped away at the ankles of the constructs, while Craftski and Orangz kept their eyes on the other statues. The assaulting statue fell, but we didn't get a moment to rest, as another statue jumped into the fray. Seeing the other two immobile statues slowly rumble into action, we knew we were in for a fight. But our damage proved to be sufficient, and even as the other two constructs joined the fight, we were never into real danger. As the last construct scattered into pebbles across the floor, we found the door open, revealing a hallway leading into the depths.
Jumping into action, we intercepted the first statue, which was rumbling towards us. Voirin held fast, and Gruegski chipped away at the ankles of the constructs, while Craftski and Orangz kept their eyes on the other statues. The assaulting statue fell, but we didn't get a moment to rest, as another statue jumped into the fray. Seeing the other two immobile statues slowly rumble into action, we knew we were in for a fight. But our damage proved to be sufficient, and even as the other two constructs joined the fight, we were never into real danger. As the last construct scattered into pebbles across the floor, we found the door open, revealing a hallway leading into the depths.
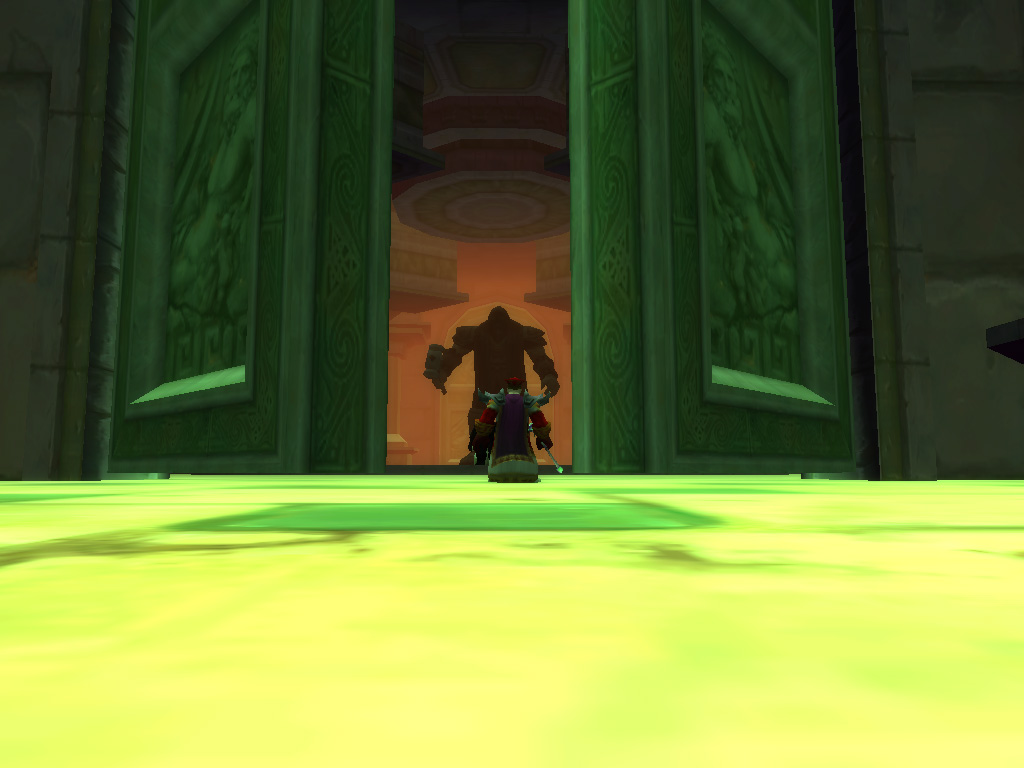
T
he hallway was once again filled with stone creatures, and we had to be careful to not to catch the attention of the constructs as we tried to clear our path. We still were unable to find any power cores; would this really be a quest we would be unable to finish? Finally, after several fights, we were able to reach the end of the staircase, where we were met with a gigantic door. And again, with our combined strength, we pushed it open.
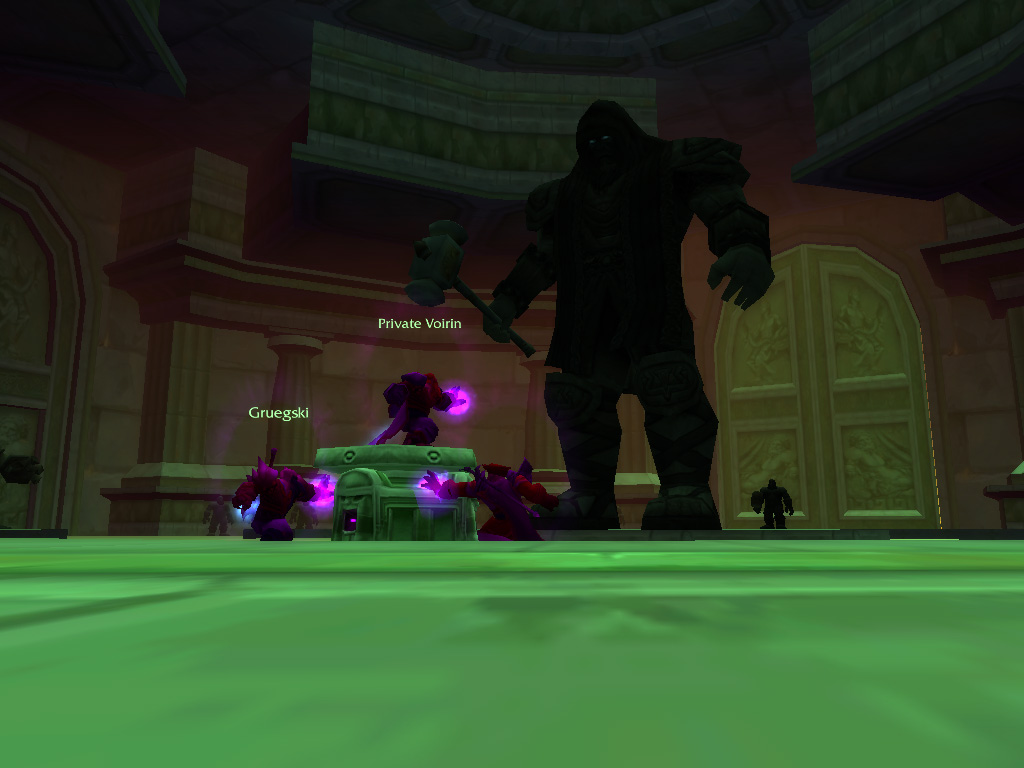
W
e entered a huge room, adorned with statues along the walls and, most intimidating, a huge giant statue in the middle of the room. As we first circled the room, we tried to open the large doors to the sides, but found the immovable. Then we inspected the altar closer to the centre and once again found the same system of three sliding side. What would happen if we would press it? Taking the change, we activated the sides together, and for a second everything was quiet... But suddenly we heard the crack of stone and the crumbling of dirt, the giant statue began to stir! Opening its eyes, it called out to us, calling itself Archaedas, and started to advance. Voirin intervened, and started to receive heavy blows from his hammer. At the same time, the rest of us started to chip away at its stone body, using steel, magic and lead. We did little, but still visible damage, creating small cracks and tiny bits of stone started to fall off. Suddenly Archaedas called out again, sending an energy beam towards the corner of the room, where one the statues suddenly sprung to life. Craftski quickly intercepted this surprise with his cat, and was able to quickly down the creature.
But it didn't stop at one, again and again Archaedas sent an energy beam towards one of the waiting statues, requiring Craftski to intercept and take out. It was clear our attacks were having an effect, as we chipped off larger chucks of stone from the construct. Suddenly, with a loud bellow, Archaedas called out to his defenders. and a large group of constructs sprung to life, swarming us, and overpowering Craftski's cat. Already weary from our fights, we knew this was a fight we could not win. With a foe beyond our strength, we started to retreat, with Voirin and Gruegski guarding our backs. We only just managed to escape, and the large doors slammed shut behind us. We had found the power core we needed, but now we only needed to finish the fight for it.
But it didn't stop at one, again and again Archaedas sent an energy beam towards one of the waiting statues, requiring Craftski to intercept and take out. It was clear our attacks were having an effect, as we chipped off larger chucks of stone from the construct. Suddenly, with a loud bellow, Archaedas called out to his defenders. and a large group of constructs sprung to life, swarming us, and overpowering Craftski's cat. Already weary from our fights, we knew this was a fight we could not win. With a foe beyond our strength, we started to retreat, with Voirin and Gruegski guarding our backs. We only just managed to escape, and the large doors slammed shut behind us. We had found the power core we needed, but now we only needed to finish the fight for it.
A mount gives your feet a well-earned break, making your trip to next quest a breeze!
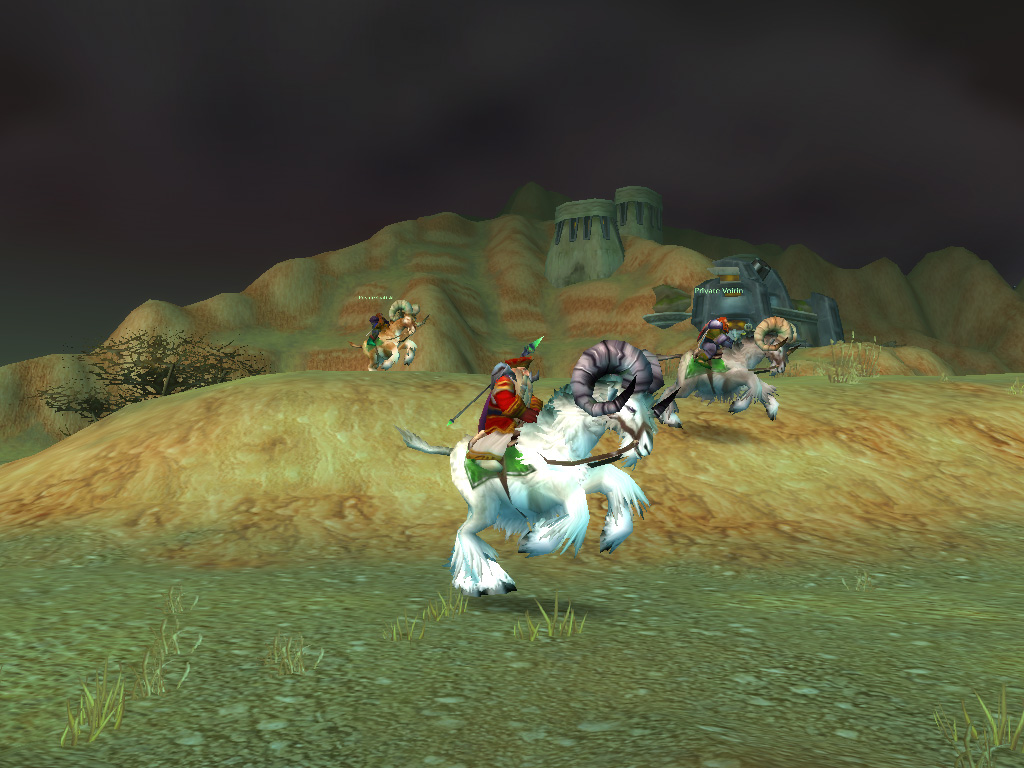
The not-so glorious return
L icking our wounds, we returned to Ironforge. Here we were able to turn over the Lost Tablets, which would be placed in the Ironforge vaults for safekeeping. The medal of courage we received from the king in return was an honour we would never expect. The Loremasters were also happy with the discovery of the secret chamber, solving another Uldaman mystery. And finally, we received some coin for returning an ale mug to its owner.
With the Uldaman defeat fresh in our minds, we pondered our options, we needed more skill to overcome such an enemy. Aiding out where we could would be the safer option for now. Gathering our funds, we managed to buy three ram mounts, finally allowing everybody to catch up with Gruegski. Now we would be able to cross large distances much faster, allowing us to take on new adventures. And Gruegski had just found the thing. While training in Stormwind Cathedral, he was given a mission of outmost importance, and for this, we would have to infiltrate The Barrens. Horde-held territory...
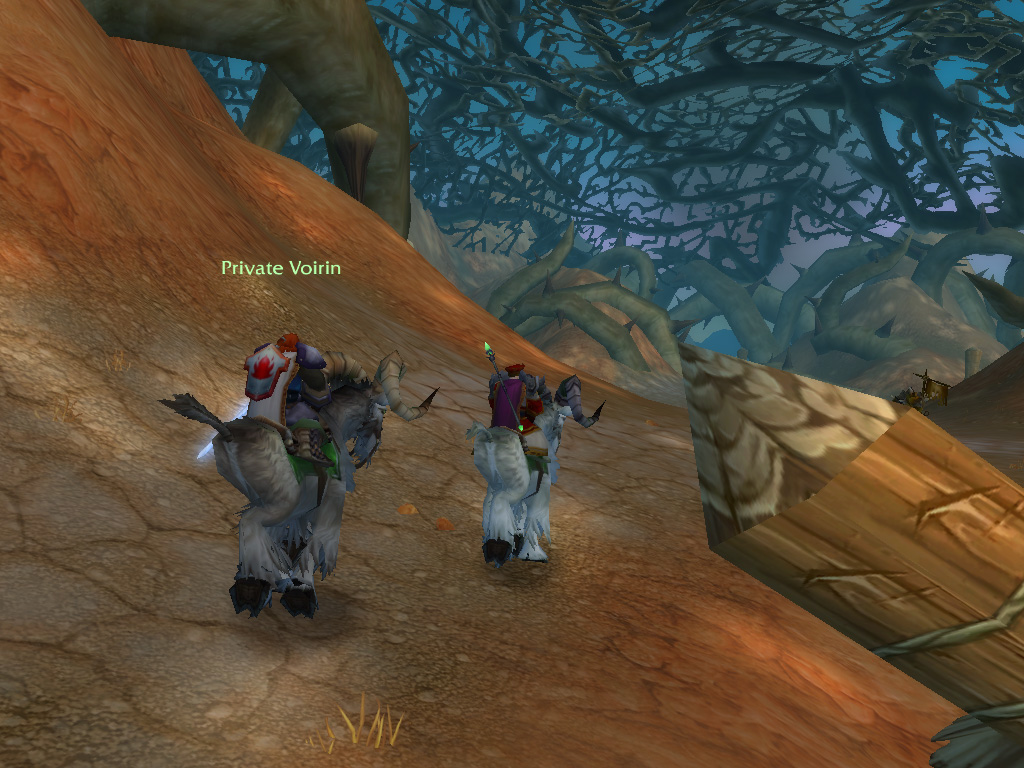
Bringing the light
Once again, we travelled to Menethil harbour, but this time took the ship heading for Theramore, a human stronghold along the coast of Kalimdor. From Theramore we traveled through Dustwallow marsh, our progress swift, aided by our ram mounts. We had to pay close attention to the roads though, as you could easily end up in a pond full of crocolisks! Traversing the marsh safely, we ended up in the Barrens, vast open plains where our rams could finally stretch their legs. This time we had to keep away from the roads however, as Horde forces patrolled the long road leading to the Canyons of Thousand Needles.
Making our way south, we reached our destination: the Razorfen Downs, the ancestral burial grounds of the Quilboar. These grounds had been taken overrun by the Scourge, the living dead, who had transformed the area into a staging area for their evil plans. Our mission would be to defeat their leader, the lich Amnennar the Coldbringer, and break its grip over the Southern Barrens.
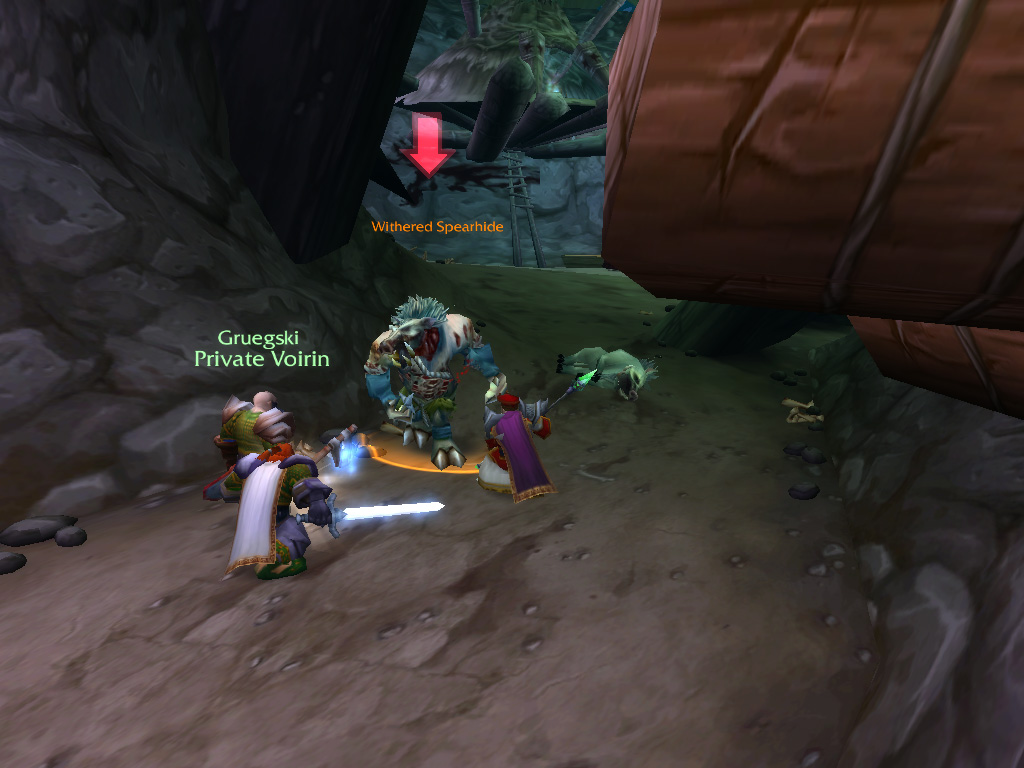
T
o reach the entrance, we had to crawl through brambles and sharp thorns, which reached massive sizes, scraping our skin and almost tearing Orangz's robe. Inside, we soon faced rotting hordes, consisting of skeletons and what was left of the Quilboar-folk, resurrected from the dead. The tunnels turned and twisted, and around every corner we found new undead creatures waiting. The creatures proved to be tough to take down, their leathery hides resistant to our attacks and their vigour without end.
And we were not left alone during the fights either, as smaller, rotting, boars would surprise us, charging from behind. Thankfully these creatures proved to be weak compared to their larger brethren and we could leave them to Craftski's cat. Making sure the wooden huts that lined the rocky walls were clear of any enemy, we advanced further, where it became darker and darker, as the brambles that shaped the roof blocked out the light.
And we were not left alone during the fights either, as smaller, rotting, boars would surprise us, charging from behind. Thankfully these creatures proved to be weak compared to their larger brethren and we could leave them to Craftski's cat. Making sure the wooden huts that lined the rocky walls were clear of any enemy, we advanced further, where it became darker and darker, as the brambles that shaped the roof blocked out the light.
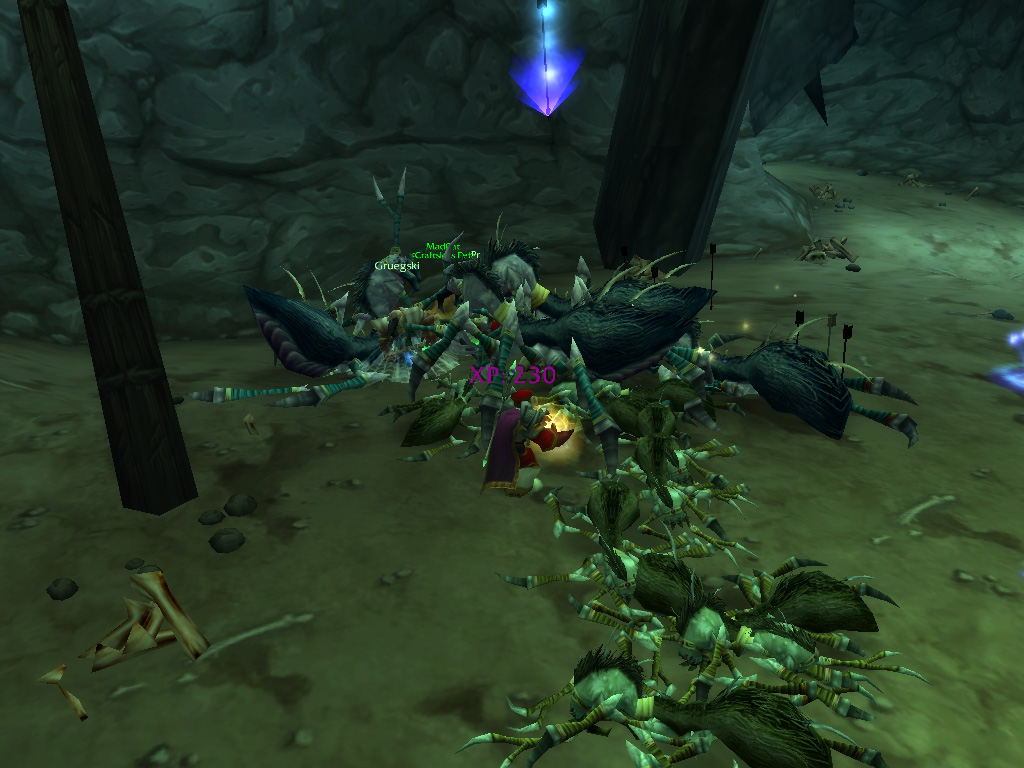
Ring the bells
W e followed the tunnels, which led us to a large cave, where an ornamental gong was hanging from the wall. We inspected it, and taking the chance, gave it a ring: We would tell Amnennar we are coming! As the loud gong faded, we could hear the skittering of small legs drawing near. The sound came closer, until a horde of spiders charged into view, trying to overwhelm us. We hid behind Voirin, and tried to fight off the spiders, taking the smaller ones out at first. The largest creatures took more effort, but eventually their carapace gave way under our blows. With the room cleared once more, we took a moment to rest, until we noticed the ground had started to shake.
W e followed the tunnels, which led us to a large cave, where an ornamental gong was hanging from the wall. We inspected it, and taking the chance, gave it a ring: We would tell Amnennar we are coming! As the loud gong faded, we could hear the skittering of small legs drawing near. The sound came closer, until a horde of spiders charged into view, trying to overwhelm us. We hid behind Voirin, and tried to fight off the spiders, taking the smaller ones out at first. The largest creatures took more effort, but eventually their carapace gave way under our blows. With the room cleared once more, we took a moment to rest, until we noticed the ground had started to shake.
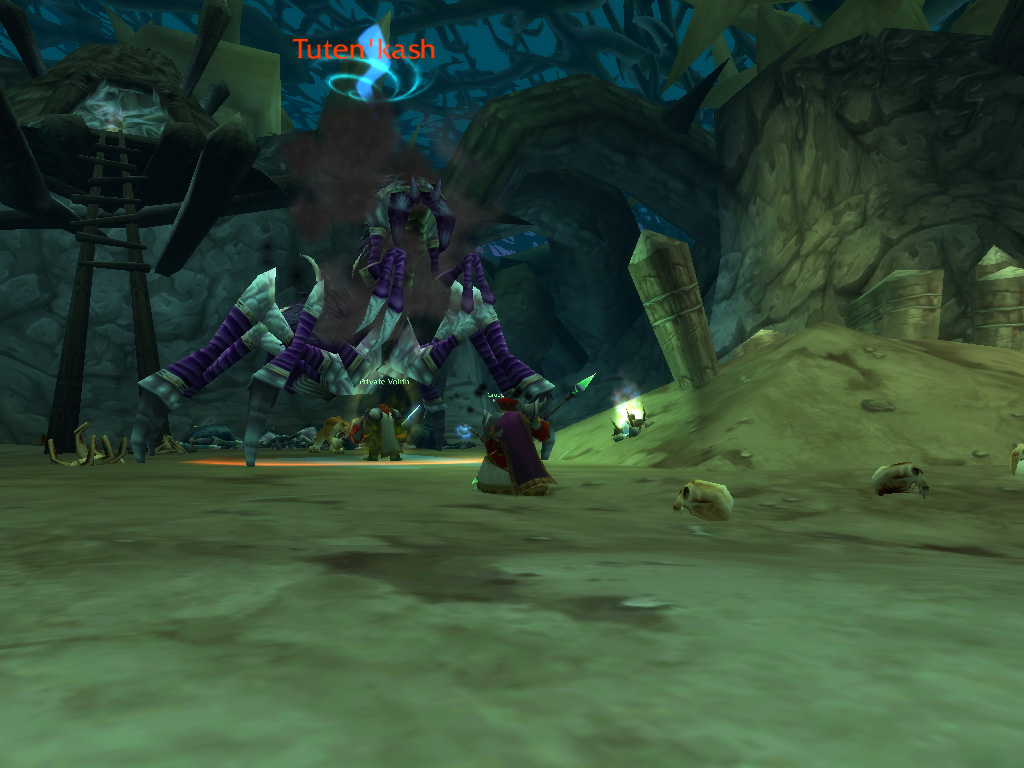
S
uddenly an enormous undead spider loomed into view: One of the fabled Crypt Fiends, resurrected spiders hailing from Northrend. The creature attacked us with ferocious speed, trying to use its sharp mandibles and legs to pierce Voirin's shield. As we started to resist its attacks, the creature started to change its tactics: It started to spray us with poisonous substances, acids and sticky webbing which nailed us to the floor. Orangz thankfully was able to cure us of the poison and, with effort, we could break free from the webbing. As we took out the spider's legs first, Gruegski managed to slam his axe straight in the creature's head, sending it thumping to the ground.
Prodding the corpse, and making sure it was dead once more, we dared to close in, and rummaged through the remains. Voirin used a part of its carapace as resilient armour, making him feel tougher than ever! We were sure this was one of the creatures Amnennar had set upon us, and wondered what else we would meet up ahead. On our guard for more surprises, we resumed our journey through the tunnels.
Prodding the corpse, and making sure it was dead once more, we dared to close in, and rummaged through the remains. Voirin used a part of its carapace as resilient armour, making him feel tougher than ever! We were sure this was one of the creatures Amnennar had set upon us, and wondered what else we would meet up ahead. On our guard for more surprises, we resumed our journey through the tunnels.
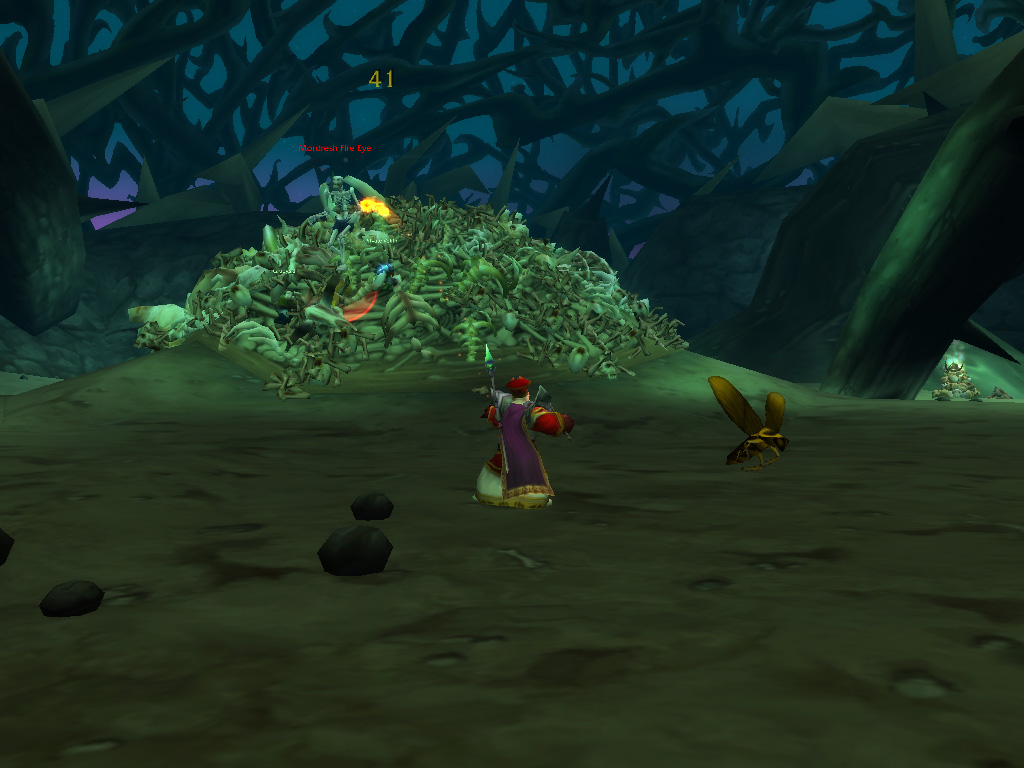
Making our way past more, and tougher packs of zombified Quilboars, we started to hear faint music, with chilling chants in the air. Bigger piles of bones started to line walls, and crossing a walkway, we found ourselves in front of a gigantic pile of skeletons, surrounded by skeletons, both big and small. But atop the pile stood the largest of them all, dancing with unholy frenzy. As we neared, the creature noticed us, and called out for its brethren: Sending all the small skeletons our way!
Once again, we had met a horde to overcome, and once again Vorin proved to be the perfect buffer between us and skeletal claws. Withstanding the assault, and sending bones scattering across the floor, afterwards Gruegski and Craftski used their area damaging abilities, burning the leftovers in holy and immolating fire. With its minions defeated, the large skeleton started to show-off it's strength: It appeared it was adept at throwing fireballs! Thankfully we had Gruegski's fire protection to ward us against the heat, making it easy to advance, and shatter the creature into fragments. Searching the bone shards, Orangz found a potent amulet, he would now be able to use for more noble purposes.
Once again, we had met a horde to overcome, and once again Vorin proved to be the perfect buffer between us and skeletal claws. Withstanding the assault, and sending bones scattering across the floor, afterwards Gruegski and Craftski used their area damaging abilities, burning the leftovers in holy and immolating fire. With its minions defeated, the large skeleton started to show-off it's strength: It appeared it was adept at throwing fireballs! Thankfully we had Gruegski's fire protection to ward us against the heat, making it easy to advance, and shatter the creature into fragments. Searching the bone shards, Orangz found a potent amulet, he would now be able to use for more noble purposes.
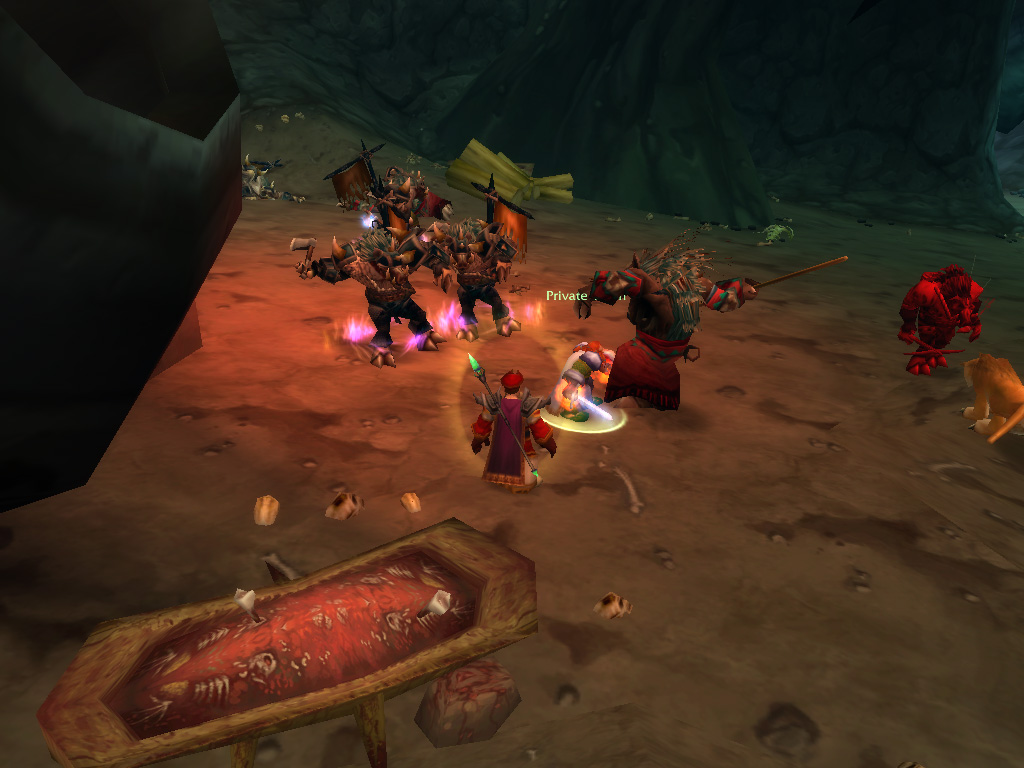
Cleansing the Downs
A s we investigated the area further, we were hailed by voices from several holding pens nearby. It appeared the undead Quilboar had imprisoned adventurers and travellers to use as a sacrifice. We found two humans and an Ogre that proved to be thankful instead of hostile. As thanks, one of the humans taught Gruegski a way to brew a fortifying potion, while Craftski, as our cook, learned a way to brew a refreshing tea. The final human, calling himself Belnistrasz, asked for our aid though, as he planned to destroy the idol used in the sacrifices. For this, we had to escort him through the caverns, heading back the way we came. Thankfully, we had done a good job clearing out every last rotting husk, so encountered little opposition. We were caught off-guard by an ambush or two, but these posed no threat, as we now had a fifth member in our party (or sixth together with Craftski's cat!).
Eventually we reached the idol, set against the wall and blazing with fire. Calling to protect us, Belnistrasz started to channel magic into the idol, trying to break its power. With their idol under attack, the remaining nearby Quilboar were alerted, attacking us from different sides. We slowly grinded the assaults down, and the bodies of undead creatures started to pile up. Eventually a large Quilboar entered the room, looking more decomposed and rotting than the smaller creatures. We took the initiative and charged in, both Orangz and Gruegski sending bolts of holy power it's way. This proved to be effective, as not long afterwards, with one foul last breath, the creature collapsed into a pile of flesh and bone. Behind us we felt a flash of searing heat and turned around to see that Belnistrasz had disappeared, a burning brazier left in place where he was standing, and the idol extinguished.

A
pproaching the brazier, we could hear a dark voice from the flames and see the silhouette of a winged creature, thanking us and mentioning "us mortals" were not beyond help yet. Barely grasping what had happened, the flames vanished, leaving four rings behind, smoldering with heat. It appeared these were magical in origin, and especially Voirin was taken by their power. But as we now found ourselves back in the beginning of the Downs, would we have to fight our way through waves of Quilboar once again?
Craftski offered to take a risk, up ahead he had discovered a ledge that, when traversed carefully, could lead us deeper into Amnennar's lair. Making sure we weren't followed, we slowly scaled down the walls, finding ourselves on an eerie path, lit by ice-cold flames. Here we found the true heart of the scourge: Spectral creatures wandering through tunnels alongside shuffling Ghouls. Now it was Orangz's time to shine: As his priest powers allowed him to shackle undead creatures in chains of holy light, rendering them powerless.
Craftski offered to take a risk, up ahead he had discovered a ledge that, when traversed carefully, could lead us deeper into Amnennar's lair. Making sure we weren't followed, we slowly scaled down the walls, finding ourselves on an eerie path, lit by ice-cold flames. Here we found the true heart of the scourge: Spectral creatures wandering through tunnels alongside shuffling Ghouls. Now it was Orangz's time to shine: As his priest powers allowed him to shackle undead creatures in chains of holy light, rendering them powerless.
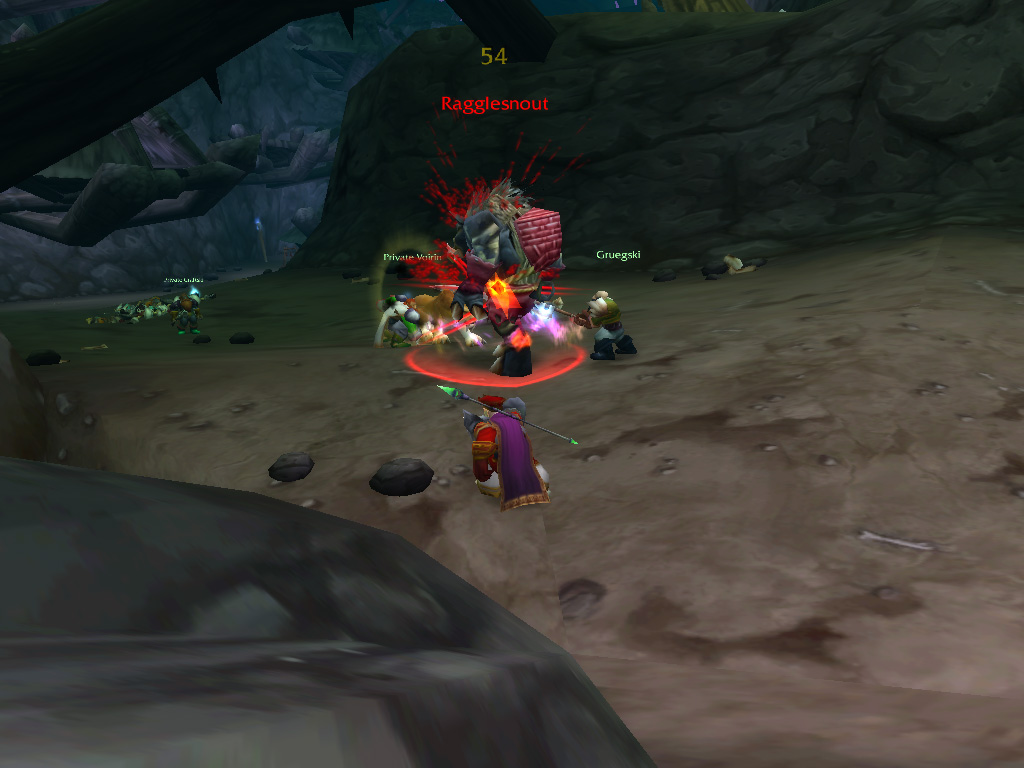
W
e felt we were nearing the inner sanctum of the Downs, as we encountered more Scourge minions as we continued. Turning a corner we found ourselves faced with another foe we knew from lore: An Abomination! Sewn together from collected corpses, these creatures were at the forefront of the Scourge army during the siege of Lordaeron and were feared foes, even for veteran knights. Without a moment to spare, Craftski started blasting with his rifle, taking advantage of the distance. As it neared, it seemed to pick up speed, wildly flailing it's weapons, which took an effort for Voirin to dodge. As we threw everything we had at the creature, it increased its speed even further, hacking away at Voirin's shield & armor and testing Orangz's holy defenses.
But our attacks had an effect, and as soon as it sped up for the last time, it collapsed on the floor with a mighty thump. Searching the remains, we sadly found little of value and continued following the path, which now started to spiral upwards. Here we found the last shacks which once belonged to the Quilboar living there, now shimmering with cold fire from within. As we neared one of the huts, a large Quilboar jumped out, swinging a huge sword. This creature seemed to be free from the undead curse, but attacked us regardless.
But our attacks had an effect, and as soon as it sped up for the last time, it collapsed on the floor with a mighty thump. Searching the remains, we sadly found little of value and continued following the path, which now started to spiral upwards. Here we found the last shacks which once belonged to the Quilboar living there, now shimmering with cold fire from within. As we neared one of the huts, a large Quilboar jumped out, swinging a huge sword. This creature seemed to be free from the undead curse, but attacked us regardless.
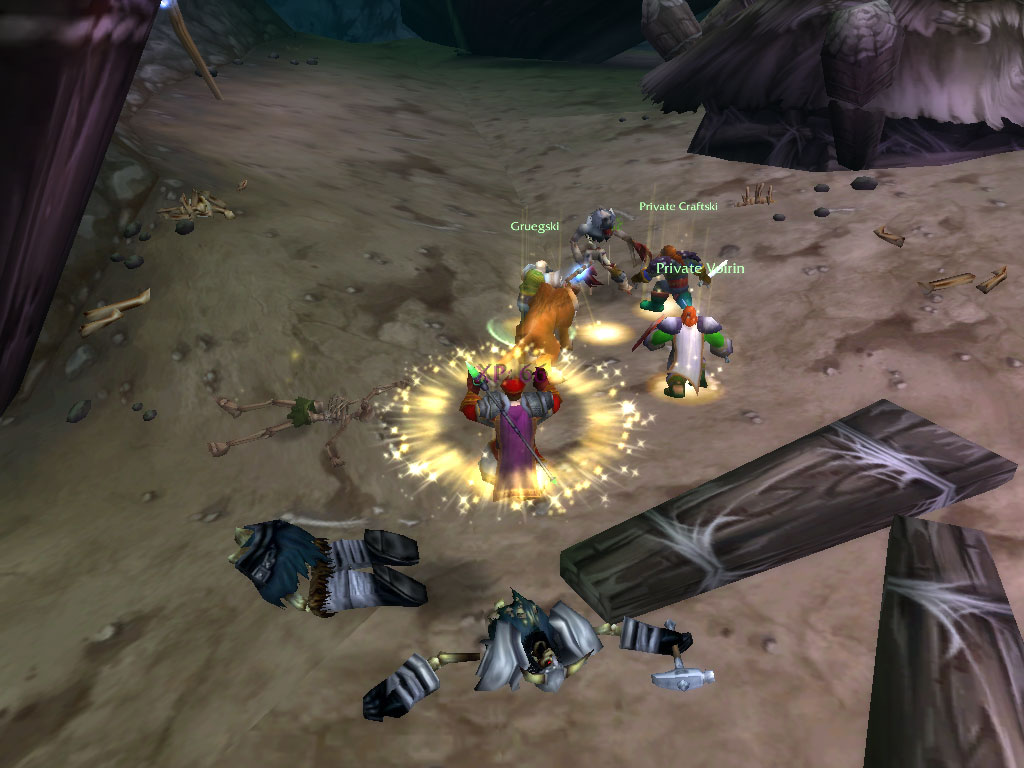
T
he creature proved to have a dangerous arsenal at its disposal, cursing us with wracking pains and sending bolts of shadowy magic our way. Voirin and Gruegski were able to disrupt the casting of spells, but we were given a nasty surprise when the creature started healing itself, just as we thought he had gained an advantage! We regained our composure and changed our tactics, this time we would keep it's healing powers in check, and let Orangz worry about the shadow magic! Eventually our numbers overwhelmed the Quilboar, and as we interrupted its final cast of healing magic, it slumped lifeless to the ground. We wondered how this creature had survived this long between the undead: Perhaps the Scourge had more use for the creature alive?
We took a short break, during which Gruegski supplied us with fortifying potions, and Craftski cooked some good warm broth. It's true that Dwarves can make a home anywhere as long as there is good brew and a campfire! Now refreshed, we resumed our journey, following the spiraling road upwards. Here we encountered packs of skeletal warriors, fighting with formidable strength and protected by plate that, although rusty, still proved to be a strong defense. Craftski's accuracy saved us from having long fights, as his eagle-eyed shots sent bone shards flying.
We took a short break, during which Gruegski supplied us with fortifying potions, and Craftski cooked some good warm broth. It's true that Dwarves can make a home anywhere as long as there is good brew and a campfire! Now refreshed, we resumed our journey, following the spiraling road upwards. Here we encountered packs of skeletal warriors, fighting with formidable strength and protected by plate that, although rusty, still proved to be a strong defense. Craftski's accuracy saved us from having long fights, as his eagle-eyed shots sent bone shards flying.
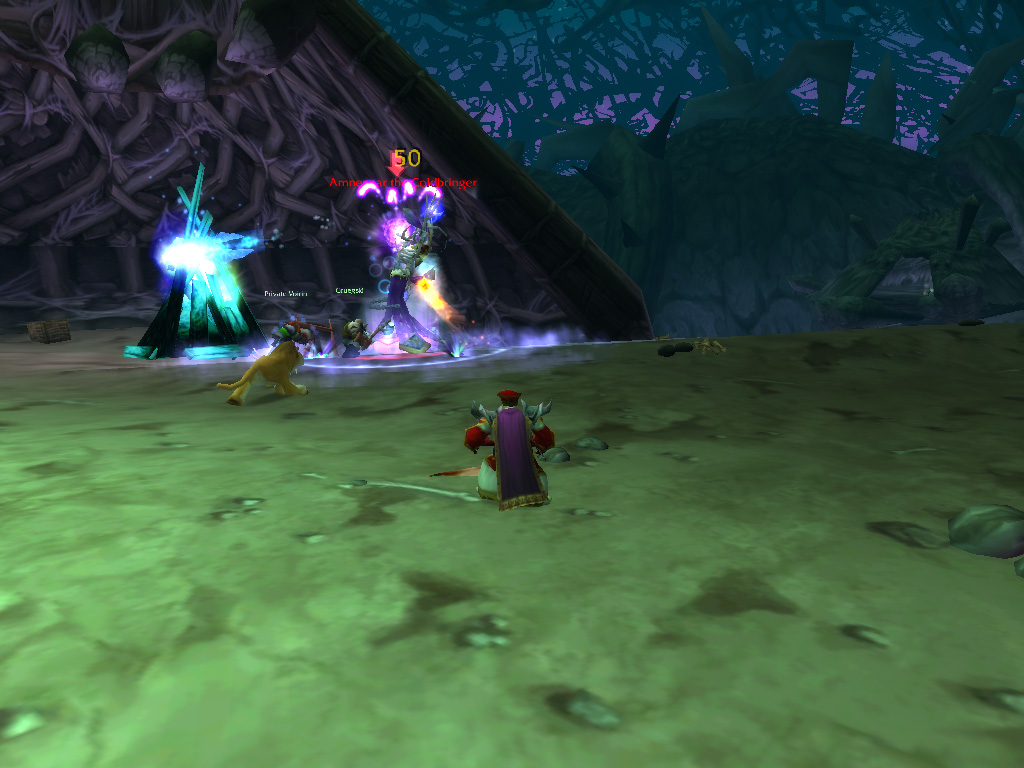
The Scourge defeated
A t the end of the path, atop a large rocky mound in the center of the Downs, we met the creature we were sent to destroy: the Lich Amnennar. And it was waiting for us. Immediately it started to throw bolts of ice, slowing our advance and chilling us to the bone. Next, it called in reinforcements, summoning ghostly creatures, trying to overwhelm us. Craftski jumped in and his cat engaged these spectres, leaving Gruegski, Orangz and Voirin to deal with the Lich. It tried to bind us to the ground using shackles of ice, but these were dispelled by Orangz. It tried to knock Voirin and Gruegki into the depths, but this only enraged Voirin even more, allowing him to intercept the Lich once again.
As its magical power was diminishing, and its attacks in vain, it finally imploded in a dazzling flash, leaving only it's shattered jewellery and robes behind. These proved to be of no use to us, and Orangz drained the magical items for enchanting purposes. Victorious, and weary after the long adventure, we returned to Stormwind Cathedral with the tale of our deeds, and were rewarded handsomely with a finely crafted sword and amulet. What would come next for us? We agreed that first we could use some time near the fireplace, so took the Deeprun Tram back to Ironforge.
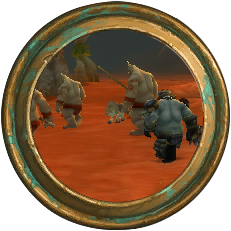
Some areas are patrolled by powerful monsters. Always be on the lookout, or you might get jumped!
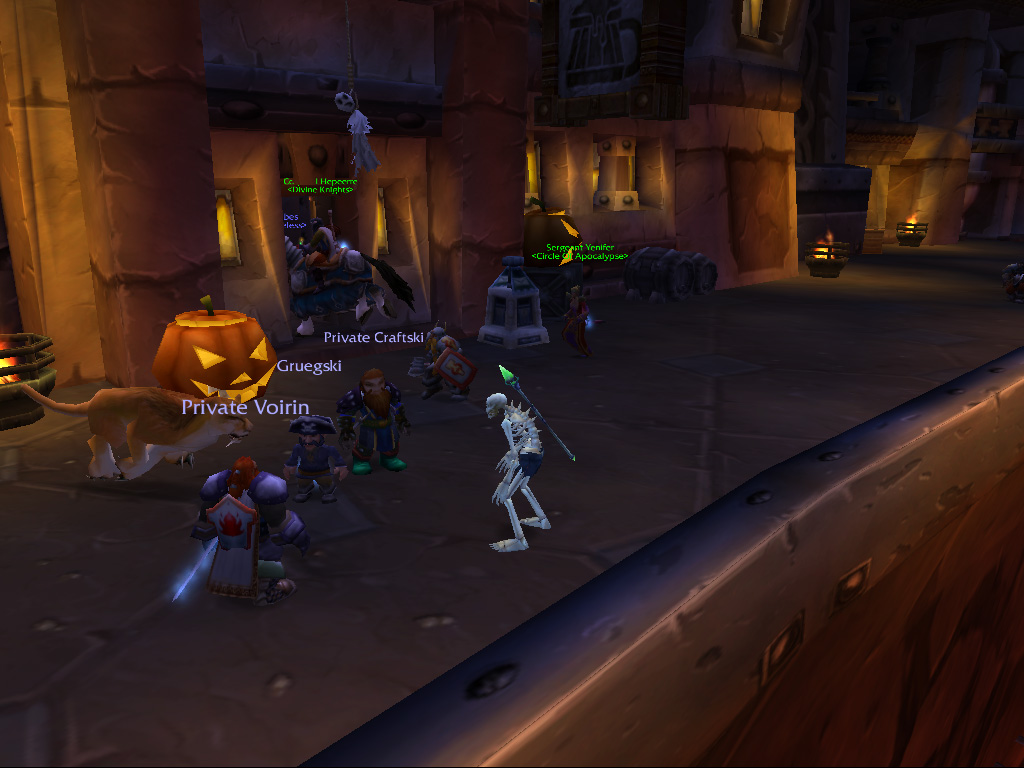
To the Hinterlands!
B ack in Ironforge, we found it decorated for the ever-nearing Hallow's end. Innkeepers provided adventurers with enchanted treats and presents, which had some interesting effects on us. We visited our trainers and honed our tradeskills, as we had quite a bit to catch up! While resting at one of the many inns, we met a Wildhammer Dwarf emissary, hailing from Aerie Peak, who was looking for adventurers to help investigate a mystery in the Hinterlands. Of course, we would never turn away from an adventure, and had never lands of our Wildhammer brothers. So, the choice was easily made: We were traveling north!
B ack in Ironforge, we found it decorated for the ever-nearing Hallow's end. Innkeepers provided adventurers with enchanted treats and presents, which had some interesting effects on us. We visited our trainers and honed our tradeskills, as we had quite a bit to catch up! While resting at one of the many inns, we met a Wildhammer Dwarf emissary, hailing from Aerie Peak, who was looking for adventurers to help investigate a mystery in the Hinterlands. Of course, we would never turn away from an adventure, and had never lands of our Wildhammer brothers. So, the choice was easily made: We were traveling north!
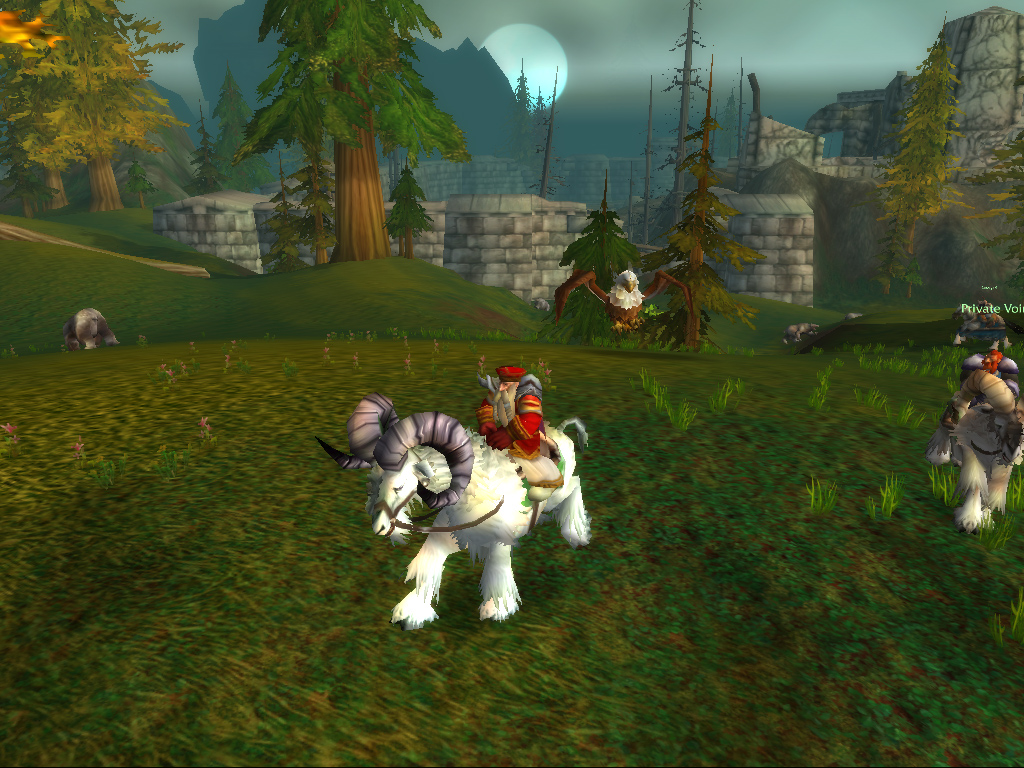
W
e knew the Hinterlands lay beyond the Hillsbrad Foothills, so, we travelled by gryphon to Soutshore, starting our journey over land from there. Heading north, we soon encountered wild gryphons, patrolling near a narrow mountain passage. The gryphons let us pass and, following the path along the large cliffs, we ended up in a large valley with grassland stretching into the distance. We were close to Aerie peak, already spotting from afar, a stronghold hewn out of the mountainside. As we arrived, we were hailed by their Gryphon Master: Something terrible had happened! The son of the mightiest Gryphon, Sharpbeack had gone missing, believing to be abducted by Trolls.
Ready to help, we agreed to investigate Troll camps, hoping to find the Gryphon or a clue to its whereabouts. Also, since the Trolls had been harassing Wildhammer scouts, we were asked to thin their numbers, bringing back their necklaces as proof.
Ready to help, we agreed to investigate Troll camps, hoping to find the Gryphon or a clue to its whereabouts. Also, since the Trolls had been harassing Wildhammer scouts, we were asked to thin their numbers, bringing back their necklaces as proof.
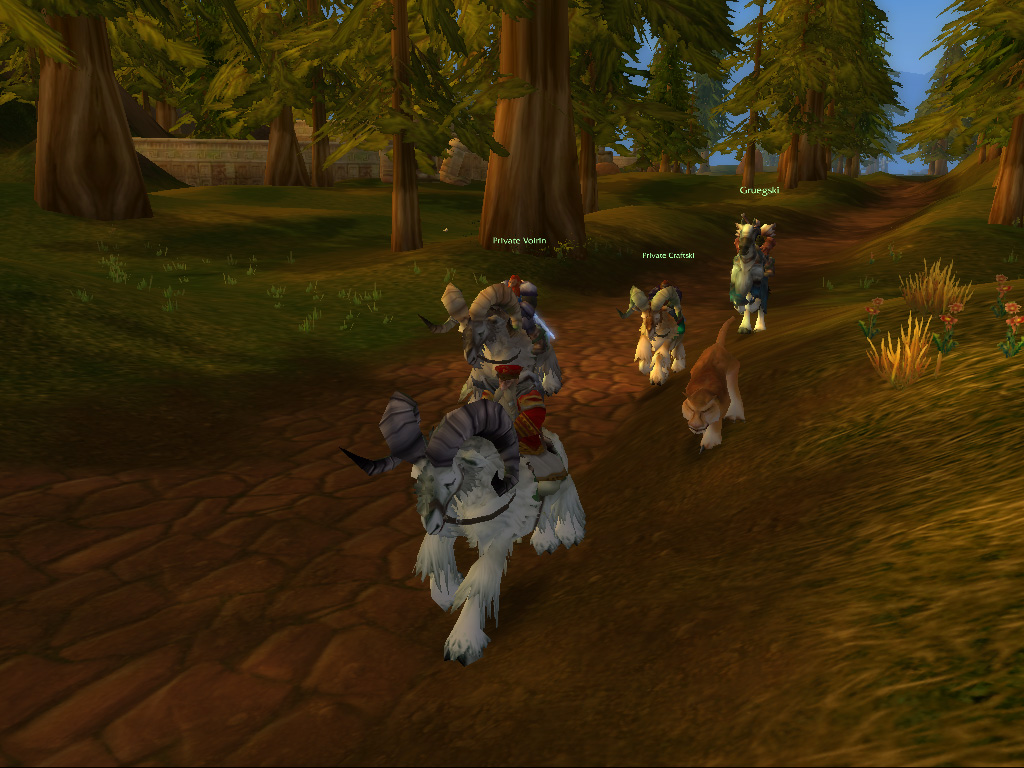
O
ur first task would be to investigate the nearby Troll camps, hoping to find a trace of the Gryphon young. But traversing the Hinterlands, there were other surprises ahead: We had our first encounters with Owlbeasts, vicious hybrids of bear and bird, which usually dwell close to Elven lands. We let the creatures be, and they were unable to catch up to us while we spurred our Rams onwards. Reaching the Troll infested parts of the area, we had little luck, as their sacrificial cages proved to be empty. We did however thin the Troll ranks, and managed to gather enough Troll necklaces to gain the trust of some Wildhammer clan members. With at least one task complete, we returned to the Peak.
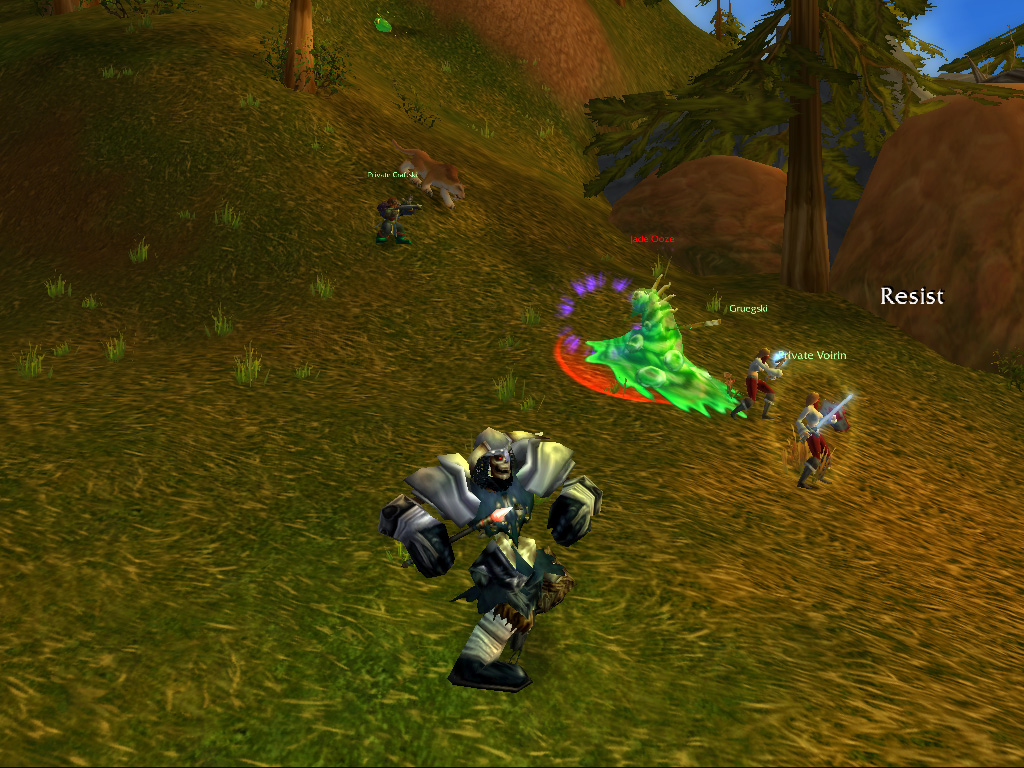
A Gryphon in peril
A lthough our search had been in vain, hope for Sharpbeak wasn't lost yet. Since the Trolls were still the prime suspect, we would have to widen our search. The Gryphon Master of Aerie Peak pointed us in a direction that would be worthwhile to investigate: There was a Troll temple, the Altar of Zul, near the southern mountains, where the Trolls made their sacrifices. If we would find Sharpbeak, or a clue of its whereabouts, it would be there.
We were also given another set of orders: To clear the nearby ruins of an Ooze infestation. As we already had plenty of experience with those slimy creatures, we first turned our attention to the ruins they infested. Empowered by the Hallow's end treats, we made short work of the creatures, splattering them over the ground, while keeping members of the horde at bay while doing so. Perhaps appeared our appearances had scared them off! With the task complete, we set course for the Troll temple.
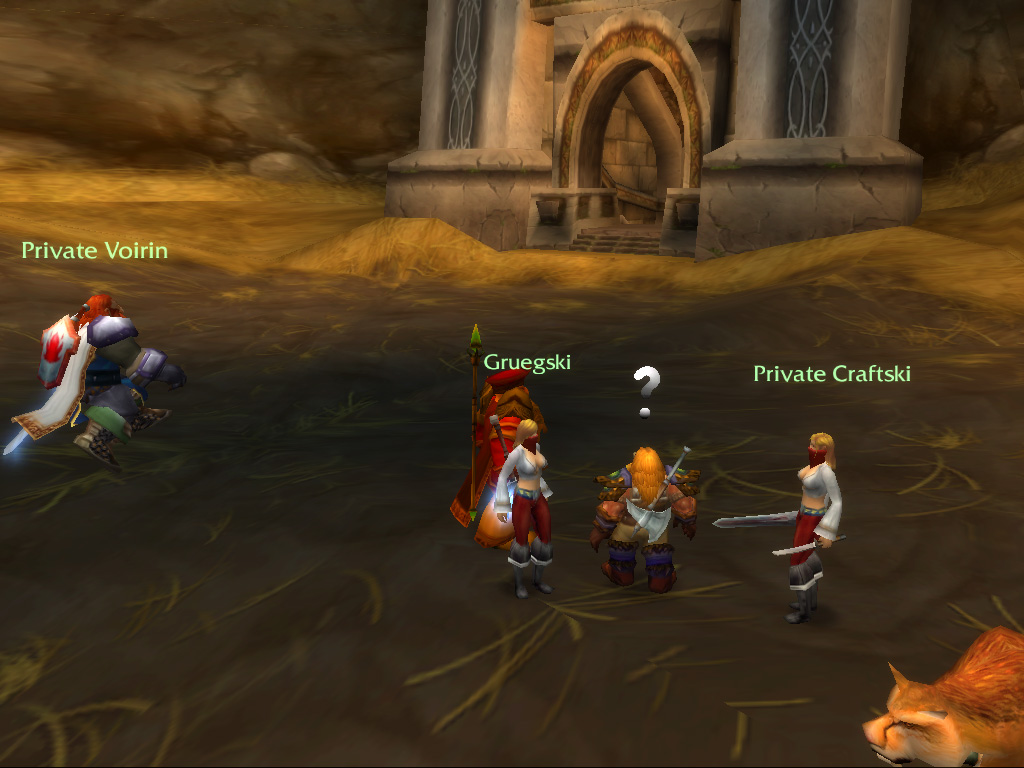
T
he area around the temple was full of Troll warriors so, as we did not want to catch too much attention, we used the high walls surrounding the temple as cover and moved slowly to hide from patrols. Getting closer, we could see gigantic spider guarding the steps to the temple's summit, how would we ever overcome such a creature? From there on, Craftski led us forwards, leading us to a safe path which allowed passage past the creature, enabling us to climb the temple from the side. As we reached the top we were met by two Troll priestesses, who immediately engaged us in combat! But guessing their power, they only proved to be apprentices, and we easily overcame the duo.
Rummaging through their belongings, we found an ornamental mallet, used for their rituals. Expecting such a hammer to prove useful, we stashed it away in our backpacks. As we searched the Altar of Zul itself, we found no trace of Sharpbeak, and with a heavy heart we returned to Aerie Peak with our findings. Even though we had reached a dead end, the Wildhammer Dwarves would not have any of it, and searched for another way to find Sharpbeak. And there was one last way: We would have to bring one of Sharpbeaks feathers to the Blasted Lands, in the far south, and seek help from a Wildhammer Dwarf who had turned to the powers of the Twisting Nether.
Rummaging through their belongings, we found an ornamental mallet, used for their rituals. Expecting such a hammer to prove useful, we stashed it away in our backpacks. As we searched the Altar of Zul itself, we found no trace of Sharpbeak, and with a heavy heart we returned to Aerie Peak with our findings. Even though we had reached a dead end, the Wildhammer Dwarves would not have any of it, and searched for another way to find Sharpbeak. And there was one last way: We would have to bring one of Sharpbeaks feathers to the Blasted Lands, in the far south, and seek help from a Wildhammer Dwarf who had turned to the powers of the Twisting Nether.
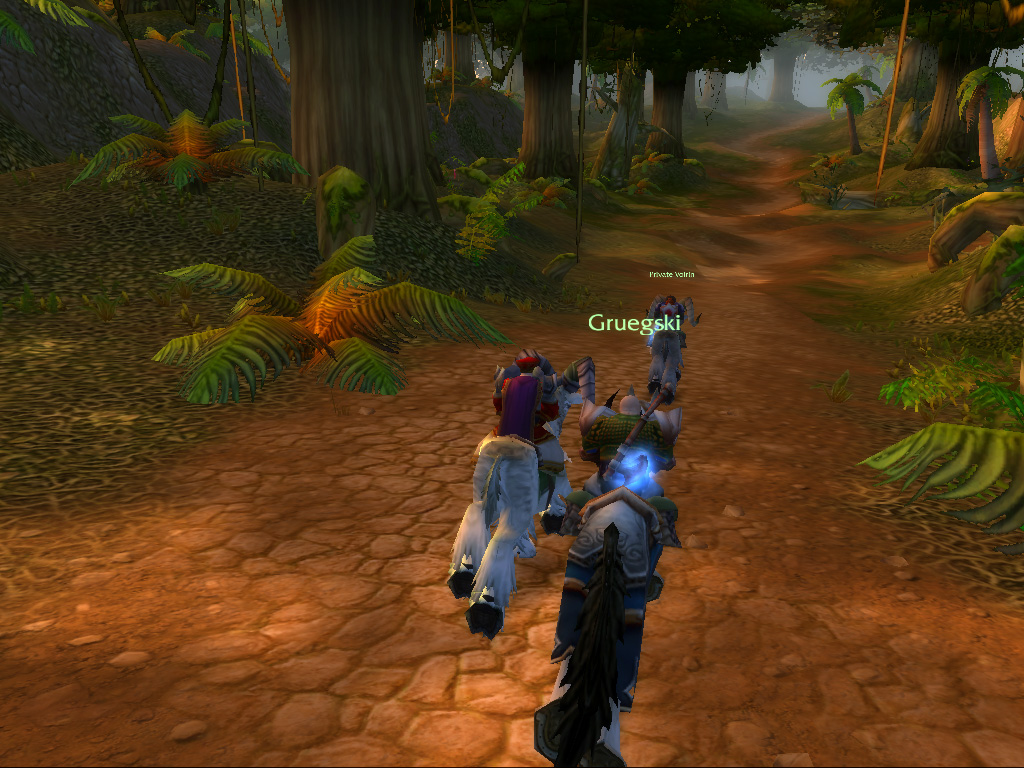
T
o reach the Blasted Lands, we would have to travel east of Duskwood, beyond the Swamp of Sorrows. But we had other plans first: Instead of traveling east, we set course south from Darkshire, heading to Stranglethorn. For a long time, we had avoided the jungle, hating the heat and weary of the many Horde troops that patrolled the roads. But we had trained hard, and were confident we could overcome the challenge. We headed for the port of Booty Bay, a trip which proved to be uneventful, the tales of Horde armies marching through the jungle exaggerated,
We arrived at Booty Bay, a large cutthroat port, where the captain of the Blackwater Raiders informed us there was a threat looming: One of their foes, The Bloodsail Buccaneers were planning to siege the bay, threatening the port and one of the crossings to Kalimdor.
We arrived at Booty Bay, a large cutthroat port, where the captain of the Blackwater Raiders informed us there was a threat looming: One of their foes, The Bloodsail Buccaneers were planning to siege the bay, threatening the port and one of the crossings to Kalimdor.
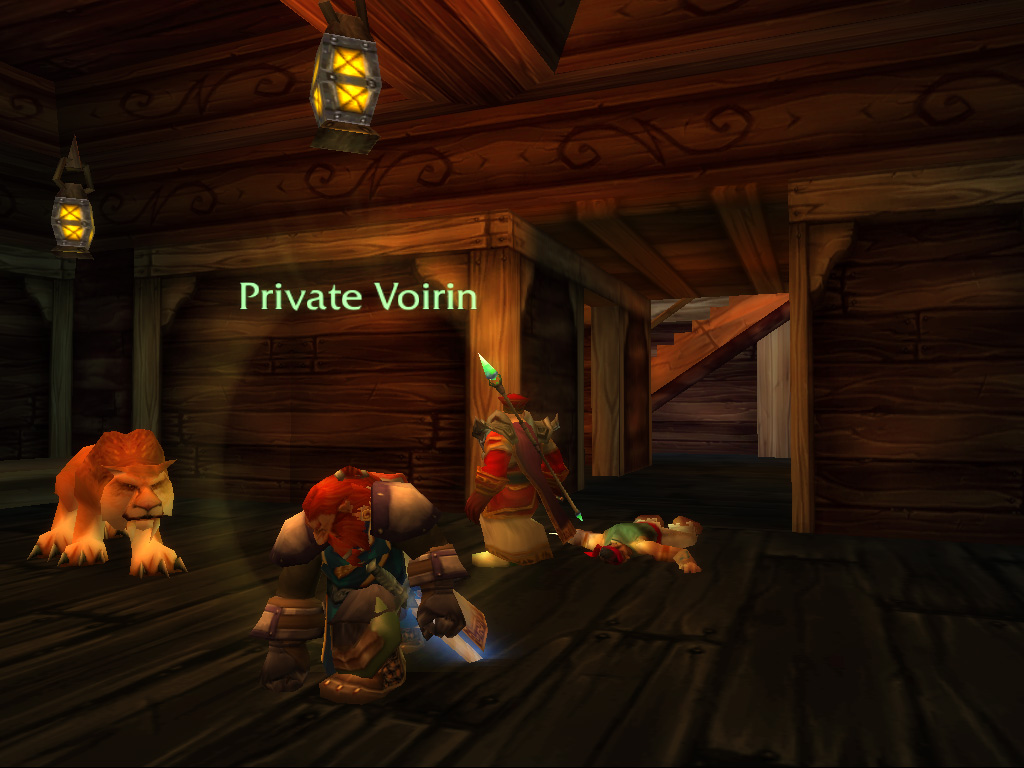
Pirates ahoy!
W e were sent to scout the southern shoreline, investigating the actions of the Buccaneers and looking for their presence. We had to travel around the cove to reach the southern beach, where we eventually found a small boat dragged ashore. As we rummaged through the belongings, we were suddenly jumped but a group of Buccaneers, hoping to keep us from discovering their intentions. They didn't pose much of a threat, and afterwards were able to salvage something: Craftski had found a map with a small note in their pockets!
Returning to Booty Bay with our findings, we were sent out once again, this time to a larger encampment south. If the Bloodsail Buccaneers were truly planning an attack, we should be able to find more details there. At the same time other sailors, impressed by our actions against the Buccaneers asked for other favours, ranging from gathering snuff to finding a magical eye the pirates had stolen!
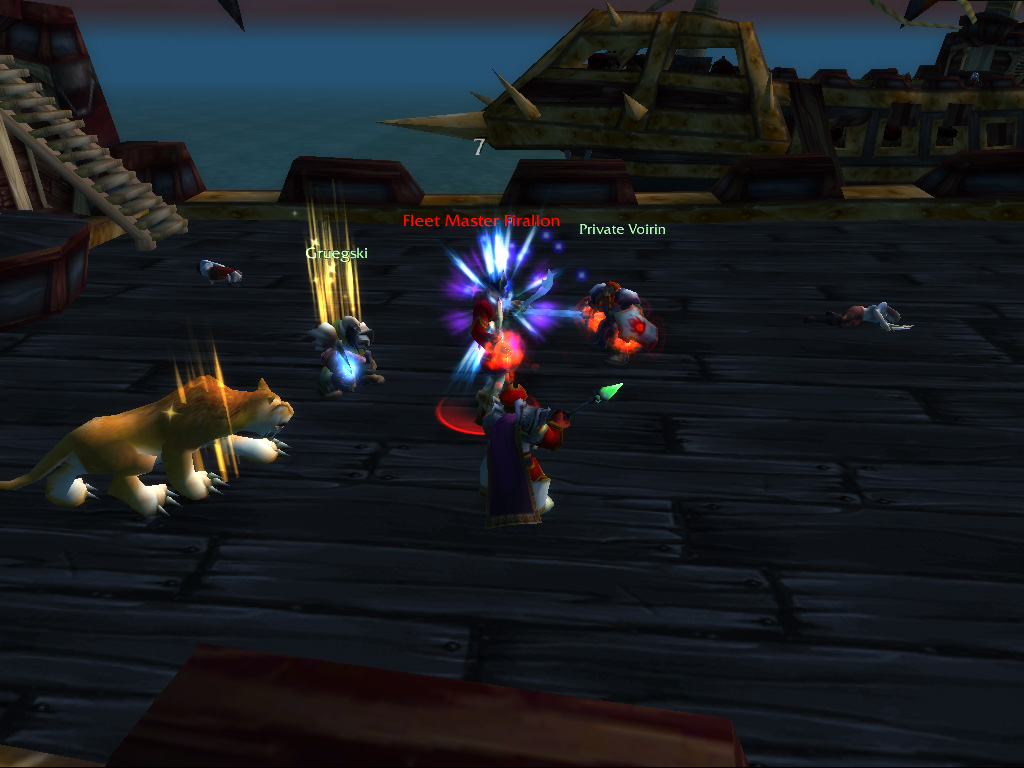
T
he encampment proved to a large series of tents, and was patrolled heavily by Bloodsail pirates. From here we could also see large Bloodsail ships, anchored in the distance, there surely was something afoot! We started taking out the patrols, and felt a bit like pirates, taking their snuff and valuables. In one of the larger encampments, we were able to find a set of charts and orders, sealed in an envelope, surely this would shed some light on what was happening! Delivering both items, and the stolen snuff, in Booty Bay, we were informed the Bloodail pirates were indeed planning a raid! But this time we had their plans, and knew the location where they would come ashore. It was time for a nice surprise!
Our orders were to kill their Fleet Master, Firalon, and his two captains, which would leave the Bloodsails leaderless and scattered. While we had been away, the pirate ships we had seen previously had now moved closer to the shoreline, in preparation for their attack. This allowed us to swim across and climb aboard! And drenched in water, but ready for a fight, we entered the deck of the first ship. and fought our way to the captain, which proved to be a Gnome. Still, four Dwarves easily overwhelmed the foe, and with the first captain down, we started swimming to the next ship.
Our orders were to kill their Fleet Master, Firalon, and his two captains, which would leave the Bloodsails leaderless and scattered. While we had been away, the pirate ships we had seen previously had now moved closer to the shoreline, in preparation for their attack. This allowed us to swim across and climb aboard! And drenched in water, but ready for a fight, we entered the deck of the first ship. and fought our way to the captain, which proved to be a Gnome. Still, four Dwarves easily overwhelmed the foe, and with the first captain down, we started swimming to the next ship.
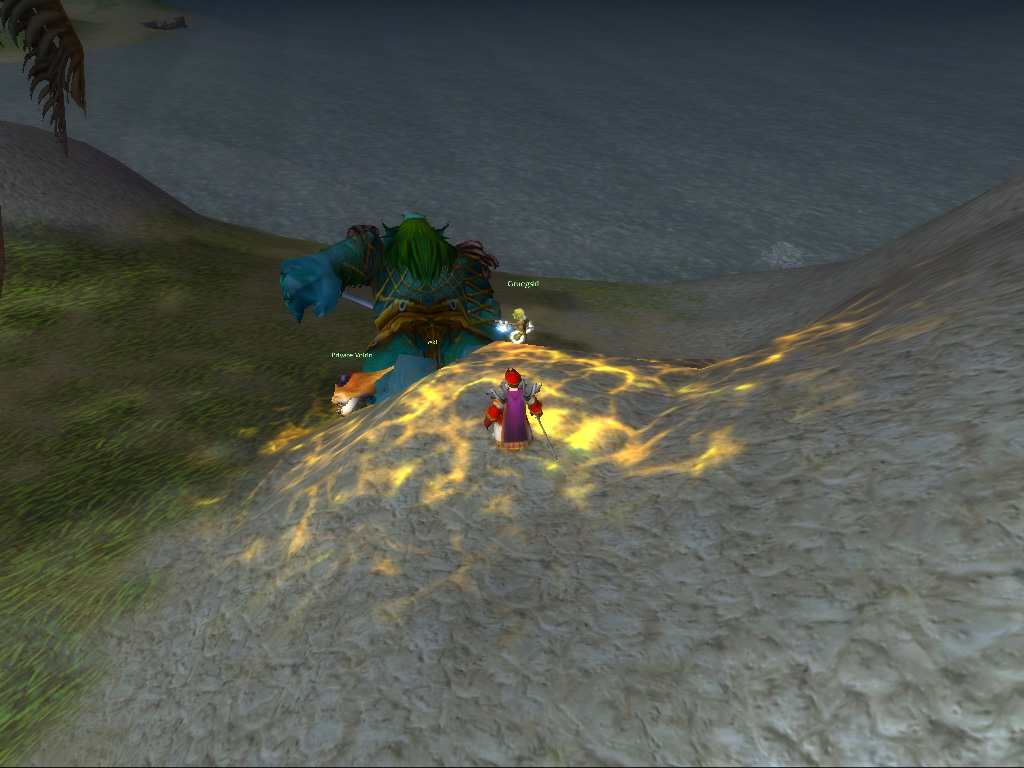
A
s we took out the second captain, this time a Goblin, we were able to find the missing magical eye: The Booty Bay sailor would be more than pleased! This left us only with the Fleet Master to take out, who by now had been alerted of our attacks. That didn't keep us from launching a frontal attack, and even though his fellow pirates kept running for reinforcements, and more buccaneers answered to his call for aid, we soon confronted him on his ships deck. More pirates joined the fight, but we were able to hold them off, while their captain tried to defeat us.
This proved to be in vain, as our combined strength proved to be too much for him, and with a final blast from Craftski's rifle the Bloodsail were left leaderless. As we got away in the commotion, and followed the beach back to Booty Bay, we suddenly ran into a Sea Giant, chasing us along the shore! We accepted the challenge, making the creature regret its actions, as it soon collapsed on the beach. Weary from all the fighting, we reached Booty Bay and informed the Blackwater Raiders of our success: The port was safe once more!
This proved to be in vain, as our combined strength proved to be too much for him, and with a final blast from Craftski's rifle the Bloodsail were left leaderless. As we got away in the commotion, and followed the beach back to Booty Bay, we suddenly ran into a Sea Giant, chasing us along the shore! We accepted the challenge, making the creature regret its actions, as it soon collapsed on the beach. Weary from all the fighting, we reached Booty Bay and informed the Blackwater Raiders of our success: The port was safe once more!
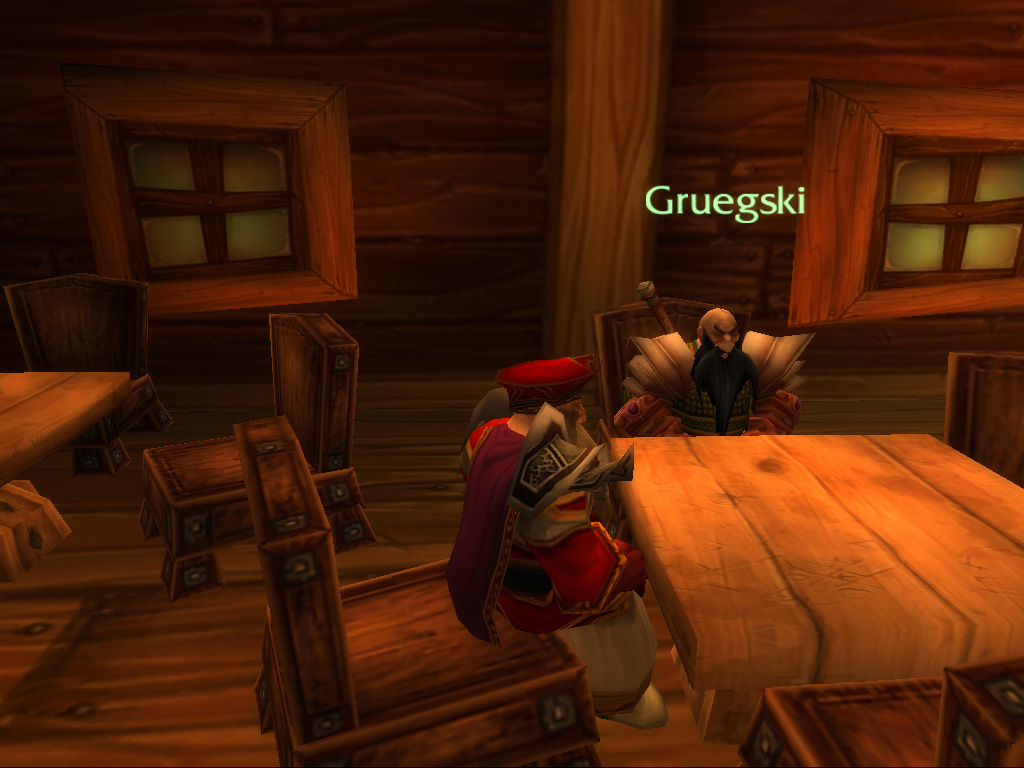
D
rinking a fine ale in the inn, Gruegski reminded us we still had a job to complete: We still had to go to the Blasted Lands to find that Blasted Dwarf! Finishing our drinks, we traveled back to Darkshire, and turned east this time. This path took us through Deadwind Pass, a mountainous, haunted canyon, where we could see the spires of Karazhan in the distance. Karazhan was once the home of the mighty wizard Medivh, and was rumoured to filled with wondrous artefacts. But such a place would be beyond our might to investigate, and we continued the path towards the Swamp of Sorrows.
Here we had to be weary, the Swamps were a Horde staging ground during the First War, and their presence was still strong. We led our rams through the forests as we evaded patrols from the Horde outpost, Stonard. Eventually we reached the mountains of the Blasted Lands, and from there it was a short travel to our destination: The Human stronghold Nethergarde Keep. We met the Dwarf we were looking for, and told him of the troubles back home. He agreed to help us, but wanted something in return: A magical artefact from the Troll temple-city of Zul'Farrak, far away in Tanaris, Kalimdor! This would require planning, and as much as we wanted to help Sharpbeak, recovering the item would have to wait.
Here we had to be weary, the Swamps were a Horde staging ground during the First War, and their presence was still strong. We led our rams through the forests as we evaded patrols from the Horde outpost, Stonard. Eventually we reached the mountains of the Blasted Lands, and from there it was a short travel to our destination: The Human stronghold Nethergarde Keep. We met the Dwarf we were looking for, and told him of the troubles back home. He agreed to help us, but wanted something in return: A magical artefact from the Troll temple-city of Zul'Farrak, far away in Tanaris, Kalimdor! This would require planning, and as much as we wanted to help Sharpbeak, recovering the item would have to wait.
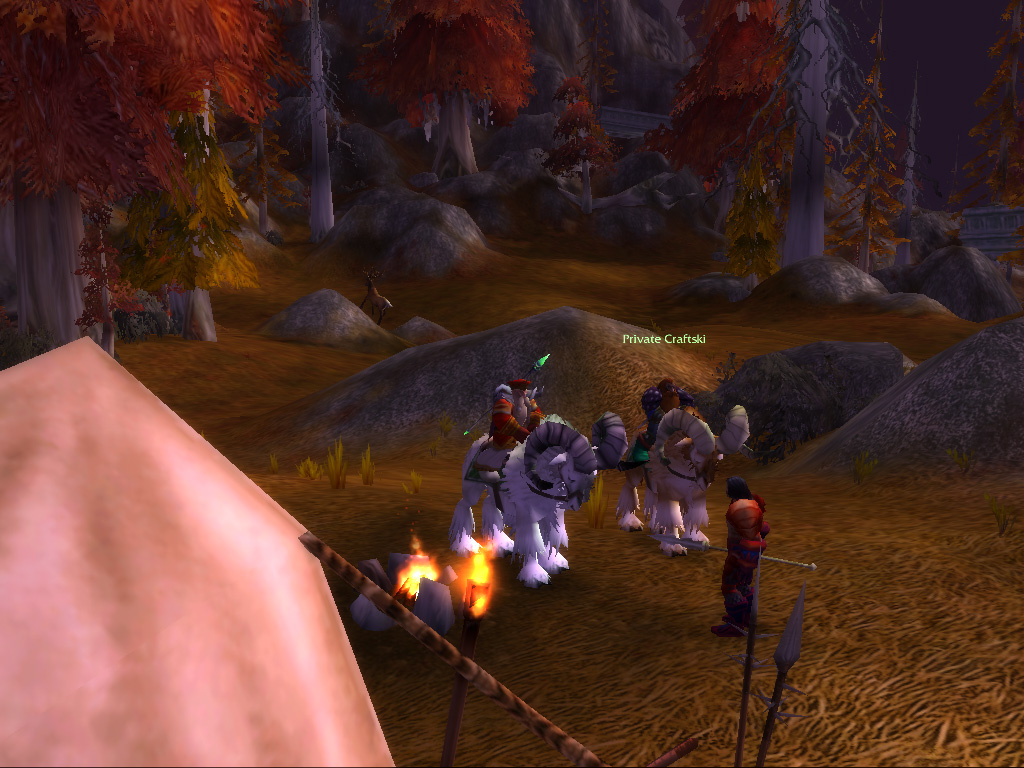
Craftski's big test
O ur next journey took us to Kalimdor however, as we had been called to aid the Alliance efforts in Feralas, a wild jungle south of Desolace. But we would also travel to Kalimdor for another reason: As we travelled by ship from Booty Bay, Craftski requested a slight detour. He had to travel to Azshara, near the Night Elf lands of Ashenvale, to complete his training in the art of dragonscale leatherworking. Our next port was the Goblin town of Ratchet, from where we, once again, made our way through the Horde-held Barrens, only this time heading north. We entered Ashenvale forest by charging through a small Horde settlement, they would never know what was happening!
From there on, until the entrance to Azshara, the roads were safe, as we ran into Night Elf patrols and sentinels along the road. Entering Azshara, Craftski seemed to know the way, leading us through blood-red forests and along sharp cliffs. Eventually we reached a small encampment, where Craftski handed over a large bag full of materials and finely crafted items to the leatherworker, as proof of his craft. It seemed Craftski had done a worthy job, and was initiated into the secrets of working with dragonscales.
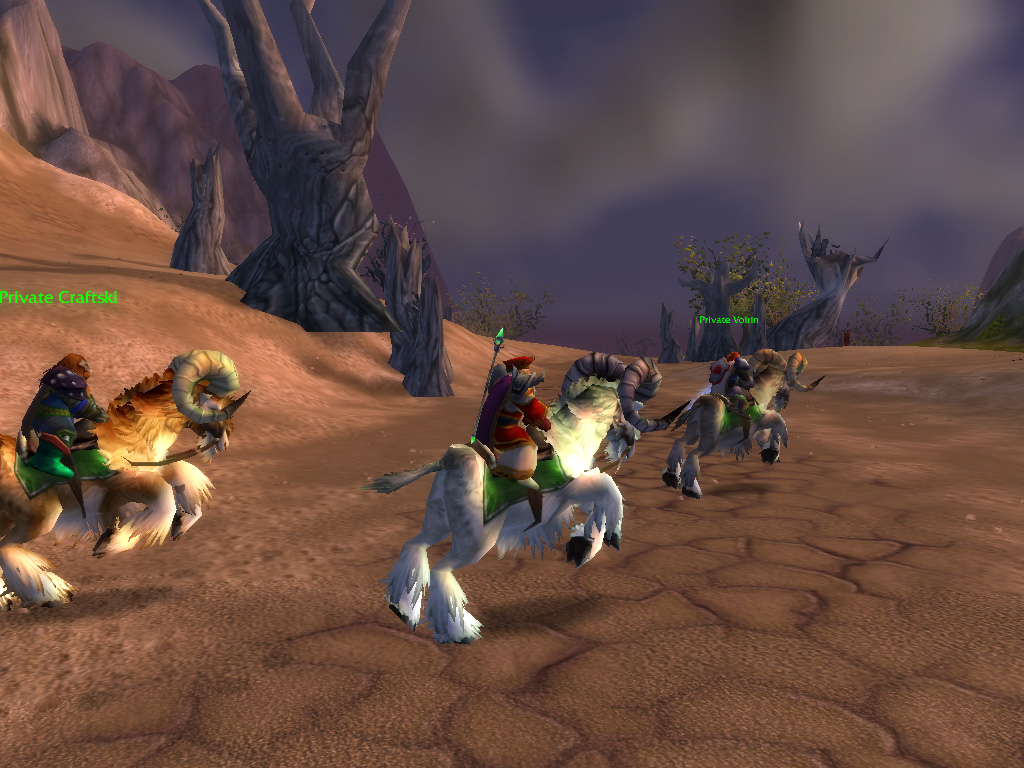
Welcome to the jungle
F inding a small Alliance outpost not far away, we flew by Gryphon to Njel's Point in Desolace, from where we continued southwards. Desolace was as desolate as we left it, Kodo spirits and Centaur still roaming the barren wastes. We followed to road to Feralas until we saw a large shape lumbering towards us, walking along the road. We immediately cleared the road, as we knew a famed Horde warrior patrolled the roads: Rexxar the Half-Ogre and his bear Misha. Keeping clear, knowing we would not be a match for the mighty hunter, we continued through the hills, resuming our journey.
F inding a small Alliance outpost not far away, we flew by Gryphon to Njel's Point in Desolace, from where we continued southwards. Desolace was as desolate as we left it, Kodo spirits and Centaur still roaming the barren wastes. We followed to road to Feralas until we saw a large shape lumbering towards us, walking along the road. We immediately cleared the road, as we knew a famed Horde warrior patrolled the roads: Rexxar the Half-Ogre and his bear Misha. Keeping clear, knowing we would not be a match for the mighty hunter, we continued through the hills, resuming our journey.

I
t didn't take long to reach the border with Feralas, where endless sand and rock was exchanged for an ancient forest. From here on we followed a path flanked on each side by two enormous mountains, their peaks lost in the greenish haze. The forest turned and twisted, passing under fallen trees and crossing small streams. Passing a huge waterfall and scaling a steep cliff, we eventually found ourselves on a wooden pier, originally built by Night Elves.
Here, Voirin told us he had been requested to gather the spirits of winged serpents that dwelled along the shore, and taking out an enchanted bramble, beckoned us to follow. We were able to find these fabled creatures quickly thanks to Craftski's tracking abilities, and as each serpent fell, Voirin waved the bramble to draw the creature's spirit into it. With three essences gathered, our job was complete, and we returned to the docks.
Here, Voirin told us he had been requested to gather the spirits of winged serpents that dwelled along the shore, and taking out an enchanted bramble, beckoned us to follow. We were able to find these fabled creatures quickly thanks to Craftski's tracking abilities, and as each serpent fell, Voirin waved the bramble to draw the creature's spirit into it. With three essences gathered, our job was complete, and we returned to the docks.
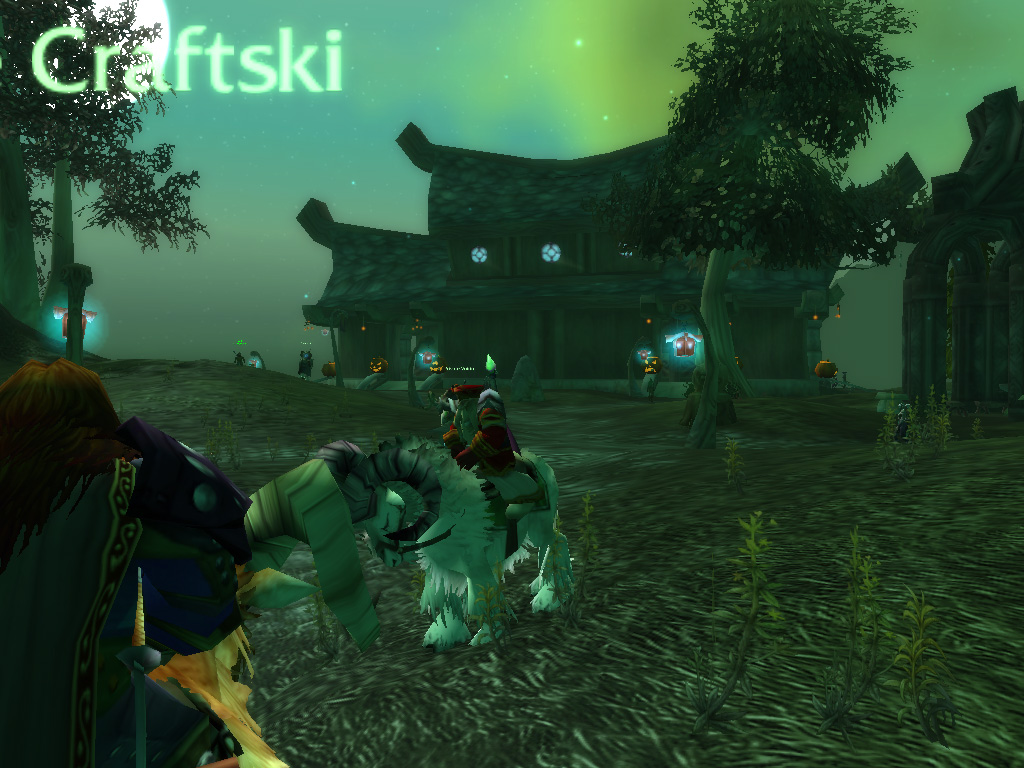
O
ur destination was Feathermoon, the Night Elf stronghold in the area, and to get there, we would need a boat. Just as we were planning to take a risk and swim the distance, an Alliance ship sailed into view, which brought us to Sardor Isle, an inland not far from the coast. Coming ashore at the Stronghold's docks, we made our way to one of the captains, reporting for duty. Our first assignment would be to take care of the nearby Naga, the Hatecrest, as their raids came ever closer to the walls. As we set out to fight these creatures, Gruegski informed us of his double agenda for visiting Feathermoon: Here he was able to train his alchemy skills from a true master, raising his skills to an even more impressive standard. Learning new recipes and distillations, he was now able to create even more useful potions!
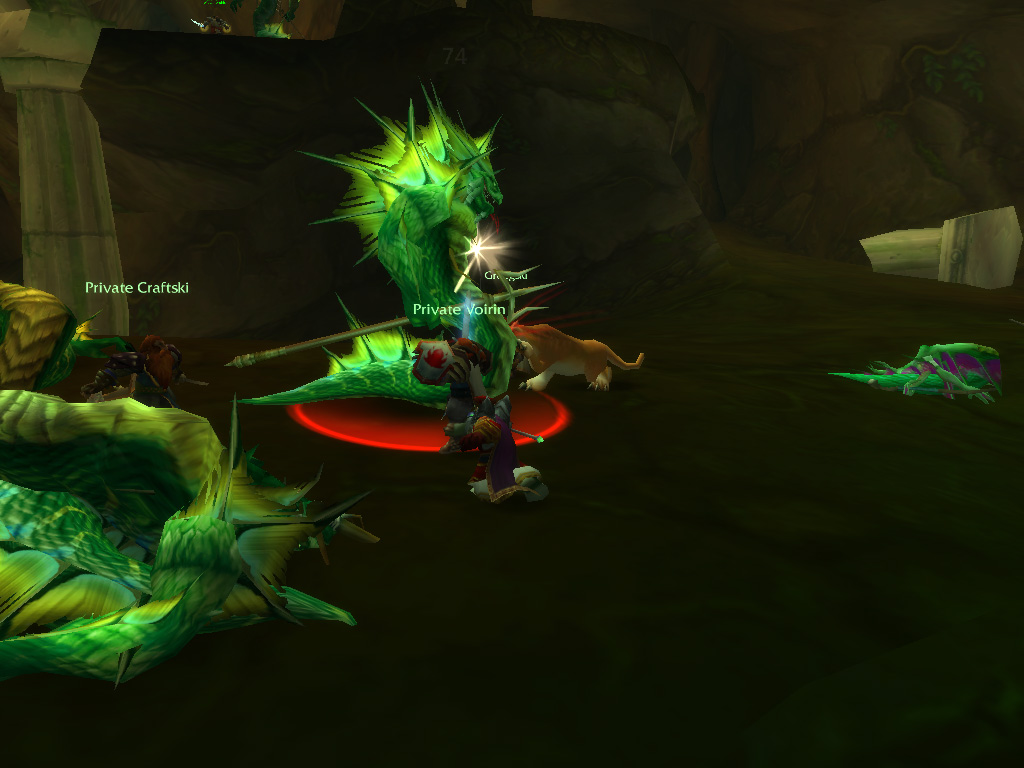
T
he Hatecrest Naga could be found all along the southern shore of Sardor Isle, slithering through the ruins of an ancient temple, searching for relics. We set out to remove their presence from the beaches, driving them back to the sea. We fought hardened warriors and insidious spellcasters, and took their scales as trophies. As we returned with proof of our success, we were sent out once more, this time to an island to the south, the ominously named Isle of Dread. It appeared the Naga's leader, called Lord Shalzaru, had found a mysterious relic, and had retreated to the Isle's caverns.
This time there wasn't a boat which could take us across, so we had to swim, eventually coming ashore soaked, but alert. Here we found the Naga presence much stronger, but were able to advance slowly. We entered the vast caves, where Craftski led us in the right direction, as the paths spiralled into all directions. Thanks to his tracking, we were soon able to confront Shalzaru, and took the relic for ourselves. With the way out still clear, made haste and carefully returned the artefact to Feathermoon. Here we were informed that the relic's origins were unknown, and more study would be required to find out why the Naga were looking for such artefacts.
This time there wasn't a boat which could take us across, so we had to swim, eventually coming ashore soaked, but alert. Here we found the Naga presence much stronger, but were able to advance slowly. We entered the vast caves, where Craftski led us in the right direction, as the paths spiralled into all directions. Thanks to his tracking, we were soon able to confront Shalzaru, and took the relic for ourselves. With the way out still clear, made haste and carefully returned the artefact to Feathermoon. Here we were informed that the relic's origins were unknown, and more study would be required to find out why the Naga were looking for such artefacts.
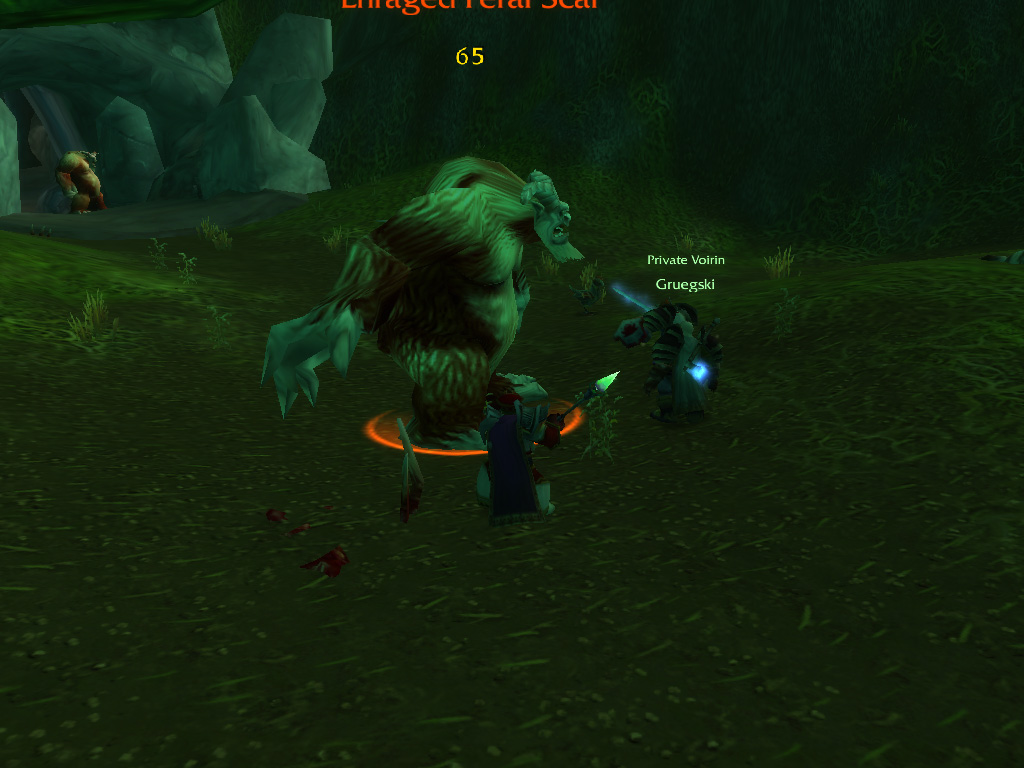
W
ith Feathermoon safe, we were trusted with another task: To help in search for a missing courier. We were told the courier had left using a rowboat, and finding boat would perhaps give us a clue. As we searched the shores of the mainland, we eventually found a sunken wreck, surrounded by powerful water elementals and Sea Giants. Sneaking our way past, we discovered a discarded knife, which we returned to Feathermoon. Using some unusual magic, one of the Elves was able to read the knife's history, and we were able to understand what had happened.
The scout had abandoned the boat, after an encounter with Woodpaw Gnolls, and was finally caught off guard by water elementals. As we had not found the Elf's body, it was believed he had survived, and perhaps more clues could found in one of the Gnolls camps, further in the jungle. As we were ready to set out once more, a Human leatherworker asked to gather leather hides, from Yetis that dwelled in faraway caves.
The scout had abandoned the boat, after an encounter with Woodpaw Gnolls, and was finally caught off guard by water elementals. As we had not found the Elf's body, it was believed he had survived, and perhaps more clues could found in one of the Gnolls camps, further in the jungle. As we were ready to set out once more, a Human leatherworker asked to gather leather hides, from Yetis that dwelled in faraway caves.

F
ollowing the path deeper into the jungle, the foliage thickened, giving the sunlight a greenish glow. Here we could hear the calls from wild birds, the gibberish from Ogres and the roars from Yetis: We were not far off from our destination! We turned from the path, and arrived at a small clearing, leading into a cave. Raging Yetis rummaged through the bushes and rocks and we agreed: We could probably find some good hides here! As we assaulted the creatures, we drove them back into the cave, gathering scraps of their pelts, while Craftski helped us skinning the finest hides. One of the creatures appeared to have found a metal egg-like machine, clutching it in its claws, and as we inspected the machine, it suddenly sprung to life, the moment we pressed one of the buttons.
A disembodied voice called out to those listening, and we responded. It appeared to be Gnomish communication device, and the Gnome on the other side needed our assistance! Somewhere in the cave ahead, a robot could be find, stolen by the Yetis. It would be up to us to get the machine back! We made our way into the cave, while still gathering pieces of fur and leather. Craftski had the day of his life as he found a pristine piece of skin, but sadly remembered all the materials had been promised to the leatherworker in Feathermoon. We eventually found the robot, and with instructions over the radio, managed to repair and reactivate the machine. As we escorted the chicken-like robot out of the cavern, more and more Yetis appeared from the cavern's depths, hoping to keep to from rescuing the machine. But we hammered and blasted our way through and soon found ourselves outside. From there, the robot turned to the main path, until it suddenly spread its metal wings and flew off with a blast! Thanking us over the radio, the Gnome told us to visit Booty Bay for a reward.
A disembodied voice called out to those listening, and we responded. It appeared to be Gnomish communication device, and the Gnome on the other side needed our assistance! Somewhere in the cave ahead, a robot could be find, stolen by the Yetis. It would be up to us to get the machine back! We made our way into the cave, while still gathering pieces of fur and leather. Craftski had the day of his life as he found a pristine piece of skin, but sadly remembered all the materials had been promised to the leatherworker in Feathermoon. We eventually found the robot, and with instructions over the radio, managed to repair and reactivate the machine. As we escorted the chicken-like robot out of the cavern, more and more Yetis appeared from the cavern's depths, hoping to keep to from rescuing the machine. But we hammered and blasted our way through and soon found ourselves outside. From there, the robot turned to the main path, until it suddenly spread its metal wings and flew off with a blast! Thanking us over the radio, the Gnome told us to visit Booty Bay for a reward.
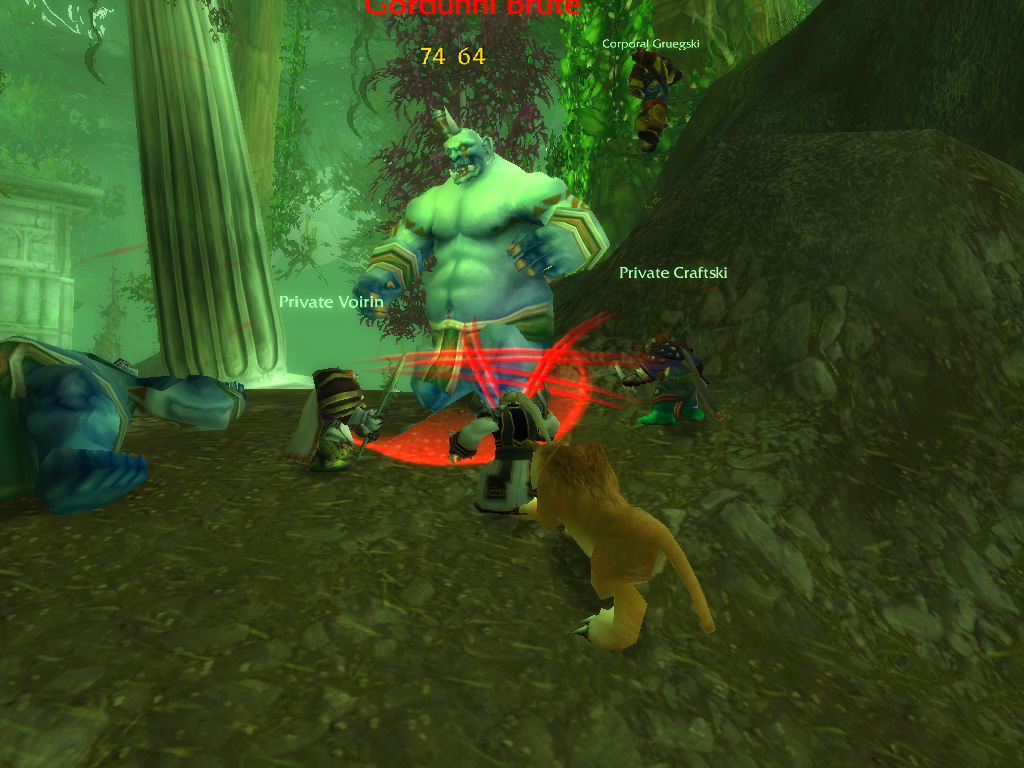
T
he escort had led us almost back to Feathermoon, so we quickly returned to deliver the Yeti leather. The Human was extremely pleased, especially by the perfect example, which Craftski was sad to see go. While restocking our supplies, we were hailed by a Night Elf, who wanted us to take care the Ogre presence in the wilderness, to drive them back to their city, Dire Maul. We once more returned to the jungle, and arrived at the Ogre-infested ruins, ready for a fight. But this wasn't the first time we fought Ogres, and although they proved to be skilful spellcasters, they weren't a match for four Dwarves. Especiallt Gruegski seemed to enjoy the fight, hammering the large creatures from above, leaping down from high-up rocks. With their numbers diminished, we returned to the path, this time to continue our search for the missing courier.
We arrived at the Woodpaw Gnoll camp, and Scattering the Gnolls before us, started searching their huts and belongings. We searched different directions, and soon were called over by Voirin: He had found Elven Backpacks, embossed with the seal of Feathermoon Stronghold. These must be the belongings of the courier, now know to be named Raschal! Inside we found the goods he was transporting, but also a small note, directed to the reader. It appeared Raschal had discovered a nest of dangerous bug-like creatures in the south, and believing it to be a threat to all of Feralas, had gone to investigate.
We arrived at the Woodpaw Gnoll camp, and Scattering the Gnolls before us, started searching their huts and belongings. We searched different directions, and soon were called over by Voirin: He had found Elven Backpacks, embossed with the seal of Feathermoon Stronghold. These must be the belongings of the courier, now know to be named Raschal! Inside we found the goods he was transporting, but also a small note, directed to the reader. It appeared Raschal had discovered a nest of dangerous bug-like creatures in the south, and believing it to be a threat to all of Feralas, had gone to investigate.
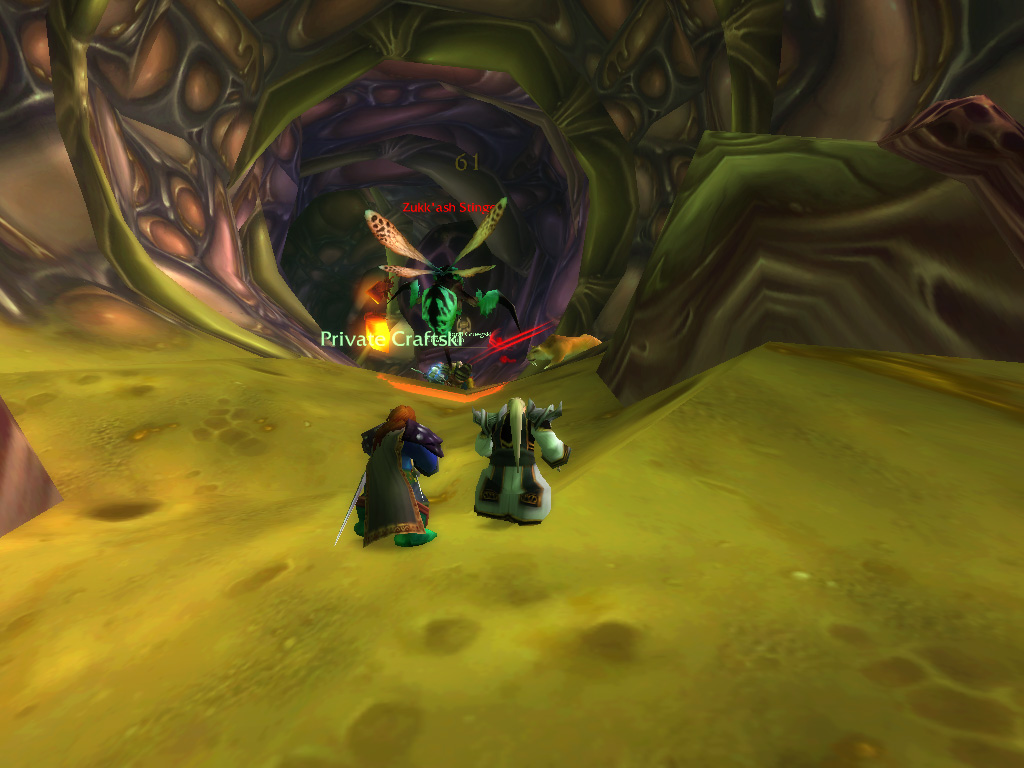
Taking a bug's life
T raveling south, as the note described, we found a hive full of insidious insects, hostile to anything that came near. If we would find a trace of Raschal, it would be here, and if he had gone in alone, it did not bode well. Ascending a spiralling path, we found tunnels along the wall that headed into all directions. Large beetle-like creatures, with tough carapace and sharp mandibles blocked our way, and we were attacked from above by winged insects with sharp stingers, dripping with poison. Thankfully Orangz and Gruegski were able to cure any ailment quickly, and emboldened, we climbed deeper into the hive. Voirin was suddenly distracted, as he had found precious minerals, and needed a pause to mine the deposit. As we sat down for a break, we noticed some kid of pod along the edge of the tunnel, perhaps these were larvae?
Inspecting the pod closer, we could see the faint shadow of a humanoid inside which, as we carefully opened the pod, turned out to be a Night Elf! He appeared to be alive, and stirred when we moved him down from the pod, with Orangz applying first aid. Regaining consciousness, he identified himself as Raschal: It seems we had found our courier! He had been overwhelmed and captured by the insects while sneaking around the hive, just as he wanted to report back to Feathermoon. We told him the tunnels up ahead were clear of insects, which would allow him safe passage, and as Voirin continued mining, the Night Elf stealthily moved away, leaving us with a parcel to deliver.
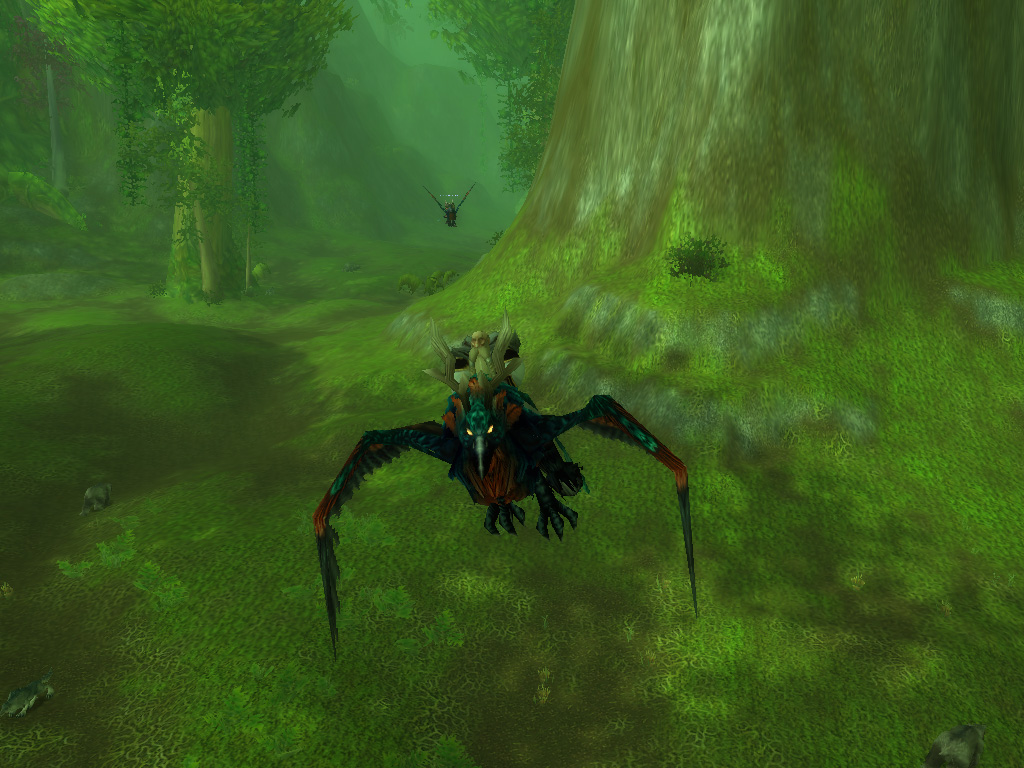
A
s the Night Elf headed to Feathermoon, we turned east, to deliver Raschal's package to a small camp along the eastern border of Feralas, Thalanaar. Letting the path lead our way, we eventually encountered a Horde village, built right on the main road through the jungle! As an outpost, full of Horde warriors, would be far beyond our prowess, we entered the jungle, traveling along a deep river to stay unnoticed. Here we found a fallen tree, which allowed us travel across the river, far away from Horde eyes, enabling us to continue our travels. Reaching Thalanaar, it proved to be even smaller than expected, consisting of only a moonwell and two tents. We delivered the package and were in for a surprise: We would be able to fly back to Feathermoon by Hippogryph!
We had never ridden such creatures before, but they proved to be calm and knew the way. As we soared through the trees, taunting the Horde from above, we soon found ourselves safely back in Feathermoon, perhaps faster than a Gryphon ride! As we had saved their courier and brought back news of the insect threat, we were welcomed as heroes, and received our rewards from Shandris Feathermoon, the commander of the stronghold. Shandris told us the threat was dire, and we would have to deliver a report of these dangerous creatures back to Darnassus. Informing the other Elves of our success against the Ogres, we were now seen us as worthy, and as advice, were told to travel to Tanaris, where a Goblin archaeologist would have a quest for us.
We had never ridden such creatures before, but they proved to be calm and knew the way. As we soared through the trees, taunting the Horde from above, we soon found ourselves safely back in Feathermoon, perhaps faster than a Gryphon ride! As we had saved their courier and brought back news of the insect threat, we were welcomed as heroes, and received our rewards from Shandris Feathermoon, the commander of the stronghold. Shandris told us the threat was dire, and we would have to deliver a report of these dangerous creatures back to Darnassus. Informing the other Elves of our success against the Ogres, we were now seen us as worthy, and as advice, were told to travel to Tanaris, where a Goblin archaeologist would have a quest for us.
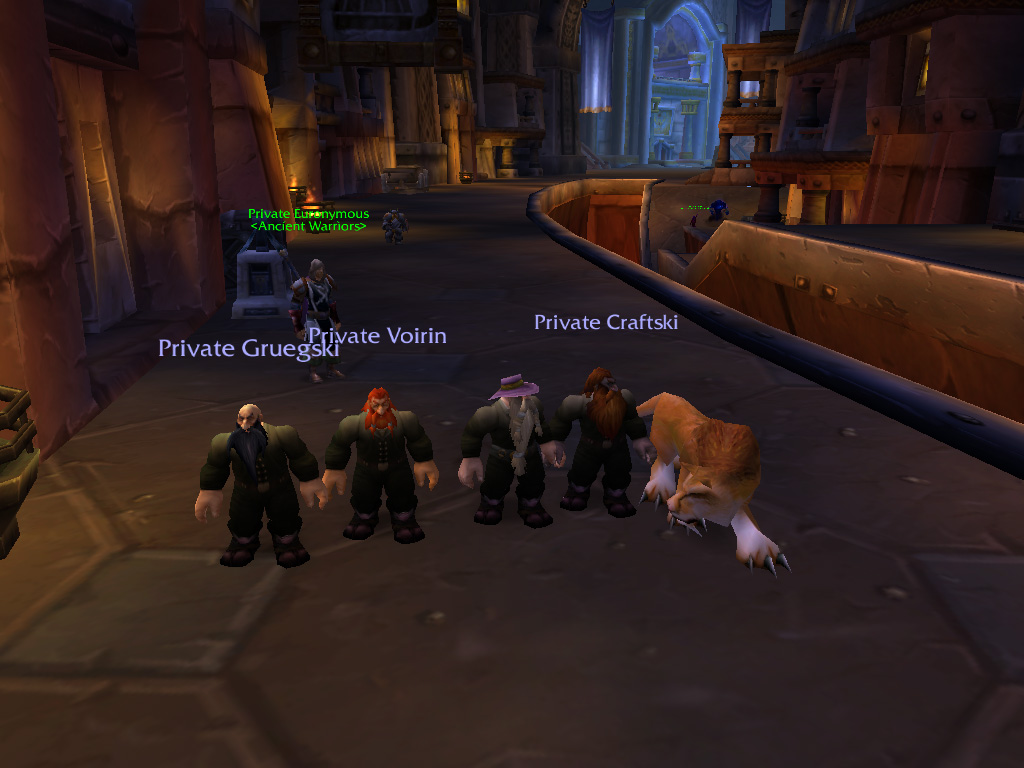
Dressed to impress
F irst, we travelled to Darnassus, once again by Hippgyph: We started to like these creatures! The flight proved to be long, but eventually we found ourselves in the most northern tip of Kalimdor. Here we delivered the report to a priestess in the Temple of Elune: And it appeared we were not alone. More news about these insects, called the Silithid, had come in over the past few weeks, and it did not bode well. The creatures consumed everything from the nearby ecosystem, posing a grave danger to all of Azeroth. Hoping to gain more information, we were ordered to head to Tanaris, where we could find an alchemist with more knowledge about these insects.
But before we travelled to Tanaris, we would travel back to Ironforge: We had a feeling to clear some unfinished business. We continued our training from our class masters, and improved our trading skills. As tailor of our stout company, Orangz felt we should not walk the streets of Ironforge in blood-splattered battlegear, but something stylish. And improving his skills, he had created some finely tailored suits for all of us. Although Craftski's cat was left out, we surely did look eye-catching now!
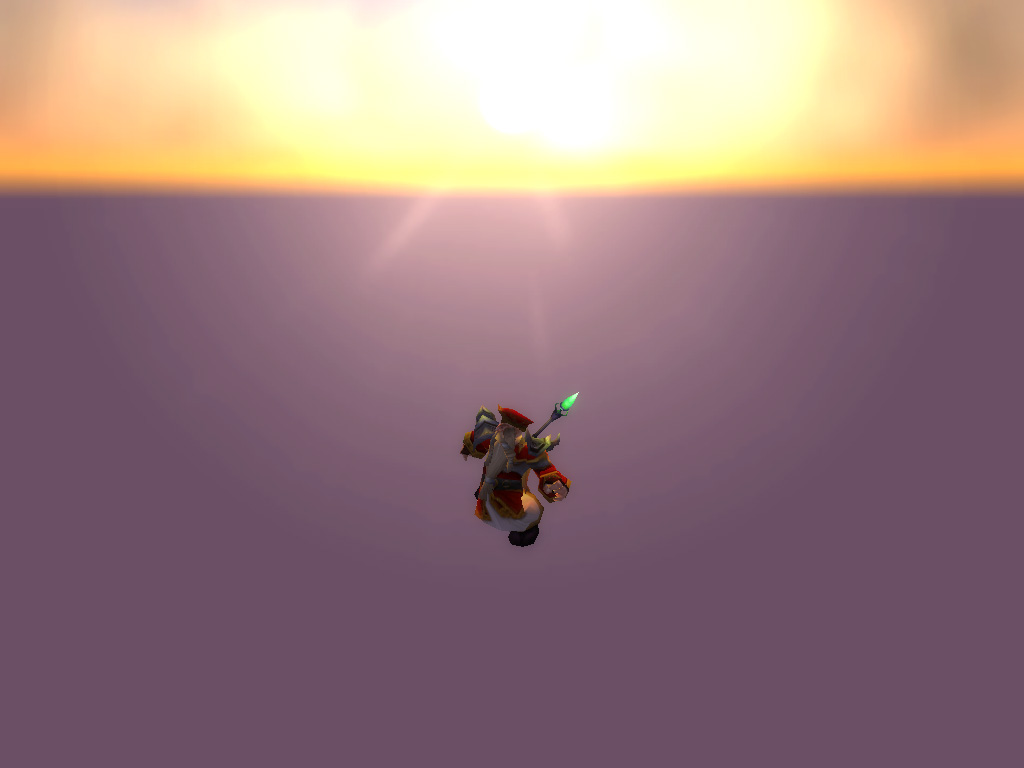
W
e had a night's rest, during which Orangz had strange dreams: He appeared to be falling, endlessly through an empty void, with only a sunset in the distance. And just as he felt the ground near, and angelic wings appearing before him in a hazy blue world, he woke up in a scare. Was this a divine message? Was it a bad omen? We were unsure, but it was etched in his mind for the coming days.

Enchanting is a great tradeskill to turn unneeded items into an advantage! Reduce items into magic essence, and use it to enchant your own!

Vengeance will be ours
E quipped with new, powerful items, improved skills and different tactics, we dared to take the plunge, and we returned to Uldaman! Voirin and Gruegski had been supplied with new shoulder guards, and we agreed, it made them look impressive! We travelled to the dig site in the Badlands and made our way through the large archway. There we discovered the Troggs had reclaimed the tunnels again, so we had to fight our way again past their hordes once more. But this time it proved to be much easier and our hard training certainly did pay off. Troggs, stone constructs and Dark Iron Dwarves: We piled through them and it wasn't long before we stood before the huge doors leading to the chamber of Archaedas.
E quipped with new, powerful items, improved skills and different tactics, we dared to take the plunge, and we returned to Uldaman! Voirin and Gruegski had been supplied with new shoulder guards, and we agreed, it made them look impressive! We travelled to the dig site in the Badlands and made our way through the large archway. There we discovered the Troggs had reclaimed the tunnels again, so we had to fight our way again past their hordes once more. But this time it proved to be much easier and our hard training certainly did pay off. Troggs, stone constructs and Dark Iron Dwarves: We piled through them and it wasn't long before we stood before the huge doors leading to the chamber of Archaedas.
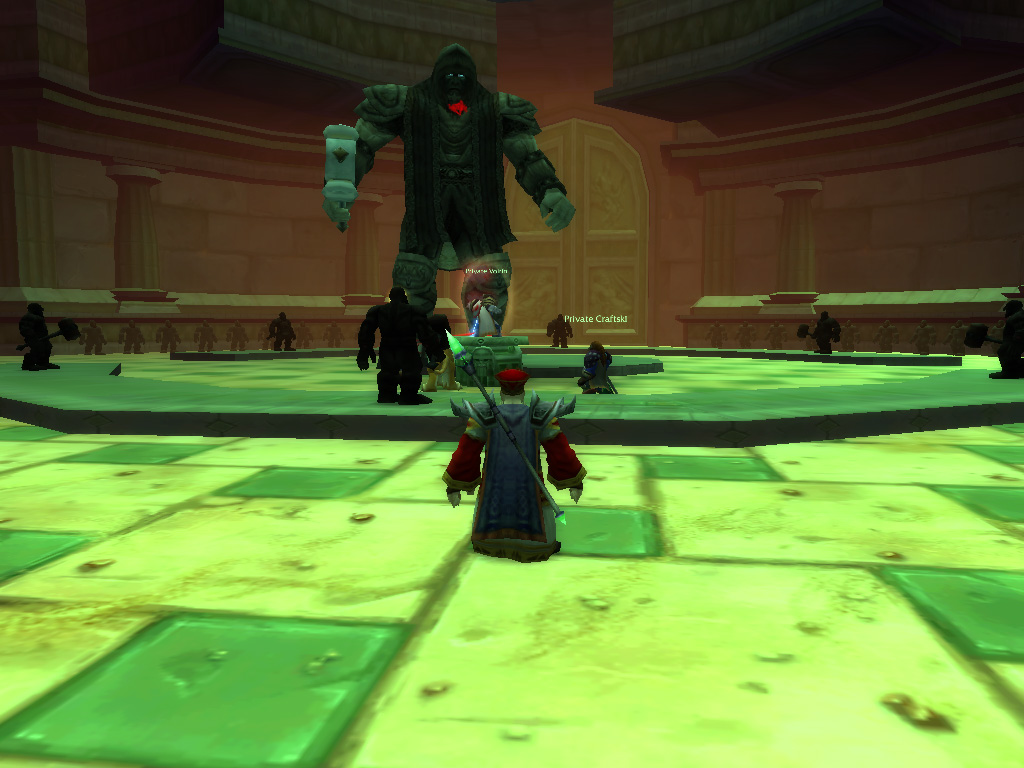
G
athering around the pedestal, we clicked the three buttons, and with the rumbling of stone, Archaedas activated, striding towards Viorin. The fight was on! Hammering, chiselling, and blasting our way at the stone construct, our attacks proved to be more effective than last time, and soon Archaedas yelled out, calling his reinforcements to life. But in comparison to last time, Craftski wasn't breaking a sweat, and neither was his loyal cat, intercepting the constructs and blasting them to pieces before they could close in on the rest of us. With a roar Archaedas called out for more reinforcements, and multiple constructs from the inner ring of the room sprung to life. Vorin acted quickly and gathered all these smaller minions around him, while Orangz created a holy shield to keep their attacks at bay. This gave Gruegski and Craftski an excellent target to blow the constructs away on a hail or lead and holy fury. With the ground still burning from holy fire, the last of these smaller creatures collapsed to the ground and we returned our attention to Archaedas.
Larger chucks of stone came crashing down from the vast construct, and with a bellow Archaedas called out for his final protectors. This time two large stone constructs, standing at the sides of the room, activated and charged in. Craftski and Orangz acted quickly, making sure Gruegski and Voirin were safe while they kept Archaedas busy. Craftski called his cat over, keeping one of the constructs at bay, while Orangz engaged the other one, making it chase him across the room. Then, with a final shot from Craftski, a thundering roar echoed through the room as Archaedas came crumbling down, in a hail of stone and dust, and the other constructs deactivated. As we stood there, relishing our victory, a door on the other side of the room slowly swung open.
Larger chucks of stone came crashing down from the vast construct, and with a bellow Archaedas called out for his final protectors. This time two large stone constructs, standing at the sides of the room, activated and charged in. Craftski and Orangz acted quickly, making sure Gruegski and Voirin were safe while they kept Archaedas busy. Craftski called his cat over, keeping one of the constructs at bay, while Orangz engaged the other one, making it chase him across the room. Then, with a final shot from Craftski, a thundering roar echoed through the room as Archaedas came crumbling down, in a hail of stone and dust, and the other constructs deactivated. As we stood there, relishing our victory, a door on the other side of the room slowly swung open.
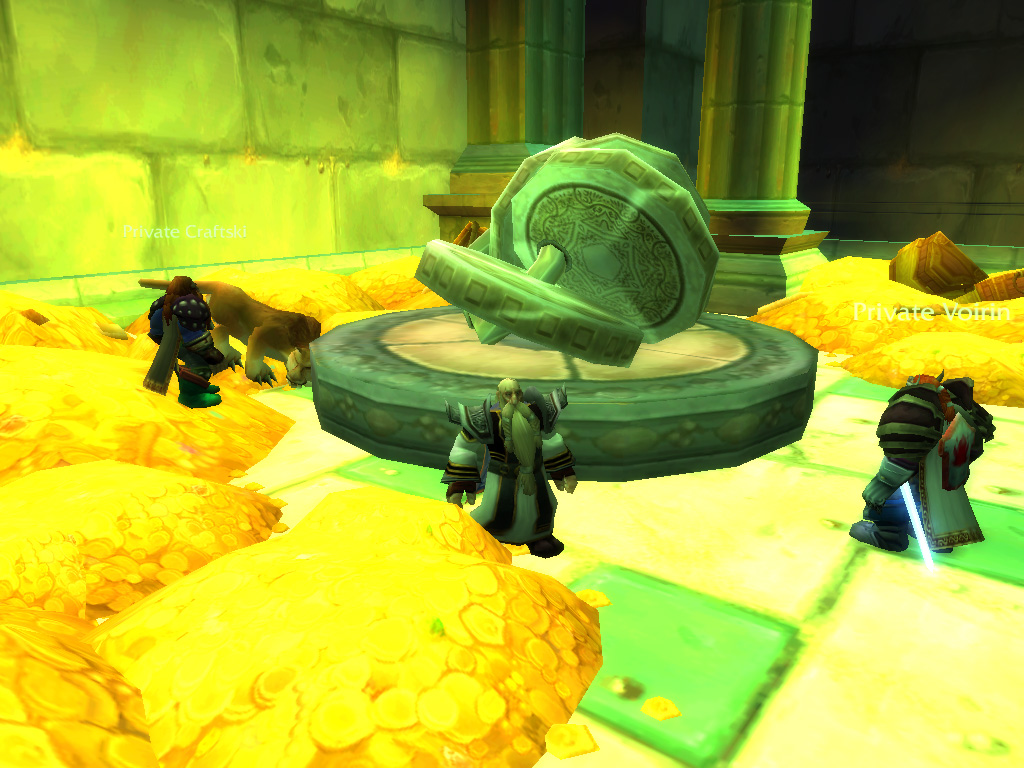
W
e saw the glitter of treasure in the distance, but first investigated the remains of Archaedas. Rummaging through the stone, we found a large energy crystal: Perhaps this could serve as a power source for the amulet we tried to reactivate? Gruegski also had found something, for him to keep: A finely crafted two-handed hammer, as one of our two main sources of damage, this would prove to be most helpful! Then we turned our attention to the newly opened room, which was filled with heaps of treasure, gold coin and other valuables. But even more of interest were huge platinum discs, placed on a pedestal in the middle of the room. As we approached them, a source of light to our left suddenly began to hum.
A power surge swept through the dusty room and a dimly lit figure, shaped like Archaedas appeared, trying to communicate with us. Investigating a pedestal to our side, we could see information appearing, but we weren't able to make much sense of it. It told us of the Uldaman "complex" and of, what it seemed to be Dwarven origin! According to the figure we were cursed, and had once been made out of stone instead of flesh! We suddenly felt a pang of regret as it seemed we had been fighting our brothers on our way in... The figure continued its interaction: Telling us of more complexes around the world and all-encompassing plans that had been set in motion by so-called "makers". Eventually the figure faded, and we turned our attention to the large discs once more. As we touched them, we felt a surge of magic, and found ourselves holding a miniature copy of the discs: We would be able to bring those along with us! We were sure the explorer's league would be interested in what we had found.
A power surge swept through the dusty room and a dimly lit figure, shaped like Archaedas appeared, trying to communicate with us. Investigating a pedestal to our side, we could see information appearing, but we weren't able to make much sense of it. It told us of the Uldaman "complex" and of, what it seemed to be Dwarven origin! According to the figure we were cursed, and had once been made out of stone instead of flesh! We suddenly felt a pang of regret as it seemed we had been fighting our brothers on our way in... The figure continued its interaction: Telling us of more complexes around the world and all-encompassing plans that had been set in motion by so-called "makers". Eventually the figure faded, and we turned our attention to the large discs once more. As we touched them, we felt a surge of magic, and found ourselves holding a miniature copy of the discs: We would be able to bring those along with us! We were sure the explorer's league would be interested in what we had found.
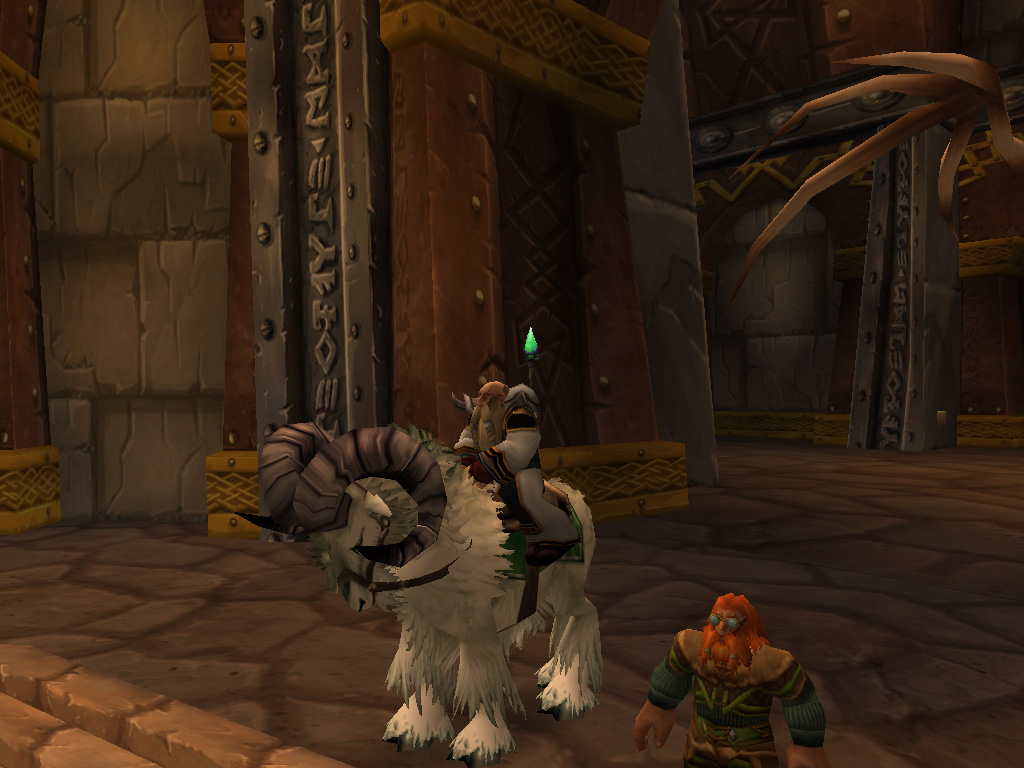
W
ith our bags full of treasure and the mystical discs, we returned to Ironforge, heading straight for the Explorer's ward. We handed over the discs and told our tale, they would have never believed us if we didn't have the proof! Soon the Dwarves working in the museum were having arguments with each other about what we had found and how to interpret it. We tried to ask if there was any reward for what we had found, but were sent on our way with a voucher. As we tried to make our way out, we were called back, and asked for a favour: Could we bring the discs we had just found to another Uldaman-like complex, in Tanaris? It seemed everyone needed us in Tanaris, so we accepted, as we had more work to do in the desert.
Next, we visited the Gnome jeweller, bringing him a bag full of goods: precious gems, a power crystal, we surely hoped this would be sufficient! As the jeweller reassembled the necklace, it was eventually linked to the power core of Archaedas which proved to be more than potent enough to re-energize its power. With the necklace restored, it was given to us as a gift, to showcase no ill would come to those who wore it and hoping to be good publicity for the Gnome's crafts.
Next, we visited the Gnome jeweller, bringing him a bag full of goods: precious gems, a power crystal, we surely hoped this would be sufficient! As the jeweller reassembled the necklace, it was eventually linked to the power core of Archaedas which proved to be more than potent enough to re-energize its power. With the necklace restored, it was given to us as a gift, to showcase no ill would come to those who wore it and hoping to be good publicity for the Gnome's crafts.
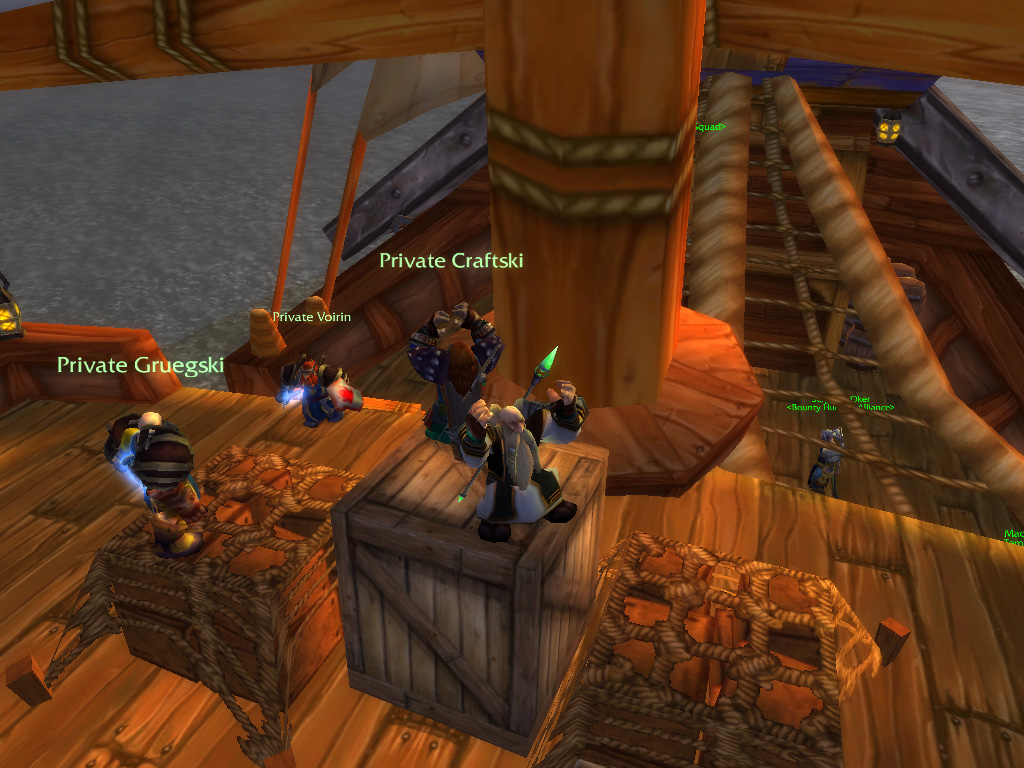
R
evisiting Uldaman had certainly payed off, our armoury now fuller than ever, with new jewelry, weapons and armour. Orangz had enchanted Gruegski's new hammer with a powerful enchant, strengthening its impact even further, and had crafted new robes for himself. He was sad to say goodbye to his bright red robes that went so well with the hat we had found in the Scarlet Monastery. With our business in Ironforge finished, and so many requests to visit the desert of Tanaris, we travelled to Menethil harbour, where we would take a ship to Theramore Isle. As we travelled across the waves, we couldn't refrain from making it a small Dwarven party, arriving at the Alliance fortress with a mighty cheer.
Here we made a small detour into the swamps, as we had heard there was a powerful mage that was in need of help. We did wonder why, but even the powerful sometimes need minions to do their work, and with a swift stride our rams made way through the murky swamp. We saw light shimmer nearby, and approached it, hoping it wasn't a will-o-wisp. It proved to be a small shack, not a fitting place for a powerful user of magic, but we knew looks could be deceiving. Here we met Tabetha, the mage we searched who asked us to search for a missing tiara, which was probably taken to Zul'Farrak.
Here we made a small detour into the swamps, as we had heard there was a powerful mage that was in need of help. We did wonder why, but even the powerful sometimes need minions to do their work, and with a swift stride our rams made way through the murky swamp. We saw light shimmer nearby, and approached it, hoping it wasn't a will-o-wisp. It proved to be a small shack, not a fitting place for a powerful user of magic, but we knew looks could be deceiving. Here we met Tabetha, the mage we searched who asked us to search for a missing tiara, which was probably taken to Zul'Farrak.
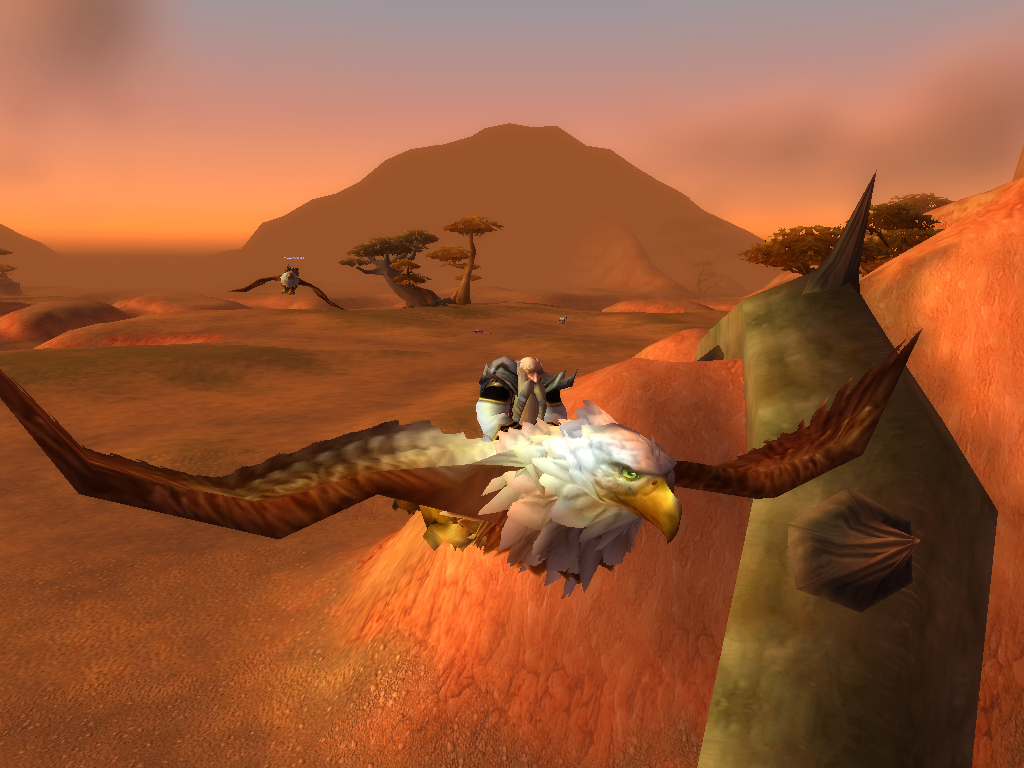
Endless dunes
F rom Theramore we flew to Thalanaar, this time flying over the Barrens by Gryphon, keeping us safe from Horde adventurers and patrols. From Thalanaar we travelled through the vast canyons of Thousand Needles, the road turning a twisting around the gigantic pillars of stone. Although weary, we did not have to fear for attacks of Horde soldiers, as they kept to themselves, in camps high above. Eventually we reached a vast salt expanse, the remains of what once had been a lake. In the middle, Goblins had made camp as a testbed for their mechanical inventions. Large clouds of smoke bellowed in the distance, as loud explosions rocked the ground.
But we had no business with them, passing their settlement peacefully, and reaching the road which led us into the Tanaris desert. From there it was a short travel to the town of Gadgetzan, a Goblin settlement surrounding a large fighting pit. Although our reasons to visit Tanaris had to be found further in the desert, we made a short stop, mingling with the locals and resting at the tavern. As we emptied our boots of sand, the Gadgetzan Chief Engineer joined us, with a request. He had heard we had business with the Trolls, and asked if we would be able to reclaim a divining rod which had been stolen from him, its thief hiding in Zul'Farrak. Upon dropping the name of Zul'Farrak, more Goblins joined us, each with their own task, ranging from gathering scarab shells to finding a tempering agent.
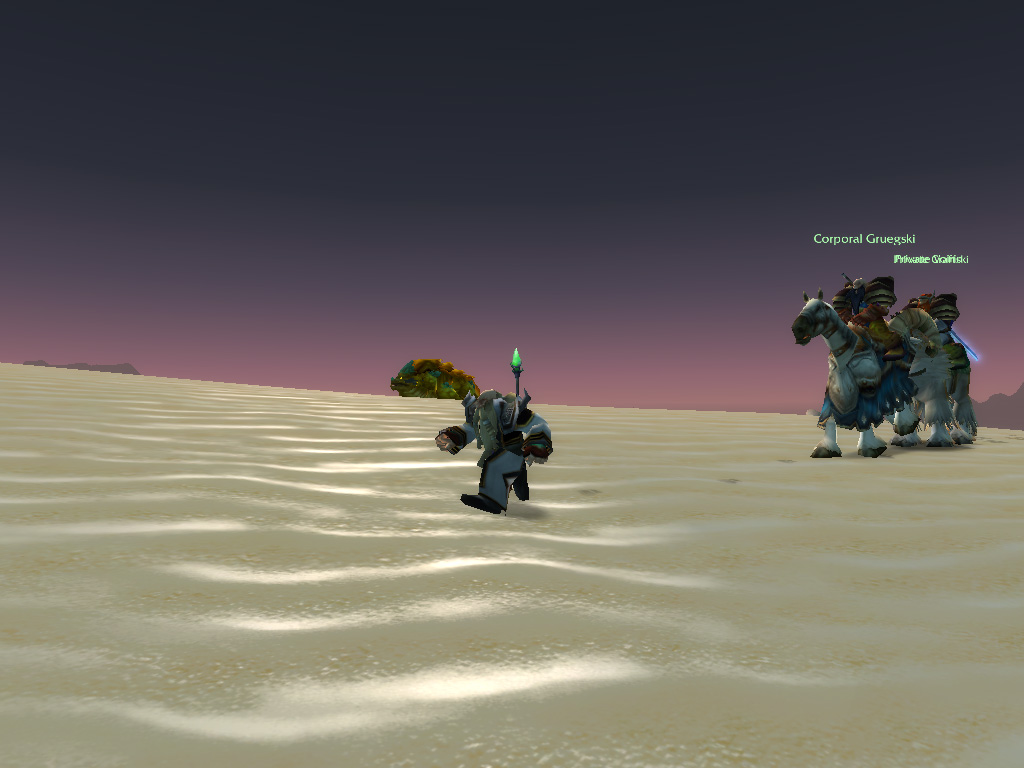
R
emembering our assignments, we first headed south, towards to the southern mountain ranges where the gates to Uldum would be found. As we travelled, we passed various ruins and investigating each, soon stumbled upon a small camp. Here we met Marvon, the Goblin we were sent to find from Feralas, and were supplied with a special detection helmet, to find ornamental relics, for him to study. The helmets certainly seemed to work, finding hydra-like carvings hidden under the sand, but still made us look silly. As we returned with a large bag full of ornaments, Marvon started to pester us about another adventure, to enter the far-away Sunken Temple and discover its secrets!
We weren't ready for such an adventure though, and continued our way south, passing human Wastewander bandits and Dunemaul ogres, each of them fighting over water springs and other valuables that could be found in the sandy wastes. We finally arrived at the gates of Uldum and found it guarded by a large Stone Giant. Trying to evade its endless watch, Craftski led us through a nearby path, allowing us to reach the pedestal that was placed near the entrance. This pedestal seemed similar to the one we had seen in Uldaman, and inserting our discs, a figure appeared. It had the same appearance as the projection we had seen before, but this time did not prove to be helpful, as we were not granted entrance: It seemed we would need the so-called "Discs of Uldum" to enter the complex, and were told "Azeroth was scheduled for revisitation". Although we had hit a dead end, we were content there had been at least a reaction, and would return later to Ironforge with our findings.
We weren't ready for such an adventure though, and continued our way south, passing human Wastewander bandits and Dunemaul ogres, each of them fighting over water springs and other valuables that could be found in the sandy wastes. We finally arrived at the gates of Uldum and found it guarded by a large Stone Giant. Trying to evade its endless watch, Craftski led us through a nearby path, allowing us to reach the pedestal that was placed near the entrance. This pedestal seemed similar to the one we had seen in Uldaman, and inserting our discs, a figure appeared. It had the same appearance as the projection we had seen before, but this time did not prove to be helpful, as we were not granted entrance: It seemed we would need the so-called "Discs of Uldum" to enter the complex, and were told "Azeroth was scheduled for revisitation". Although we had hit a dead end, we were content there had been at least a reaction, and would return later to Ironforge with our findings.
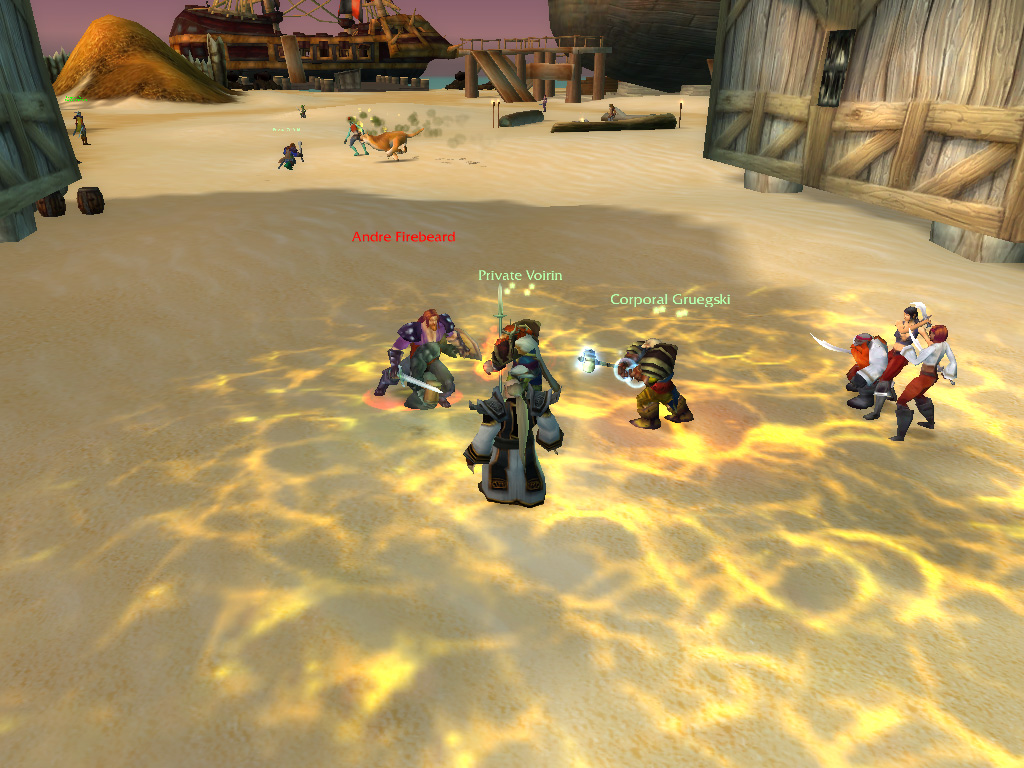
F
irst, we headed back to the northeast, to the port of Steamweedle. Here we found the Troll who had send us to gather the flying serpent spirits, and we apparently had done a decent job! He revealed his intent to us: The Troll was trying to capture the spiritual essence of the long-dead Troll god Hakkar, to keep it from falling into the wrong hands. For this, a special container would be required, which was described in more detail on tablets kept in Zul'Farrak. As we were heading for the temple complex already, we gladly accepted the task. But we were called into action first! The port was under threat by the Southshore pirates, and we were asked to clear the shores, steal their hats and kill their leader, Andre Firebeard!
The pirate encampment wasn't far away, hidden in a cove only reachable through a small tunnel. What wasn't hidden was the large wharf the pirates had built, with several ships already in the water and barracks full of amassed troops. It seems a raid on Steamweedle was looming ever closer, our fears solidified by attack plans strewn around the compound. We took a copy for ourselves, making sure to deliver it to Steamweedle later and give them time to prepare. But with our actions, we hoped it would not have to come that far: We cleared every building we encountered, and took their hats as trophies. As we hid inside one of the buildings, we were able to ambush their human leader, Firebeard. Without support of his fellow pirates, he was no threat at all, and knocking him out, we claimed his pretty red beard as our own. What a fine trophy!
The pirate encampment wasn't far away, hidden in a cove only reachable through a small tunnel. What wasn't hidden was the large wharf the pirates had built, with several ships already in the water and barracks full of amassed troops. It seems a raid on Steamweedle was looming ever closer, our fears solidified by attack plans strewn around the compound. We took a copy for ourselves, making sure to deliver it to Steamweedle later and give them time to prepare. But with our actions, we hoped it would not have to come that far: We cleared every building we encountered, and took their hats as trophies. As we hid inside one of the buildings, we were able to ambush their human leader, Firebeard. Without support of his fellow pirates, he was no threat at all, and knocking him out, we claimed his pretty red beard as our own. What a fine trophy!
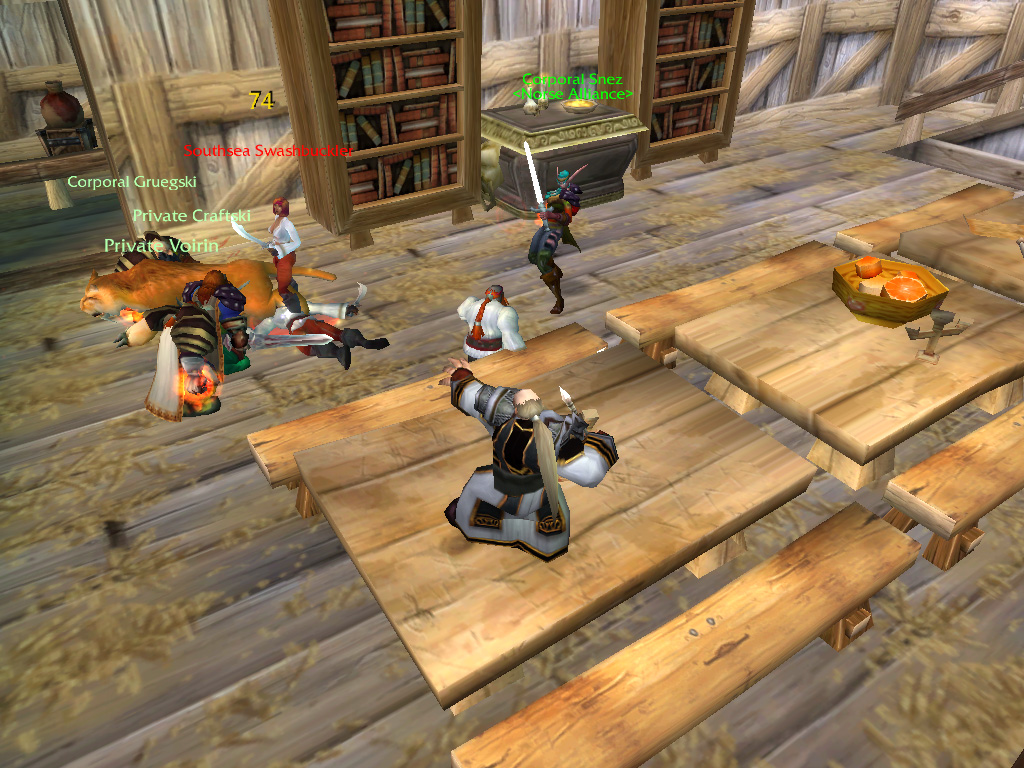
W
ith the pirates leaderless and their numbers thinned, we returned the assault plans to Steamweedle port, now they would be ready! We returned the hats to a Goblin tailor, who would use the fine silks as material for her creations. With Steamweedle safe, we finally set our sights so the west, to the Temple complex of Zul'Farrak. We travelled past Gadgetzan where we restocked on supplies once more. We returned Firebeard's head for a bounty, while Gruegski brewed mystic potions and Voirin sharpened our weaponry. Now we were prepared for a Troll fight! Mounting up and riding out, we made our way towards Zul'Farrak, charging through the ruins surrounding it, leaving surprised Troll guards in our wake. Eventually we passed a large archway and hanging bridge, where we saw more and more guards in the distance. To be safe, we dismounted and grouped up to head further into the complex.
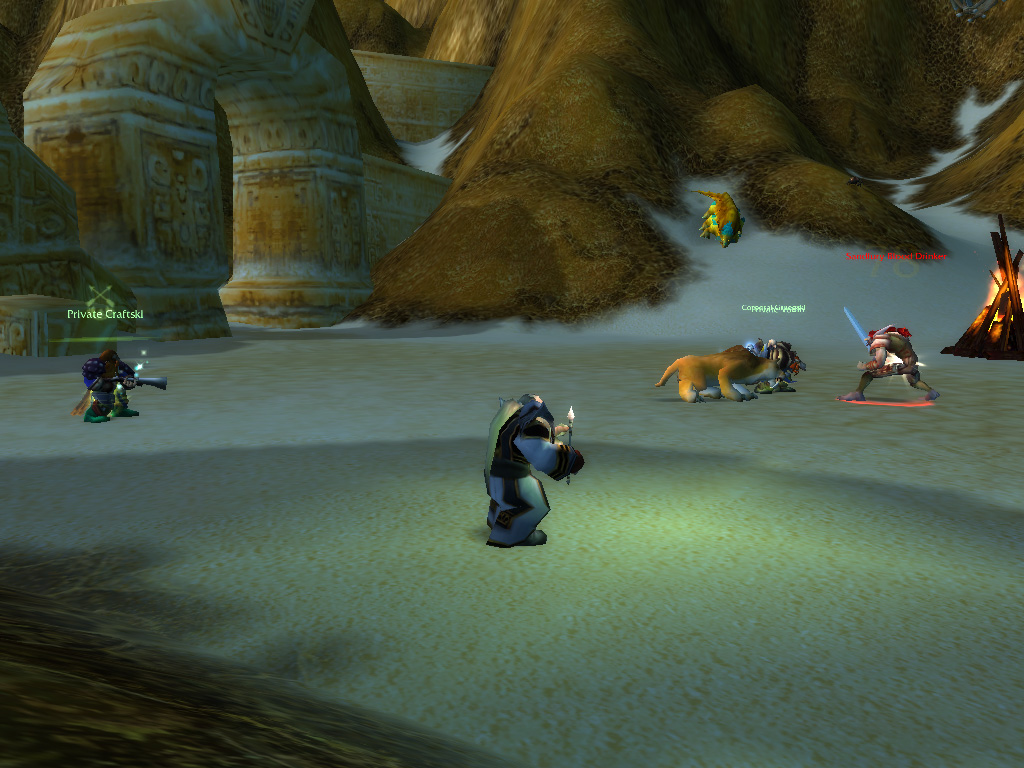
Into the Troll town
G roups of Trolls stood between us and the walls, ponds and huts of the complex, gathering in groups of strong warriors and hexing voodoo magicians. Taking care to catch their attention and lure them away from their allies, we were able to take them down safely, although Voirin got a few jump scares when he was suddenly transformed in a frog! Thankfully Craftski's cat and Gruegski jumped in to save us rest from harm, as the dwarf-frog was ignored, while Orangz tried to dispel the enchantment. We followed the road which led upwards, which was guarded by Basilisks. Killing all of the creatures, we approached a Troll standing in front of a cave: Which called out to us and his beauties, as suddenly, more groups of Basilisks appeared from the hills. Charging in, Voirin slammed into the Troll, while Craftski and Gruegski brought the Basilisks down with combined strength, destroying the shamanistic totems the Troll placed at the same time.
As we continued landing our hits, the Troll called out once more, and this time more, stronger Basilisks appeared from the cave. But Voirin raised his shield and gathered the creatures all around him, leaving it once again to the rest of us to damage the creatures. As the last Basilisk fell, we once again returned our focus on the Troll, which was by now weary and fell not long afterwards. Searching his remains, we found a precious amulet, which was disenchanted by Orangz into even more precious magical shards. The cave the Troll had been guarding proved to be a dead end, and we returned to the base of the hill, once again entering the ruins.
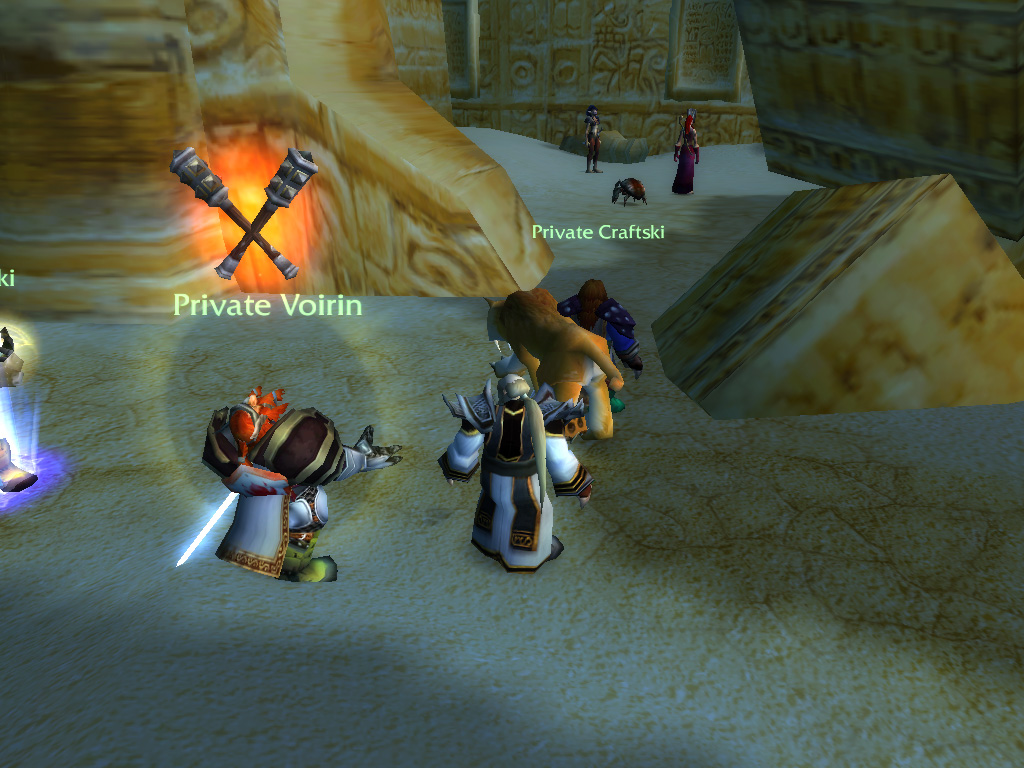
N
ow we took a different path, passing an ornamental pond, and running into a scarab-infested chamber. Here we had to careful, as a reward was promised for pristine, crack-free scarab shells! Wandering between all the scarabs was a single Troll, who we engaged. Making sure no ricochet or other damage would hit the surrounding scarabs, we aimed with outmost precision. Perhaps such a way of attacking would be worth repeating, as the Troll soon crumpled to the ground! Investigating his body, we found a small clay tablet, probably one of the prophet tablets we had been sent to search! With one part of this task complete, we were hungry for more. Piles of sand lined the path up ahead, and rummaging through one of them, a clawed hand appeared, giving us quite a start! It seems we had awakened the living dead once again! Mummified, long-withered Trolls assaulted us from multiple sides, driving us back. With effort, we sent the zombies back to where they came from, and made sure to not touch the piles again.
At the altar at the end of the room stood a Troll Witch Doctor, complete with the mask and shrunken heads, a proper foe! But he appeared to greet us and beckoned us closer. But suddenly he lashed out with shadow magic while at the same time undead Trolls surrounded us from all sides! Orangz acted quickly and shackled one of the undead in chains of holy light. At the same time, Gruegski gathered all remaining undead, dragging them to the Witch Doctor, now engaged with Viorin. Craftski blasted from afar, bringing the attacking undead down, and inflicting critical wounds on the Troll. Knowing their master was in danger, more and more undead joined the fight, only to be intercepted by Gruegski and brought down by our combined might. With a final slam from his shield, Voirin downed the Witch Doctor, and the magic that had resurrected the undead vanished, leaving us standing upon piles of bones.
At the altar at the end of the room stood a Troll Witch Doctor, complete with the mask and shrunken heads, a proper foe! But he appeared to greet us and beckoned us closer. But suddenly he lashed out with shadow magic while at the same time undead Trolls surrounded us from all sides! Orangz acted quickly and shackled one of the undead in chains of holy light. At the same time, Gruegski gathered all remaining undead, dragging them to the Witch Doctor, now engaged with Viorin. Craftski blasted from afar, bringing the attacking undead down, and inflicting critical wounds on the Troll. Knowing their master was in danger, more and more undead joined the fight, only to be intercepted by Gruegski and brought down by our combined might. With a final slam from his shield, Voirin downed the Witch Doctor, and the magic that had resurrected the undead vanished, leaving us standing upon piles of bones.
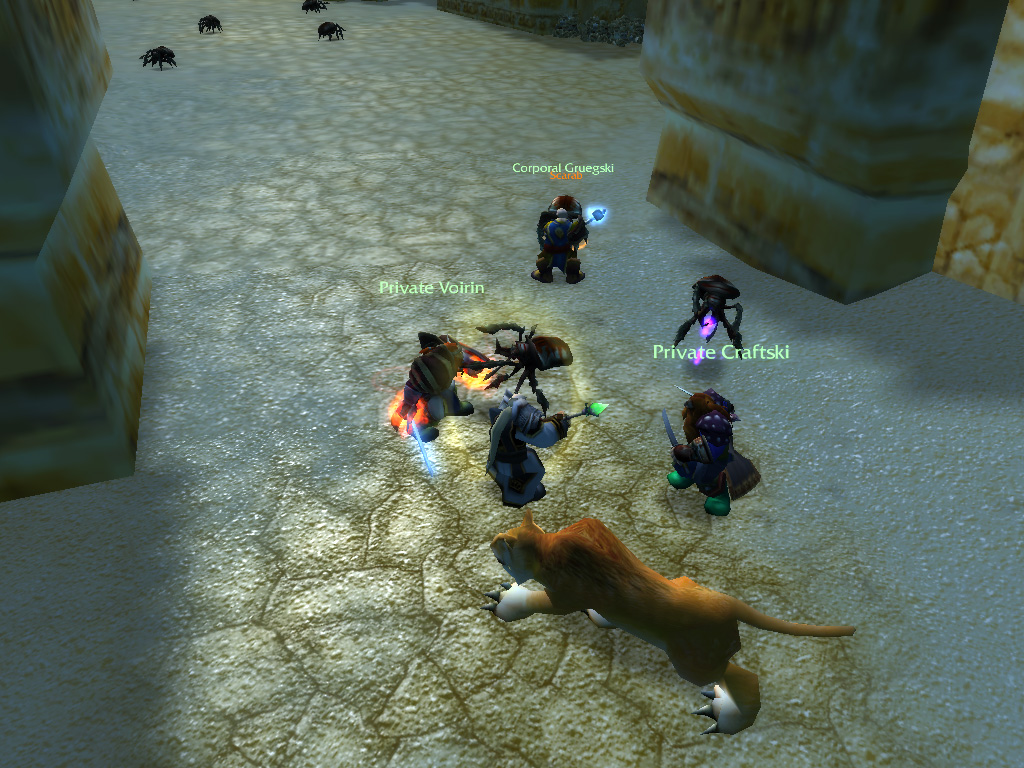
A
s we advanced, we entered a more inhabited part of the complex, with huts lining the path and a vast pyramid looming over a small square. We found an entrance, leading deeper into the complex, but it was barred with a large gate and with no keyhole or another method to open it, we agreed to head for the pyramid first. We cleared the square of Trolls, making our way around the large bonfire that stood in the middle and approached the pyramid for a long climb. We eventually reached the top, slightly out of breath, where we were greeted by the Troll executioner, running at us with a large axe. Taking him out without a problem, we noticed locked cages, which were filled with a gang of adventurers! It was a rag-tag group, consisting of Humans, a Dwarf, Orc and Goblin, and they asked us to help them escape. We searched the body of the executioner and found a key, which fit the cage locks perfectly. As the doors swung open and the adventurers introduced themselves, we could hear a loud commotion below.
Turning around, we were gifted with a beautiful vista of the temple complex, allowing us to see far into the distance. But we could also see something else: The entire square had suddenly been filled with Trolls! And they weren't waiting either, groups of Trolls were already making their way up the stairs, trying to reclaim their sacrifices! We could see a priest, standing in the middle of square, calling out orders, and we gripped our weapons tightly, ready for the charge. But we weren't alone, as the freed adventurers stood beside us, standing their ground. Together we withstood the attack, as wave after wave of Trolls made their way upwards, each more powerful than the other. As Voirin and Gruegski accepted the impact of each charge, Craftski and Orangz kept themselves safely in the back, supporting from afar and raining hail on those that came near. Our armour drenched in blood and heavily dented, the endless waves of Trolls seemed to come to an end, allowing us to push back.
Turning around, we were gifted with a beautiful vista of the temple complex, allowing us to see far into the distance. But we could also see something else: The entire square had suddenly been filled with Trolls! And they weren't waiting either, groups of Trolls were already making their way up the stairs, trying to reclaim their sacrifices! We could see a priest, standing in the middle of square, calling out orders, and we gripped our weapons tightly, ready for the charge. But we weren't alone, as the freed adventurers stood beside us, standing their ground. Together we withstood the attack, as wave after wave of Trolls made their way upwards, each more powerful than the other. As Voirin and Gruegski accepted the impact of each charge, Craftski and Orangz kept themselves safely in the back, supporting from afar and raining hail on those that came near. Our armour drenched in blood and heavily dented, the endless waves of Trolls seemed to come to an end, allowing us to push back.
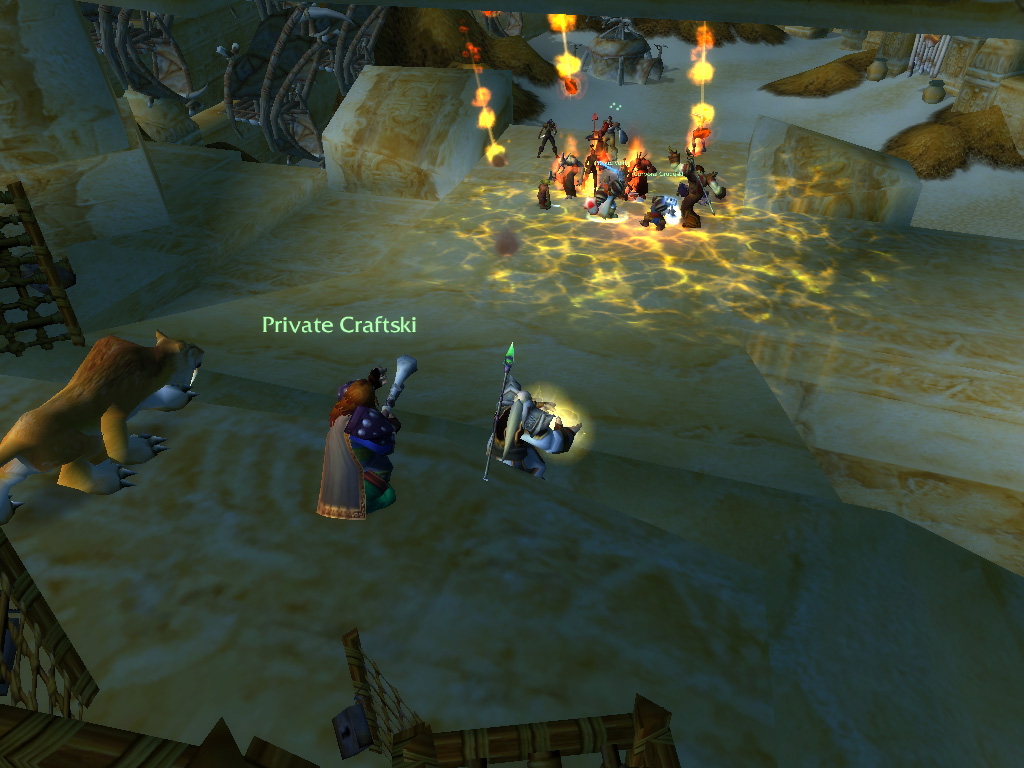
Upstairs, downstairs
T ogether, we made our way down the pyramid, where, after deflecting the last attacks, only the Troll priest and his bodyguard remained. Without the support from their other minions, we outnumbered them easily. The bodyguard proved to be an undead creature, so Orangz chained it tightly in holy light. The rest of us, stomped the priest into pulp, leaving the undead creature to fend for itself. It did not last long. As we searched the remains, we were able to find the medallion we needed to save Sharpbeak. What we wouldn't do for a Gryphon young! We all calmed down, finally able to have a talk with the other adventurers. The Goblin of their party proved to be helpful as he blew up the door we had been trying to open, while their leader, Sergeant Bly, became evasive after a bit of talking. Evading our questions on why there were in Zul'Farrak, we connected the dots: It seems they had stolen the divining rod!
As we accused their leader, the entire group turned upon us: Even the Dwarf! And they outnumbered us! But thankfully, we were cunning: Craftski set up a trap and froze the Orc of their group, while we quickly bludgeoned the Dwarven traitor. Now there were only three. Their Captain proved to be persisting, but his comrades fell one by one, even the now thawing and slightly clammy Orc. Without help, Bly had to face us alone, which was something he couldn't do for long. As we searched his belongings we found the rod we were looking for, stashing it safely away. Was it really worth this bloodshed?
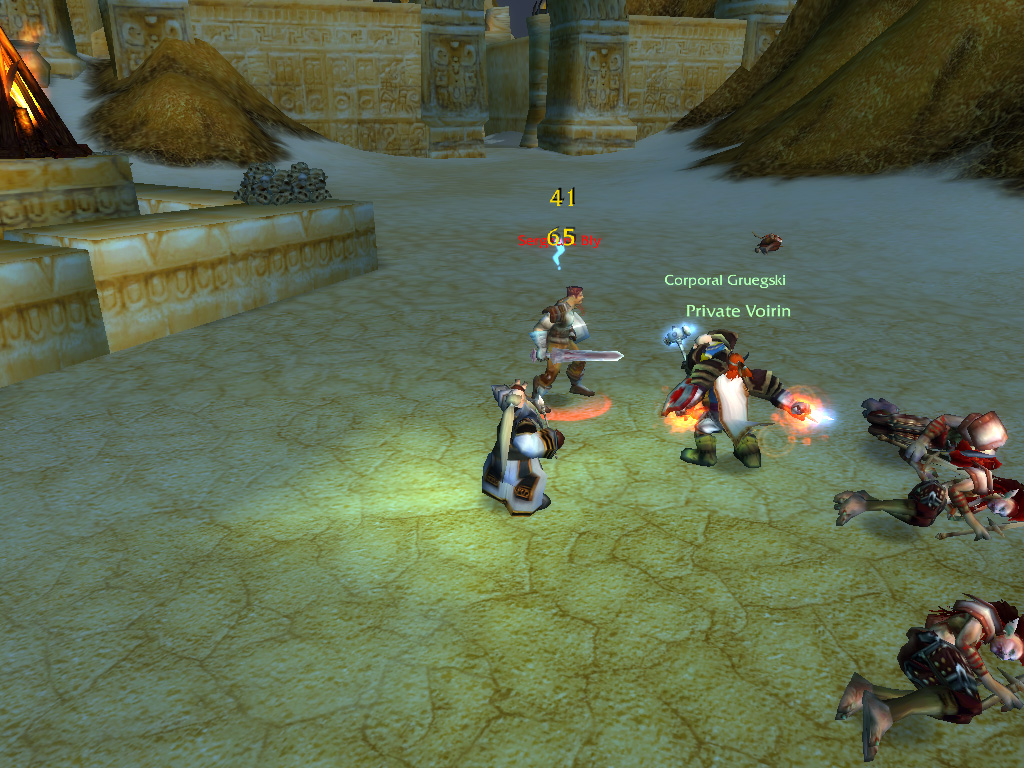
X
We set our eyes upon the newly opened door, as we still searched a tiara and a second tablet! The doorway led us into a larger room, adorned with reliefs and statues. Near the back wall stood a large Troll together with what appeared to be a bodyguard. But also, Basilisks and large serpents crawling in the corners. We engaged the Basilisks first, mopping them up quickly and afterwards took care of the serpentine enemies, on guard for their poisonous bites. With the room now clear of enemies, we engaged what appeared to be the Troll leader. The Troll yelled for our death, sending his bodyguard at us and slamming into Voirin with force. But there were only two of them, and compared to what we had survived earlier, they didn't pose a real threat. Enraged at our defiance, the Trolls threw everything they had at us, and burned out, leaving Orangz to transform their heirlooms in crystals of magical energy.
There were no tablets to be found in the room, so we turned to the final path we had to investigate. This led us to a large rectangular pond, flanked by a big gong. We tried to ring it, as we had done in the Razorfen Downs, but this had no effect. Gruegski even grabbed the ornamental hammer we had taken from the Hinterlands to test, as it was Troll made, but this also had no effect. The ring seemed to linger longer than our own hits though, perhaps this was a clue? We were disturbed in our investigations though, as the temple's Hydromancer, who was pacing around the pool, had noticed us. Trying to keep us from meddling in Troll affairs, she attacked, calling in for help. But there were none to help her, and we sent the Trolll tumbling to the ground. Looking through her pouches, we discovered the tiara we were sent to find and the final clay tablet!
There were no tablets to be found in the room, so we turned to the final path we had to investigate. This led us to a large rectangular pond, flanked by a big gong. We tried to ring it, as we had done in the Razorfen Downs, but this had no effect. Gruegski even grabbed the ornamental hammer we had taken from the Hinterlands to test, as it was Troll made, but this also had no effect. The ring seemed to linger longer than our own hits though, perhaps this was a clue? We were disturbed in our investigations though, as the temple's Hydromancer, who was pacing around the pool, had noticed us. Trying to keep us from meddling in Troll affairs, she attacked, calling in for help. But there were none to help her, and we sent the Trolll tumbling to the ground. Looking through her pouches, we discovered the tiara we were sent to find and the final clay tablet!
A duel is a great way to test your combat prowess without the threat damaging your expensive outfit!
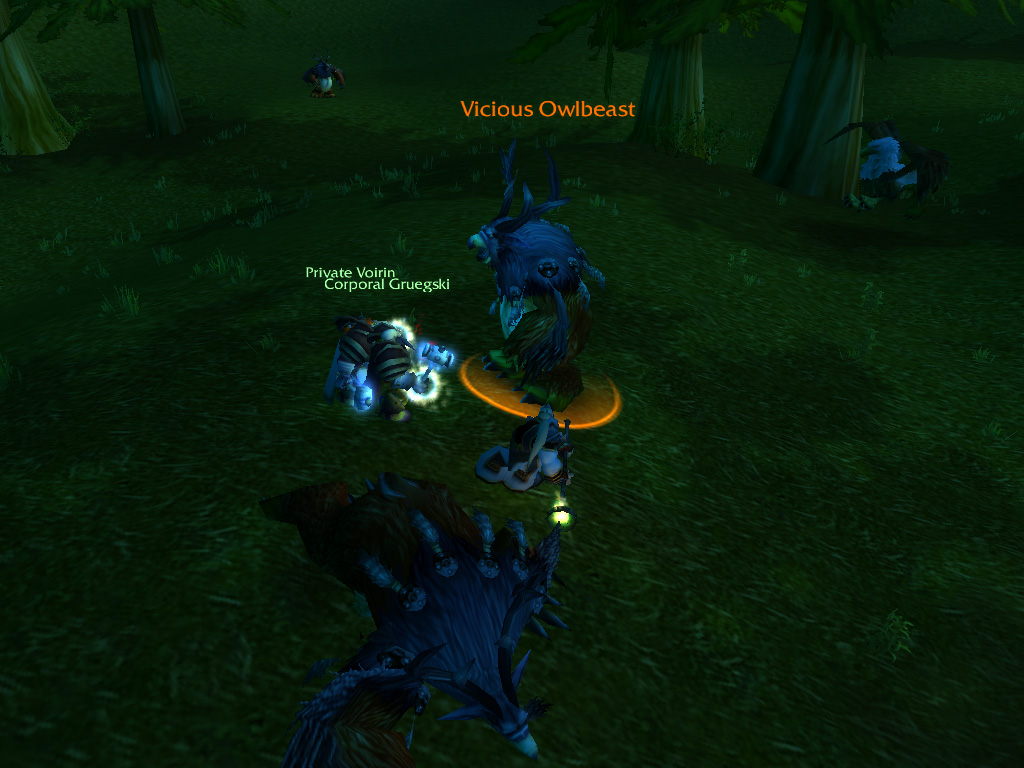
O
ur assignments complete, we mounted our rams and made haste, charging out of the city once more. We stopped in Steamweedle, where the Troll was most happy with our findings. The tablets did indeed tell of a method to capture the essence of Hakkar, using an ancient artefact which was now held by the Trolls in the Hinterlands. As we expected to return to the Hinterlands, we agreed to search for this relic, which was shaped like some sort of egg. Afterwards, we stopped by in Gadgetzan where we returned the rod we had recovered, a job for which Craftski received a potent magical ring. We would have to travel to the Nethergarde next, and planning ahead, we took the shortest route. Flying to Ratchet, we took the boat to Booty Bay, from where it was only a short ride to the Blasted Lands. It was a good thing we had visited all those Gryphon trainers!
The Dwarf in Nethergarde had been waiting for our return and with the medallion now in his possession, he performed a divination using Sharpbeak's feather. The ritual took it's time, but it was a success, revealing that Sharpbeak had indeed been captured by the Trolls, and was locked up in a cage at the top of the Jintha'Alor temple. Using our hearthstones, we returned to Ironforge, and took a flight straight to Aerie Peak. We told their Gryphon master about our findings, upon which he enlisted us to bring Sharpbeak back: We would have to assault the Troll temple!
The Dwarf in Nethergarde had been waiting for our return and with the medallion now in his possession, he performed a divination using Sharpbeak's feather. The ritual took it's time, but it was a success, revealing that Sharpbeak had indeed been captured by the Trolls, and was locked up in a cage at the top of the Jintha'Alor temple. Using our hearthstones, we returned to Ironforge, and took a flight straight to Aerie Peak. We told their Gryphon master about our findings, upon which he enlisted us to bring Sharpbeak back: We would have to assault the Troll temple!
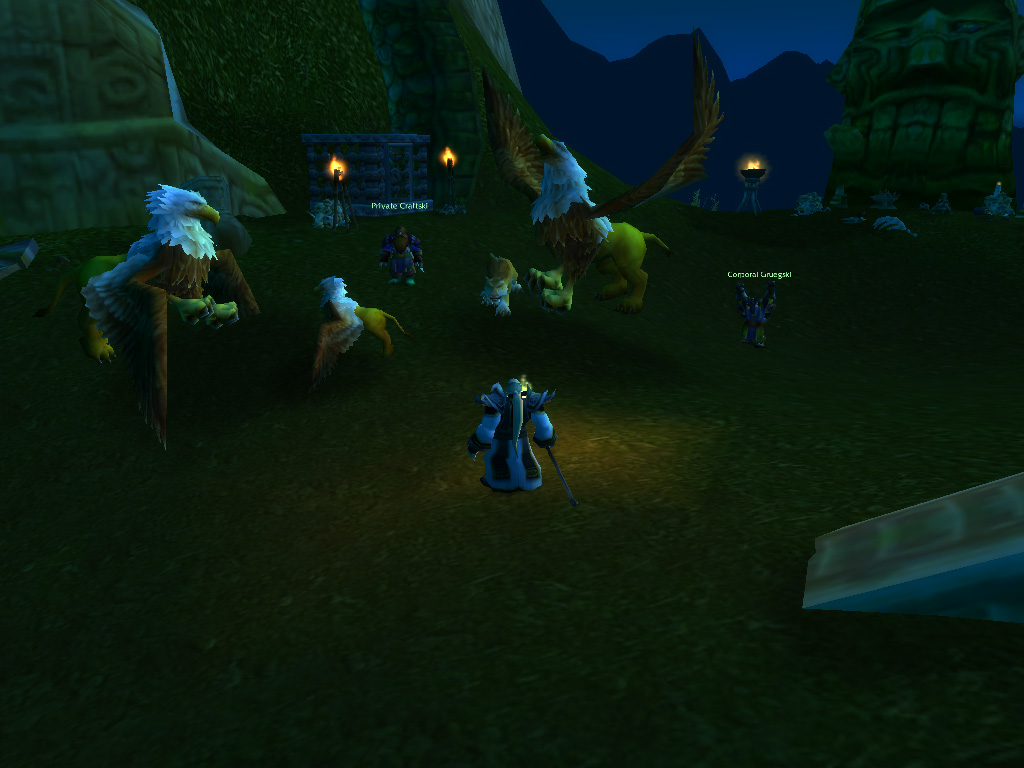
Saving Sharpbeak
T he trip to the complex was uneventful, but as we reached the entrance, we found them guarded by their most powerful soldiers. The temple was built on the mountainside, and the road leading upwards had outposts at every turn. Groups of Witch Doctors, powerful warriors, and hunters guarded the gates, ready to throw spears and arrows from above. We took a chance, charging in on our rams, Voirin as a shield at the front, guarded by Orangz's holy protection. Running deeper into the complex, we were able to make swift process, trampling Trolls under our hooves, or leaving them in our dust. We rode higher and higher, eventually dismounting and dealing with our chasers. In the end, there weren't many Trolls who had been able to keep up with us, and we only had to fight the most persistent guards.
Clearing the final chasing Trolls, we found ourselves in a circular arena, surrounding an altar and fighting pit. Approaching the altar, we were met with the leader of the Vilebranch Trolls, the priestess, Hex. We weren't given a warm welcome, as the Troll engaged us, attacking us with magic. She tried to hex Orangz into a frog, but this enchantment was quickly broken by Gruegski, allowing us to attack her full strength. As we landed blow after blow, she tried to heal her wounds, but this was thwarted by both Gruegski and Voirin, who knocked her out of her concentration. With a perfect hit, Gruegski knocked her to the floor, leaving us victorious.
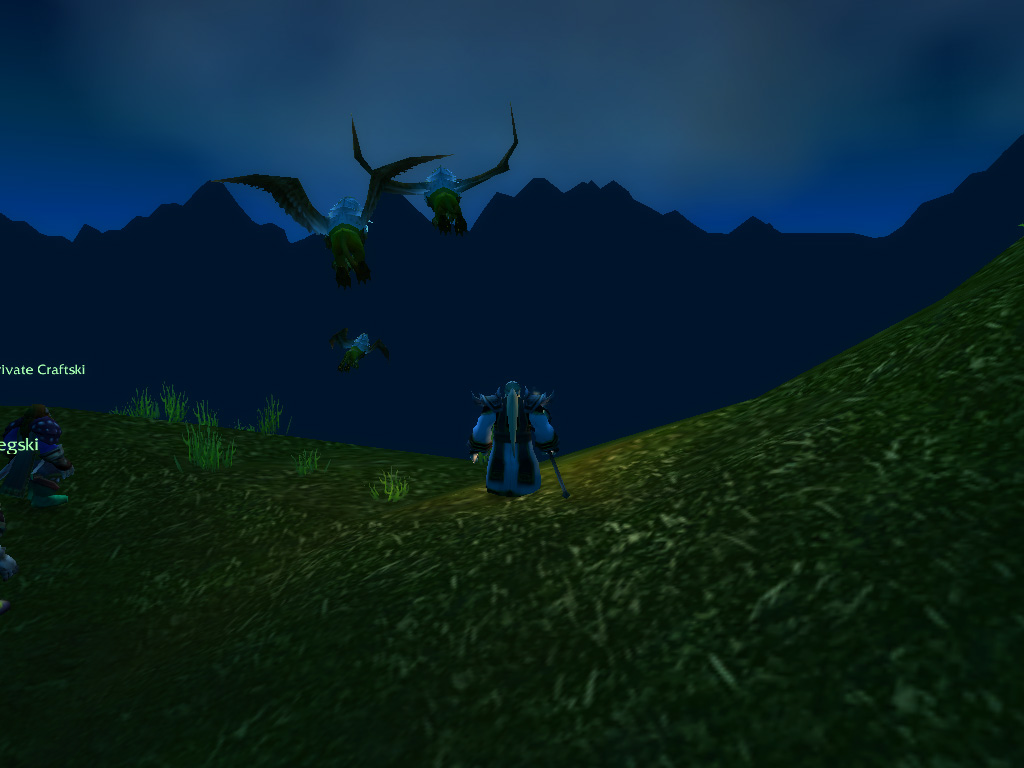
W
e rummaged through her belongings, and found a small key which we kept for safekeeping, perhaps we would need for it later! We also inspected the altar, which emanated a magical aura. As we closed in, Gruegski's bag began to glow, which appeared to originate from the ornamental hammer he had been carrying around. As he placed the hammer on the altar, it seemed to soak up magical power, and started to glow from within. Perhaps this would change its interaction with the gong we had found in Zul'Farrak? With the arena clear, we discovered a large cavern entrance, leading into the depths of the mountain. Here tunnels twisted and turned, and more and more Trolls wandered in the darkness. Craftski made sure we did not lose our way, or that we moved in circles, which made our progress swift and purposeful. Then, as we rounded one of the corners, we were suddenly greeted with a greenish glow
The source of the glow was a large egg nestled in the ground, was this the egg the Steamweedle Troll was looking for? we surely hoped so! We lifted it carefully and stowed it away in our bag, hoping it would get it to Tanaris in one piece. Claiming the egg, we now seemed to have reached a dead end, so made our way outside again. Now we only had one more place to explore, which was a small path leading further up the mountain... This path lead towards a cliff where, after dealing with a few guards, we found Sharpbeak, locked away in a small cage! The small key we had found smoothly slid in and turned, setting the Gryphon child free. With a shrill cry the young announced its freedom, and it did not take long for its parents to arrive, responding to the call. Gruegski was visibly moved by the reunion, with the Gryphon family flying into the sunset.
The source of the glow was a large egg nestled in the ground, was this the egg the Steamweedle Troll was looking for? we surely hoped so! We lifted it carefully and stowed it away in our bag, hoping it would get it to Tanaris in one piece. Claiming the egg, we now seemed to have reached a dead end, so made our way outside again. Now we only had one more place to explore, which was a small path leading further up the mountain... This path lead towards a cliff where, after dealing with a few guards, we found Sharpbeak, locked away in a small cage! The small key we had found smoothly slid in and turned, setting the Gryphon child free. With a shrill cry the young announced its freedom, and it did not take long for its parents to arrive, responding to the call. Gruegski was visibly moved by the reunion, with the Gryphon family flying into the sunset.
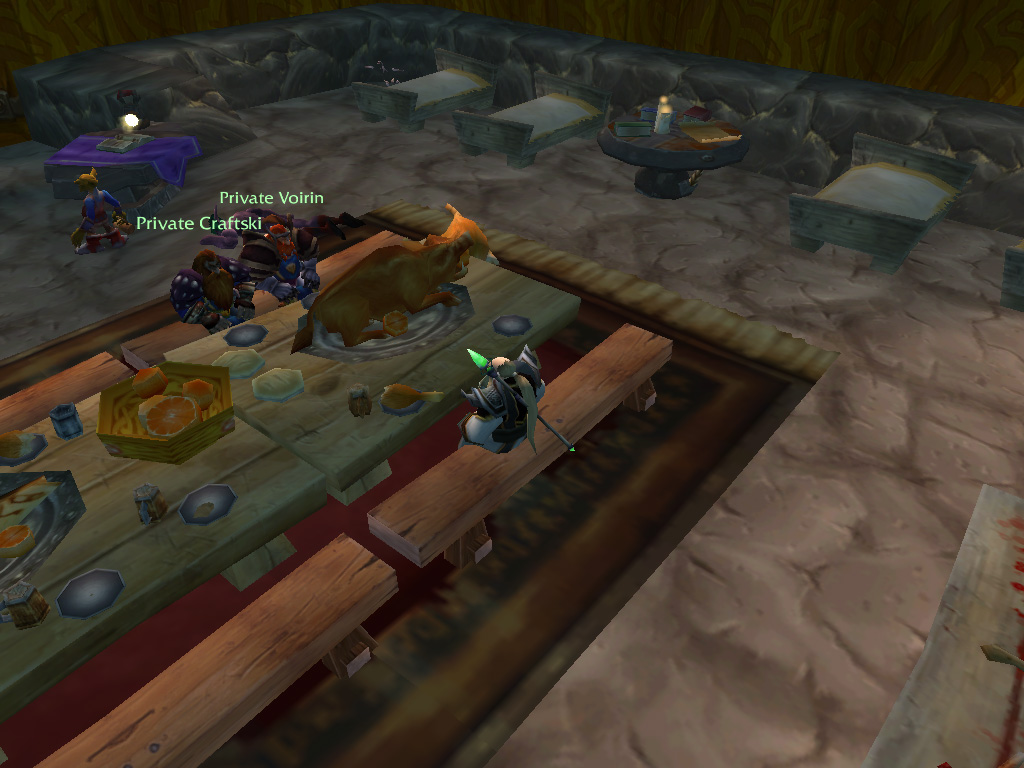
R
eturning to Aerie Peak with good tidings, it appeared news our success had travelled ahead, and the family had nestled in the mountain once more. This time higher up, to prohibit any future Troll tricks. With the bloodline safe once more, the Wildhammer Dwarves promised their eternal gratitude, and rewarded us with magical artefacts from their vaults, granting us one of the hammers from a one of their fabled Gryphon riders! Our business in the Hinterlands was now complete, and were told we would always be spot for us at the Aerie Peak hearth, as worthy brothers of the Wildhammer clan, and not just city-dwelling Dwarves.
A visit to Tanaris would be next in order: We flew to Menethil, from where we took the boat to Theramore. We still had the lost tiara in our bags, so we made slight detour through the marshes to deliver it to the mage Tabetha, who was happy to see it returned. With a small reward in our purses we returned to the Theramore and flew by Gryphon to Gadgetzan, here we enjoyed the hospitality of the Goblins. From there it was a small trip to Steamweedle, where we showed the egg we had found to the Troll. We had been right, this was indeed the egg he was looking for, and in an excited voice, he told us of the next, final step. We would have to journey to the Temple of Atal'hakkar, better known as the Sunken Temple, and capture the essence of Hakkar that lingered deep inside.
A visit to Tanaris would be next in order: We flew to Menethil, from where we took the boat to Theramore. We still had the lost tiara in our bags, so we made slight detour through the marshes to deliver it to the mage Tabetha, who was happy to see it returned. With a small reward in our purses we returned to the Theramore and flew by Gryphon to Gadgetzan, here we enjoyed the hospitality of the Goblins. From there it was a small trip to Steamweedle, where we showed the egg we had found to the Troll. We had been right, this was indeed the egg he was looking for, and in an excited voice, he told us of the next, final step. We would have to journey to the Temple of Atal'hakkar, better known as the Sunken Temple, and capture the essence of Hakkar that lingered deep inside.
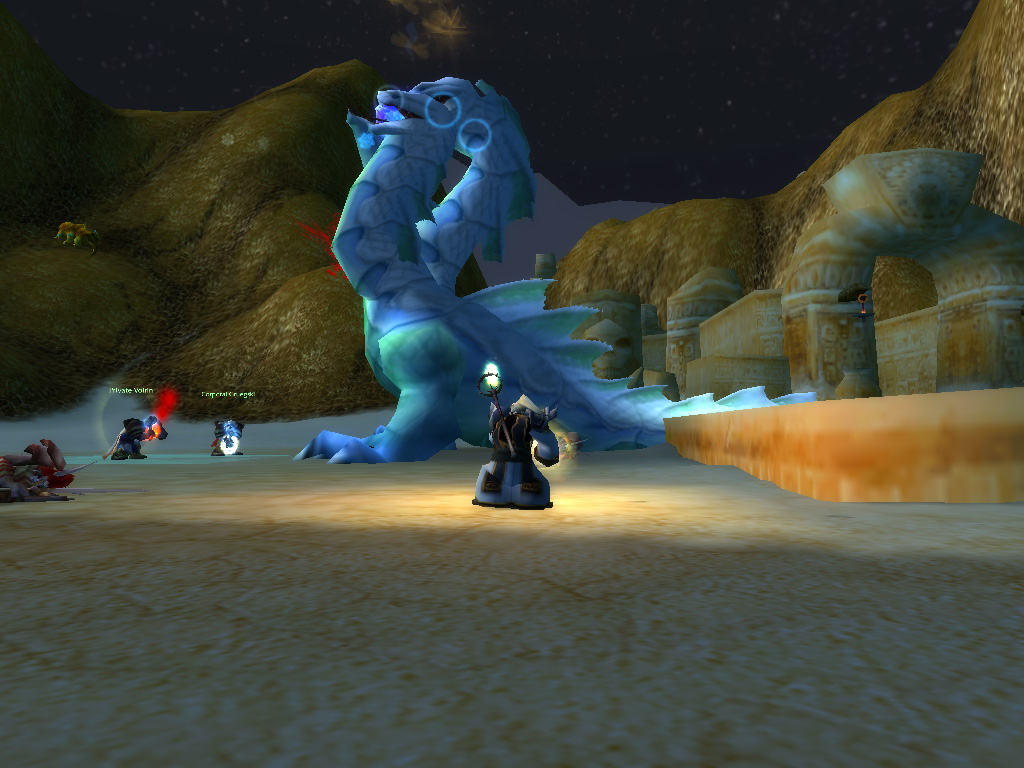
Back to Zul'Farrak
B ut we were sure the Sunken Temple was still too dangerous to explore for the four of us, and returned to the Gadgetzan inn to plan our next adventure. Would we travel to west, and go beyond the desert? Or would we return home once more, to Ironforge? We had not noticed Gruegski had been missing, but suddenly he came running through the door: He had been investigating our enchanted Troll hammer! He had met up with the Gnomes camped at the salt flats to the north, and discovered that a mythical creature lived in the Zul'Farrak pond, which could be awakened by the hammer in our possession! And even better, there was a reward to slay the creature and bring back one of its energy charged scales!
We mounted up, and rode towards Zul'Farrak, using the same tactics as before and charging past Troll scouts. The gates of the temple complex were reached without problems, and once inside, it seemed the number of guards had not increased since our last visit. Only a few Trolls remained, and soon, thanks to a shortcut Craftski had found, we stood next to the large pool once more. Gruegski grabbed the enchanted hammer, and after a few test swings, slammed it hard against the gong. The resulting sound was a deafening, bouncing off the surrounding hills before slowly ebbing away. We now turned our attention to the pool, it's water bubbling and splashing wildly, and from its depths a dark shape was emerging...
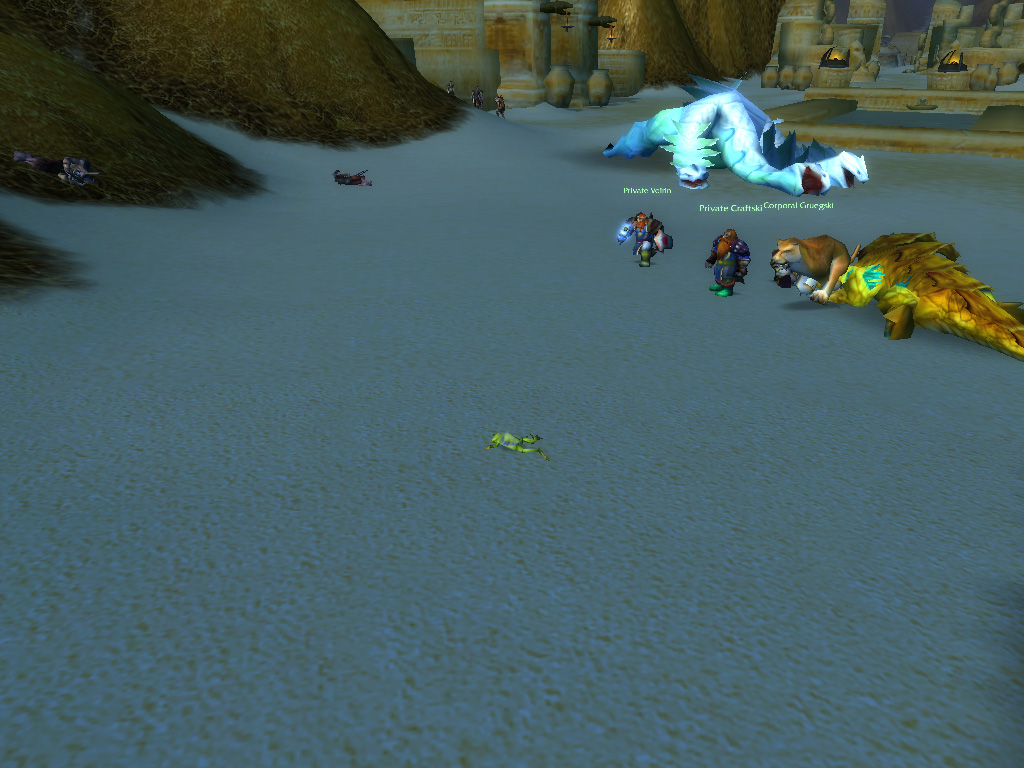
W
ith a loud bellow, a gigantic albino Hydra crawled out of the water, towering over us, finally coming to a halt next to the pool. How did this creature live in this pool? Were there underground caverns? Was there an ocean below the desert of Tanaris? We would find no answer for these mysteries, we would find though, was a fight. Voirin charged into the large creature, using his shield to defend himself from its sharp claws, powerful jaws and ice-cold breath. With three heads, the creature proved to extremely observant, aware of all our actions and keeping us at bay. With a heavy slam the creature sent Gruegski and Voirin flying high into the air, slamming them a nearby hill. With the creature now not engaged in close combat, it lumbered towards Craftski, who sent his cat to keep it at bay. Voirin and Gruegski returned, running as fast they could, to intercept the monster.
But they had also brought friends! It seems the Trolls thought they would be easy pickings, worn down by the monster, and had attacked them on their way back to Orangz and Craftski. Now, fighting the monster and a pack of Trolls, our battle suddenly proved far more interesting! We drew up every ounce of strength we had: Craftski speeding up his shooting and Vorin lifting his shield high to deflect the attacks. And this proved to work, as one by one the Trolls fell, and finally with an eagle-eyed shot, Craftski sent the monster slamming into the ground. We heard croaking behind us, and noticed that the Troll Witch Doctor had transformed Orangz into a frog with its final strength, leaving him slumped on the ground. Gruegski dispelled the magic, and together, we inspected the creature. With care, we removed one of the magic infused scales, but found little else of value.
But they had also brought friends! It seems the Trolls thought they would be easy pickings, worn down by the monster, and had attacked them on their way back to Orangz and Craftski. Now, fighting the monster and a pack of Trolls, our battle suddenly proved far more interesting! We drew up every ounce of strength we had: Craftski speeding up his shooting and Vorin lifting his shield high to deflect the attacks. And this proved to work, as one by one the Trolls fell, and finally with an eagle-eyed shot, Craftski sent the monster slamming into the ground. We heard croaking behind us, and noticed that the Troll Witch Doctor had transformed Orangz into a frog with its final strength, leaving him slumped on the ground. Gruegski dispelled the magic, and together, we inspected the creature. With care, we removed one of the magic infused scales, but found little else of value.
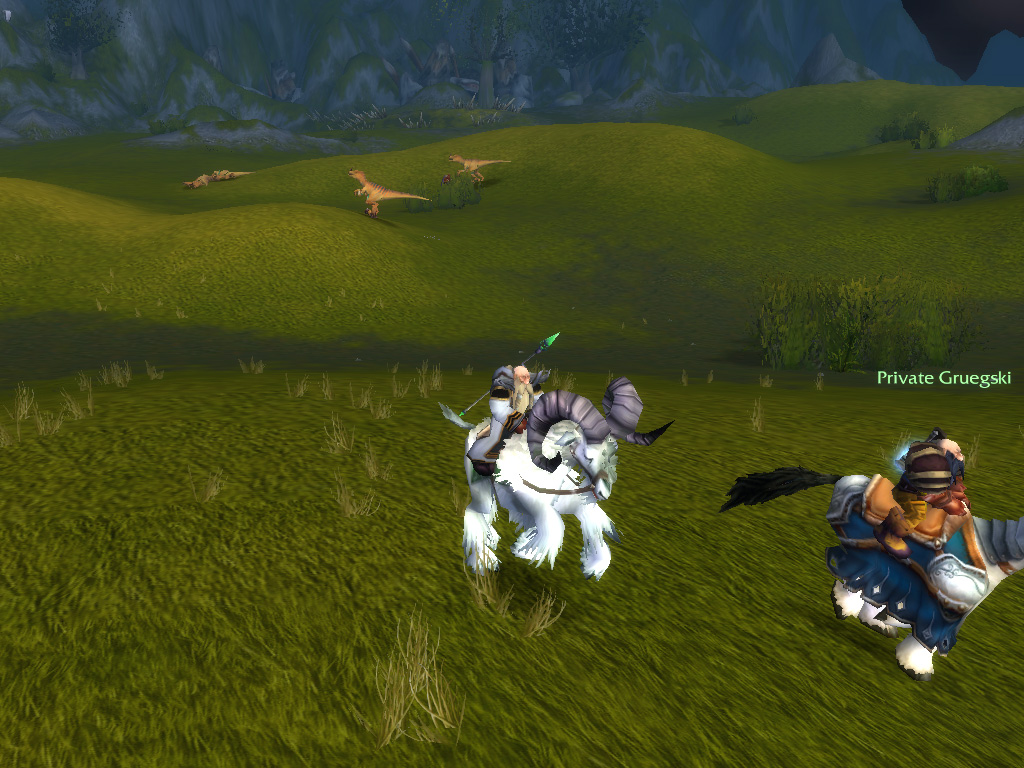
A Royal Visit
W ith the scale safely stowed away, we took one final look into the pool, but could see the bottom as clear as day. We were baffled: Where did the creature came from? But we had to leave, loud yells of Trolls approached, and we had no intention of fighting the temple's inhabitants again. We rode our rams straight into the desert, staying close to the northern mountains until we reached the path into Thousand Needles. Here Gruegski led us to the Gnome camp, where we delivered the scale. We were informed the scale would be used to power the Gnomish inventions, as it was fully of potent energy. In return, we received a handy reward: A treat which would make our mounts run faster!
Our Business complete, we returned back home, to Ironforge. Rummaging through our bank storage, we were reminded of another loose end, and agreed to pay a visit to our dear princess, Myzrael. Gathering the scroll which we needed to summon her, we flew to Refuge Pointe, and headed for the northern mountains. We had not been to Arathi for some time, and the grassy hills were a welcome change from the desert of Tanaris. Reaching the obelisk where this adventure began, we read out the scrolls incantation and waited... With a flash of light and loud rumble, Myzrael appeared, calling out to us why she was summoned, when she was still weak. As we were searching for an answer, she called us fools, and summoned elemental allies to fight us.
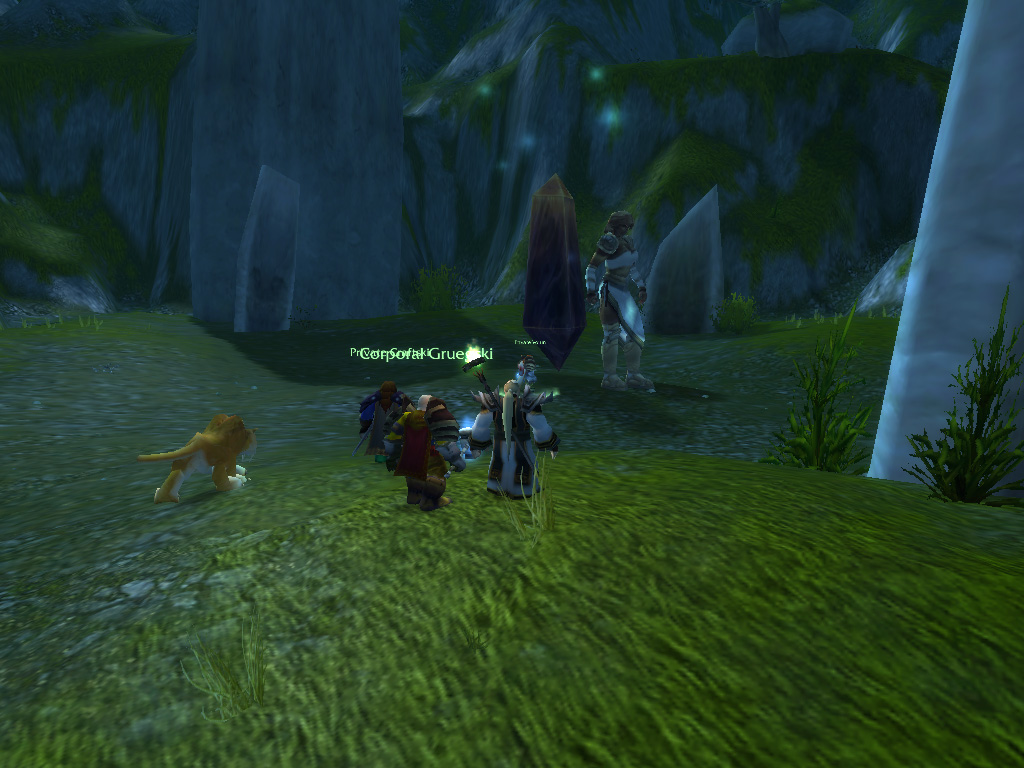
E
lementals of various powers charged into us, fire, thunder, water and wind, making it difficult for Gruegski to choose what elemental damage he would guard against! And if that wasn't the worst: Myzrael, the princess herself, made her way to us as well! Once again, we sent our local meat-shield, Voirin into the fray, supported by the holy warding of Orangz. At the same time, Gruegski and Craftski used their area-of-effect attacks to take out Myzraels minions, banishing them to the elemental plane. With the support gone, we could focus on Myzrael, taking advantage of her weakened state. Our blows hit their mark, and slowly we gained the upper hand. But we were only mortal insects in her eyes, and once again she summoned elemental minions to defend her. Gruegski and Craftski quickly sprung to action, and soon only the bindings of the elements littered the ground. With our combined might we gave Myzrael a final blow, banishing her back into the deeps, leaving only her shackles on the ground. As we were instructed, we bound these shackles to the obelisk, and trapped her once again in the earthen prison. As we mounted up ready to return to Refuge Pointe, we could hear an unhuman wail from far below. The princess was not pleased.

Fire and Flame
W ith the loose ends now tied, we set our sights for new lands. We had heard of an encampment in the Searing Gorge, at the foot of Blackrock Mountain, where alliance presence was required. Reaching the Searing Gorge would not be easy, and we would have to travel through the Badlands to get there. We travelled to Loch Modan, and rode south, into the barren wastes. Here we were hailed by a High Elf, not often seen, since the fall of Quel'Thalas. He had been sent here on a mission by the Kirin Tor, the wizard council of Dalaran, investigating the Black Dragon presence in the Badlands. Imprisoned nearby were two dragons, but the magic that held them was weakening. Our help would be needed to deal with the danger. We were sent to reclaim a stone object first, the Sign of the Earth, which had been stolen by a wandering Ogre warband. We visited their base camp, finding it empty with footprints leading into the distance.
Mounting up, we chased after the prints, and were able to catch up with the band of brutes. Charging from the back, we took out their leader with a heavy impact, and sent the rest of the Ogres scattered in all directions. Finding the stone in the possession of the chief, we refrained from chasing the minions, and returned to the elf. The retrieved stone proved to be a binding key, used to lock the Dragons away. But it could also be used to open their prison, and with this in mind, we were sent into the nearby canyon to become dragonslayers. Using the Elf's instructions, we were able to gather the power from four obelisks, which were scattered along the mountains. And then, with the Sign of Earth charged with power, we were able to approach the final obelisk, standing deep inside the chasm. We touched the obelisk with the stone, and with a blinding flash, two dragons sprung from within!
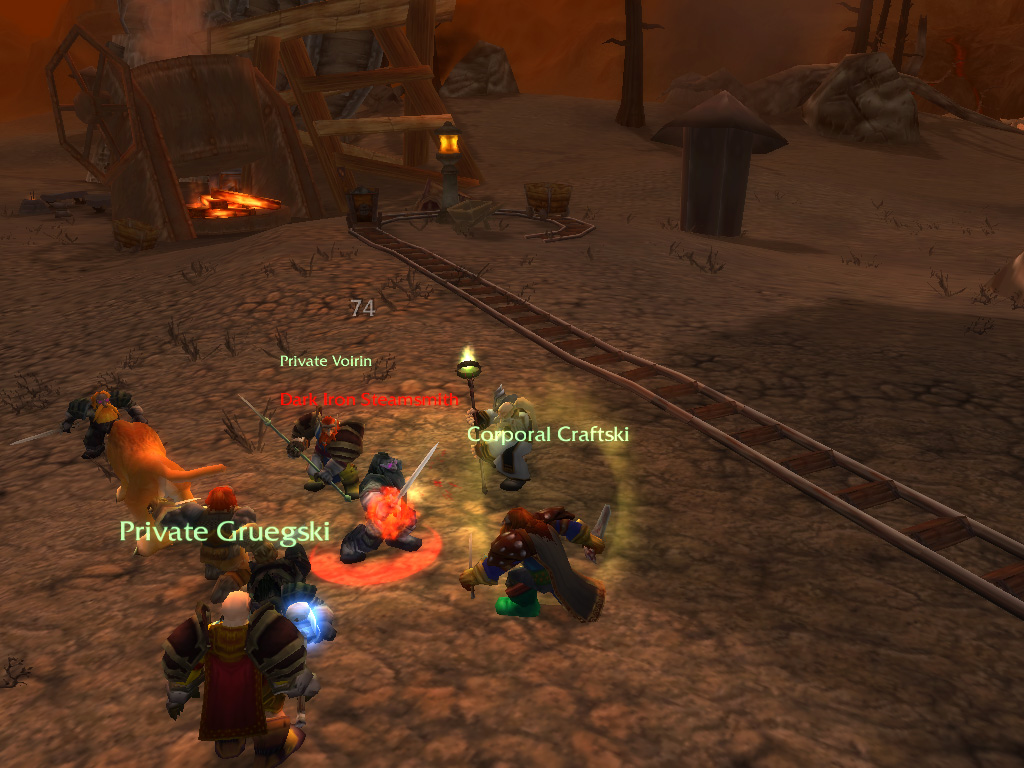
Welcome to Searing Gorge
S urprised, but ready for a fight, we engaged both monsters, with Gruegski invoking a fire resistance aura to protect us from their flames. Flapping wings, deep roars and scorching flames, for a second it was overwhelming, but we regained our grip. And to think these dragons were only small broods! Making sure our hits counted, we first focussed on the slightly smaller one, sending it plummeting to the ground after a hail of lead from Craftski. Without the help from its kin, the other dragon didn't hold out against us long, and soon the two hulks were lying on the ground. It seemed like a waste to leave the huge carcasses behind, so Craftski took the dragonscales for his own, these would certainly come use! We returned the bindings which once held these dragons in their prison to the Elf, who was most pleased, and were rewarded with magical items from the Kirin Tor coffers.
Now we would continue our trip to Searing Gorge, which took us to the far west of the Badlands. Here we passed a Horde camp, built in the corner of a canyon, and made sure to stay out of sight of their scouts. We travelled through a chasm, the red dust from the Badlands slowly turning soot-black with ash, as we were coming ever closer to Blackrock mountain. We eventually found Thorium Point set in the mountainside, a small camp reachable by a narrow path, consisting of various tents and a large watchtower. Here the Thorium Brotherhood ruled, Dwarves once part of the Dark Iron Dwarf clan, but now stuck in an endless struggle to remain independent form their former brethren. It was beset from all sides by danger: Dark Iron Dwarves, Fire elementals and Incendosaurs, so we had some work to do...
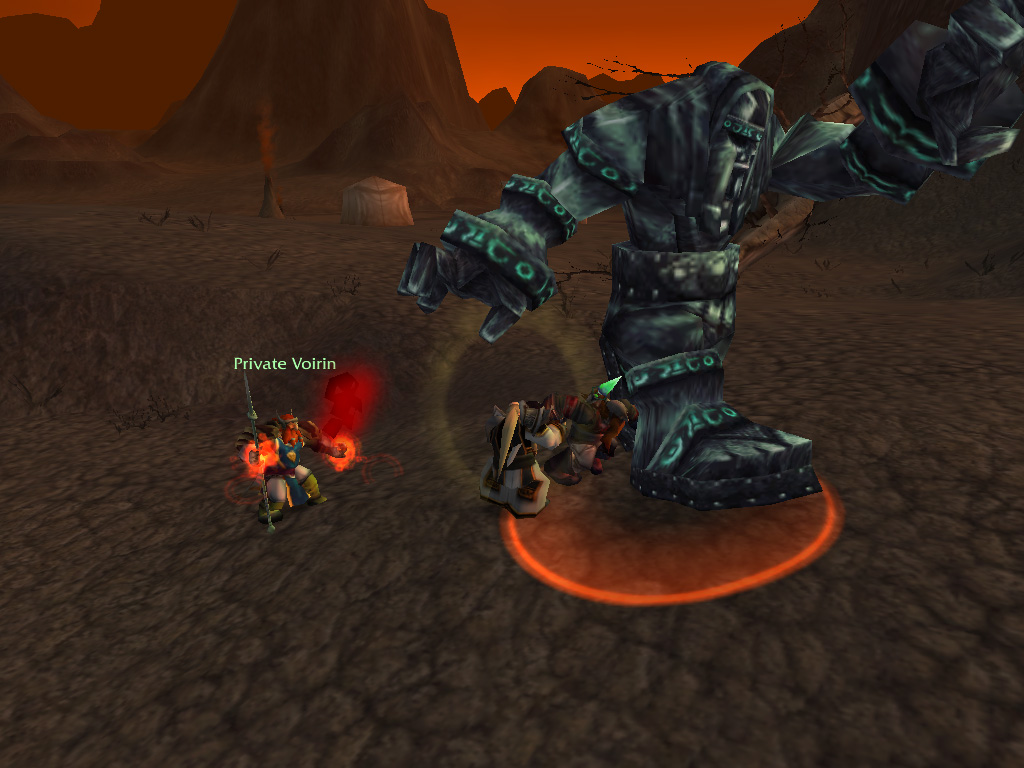
O
ne of the main concerns was the Dark Iron activity, all around. A large mining operation dominated the landscape, with cranes and elevators lifting ore and other precious minerals from the depths. The Dark Iron Dwarves had enslaved anyone foolish enough to tread near Blackrock mountain, and enforced their rule with an iron fist. One of the ways to break the Dark Iron might would be to free these workers, disrupting their mines. We were sent to slay their taskmasters, slavers and break their vigilant golems. Scouring the scarred landscape, the smashed any golem we found to rubble, and ran down every Dark Iron Dwarf we met. Eventually we found ourselves overlooking a smaller Dark Iron digsite, where we were called over by a voice coming from an outhouse. It appears a Dwarf had been locked inside, and asked us to clear the way for a safe escape. And, we would have to gather some pieces of silk...
Voirin jumped straight down into the pit, drawn to the large mithril seam which he saw. And the rest of us swiftly followed, taking care of the Dark Iron geologists that were working in site. As Voirin was mining his rewards, we returned to the outhouse, letting the Dwarf know the path was clear. Thankful, but not finished yet, we were asked to push the silk cloth through the crack at the bottom, which was grabbed swiftly. We let the Dwarf do its business in peace and returned to Voirin. Suddenly, we saw a collapsed shape, lying under a tent. It seems we had run into another Dwarf, who was thankfully alive!
Voirin jumped straight down into the pit, drawn to the large mithril seam which he saw. And the rest of us swiftly followed, taking care of the Dark Iron geologists that were working in site. As Voirin was mining his rewards, we returned to the outhouse, letting the Dwarf know the path was clear. Thankful, but not finished yet, we were asked to push the silk cloth through the crack at the bottom, which was grabbed swiftly. We let the Dwarf do its business in peace and returned to Voirin. Suddenly, we saw a collapsed shape, lying under a tent. It seems we had run into another Dwarf, who was thankfully alive!
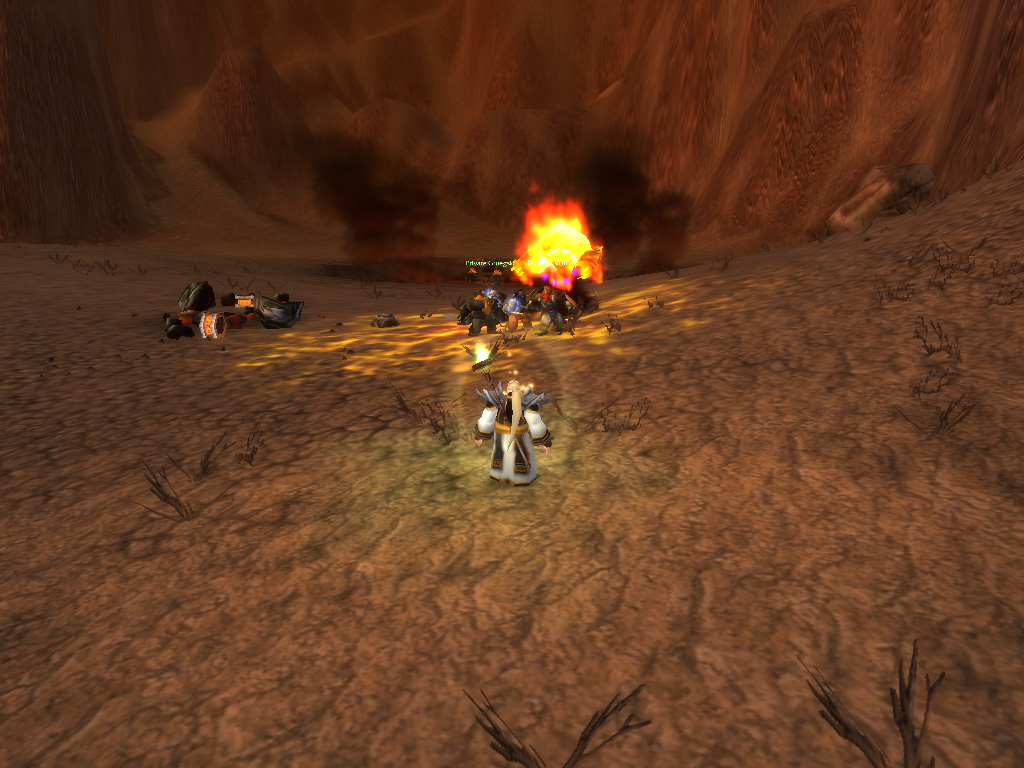
The Four to the Rescue!
O rangz gave first aid, and the Dwarf slowly regained consciousness, letting us know he was named Dorius, and needed to get back to Ironforge quickly. Supporting him as he walked, we led him out of the digsite, and headed north. As we walked, we passed the large chasm in the middle of the area; which Dorius called "The Cauldron", and mentioned evil things lurking in the depths. Climbing over a small wooden staircase, we were suddenly attacked by two Dark Iron dwarves, appearing from the shadows. But they probably underestimated us, or had miscounted, as the four of us sent them easily into the dirt. With the gate to Loch Modan in our sight, Dorius, felt rejuvenated and started running, we were almost there!
But suddenly, there was a loud crack and Dorius tumbled to the ground, dead. And looking back, we saw a Dark Iron sharpshooter hidden behind one of the hills, who vanished with a smirk. We tried to give chase, but could not find a trace of the assassin, and as we returned to Dorius, we noticed a piece of parchment had fallen out of its pocket, addressed to a Dwarf in Ironforge. It would be up to us to deliver the grim news. We returned to Thorium Point, from where we flew back home.
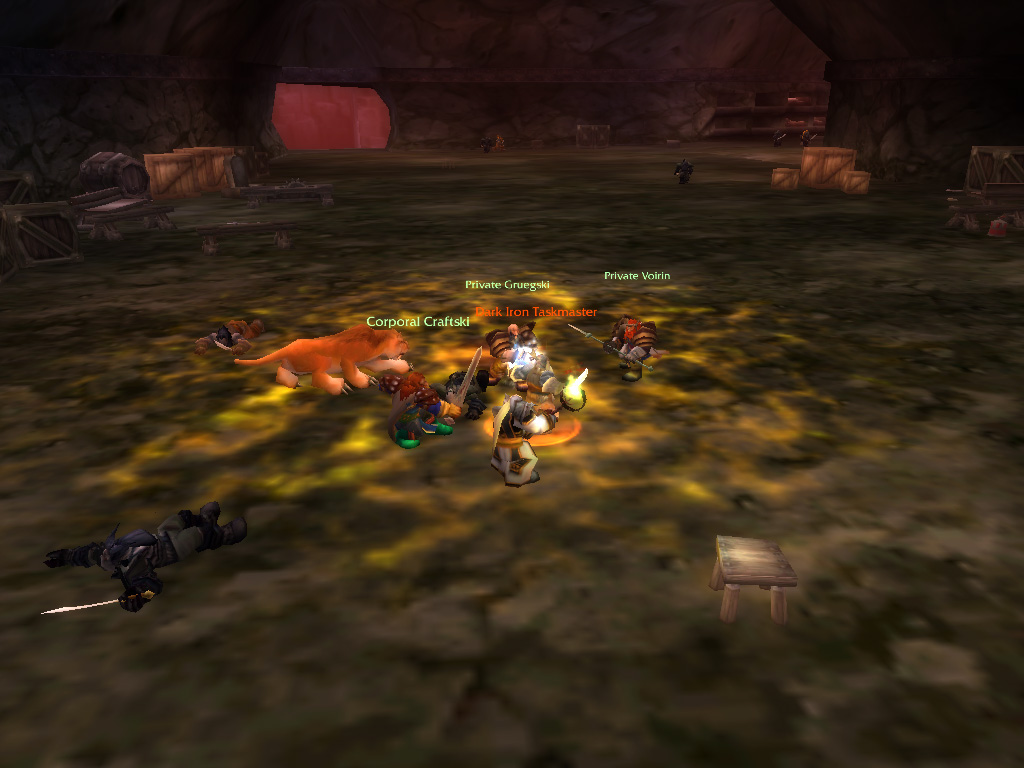
S
earching throughout Ironforge, we discovered the addressee of the letter was none other than the curator of the Ironforge museum and library, and Dorius was his brother. Thorius, as the Dwarf was called, took the news hard, and told us of the letters contents. It appeared the leader of the Dark Iron Dwarves, Lathoric the Black, had enslaved the Dwarven excavation teams that had been sent into Searing Gorge, and was using foul magic to bend them to their will. Using the skills of the enslaved, the Dark Irons were trying to construct a powerful golem, which they called "Obsidion". Asking for a favour, the curator asked us to deliver Dwarven justice, to which we wholeheartedly agreed.
Returning to Thorium Point, the Brotherhood was happy with our results so far, and sent us deeper into the mines. This time our target was their overseer, a Thorium Brotherhood members turned traitor, and as were infiltrating their mining operations, we were asked to be on the lookout for items Dark Iron's had stolen. We used a gigantic elevator to decent into the mines, entering the stuffy, hot tunnels. Here we found even more captives, working tirelessly for their Dark Iron masters. Making a turn, we entered a small balcony, overlooking the operation, where we were greeted by the overseer we had been sent to take out: Maltorius.
Returning to Thorium Point, the Brotherhood was happy with our results so far, and sent us deeper into the mines. This time our target was their overseer, a Thorium Brotherhood members turned traitor, and as were infiltrating their mining operations, we were asked to be on the lookout for items Dark Iron's had stolen. We used a gigantic elevator to decent into the mines, entering the stuffy, hot tunnels. Here we found even more captives, working tirelessly for their Dark Iron masters. Making a turn, we entered a small balcony, overlooking the operation, where we were greeted by the overseer we had been sent to take out: Maltorius.
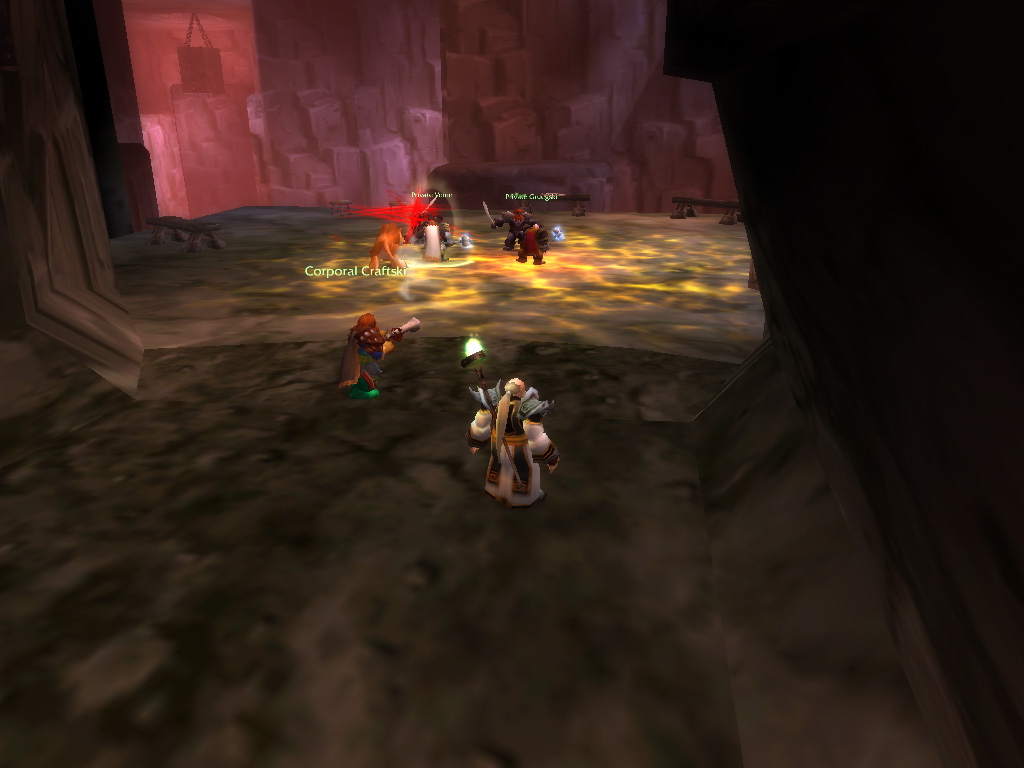
Among Thieves
H e was accompanied by two guards, and mocked us for working for the Thorium Brotherhood, which resistance was futile. We disagreed, and charged in with a flash of steel and blast of gunpowder. As Voirin dealt with Maltorius alone, Gruegski and Craftski's cat kept the bodyguards busy, focussing them down one by one. Finally, only Maltorius remained, and defiant, loyal to Ragnaros, he slumped to the ground. The Thorium Brotherhood had request his head, so although messy, we did our job, making sure no blood dripped on our valuables. Close by, we also found a formula Maltorius had stolen, a recipe for the Brotherhoods fabled Fiery Flux, which they would be happy to see again.
Taking the elevator one level lower, we reached the bottom of the chasm where we entered a large quarry, full of workers. Judging by their uniforms, we had found members of the excavation team Dorius had been part off! The Dwarves were hacking mindlessly, gathering a type of dark stone, and they didn't respond to anything. We searched further until finally, slumped by an altar in the middle of the quarry, we found an Dwarven archaeologist, who beckoned us over. With his last breaths, he told us the key to setting everyone free was a mysterious artefact, held by the Twilight Hammer cult, hiding nearby. We would have to return this relic to the altar, breaking the binding power.
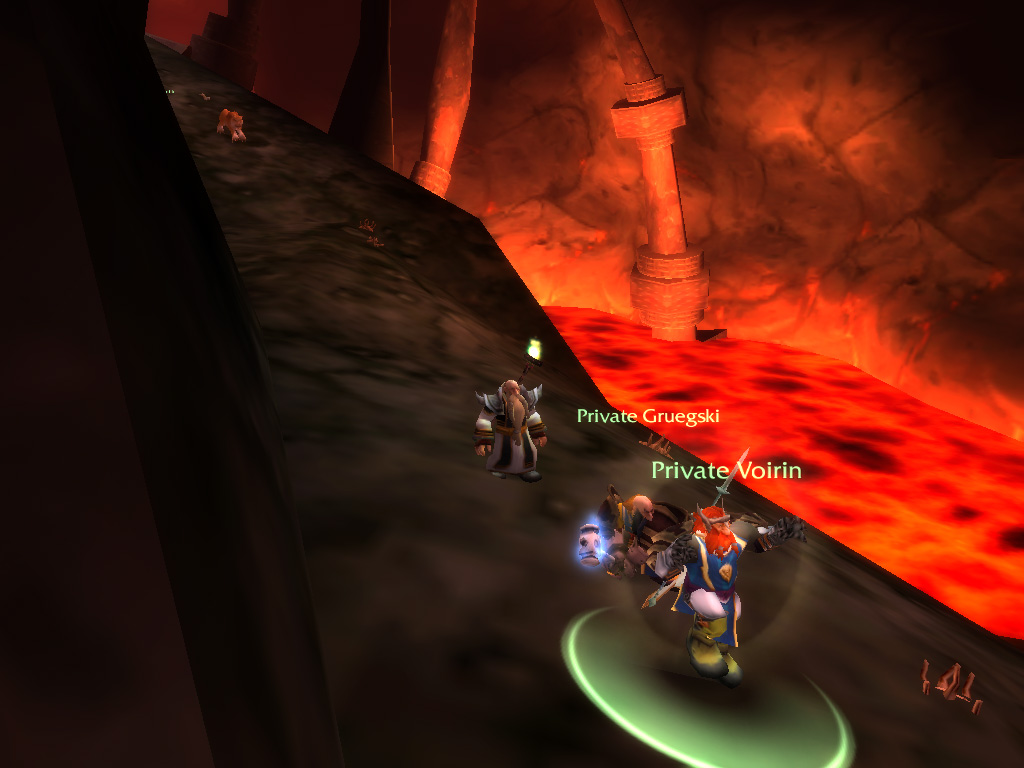
I
nstead of using the elevator, we made our way to the surface through a ramp to the west, as there were still some stolen Brotherhood items to reclaim! Keeping an eye out for more Dark Iron Dwarves, we raided an encampment, finding a stolen smithing tuyere and a finely crafted lookout glass in their possession. Returning to Thorium Point, we delivered these items and the fiery flux recipe to the Brotherhood, and handed over the bag containing the head of Maltorius to their captain. He was quite pleased, and quickly placed it on a pike at the camp's entrance. Happy with our results, and with the Dark Iron Dwarves weakened, we were sent out to take care of other dangers in the area: Incendosaurs and Lava Spiders!
But first we rode further up the mountain, where we knew a Twilight's Hammer camp could be found. The cultists were few in number, and we approached as unstealthily as we could, diving straight into their camp. Loyal to their masters, they stood and fight, but were no match for us, and soon we had a Twilight Hammer ritual circle all for ourselves. Searching the area, we found the relic we needed floating in the middle of lava, leaving us with no method to get it out. But Gruegski would not have it, and invoking divine protection, he shielded himself and dived straight into the magma pool. Although we had faith in his skill and the divine powers, we still let out a sigh of relief when he emerged, carrying the relic. Now it was time to deliver some justice at last, and set our brethren free.
But first we rode further up the mountain, where we knew a Twilight's Hammer camp could be found. The cultists were few in number, and we approached as unstealthily as we could, diving straight into their camp. Loyal to their masters, they stood and fight, but were no match for us, and soon we had a Twilight Hammer ritual circle all for ourselves. Searching the area, we found the relic we needed floating in the middle of lava, leaving us with no method to get it out. But Gruegski would not have it, and invoking divine protection, he shielded himself and dived straight into the magma pool. Although we had faith in his skill and the divine powers, we still let out a sigh of relief when he emerged, carrying the relic. Now it was time to deliver some justice at last, and set our brethren free.
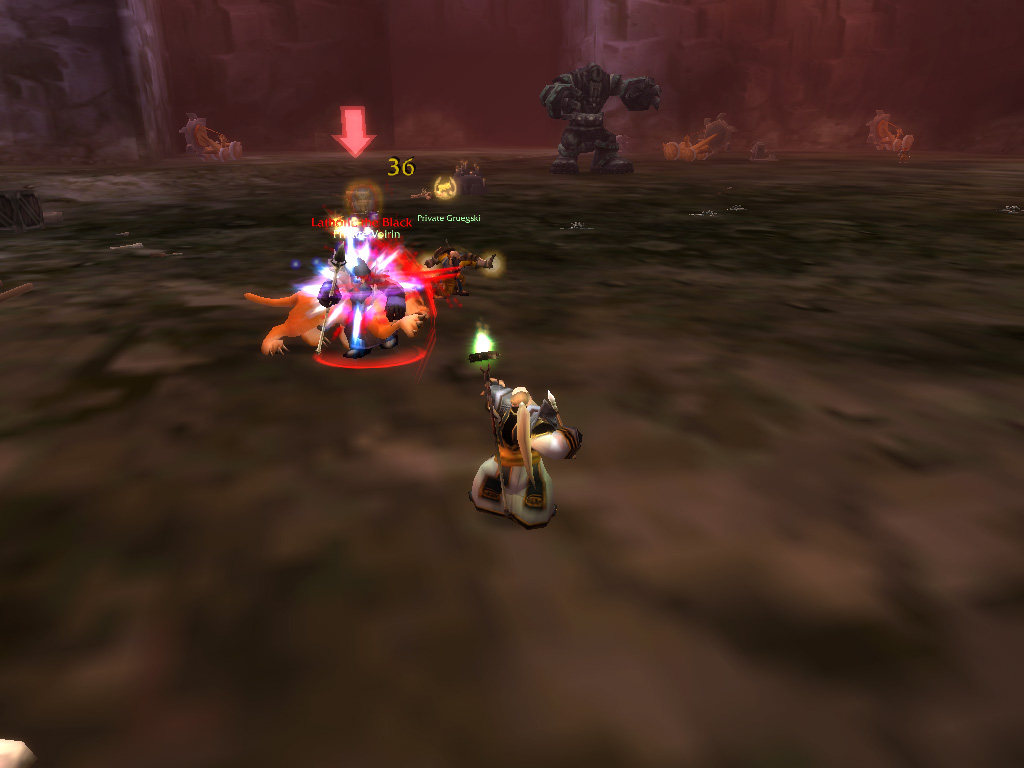
A Traitor Revealed
W e travelled to the bottom of the chasm again, entering the quarry and making our way to the altar. This time however, a lifeless obsidian golem stood nearby, towering over us as we approached the altar once more, feeling an ominous tug from the relic we had claimed. As we lay the stone on the altar we felt a surge of power, this did not feel as breaking bindings! Suddenly we heard a slow clapping behind us, and a dwarf appeared into view: It was Dorius! This time he wore dark robes, and told us we had been tricked and his death was staged. We had been used to claim the last binding stone, which was now in his possession, and using the stone, he would claim Blackrock Spire for Ragnaros. He referred to himself as Lathoric the Black, and with one final word, the golem, Obsidion sprung to life.
Lathoric started the fight alongside his construct, wielding powerful magic, and blasting us with shadow magic. At the same time Obsidion rumbled ever closer, finally colliding with Voirin in a clash of black stone with steel. Gruegski and Craftski had by now connected powerful hits with Lathroic, who's spellscasting was becoming erratic. Finally, smiting with holy force, Gruegski stunned the Dwarf to the floor, and connected the hammer straight to the head. This left Lathoric sprawled on the ground, enabling us to focus to Obsidion. Voirin had stood valiantly, holding the massive fists at bay, and absorbing impacts that would have sent a lesser Dwarf flying. Coming to the rescue, Orangz reinforced Voirin's holy shield, and started swinging his magic wand at the golem. Craftski joined from a distance, and started to take pot-shots at the spots where Voirin already had chipped the stone, leading to deeper and deeper cracks.
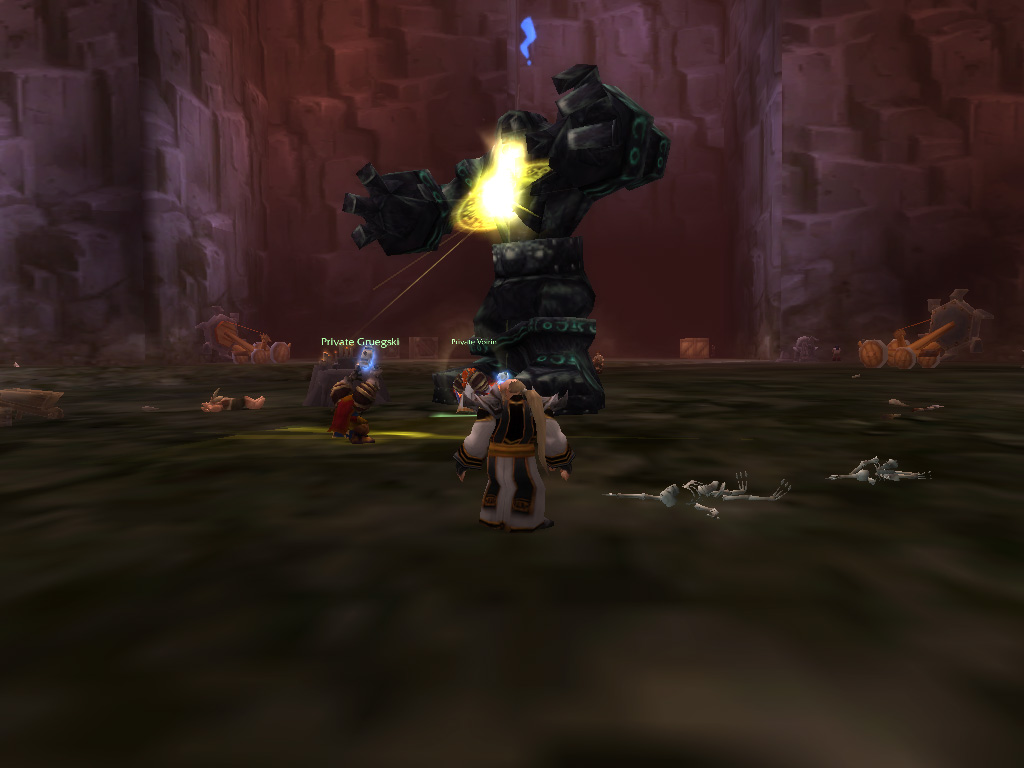
I
t wasn't long before parts of the Golem began to crumble, it's construction weakening and stone chips flying off in all directions. As Obsidion shattered in fragments of stone, the halls finally fell silent, and all around us Dwarves and other enslaved creatures looked around, bewildered. It seemed the enchantment had been broken! We claimed proof of Obsidions destruction and Lathorics demise, and helped our kin to the surface. Here we led them to Thorium Point to travel back to Ironforge, and we went along for the ride. There, we revealed our findings to Thorius, who at first didn't believe us, that is, until we showed him physical proof. Grieving, and shaken by the influence of the old gods, he was content with our actions against a betrayer of Ironforge, and rewarded us for our actions.
Now we only had to return to Searing Gorge to do some cleaning up, as there were animal infestations! We had no idea what Incendosaurs were, so we first turned our focus on the spiders, which skittered along the mountains. Thanks to Craftski's tracking we were able to find these creatures easily, and making our way along the ridge, we suddenly were met by a sight we had not seen before. A Human, dressed in black armour, stood there, accompanied by a squire, surrounded by scorched Dark Iron corpses. The Human introduced himself as Kalaran, a Stormwind noble who was yearning for revenge. He had come to Searing Gorge to take the fight to the Dark Iron Dwarves, and asked us to be his instrument for revenge.
Now we only had to return to Searing Gorge to do some cleaning up, as there were animal infestations! We had no idea what Incendosaurs were, so we first turned our focus on the spiders, which skittered along the mountains. Thanks to Craftski's tracking we were able to find these creatures easily, and making our way along the ridge, we suddenly were met by a sight we had not seen before. A Human, dressed in black armour, stood there, accompanied by a squire, surrounded by scorched Dark Iron corpses. The Human introduced himself as Kalaran, a Stormwind noble who was yearning for revenge. He had come to Searing Gorge to take the fight to the Dark Iron Dwarves, and asked us to be his instrument for revenge.
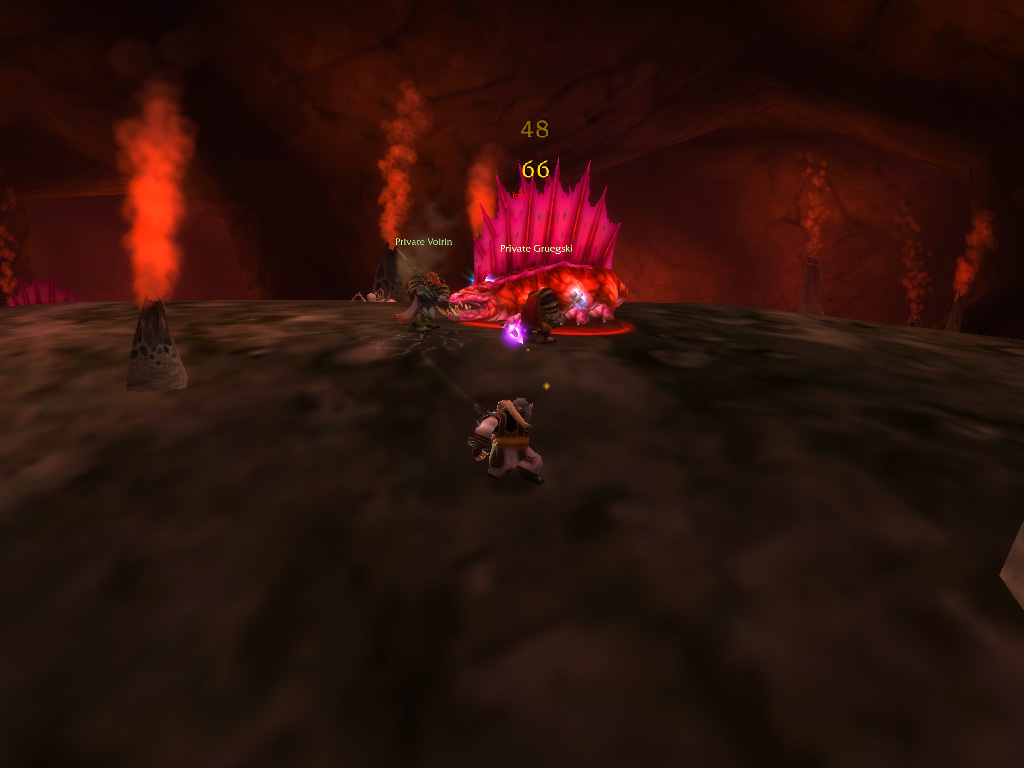
T
o achieve this, he needed to create a torch, blazing like no other, which would light up Searing Gorge, leaving only ash. As his fight against the Dark Irons was our fight, we agreed to help him out, and were sent to gather fiery embers and oil, which we would be able to retrieve from the golems and fire elementals that roamed in the lava pits. Gathering the oil caused us no problems, as we had battled golems before, but the embers proved to be more problematic, the flames dousing the moment the elementals were banished to the Elemental Plane. But we were persistent, and soon we returned to Kalaran with the objects he required. Our next task would be to gather thorium, to create a staff that could hold a flawless flame. Voirin informed us he had never seen Thorium veins before, so we would have to salvage it from others. The Dark Iron Dwarves seemed to like the material, so we set out to scavenge it from their stockpiles.
Delving deeper into the Dark Iron mines, we were able to gather various thorium plated items, and hoped these would prove sufficient. Entering the lava-filled tunnels of the mines, we saw a creature unknown to us: A large reptile with a large sail-like webbing on its back, basking in the sizzling heat. Were these the Incendosaurs we searched? After a short discussion, we agreed they had to be, and set out to take care of their numbers, as requested by the Thorium Brotherhood. The creatures proved the dangerous, blasting us with flaming breath and raking armour with sharp claws. There also proved to be almost endless numbers as well, as more and more creatures popped up from the lava streams below. After much fighting, our beards singed and cloaks almost burnt to a thread, we agreed we had culled their numbers enough, and with word of success, we returned to Thorium Point.
Delving deeper into the Dark Iron mines, we were able to gather various thorium plated items, and hoped these would prove sufficient. Entering the lava-filled tunnels of the mines, we saw a creature unknown to us: A large reptile with a large sail-like webbing on its back, basking in the sizzling heat. Were these the Incendosaurs we searched? After a short discussion, we agreed they had to be, and set out to take care of their numbers, as requested by the Thorium Brotherhood. The creatures proved the dangerous, blasting us with flaming breath and raking armour with sharp claws. There also proved to be almost endless numbers as well, as more and more creatures popped up from the lava streams below. After much fighting, our beards singed and cloaks almost burnt to a thread, we agreed we had culled their numbers enough, and with word of success, we returned to Thorium Point.
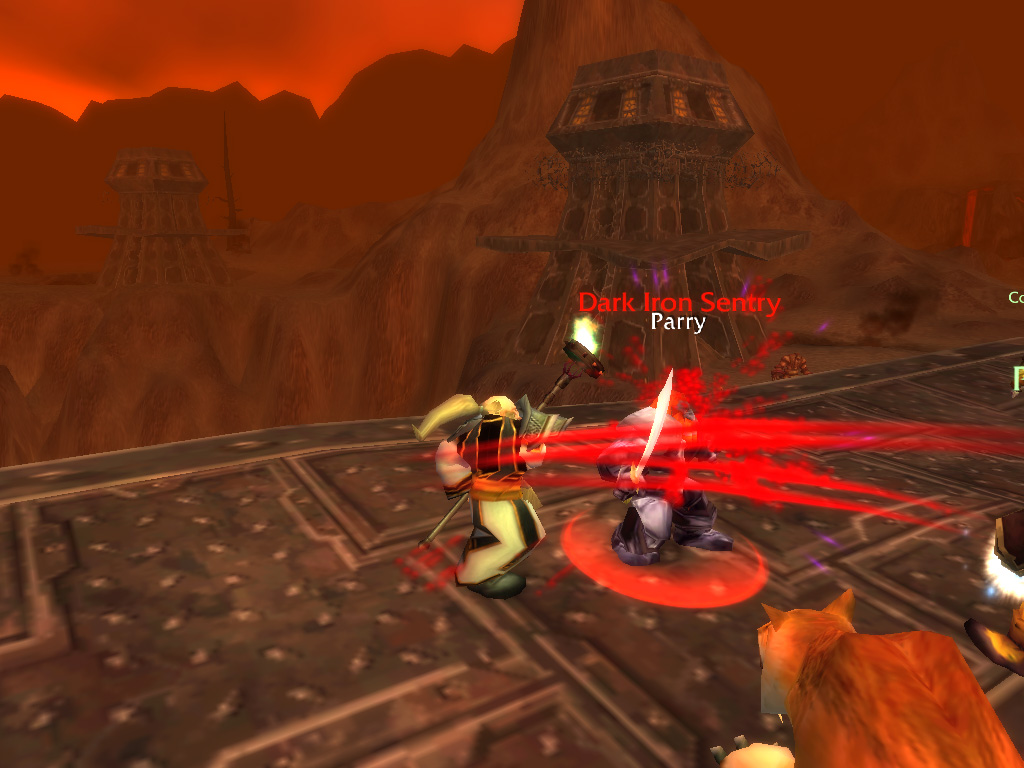
Unexpected Employers
W e brought Kalaran the salvaged Thorium, which proved to be more than enough for him, and with the staff almost done, we required only one more ingredient. This was the magical power to encase the flame, a power we would find to the west, held by another group of twilight Hammer cultists. There we had to find one of the symbols of Ragnaros, the Firelord, which some of the cultists carried with them. The cultist camp proved to be far larger than the small encampment we had raided earlier, and took care infiltrating their settlement. The cultists consisted of many different races, Trolls, Orcs, Humans... But also Gnomes and Dwarven brethren! In the end, we found one of these symbols held by a Gnome cultist, and returned it safely to Kalaran. While we were away, he had crafted the shaft, waiting for its flame to be lit. With an incantation which we had never heard before, he empowered the torch, setting the staff alight with a powerful flame.
Now it would be time for revenge, and we were sent to set all the Dark Iron guard towers, which surrounded the mining pit, ablaze. In our travels, we had passed these towers before, which made our movement swift and purposeful. The towers were guarded by strong sentries, but even those would not stop us, as we shovelled them off the tower, or burned them together with what they wanted to defend. With all four towers on fire, we returned to Kalaran, who had been inspecting our handiwork from afar. He let out a laugh, unlike any we had heard before: We had been fooled again, and this time by a dragon! But Kalaran was amused by our work and let us be, leaving a chest filled with riches behind. As we rummaged through the chest we found a strange patch of skin, which Craftski identified as that of a dragon. It made us wonder, why had we received such a gift?
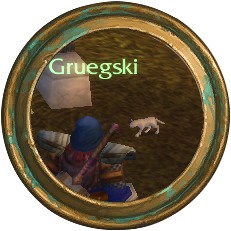
Even non-hunters can get various pets, although a fluffy kitten or tiny squirrel won't do any damage soon!
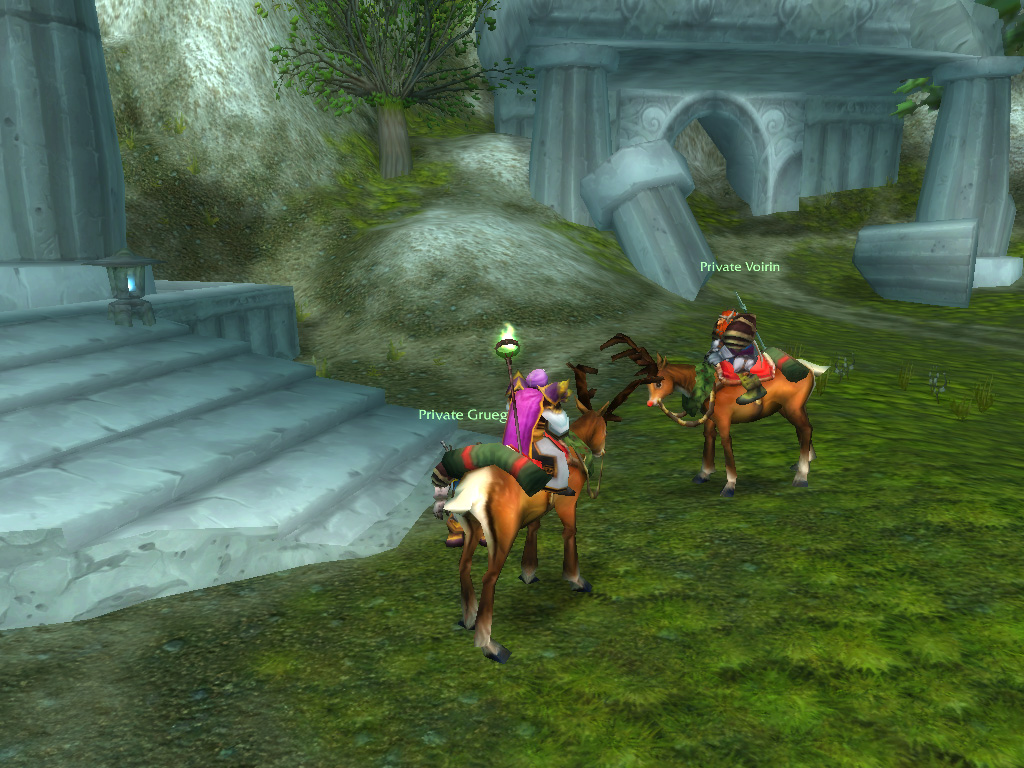
Back to Kalimdor
B ack in Ironforge, we found strange things afoot: Snow was randomly falling from the sky and faint bell noises could be heard in the air. And in the stables, we found our faithful rams had been randomly polymorphed into reindeers! All these enchantments had to do with the upcoming feast of Winter's Veil, enthralling the most hardened adventurers! With the Searing Gorge safe, and the Dark Iron Dwarves driven back into Blackrock Mountain, we explored our options: Would we dare to set foot in the Sunken Temple? Would we head beyond Blackrock, into the Burning Steppes? We could not agree, until Orangz came with another option: Across the ocean, deep inside Desolace, we could find a great temple of elemental gods, the caverns of Maraudon. These caves had recently filled with corruption from Satyrs and other dark creatures, which were a threat to all of Kalimdor.
Anxious to delve in some mysteries once more, we travelled to Menethil, taking the boat to across the sea. Tidings from the earthen temple had also reached the mages of Theramore, and asked us to gather powerful fragments of shadow energy to study. From there it was a long flight to Desolace, which led us through the Barrens and over the grassy fields of Mulgore, home of the Tauren. We landed in Njel's point, where we gathered information from the camp commander. To cleanse the caves of the corruption, we would have to use the power of Maraudon itself and were give a vial to harness the waters of the temple. And finally, we would have to travel into the depths, and destroy the earth elemental known as Princess Theradras.

T
raveling south, we passed a small hut, where we were hailed by a Forsaken lady, who acted most friendly to us. She introduced herself as a researcher and asked us if we were heading for Maraudon. We confirmed her suspicions, and were asked to collect carvings from the creatures living in the caves. Continuing our travels, we made our way to the Valley of Spears, the Centaur grounds surrounding the Maraudon. Fighting our way past groups of Centaur, we stumbled upon one of them that wasn't hostile to us, who introduced himself as the Pariah. Although exiled from his own clan as a heretic, he still believed the Centaur clans could be united, and needed the power of ancient Centaur Khans to reach this goal. He instructed us to steal a relic, and imbue it with the power of past Khans. A Desolace without warring Centaur factions would be a far more peaceful one, so we agreed to honour his request.
As we continued our path, we came closer to temple, which we saw towering in the distance. A vast figure, hewn out of the mountainside with huge doors where its mouth would be. We approached the gates, and with a touch, they slowly swung inwards... Inside we found more Centaur, enraged at our presence, and also far stronger than those that had met outside. Dimly lit tunnels guided our way, leading into a vast cavern complex, where orange and purple crystals shone from the walls. During our decent, the living had been exchanged for the dead, as we now found ghostly centaurs barring our way. With holy fury, Orangz and Gruegksi banished them to the netherworld, and it wasn't before long that we were confronted by a final living Centaur. This had to be the Prophet, the one who oversaw the spirits of the temple.
As we continued our path, we came closer to temple, which we saw towering in the distance. A vast figure, hewn out of the mountainside with huge doors where its mouth would be. We approached the gates, and with a touch, they slowly swung inwards... Inside we found more Centaur, enraged at our presence, and also far stronger than those that had met outside. Dimly lit tunnels guided our way, leading into a vast cavern complex, where orange and purple crystals shone from the walls. During our decent, the living had been exchanged for the dead, as we now found ghostly centaurs barring our way. With holy fury, Orangz and Gruegksi banished them to the netherworld, and it wasn't before long that we were confronted by a final living Centaur. This had to be the Prophet, the one who oversaw the spirits of the temple.
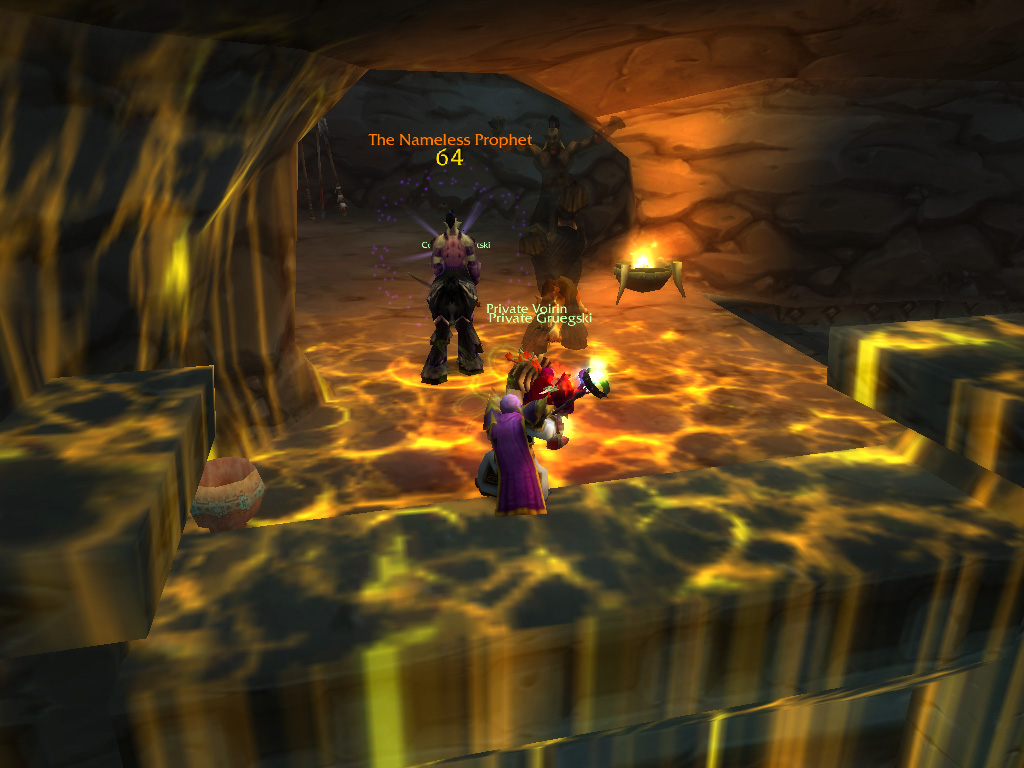
The Gates of Maraudon
W e asked for the relic peacefully, but were replied with bolts of shadow, and were called defilers. Telling him it would all be for the greater good, we brought the prophet down, and retrieved the relic, which proved to be a magical amulet. According the Pariah, spirits of ancient Khans roamed the depths of the temple, and with this artefact, they could be tricked into the mortal realm. We had to find each Khan, made them appear from the netherworld, and take the gemstones they held. Together with these gems, the amulet would become a symbol to which all Centaur clans would swear allegiance. Up ahead, the paths split, and we had to make a choice where to go first. We agreed to explore the caverns studded with purple crystals first, where we ran into powerful stone elementals. Shattering them during our fight, they collapsed into shards of shadowy rock, the material the mage in Theramore was seeking.
As we filled our bags with the stones, we scouted a shadowy figure in the distance, which was a large, powerful Centaur spirit, wandering through the tunnels. The Centaur seemed to look straight through us, undisturbed by our presence. It appeared we had found our first Khan! Invoking the power of the amulet, the Khan suddenly trained his eyes upon us, as if a curtain had been lifted, and with a defiant roar he engaged us. However, with our combined holy smiting, the Khan was easily dealt with, and as the spirit vanished, we found a gemstone left on the ground. Stowing it away safely, we returned to the crossroads where we had been before, this time heading for the tunnels full of orange crystals. On our way there, we ran into another Khan, and finally a third! Now, with three gemstones in our bags, we were halfway to the completion of the amulet...
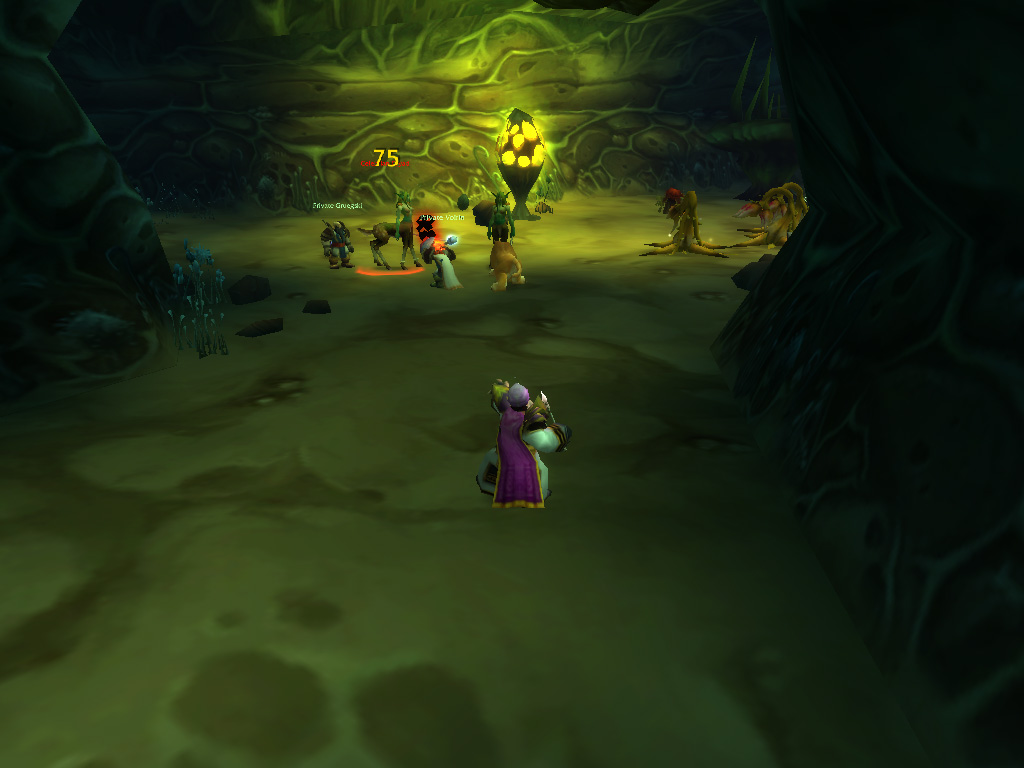
W
ith the caves quiet, only stirring with a deep rumble, we heard the sound of splashing hooves up ahead, and turned the corner, ready for a fight with more Centaurs! To our surprise we stood eye in eye with a Dryad, a Sister of Cenarius. We hadn't met any of them before, and had only seen glimpses during our travels through Night Elf lands. We greeted her, upon which she gave a small nod. Cavindra as she was called, told us about how she had ended up here, that Celebras, her brother, had been corrupted by an evil Satyr that dwelled deeper inside. She asked us for help: To save Celebras, we had to return the sceptre which was stolen from him, an artefact that was now broken, it's parts scattered throughout the caves. With the promise of a magical pathway into Maraudon in return, we agreed to help the Dryad and set out onwards. Further ahead we found a deep enough pool to fill the vials we had been given, and with the cleansed water safely stowed away, we were ready to remove some corruption!
We slowly descended, climbing past a rocky staircase and through a small tunnel. Here rough stone and rocks started to give way to rampant plant growth, with vines and roots growing from the ceiling and forcing their way through the walls. Gigantic plant-like creatures, that appeared to be sentient, crawled through the halls, followed by smaller packs of living flowers. And as we discovered in our first encounter, the leaves were razor-sharp, and its limb-like roots dripping with acidic venom! The plants were posing a danger to the armour of Voirin! The smaller flower-creatures tried to overwhelm us with numbers, so we depended on Craftski and Gruegski to keep them at bay. As we kept the botanical terrors at bay, we noticing multiple plants lining the walls, dripping with foul ooze. Taking out our vial, we poured some of the gathered water over them, which resulted in an explosive situation!
We slowly descended, climbing past a rocky staircase and through a small tunnel. Here rough stone and rocks started to give way to rampant plant growth, with vines and roots growing from the ceiling and forcing their way through the walls. Gigantic plant-like creatures, that appeared to be sentient, crawled through the halls, followed by smaller packs of living flowers. And as we discovered in our first encounter, the leaves were razor-sharp, and its limb-like roots dripping with acidic venom! The plants were posing a danger to the armour of Voirin! The smaller flower-creatures tried to overwhelm us with numbers, so we depended on Craftski and Gruegski to keep them at bay. As we kept the botanical terrors at bay, we noticing multiple plants lining the walls, dripping with foul ooze. Taking out our vial, we poured some of the gathered water over them, which resulted in an explosive situation!
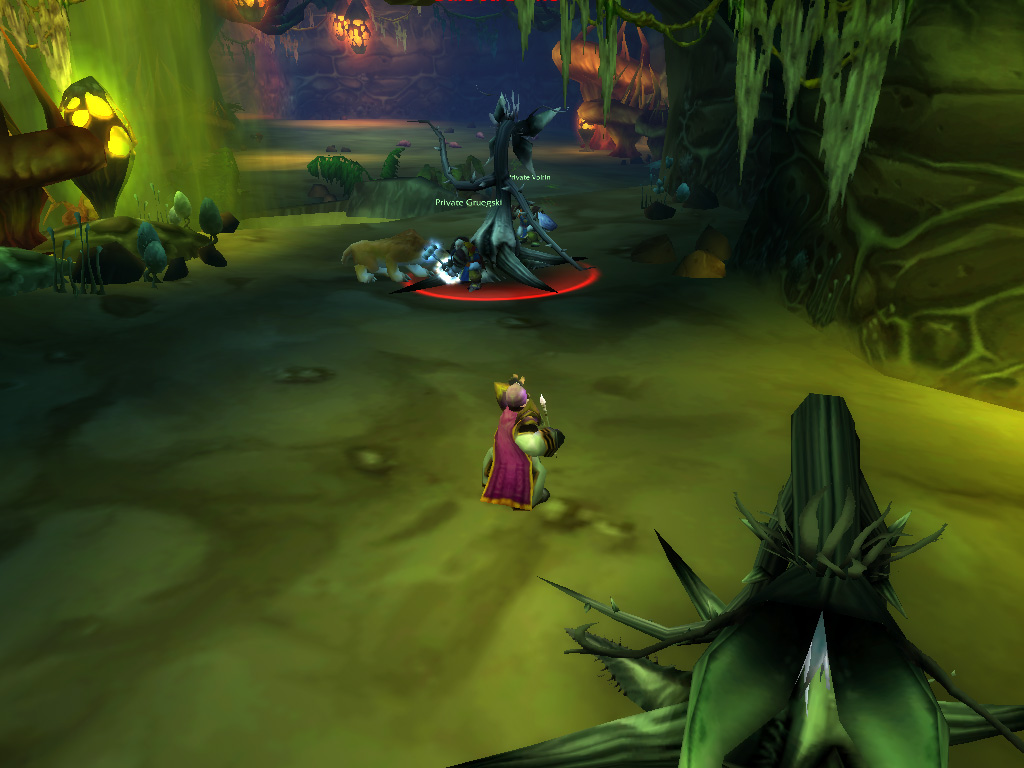
O
oze sprayed from the plant, forming elemental creatures as it hit the floor, that tried to overwhelming us in a stream of poisonous water. We gathered around Voirin who, with his shield raised, managed to fend off most of the spray, and fought back. Eventually, the magic of the ooze was drained, and the elementals splashed lifeless to the ground. We were now wondering, with this resistance, how much of the caves did we have to cleanse? Another tunnel led us to more poisonous beings that barred our way: Large globs of slime, pulsing with venom, dribbled over the floor, and gave Gruegski quite a scare when he came near. Invoking his divine protection, he was able to get away, but from there on we relied on Craftski and Orangz to defeat the blobs from afar, with Voirin leading them over Gruegski's concentrated ground.
Dryads also patrolled these caves, but unlike Cavindra, these proved to be less friendly, yelling at us for defiling their caverns and bombarding us with poisonous spears. When engaged, we had to be weary as well, as their hooves could pack quite a punch and their poisonous magic was draining. As we slowly made our way forward, past waterfalls of blighted water, we came upon a chamber infested with small larva, and a large organism, which was spewing larger grubs endlessly. Dragging all creatures with us, Voirin grabbed the larger creatures while Gruegski and Craftski dealt with the smaller ones. Orangz meanwhile had ran straight to the spewing organism, collapsing it with a few solid hits. Who said priests couldn't fight? With all the larva taken down, the path was clear again, and we continued onwards, this time heading into a tunnel.
Dryads also patrolled these caves, but unlike Cavindra, these proved to be less friendly, yelling at us for defiling their caverns and bombarding us with poisonous spears. When engaged, we had to be weary as well, as their hooves could pack quite a punch and their poisonous magic was draining. As we slowly made our way forward, past waterfalls of blighted water, we came upon a chamber infested with small larva, and a large organism, which was spewing larger grubs endlessly. Dragging all creatures with us, Voirin grabbed the larger creatures while Gruegski and Craftski dealt with the smaller ones. Orangz meanwhile had ran straight to the spewing organism, collapsing it with a few solid hits. Who said priests couldn't fight? With all the larva taken down, the path was clear again, and we continued onwards, this time heading into a tunnel.
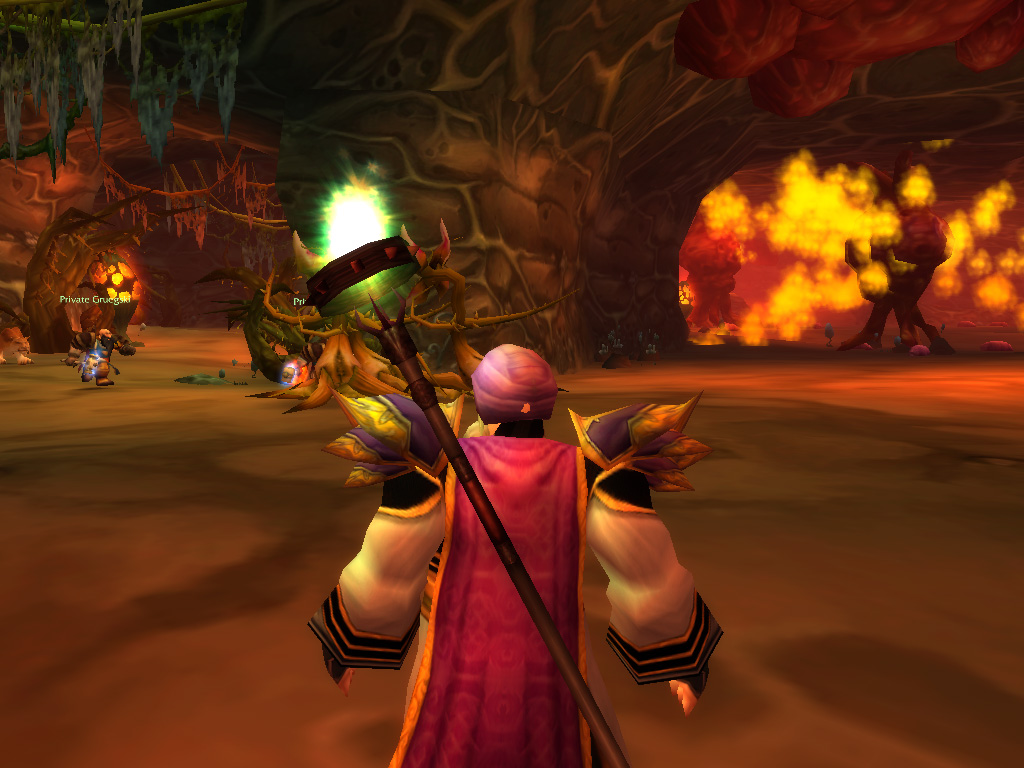
Cleansing the Corruption
T he tunnel was filled with more plant-creatures, this time spitting at us with a corrosive venom. While we were fighting the plants, we another Khan spirit passed, straight through us. This time we were happy the Khans would let us be when not called for, and quickly gave chase when the last living herb fell to the floor. We invoked the amulet once again, and soon afterwards we were in possession of four gemstones: Only one more to go! We turned back, cleansing any corrupted plant we encountered. And this time we were ready for the elementals, with Craftski and Orangz staying safely in the back. This way Voirin and Gruegski could easily absorb the initial wave, leaving Craftski to do damage from afar. Eventually the tunnel opened up into a large cavern with large spores were hanging from the walls, that were filling the room with noxious fumes.
To the side of the room was a pool of greenish water, inhabited by a gigantic water elemental! We had fought smaller versions of this creature when cleansing the plants, and were sure: this had to be one of the sources of the corruption! Dipping our toes in the pool seemed to alert the elemental, thundering towards Voirin and colliding in a splash of poisonous water. Then, swirling around, the creature sprayed us all with more poison, which had to be cured by Orangz hastily. The initial impact survived, we began our counterattack, and our swings and shots started to hit their mark. Driving the elemental back, it suddenly dove into the pool, leaving only smaller copies of itself behind. As these spawns tried to find targets, they were immediately caught by Gruegski's consecration, setting the pool we were standing in ablaze. As the waters calmed, the spawns were gone, and the larger elemental had resurfaced.
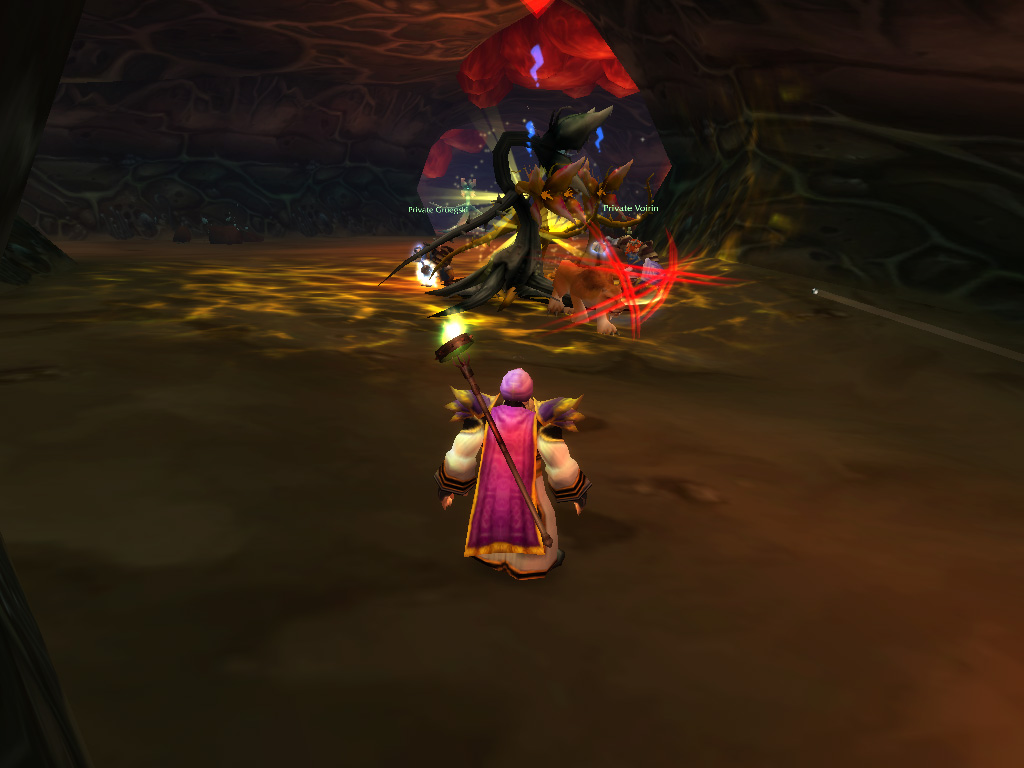
V
oirin thankfully had split-second reactions, and picked up where we had left off. Renewing our attacks, we gave it the extra mile, hoping the creature would not split once more. With Craftski's attacks sped up, and Orangz swinging his wand for what he was worth, the elemental finally exploded in a shower of foul water. The pool now empty and calm, Orangz found a powerful magic wand at the bottom, and we found a sleek staff floating in the water, this was one of the staff fragments we were searching! With the caves free from one of the sources of corruption, planned our next move, would we return, and discover what secrets the caves with the purple gems held? Or would we continue onwards? We chose the latter, and dove into the twisting tunnels once more. Fighting more plant creatures and Dryads, we soon found ourselves in another cave, opposite of a gigantic, pale-green plant creature.
Engaging, we were sprayed by razor-sharp brambles and smacked by flailing vines, but Voirin held his ground, and Gruegski started smiting away. Although large, the plant didn't pose much of a threat, and through endurance we were able to send the creature tumbling to the ground. Rummaging through the remains, Orangz was quite happy, as he was able to find a pair of slippers that were most welcome. From there on, the caves were mostly clear, and soon we reached a large waterfall, which poured endless greenish water into the depths. Here we finally were able to cleanse the last plants of their taint, leaving this part of the caves free from elemental corruption.
Engaging, we were sprayed by razor-sharp brambles and smacked by flailing vines, but Voirin held his ground, and Gruegski started smiting away. Although large, the plant didn't pose much of a threat, and through endurance we were able to send the creature tumbling to the ground. Rummaging through the remains, Orangz was quite happy, as he was able to find a pair of slippers that were most welcome. From there on, the caves were mostly clear, and soon we reached a large waterfall, which poured endless greenish water into the depths. Here we finally were able to cleanse the last plants of their taint, leaving this part of the caves free from elemental corruption.
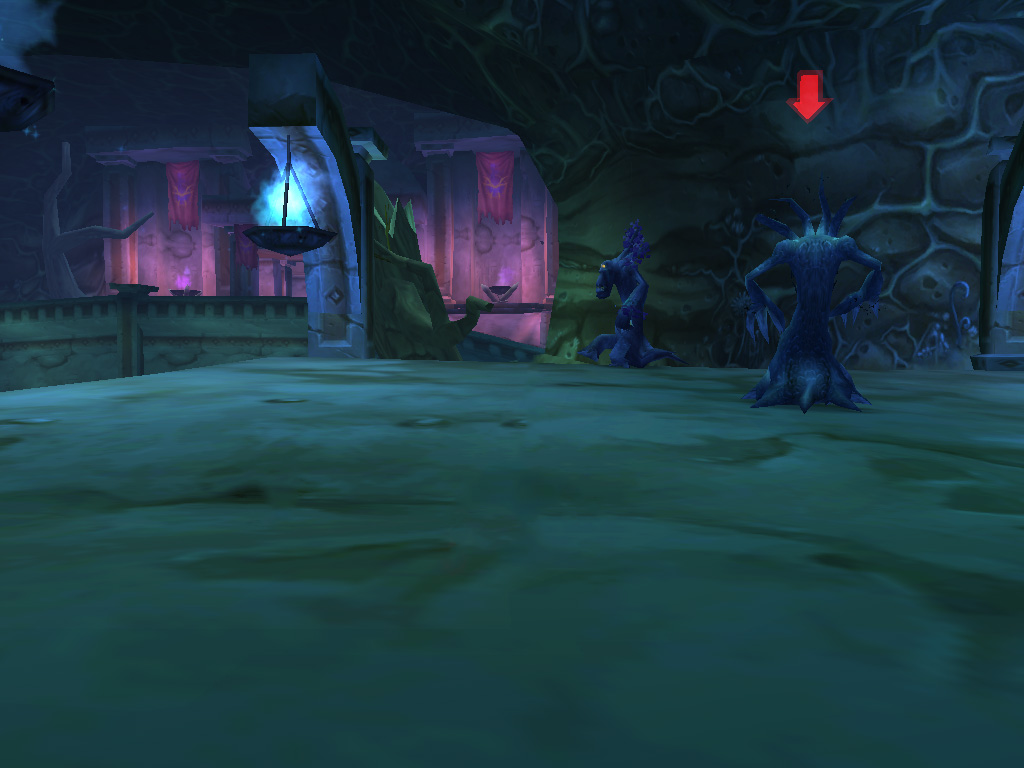
W
e could see the caverns continued in the distance, on the opposite side of the waterfall, but it would take quite a climb to get there. First, we descended from our side, making our way alongside the waterfall, following a winding path and fought through the fen-creatures that were dredging through the slimy water. Crossing the stream, taking care we were not swept away, we climbed upwards again, and not long afterwards reached the top. Here the caverns were dimly lit with an eerie purple glow, and blue-flamed torches along the walls. More bog-monsters barred our way, and we once again ran into the venomous slimes from before. Remembering our approach from last time, we slowly drew the oozes towards us, while shooting them from afar. We left only puddles behind, and continued onwards, where we encountered wandering Treeants, ancient tree elementals, and known to be allies to the Night Elves.
But these proved to be anything but friendly, corrupted by demonic powers, and attacking us, they left us no choice but to take them down. The demonic corruption became more apparent deeper inside as Satyrs, and packs of Imps moved through the caverns, conducting dark rituals and bending the life within the caves to their will. The Satyrs also proved to be master tricksters, as during one of our fights, we were suddenly attacked by one of them hiding in the shadows. To prevent future jump-scares, Craftski would now be shooting flares up ahead, keeping us safe from surprises. Further ahead, we found their master, Lord Vyletongue, who was holding court in a small temple. Guarded by Satyr bodyguards, we approached stealthily, taking out his minions, which Craftski handily spotted. With the lord finally alone, we turned corner, and charged straight in!
But these proved to be anything but friendly, corrupted by demonic powers, and attacking us, they left us no choice but to take them down. The demonic corruption became more apparent deeper inside as Satyrs, and packs of Imps moved through the caverns, conducting dark rituals and bending the life within the caves to their will. The Satyrs also proved to be master tricksters, as during one of our fights, we were suddenly attacked by one of them hiding in the shadows. To prevent future jump-scares, Craftski would now be shooting flares up ahead, keeping us safe from surprises. Further ahead, we found their master, Lord Vyletongue, who was holding court in a small temple. Guarded by Satyr bodyguards, we approached stealthily, taking out his minions, which Craftski handily spotted. With the lord finally alone, we turned corner, and charged straight in!
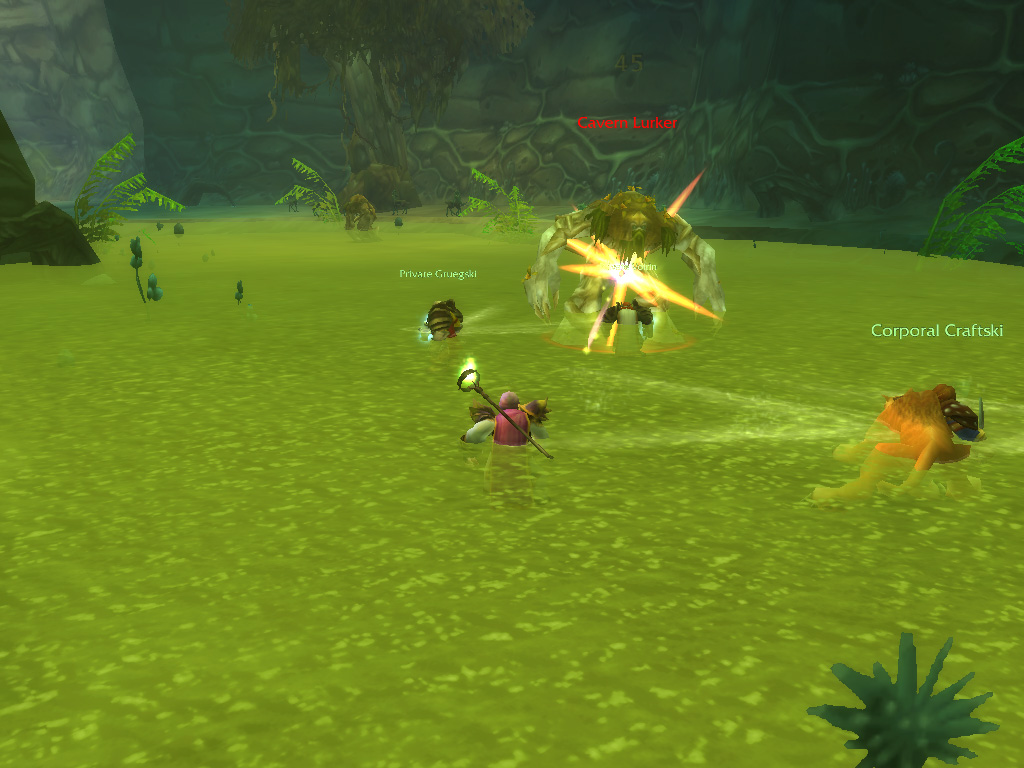
Deamonic Tricks
B ut this time we were the surprised! From the shadows, two more Satyrs sprung, assaulting us from the sides. Leaving Vyletongue in the hands of Craftski's cat, Voirin intercepted the two dagger-wielding demons, keeping Craftski and Orangz safe. While our cat showed excellent tenacity, we were able to slowly take down the bodyguards, who proved to potent, but not as strong as their lord. Soon, they collapsed to the floor, allowing us to focus on Vyletonge. But true to their nature, the Satyr again played tricks on us, and teleported through the room, appearing on the other side. Here he drew out his bow, and rained arrows upon us. With a sprint Voirin closed the distance, but this time the Satyr disappeared in a cloud of dark smoke, vanishing from plain sight. Vyletongue suddenly appeared behind Orangz, ready to maul him with his claws, but this was hastily deflected by a holy shield. The Satyr jumped around once more, but this time we were ready, and with a final barrage of lead, the Satyr fell to the floor. Inspecting its belongings, we found a multifaceted diamond, cut with a skill far beyond that of demons. This had to be the final artefact we were searching; the staff was almost complete!
Heading deeper into the purple-lit caves, we found more Satyrs, Imps and corrupted Treeants, and were able to gather the carvings we were sent to find. These pulsed with dark energies, making us wonder what the researcher was actually studying... Up ahead we also found the final Khan spirit, and after making sure we were safe from demonic tricks, we engaged and defeated the spirit. With the final gemstone now in our possession, we took the amulet and carefully inserted all the gemstones, which snugly dropped in their place. Now complete, the amulet had a mysterious shine to it, now it certainly did look like an artefact which could unite all Centaur! Turning back to where we came from, we soon found ourselves facing the waterfalls once more. This time we would follow the stream, and see where it would lead us.
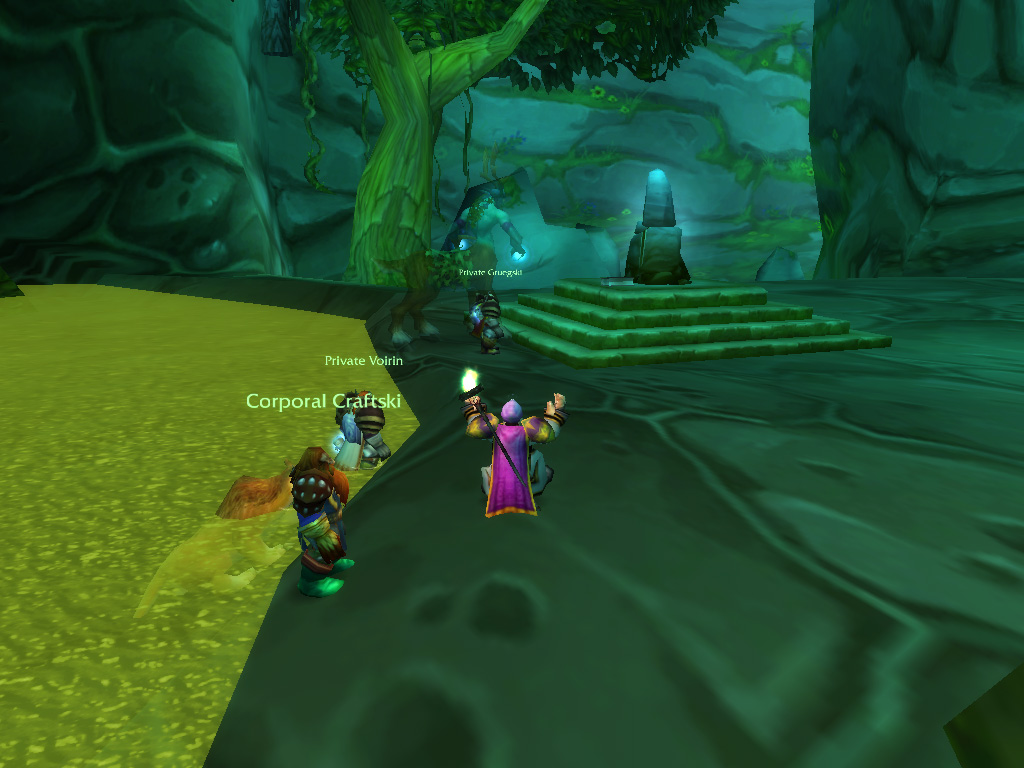
T
he foul water was filled with marsh-creatures but it was the safest way to go, as more creatures roamed along the water's edge. We treaded through the stream, soaking our robes and armour, as we made our way forward. Rounding a corner, we found a small island up ahead. There, surrounded by Treeants, stood the source of these creatures, a Keeper of the Grove. This had to be Celebras! We closed in, wading through the water, and the Keeper finally took notice. He immediately sent his minions after us, which were intercepted by Gruegski. Voirin meanwhile kept Celebras busy, interrupting his incantations and absorbing his blasts of nature magic. As we cleaned up the Treeants, Celebras summoned new minions to his aid, and bound Gruegski to the ground with magical roots, which were thankfully quickly dispelled.
Now seeing Celebras as the bigger threat, we left the Treeants clawing away at Craftski's cat, and focussed on taking the Keeper down. Working as one, we were able to break all incantations, and disrupted the further summoning of minions. Our hits kept hitting home, and finally his stag-legs gave way, and Celebras collapsed to the ground. We had failed our quest... We had been unable to save him, as his mind was clouded by madness and he saw only enemies. We had gathered the pieces of the sceptre for nothing. As we inspected the remains, and Voirin took his cloak for his own, we felt something stirring behind us. Turning around, we found us facing Celebras, but different this time. He was like a spirit, and his eyes brimmed with a clarity we did not see before. As we approaching him, he thanked us, for freeing him from the darkness that had taken hold of him.
Now seeing Celebras as the bigger threat, we left the Treeants clawing away at Craftski's cat, and focussed on taking the Keeper down. Working as one, we were able to break all incantations, and disrupted the further summoning of minions. Our hits kept hitting home, and finally his stag-legs gave way, and Celebras collapsed to the ground. We had failed our quest... We had been unable to save him, as his mind was clouded by madness and he saw only enemies. We had gathered the pieces of the sceptre for nothing. As we inspected the remains, and Voirin took his cloak for his own, we felt something stirring behind us. Turning around, we found us facing Celebras, but different this time. He was like a spirit, and his eyes brimmed with a clarity we did not see before. As we approaching him, he thanked us, for freeing him from the darkness that had taken hold of him.
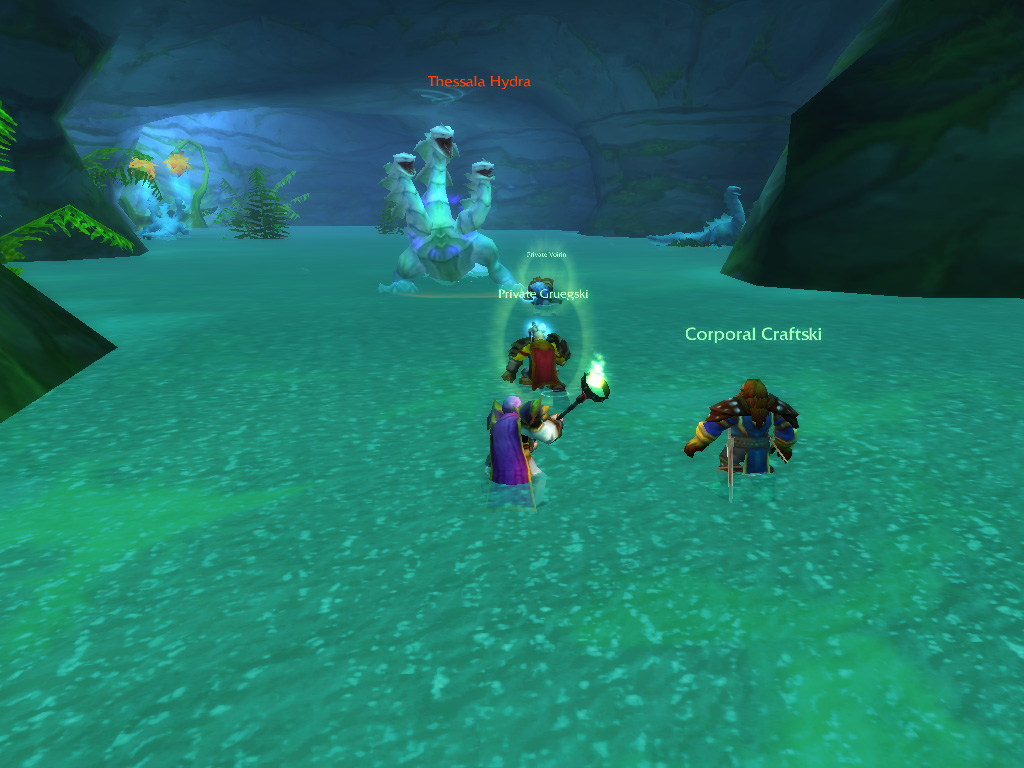
The Secrets of Maraudon
T his had to be the first time someone was thankful for their defeat! Telling him of our task given by Cavindra, and showing him the pieces of the sceptre we had found, Celebras eyes widened, and told us we had done a great deed. With these parts, he would be able to reconstruct the sceptre, and had faith that using it, the corruption of the caves could be lifted forever. We were led towards a stone altar, where Celebras placed an ancient tome on the platform and started an incantation. He asked us to read aloud from the tome, while he channelled his energies into the staff. The ritual took a moment, made difficult by our grasp of ancient scripts, but eventually the staff appeared in the hand of Celebras, forged as one. He handed it over, trusting us with its power and telling that with this sceptre, we could enter the inner sanctum of Maraudon, and would be reachable through a small altar outside of the caves.
His task complete, the spirit of Celebras wandered off back into the caverns, and left us facing a gigantic waterfall in the distance. We walked to the edge, overlooking a vast pool below, with tunnels heading into all directions. Seeing no other way down, Orangz shielded all of us, and we took the chance, jumping into the depths. The lake was deep enough to absorb our fall, and after a short swim, we came ashore, treading though knee-deep water. The area seemed lush and uncorrupted, and the foul green water from before was now crystal clear. Huge plants reached the ceiling of the caves and the walls were overgrown with foliage. But dangerous creatures dwelled up ahead, and we were soon attacked by large Hydras. Thankfully, these were a bit smaller than the fabled Ghaz'Rilla we had encountered not long ago.
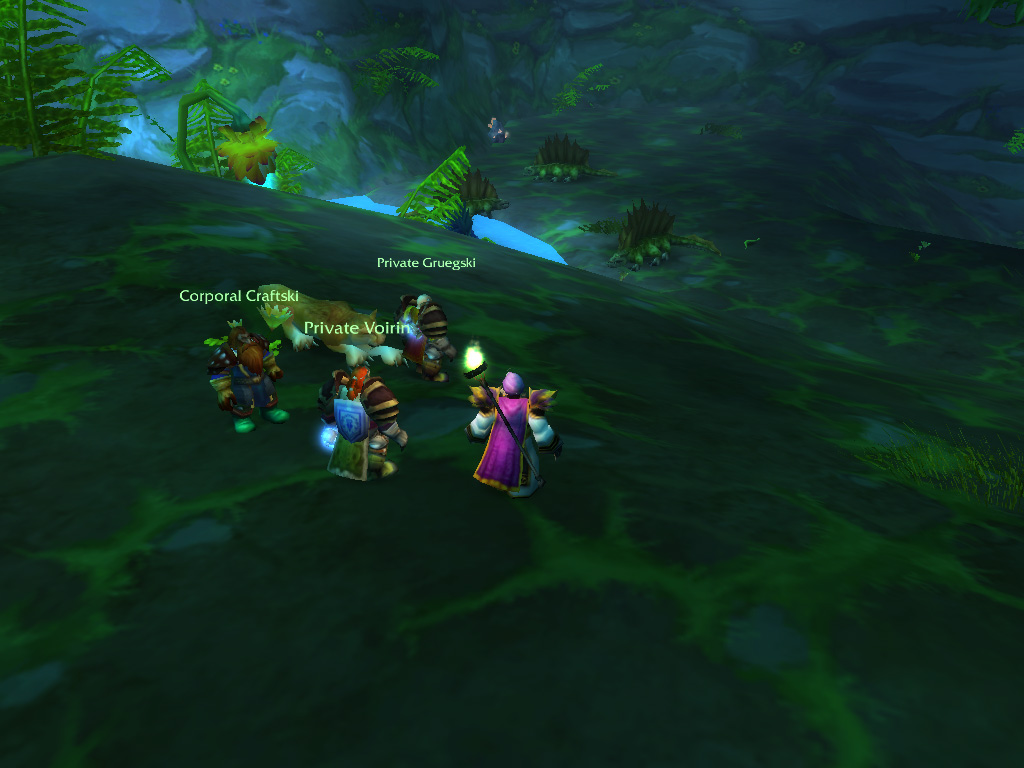
T
aking care of the Hydras, we waded further through the water, eventually reaching dry ground as we passed under an arch of plants. Here we found ourselves in a large cave, crawling with reptiles that looked quite similar to the Incendosaurs we had encountered in Searing Gorge. We saw large rock elementals raging through the tunnels in the distance, and chose to advanced carefully. We had to climb upwards, fighting packs of lizards as we did. These creatures proved to be unexpectedly dangerous, as their screams interrupted spellcasting, which left Orangz powerless to support the rest of us. Thankfully Orangz managed to regain focus, shielding Voirin form the worst of the reptile claws. We slowly drew more creatures away, allowing us to clear a space where we could fight the patrolling rock elementals.
Drawing the elementals attention, we pulled them away from the surrounding monsters, and weathering them down, sent pebbles flying into all directions. As we smashed the rocks apart, the remaining fragments reshaped themselves and continued fighting. More and rocks were chunked off, surrounding us, untill Gruegski and Craftski finally cleared all of them all in a hail of lead and holy light. This seemed to be an excellent technique, and we remembered to use this approach for packs up ahead. Traversing the winding tunnels, we now encountered large worm-like creatures, who also seemed to favour numbers over strength. Fighting our way through, we cleared a path, until finally, as we pushed through some overgrowing foliage we were met with an unexpected encounter.
Drawing the elementals attention, we pulled them away from the surrounding monsters, and weathering them down, sent pebbles flying into all directions. As we smashed the rocks apart, the remaining fragments reshaped themselves and continued fighting. More and rocks were chunked off, surrounding us, untill Gruegski and Craftski finally cleared all of them all in a hail of lead and holy light. This seemed to be an excellent technique, and we remembered to use this approach for packs up ahead. Traversing the winding tunnels, we now encountered large worm-like creatures, who also seemed to favour numbers over strength. Fighting our way through, we cleared a path, until finally, as we pushed through some overgrowing foliage we were met with an unexpected encounter.
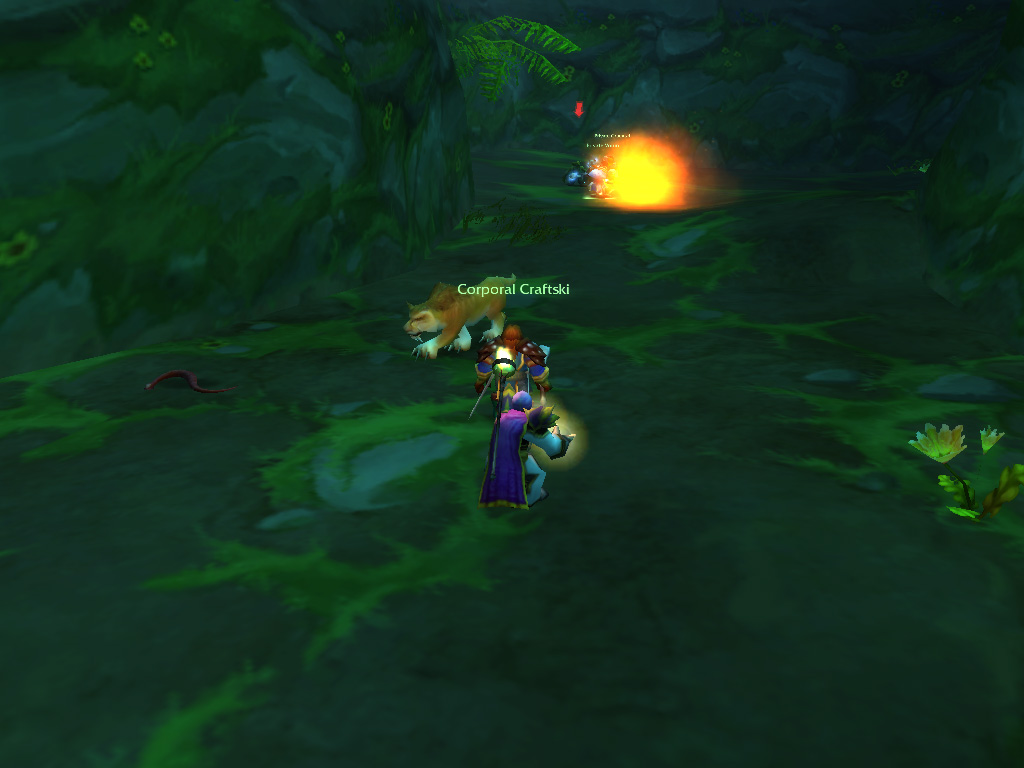
W
e had run into a Goblin! He immediately started shouting at us, calling himself Gizlock, the ruler of these caves, and bombarded us with grenades. Small fires started around us as we evaded the explosions, and Voirin quickly jumped in. An impressive fight broke out, as both Voirin and the Goblin began a proper sword & shield duel. Gruegski engaged from the side, but the Goblin had some kind of mechanical shield, deflecting our attacks. As Orangz and Craftski attack from afar, Gizlock appeared to load a mechanical trinket, and suddenly a blazing fire appeared in front of him. Although Gruegski invoked protection against fire, they still back off for safety, leaving scorched ground where they had been standing. They ducked once more, grenades flying over their heads, and closed the distance. With the flamethrower empty and the grenades mostly missing their mark, the arsenal of the Goblin had dried up, and we finished him off with a final slam of Gruegski's hammer.
It was a mystery to us how a lone Goblin had been able to reach the depths of the caves, and we questioned ourselves why he even was there. Sadly, some mysteries could never be solved. As we rummaged through the remaining supplies, Craftski managed to find a Goblin-made rifle. Although not as well-crafted as a proper Dwarven gun, it was a more than welcome replacement for his current blunderbuss. After a small rest, we continued following the path, and reached the end of the tunnel, opening up to a small lake. It appeared to be a dead end, and looking up, we could saw a large walkway leading to a rocky island in the middle of the water. We turned back, and hoped we could find a path leading upwards, feeling our objective was near.
It was a mystery to us how a lone Goblin had been able to reach the depths of the caves, and we questioned ourselves why he even was there. Sadly, some mysteries could never be solved. As we rummaged through the remaining supplies, Craftski managed to find a Goblin-made rifle. Although not as well-crafted as a proper Dwarven gun, it was a more than welcome replacement for his current blunderbuss. After a small rest, we continued following the path, and reached the end of the tunnel, opening up to a small lake. It appeared to be a dead end, and looking up, we could saw a large walkway leading to a rocky island in the middle of the water. We turned back, and hoped we could find a path leading upwards, feeling our objective was near.

B
acktracking our footsteps, we returned to the cavern that we had cleared earlier, and this time followed another path. Craftski led us upwards, and as we reached the top, we found ourselves in a vast cave, filled with large rock behemoths. Standing at the sides of gigantic archways, we knew there had to be something they were guarding... The ground quaked as one of the gigantic creatures spotted us, and started running towards us, colliding with both Voirin and Gruegski, sending them tumbling backwards. But we regained our grip, and soon they were on their feet again, holding the giant fists at bay, and deflecting its attempts to stomp on us. We chipped away at its stony hide, and finally sent the creature tumbling to the ground, lifeless. And it was just in time, as another of the rock monsters started to wander closer and closer.
This time we took the initiative, and this certainly helped, with the giant holding its ground, unable to use its mass and momentum against us. With focus and combined attacks, we sent this behemoth tumbling to the ground and started to follow a path upwards, which lead us along a wide ridge. The ridge spiralled upwards, leading us past more and more behemoths, some wandering and others stationary in an eternal watch. But we made sure to fight them on our terms, leading them downwards and focussing on their weak points. Finally, we reached the top of the ridge, which lead into a high rocky chamber, where a single stone giant was waiting for us.
This time we took the initiative, and this certainly helped, with the giant holding its ground, unable to use its mass and momentum against us. With focus and combined attacks, we sent this behemoth tumbling to the ground and started to follow a path upwards, which lead us along a wide ridge. The ridge spiralled upwards, leading us past more and more behemoths, some wandering and others stationary in an eternal watch. But we made sure to fight them on our terms, leading them downwards and focussing on their weak points. Finally, we reached the top of the ridge, which lead into a high rocky chamber, where a single stone giant was waiting for us.
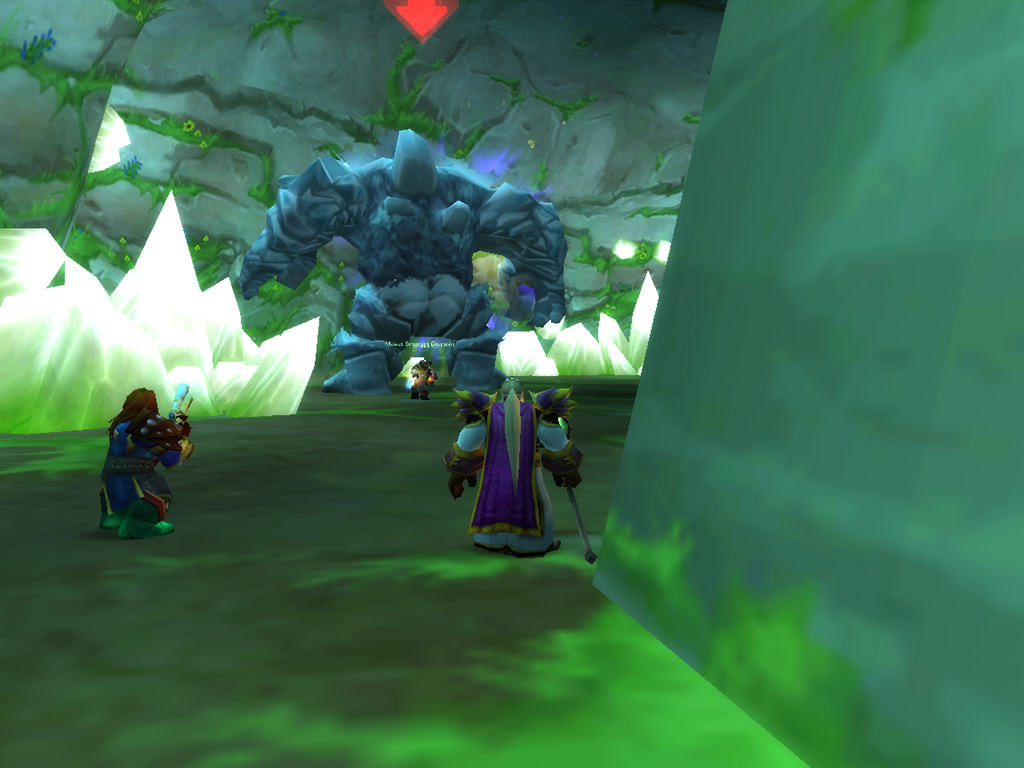
B
igger and bulkier, it also seemed this giant was made out of marble, with its stony hide gleaming in the light. We drank fortifying potions, while Orangz and Gruegski called upon the light to reinforce our attacks and stamina. When we were all ready, Voirin dove in for the fight. The Giant let out a guttural howl, and knocked Voirin straight into the wall, making us thankful he didn't pick another approach to attack, as otherwise he might had found himself flying out of the cave! Voirin regained his footing, while Orangz shielded him from most of the incoming damage. Knowing now was time to dish out the damage, we intensified their attacks, chipping stone, and scratching the surface. The seems to enrage the giant, and with an enormous stomp, he knocked all of us shortly unconscious.
Waking up, we regained our bearings although we were still slightly dazed. Voirin was still engaged in combat by the giant, but we also found ourselves surrounded by small stone elementals, clawing at us from all sides. Gruegski gathered the creatures around him, and through combined efforts with Craftski, sent the elemental stones scattered on the floor again. We were hoping the behemoth would not try to knock us out like that, and doubled our efforts to take the creature down, as its attacks would leave us with a concussion! We kept hacking away, and with Craftski's attacks now even more effective, thanks to the scope attached to his rifle, the creature crumbled to the ground. As Orangz drained the magical items the creature had been holding for enchanting purposes, Voirin mined the creatures body for precious ore, making the fight worthwhile after all!
Waking up, we regained our bearings although we were still slightly dazed. Voirin was still engaged in combat by the giant, but we also found ourselves surrounded by small stone elementals, clawing at us from all sides. Gruegski gathered the creatures around him, and through combined efforts with Craftski, sent the elemental stones scattered on the floor again. We were hoping the behemoth would not try to knock us out like that, and doubled our efforts to take the creature down, as its attacks would leave us with a concussion! We kept hacking away, and with Craftski's attacks now even more effective, thanks to the scope attached to his rifle, the creature crumbled to the ground. As Orangz drained the magical items the creature had been holding for enchanting purposes, Voirin mined the creatures body for precious ore, making the fight worthwhile after all!
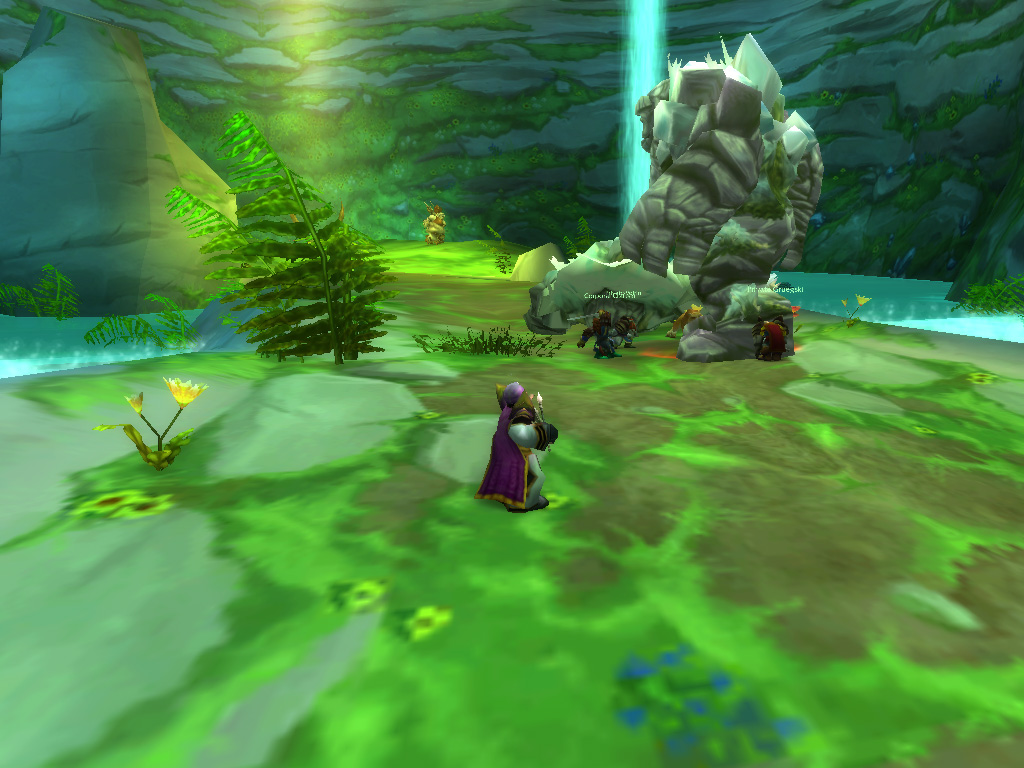
Meeting the Princess
W ith this path leading us into another dead end, we turned back, and made our way down the ridge again. There was now only one more path to take, leading into a cavern guarded by a pair of stone behemoths. And although fighting one behemoth was well within our capabilities, we were unsure about taking on two of them at the same time. Thankfully Craftski had a solution for our problem, as he would be able to trap one of the behemoths in a chunk of ice which, as it slowly thawed, would buy us time to deal with the other. Putting it into practice, we were quite surprised to see it work, as a huge block of ice covered the behemoth as it activated the trap. Voirin intercepted the other giant, which we brought down quickly with our combined strength, with even Orangz throwing in a few attacks of his wand. As it collapsed to the ground, the last traces of ice from the trap melted, setting the other behemoth free, only to be caught instantly by Voirin.
It wasn't long until this behemoth fell, which left Voirin with even more precious gems. By now we did point out to him that we were slightly uncomfortable with the idea of strip-mining of elementals. Catching our breath, we took a short rest, gathering our strength for the next group of giants we could see in the distance. We expected to fight more groups of them, so we would better be ready! This proved to be true, as we had to fight three more groups of behemoths, until we were finally facing the reason we had travelled to Maraudon: Wandering around the grave of Zaetar, father of Centaurs, was Princess Theradras, a powerful earth elemental.

T
owering over us, with four arms and three heads, Theradras appeared to be an impressive foe, but we reminded ourselves numbers had never scared us off before. Calling for the attack, we charged in together, hoping to make the fight quick and painless. With Gruegski and Voirin fending off her attacks, Craftski and Orangz were free to hit her from afar. But she showed prowess, slamming Voiring hard, and throwing boulders at Orangz, disrupting his incantations. Then, in a cloud of dust, Gruegski and Voirin were slammed away, as she created ripples of sand on the ground, driving everything nearby back. Waiting for the ripples to calm again, Gruegski stood at a safe distance, while Voirin used his rifle to take a few shots.
As the ground calmed, they returned to the fight, swinging their weapons with renewed vigour. Enraged, Theradras let out a furious howl, which sent Voirin running for cover. But thankfully he quickly was able to grab a hold of himself, building up a seething rage, and not giving another inch. Gruegski had kept Theradras busy in the meantime, and ever so slowly we gained the upper hand. She tried to throw more builders at us, but by now we were prepared, and her next storm of dust didn't catch us off guard either. Then, after multiple well-aimed shots at her heads, Craftski sent her crashing into the ground. As the dust settled, and we could inspect the remains, we were able to claim a finely wrought tiara for Orangz and studded plated leg guards for Gruegski.
As the ground calmed, they returned to the fight, swinging their weapons with renewed vigour. Enraged, Theradras let out a furious howl, which sent Voirin running for cover. But thankfully he quickly was able to grab a hold of himself, building up a seething rage, and not giving another inch. Gruegski had kept Theradras busy in the meantime, and ever so slowly we gained the upper hand. She tried to throw more builders at us, but by now we were prepared, and her next storm of dust didn't catch us off guard either. Then, after multiple well-aimed shots at her heads, Craftski sent her crashing into the ground. As the dust settled, and we could inspect the remains, we were able to claim a finely wrought tiara for Orangz and studded plated leg guards for Gruegski.
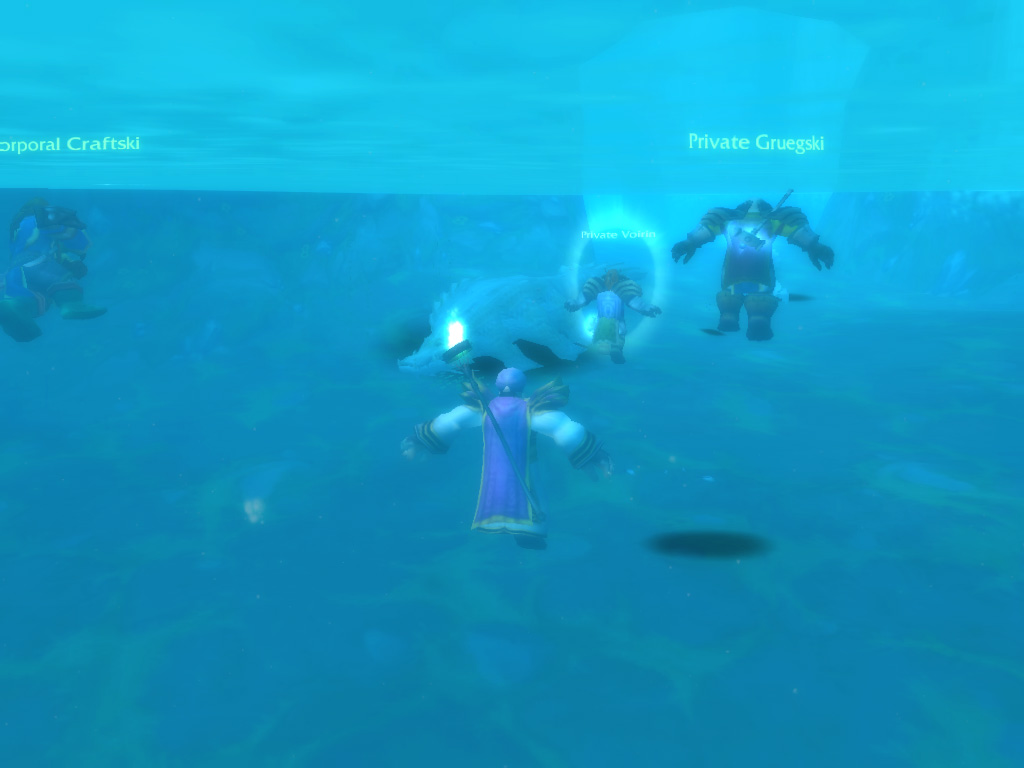
Saving the Best for Last
B But, again, we felt something stir behind us, and as we turned, we were greeted by the spirit of Zaetar, father of Centaurs. He felt the caves, now free from their taint, were a beacon of hope, and he would have to remain behind to guide his children, the Centaur. As an offering of redemption to his brethren, the Keepers in the north, he gave us a seed of life, which he asked us to deliver in Moonglade, home of the druids. With such a precious gift in our hands, we did not dare to tell him we had no idea how to reach Moonglade, and agreed to see it done. With the caves free from taint, we felt our work was done, but Craftski told us otherwise.
There was one more thing to do: Craftski had been tracking a devious creature through the caves, a gigantic crocolisk, which according to him, was swimming in the waters below us. With blessings from Orangz, we gathered, and again made a leap of faith, into the depths. Splashing in the lake, we opened up our eyes underwater, spotting a gigantic albino crocolisk treading through the water, towards our disturbance. Voirin threw himself between its giant maw and the rest of us, it's sharp fangs piercing his armour. As he kept the creature at bay, the rest of us intervened with all our might: Orangz boosted Voirins defences and closed his wounds, while Craftski and Gruegski bombarded the creature with a hail of leaden shells and blunt impacts. In the end, aside from its size, the crocolisk had little else, and in a fight to exhaustion, we proved victorious.


We travel to all corners of the world, from Winterspring to the Plaguelands and from the Blasted Lands to Felwood.
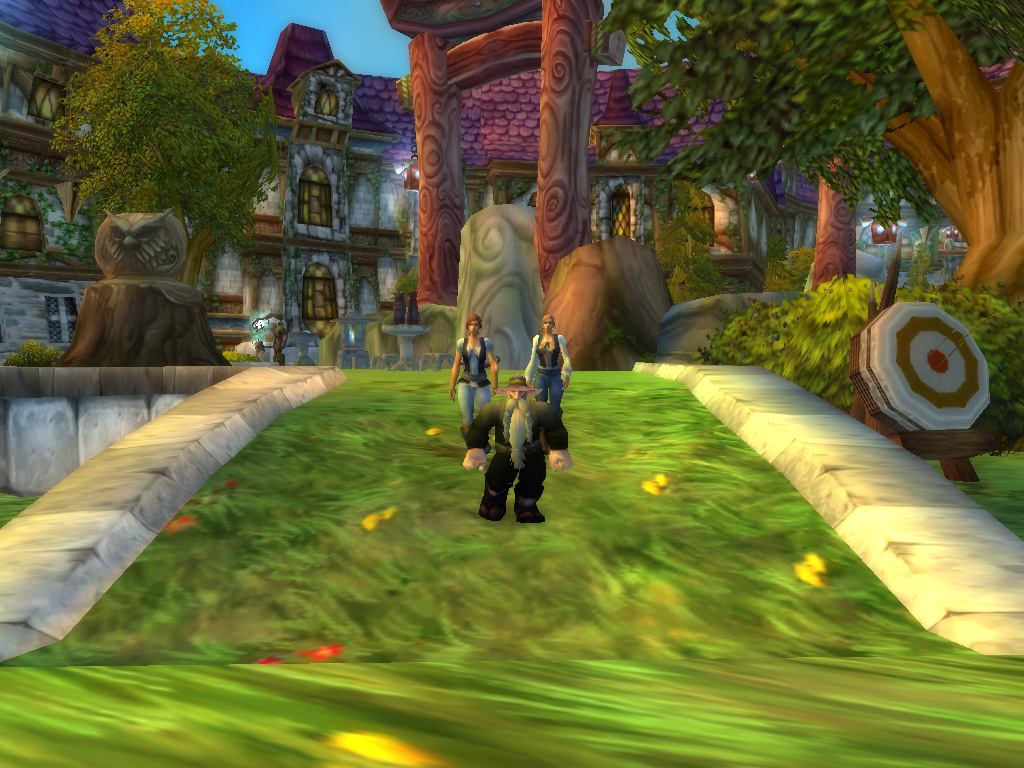
Homeward Bound
W ith our work complete, we used our hearthstones to return to Nijel's Point, bringing the tidings of Theradras fall, and the cleansing of the caves. The Elves were happy to hear of our tidings, and hoped our interventions would help rejuvenating Desolace. We delivered the found carvings to the Forsaken researcher, who seemed to be most pleased, not answering our questions of their use. Traveling further south, we returned the completed amulet to the Pariah, who promised us that thanks to our work, Desolace would finally be able to become a different place, with its Centaur clans united. With most of our findings delivered, we now had to travel the long way back home.
Taking the Gryphon back to Theramore, we left a bag full of shadowshard fragments behind for their mages, before we took the boat back to Menethil. From there it was a short travel to Ironforge, where we could finally gather at the hearth with our fellow Dwarves, exchanging stories of our adventures. We dried our robes and removed rust and dents from our armour, we visited our class masters, where we accepted their requests, as we were nearing our final training. Finally, Orangz was able to create his first pieces of Mooncloth in Stormwind, material used to create wondrous items, which also sold for a hefty penny!
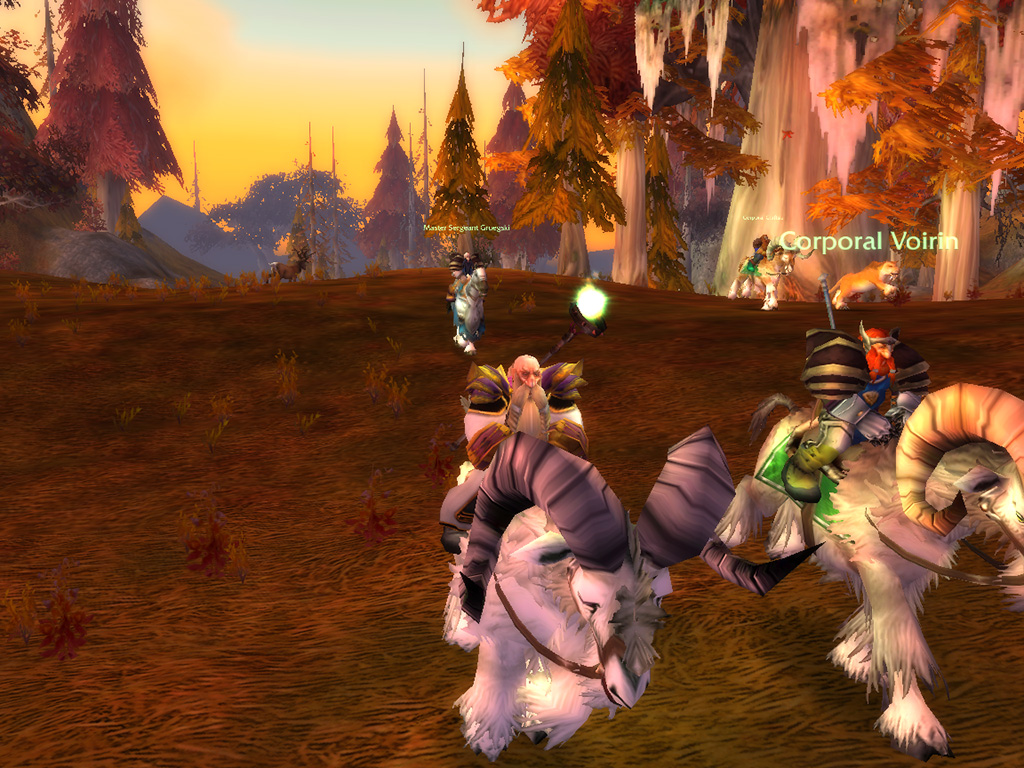
O
ur class masters thought we were ready for a real challenge, so and we agreed to face these dangers together. We were all sent to different corners of the world: Craftski and Orangz were sent to Azshara, to meet an envoy from the Cenarion Circle, the order of the Druids. Guegski was sent to the Plaguelands, better known as the fallen kingdom of Lordaeron while Voirin was asked to visit the Blasted Lands, to honour a fallen hero. We chose to travel abroad first, taking the boat from Menethil and arriving in Theramore. Thanks to Craftski's dragonscale training, we all had visited the flightmaster in Azshara before, allowing us to fly over the Barrens and Ashenvale. We skirted dangerously close to the Horde Capital of Ogrimmar, staying just out of range of the vast guard towers, following the river that streamed along the vast walls.
We arrived in the encampment, and set course towards the cliffs where we hoped we would find the Elf. But as we came closer, we got a surprise: The envoy wasn't an Elf, but a Furbolg! These intelligent bear-like creatures have long been known as allies of the Night Elves, but we had never run into a talking one before. The Furbolg, named Ogtinc, asked both Craftski and Orangz to hunt the stags in the vicinity: Orangz had to retrieve their glands as the creatures proved to be highly immune to corruption, while Craftski was asked to showcase his prowess as a hunter.
We arrived in the encampment, and set course towards the cliffs where we hoped we would find the Elf. But as we came closer, we got a surprise: The envoy wasn't an Elf, but a Furbolg! These intelligent bear-like creatures have long been known as allies of the Night Elves, but we had never run into a talking one before. The Furbolg, named Ogtinc, asked both Craftski and Orangz to hunt the stags in the vicinity: Orangz had to retrieve their glands as the creatures proved to be highly immune to corruption, while Craftski was asked to showcase his prowess as a hunter.
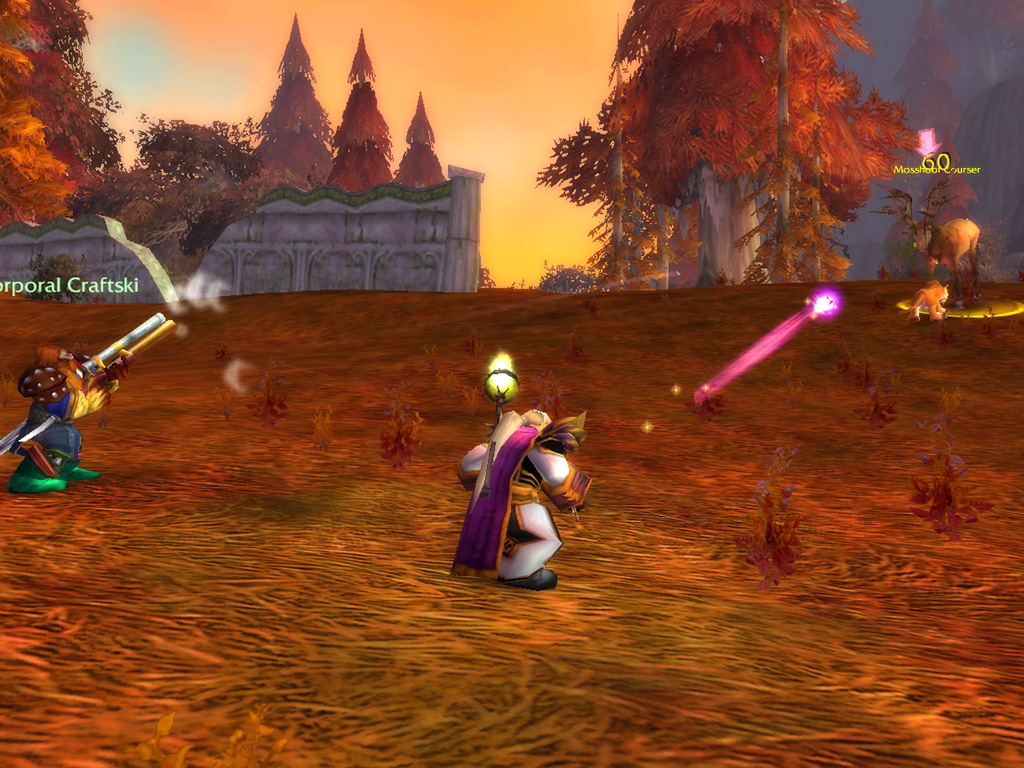
T
ogether with Craftski, Orangz started the hunt, while the rest of us helped out. And thanks to Craftski's tracking skills, the stags couldn't hide from us. Eventually Craftski and Orangz had proven their worth, and returned to the Furbolg atop the cliff. With the first test complete, they were now asked to gather the essence of undead and hunt dangerous hydras for their scales. As our objectives were to be found in different parts of Azshara, we split up, as Voirin assisted Orangz while Gruegski helped Craftski. Hoping to not run into Horde soldiers, we agreed to regroup at Ogtinc when we were done. When we grouped up again, it appeared that Orangz's task had been a lot easier, as he and Voirin had been waiting for quite a while.
With this final task complete, they were given their true objective: To search the Sunken Temple in the Swamp of Sorrows and defeat the dragon Morphaz that dwelled there. Orangz would have to bring back it's blood as a powerful reagent, while Craftski had to return the it's tooth, as a mark of victory. With our work in Azshara complete, we bade farewell to Ogtinc, and told him we would return with good tidings. Next, we would help Voirin, so we hearthstoned back to Ironforge where we took the Deeprun Tram to Stormwind.
With this final task complete, they were given their true objective: To search the Sunken Temple in the Swamp of Sorrows and defeat the dragon Morphaz that dwelled there. Orangz would have to bring back it's blood as a powerful reagent, while Craftski had to return the it's tooth, as a mark of victory. With our work in Azshara complete, we bade farewell to Ogtinc, and told him we would return with good tidings. Next, we would help Voirin, so we hearthstoned back to Ironforge where we took the Deeprun Tram to Stormwind.
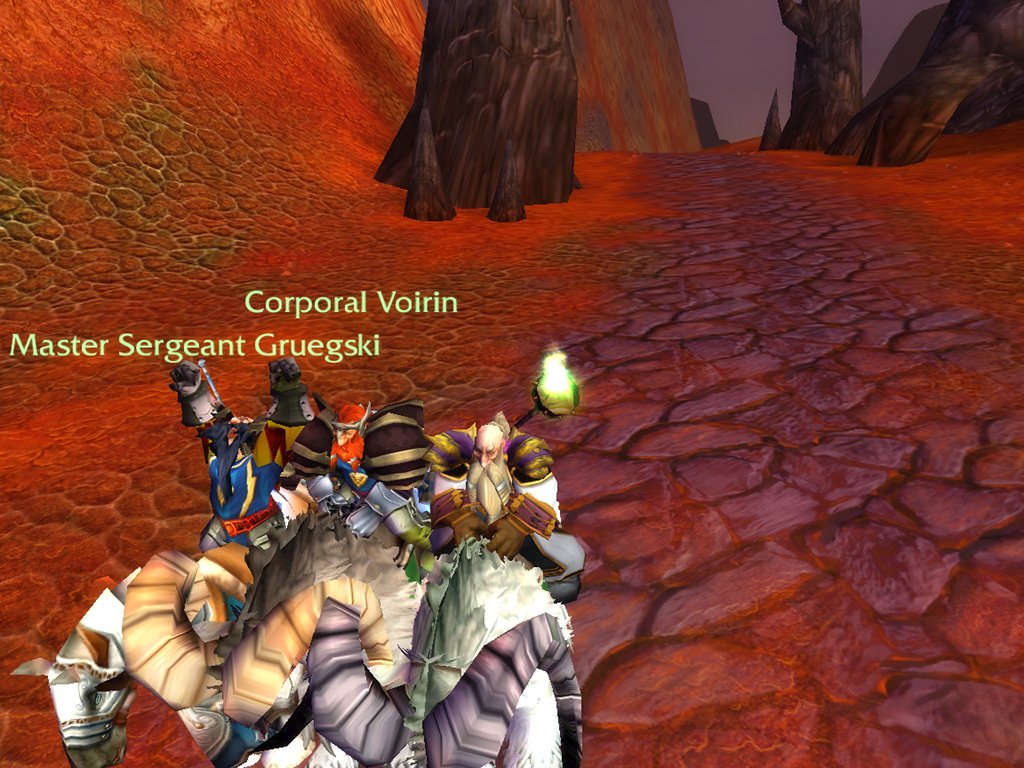
A Spirit's Request
F resh out of the train we took a Gryphon south, towards Nethergarde keep in the Blasted Lands. In these barren lands, Voirin had to search a spirit of an ancient hero, to guide him in the way of the warrior. And as with the Furbolg, things proved to be different: The spirit was that of an elder Orc, who guided warriors in their quest for battle prowess, regardless of their allegiance. The first task for Voirin was to slay Hellboar, vicious creatures that had been brought along by the Orcs through the Dark Portal, during the first war. These monsters could be found all over the lands, and although they looked like large boars, their sharp tusks, spikes and ferocity set them apart from any boar we fought in the past!
Together we were able to take down many of them, and we returned to the hero's spirit together with Voirin. Content with the results, the Orc sent Voirin to his next target: The Shadowsworn, a group of cultists. These cultists were conducting vile rituals, which disrupted the flow of magic as they summoned daemons from the Twisting Nether. To find the cultist staging ground, we had to travel further into the lands, eventually reaching the cliffs that overlooked the cause of Azeroth's current state: The Dark Portal.
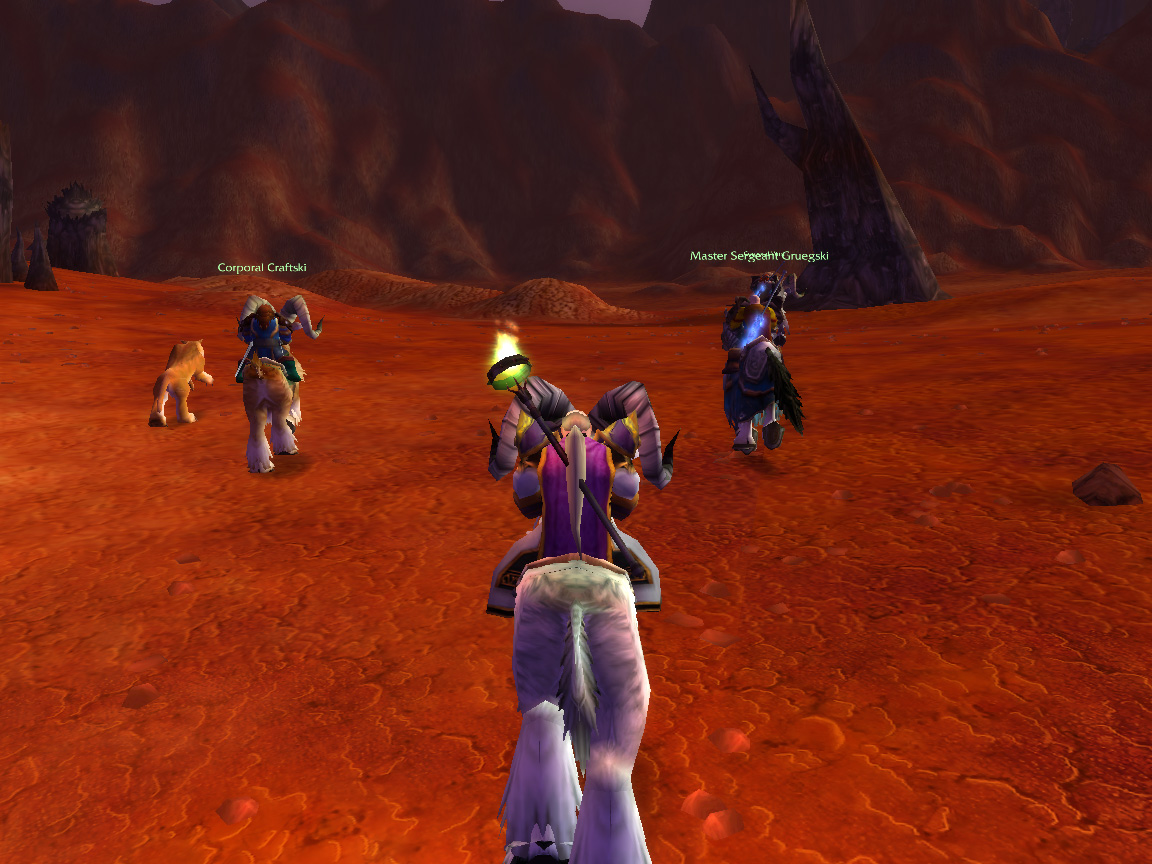
R
ebuilt after it's destruction during the second war, and even larger than the portal made by Medivh, its energies swirled almost peacefully, the connection to Draenor inactive. But we had no time to linger, or even fight the daemons that wandered around the monoliths, we had cultists to kill! The cultists had made camp outside an abandoned mine, and didn't appreciate our presence, as we were greeted with volleys of shadow magic and sharp steel! But together we were able to scatter their defences, allowing us to enter the mines they had taken hold of. Here we found more warlocks and thugs, which we slowly drove back into the cave's depths.
We resurfaced victorious and returned to the Orc hero who, happy with our results, sent Voirin, just like Craftski and Orangz, to the Sunken Temple. Here Voirin would have to defeat a series of Trolls, and gather magic-imbued feathers. We bade farewell to the spirit, as now it was time for our next destination: the Plaguelands. And it wasn't only Gruegski's task that sent us that way, as we all had been called upon, to travel to staging ground known as Chillwind Camp. There we would join the battle against the undead, ensuring the safety of the Eastern Kingdoms. Here we would aid the order that was leading the defence and assault against the undead Scourge, the Argent Dawn. They stood above the petty struggles of the Alliance and Horde, and had only one goal: To defeat the Lich King and cleanse Azeroth from all undead.
We resurfaced victorious and returned to the Orc hero who, happy with our results, sent Voirin, just like Craftski and Orangz, to the Sunken Temple. Here Voirin would have to defeat a series of Trolls, and gather magic-imbued feathers. We bade farewell to the spirit, as now it was time for our next destination: the Plaguelands. And it wasn't only Gruegski's task that sent us that way, as we all had been called upon, to travel to staging ground known as Chillwind Camp. There we would join the battle against the undead, ensuring the safety of the Eastern Kingdoms. Here we would aid the order that was leading the defence and assault against the undead Scourge, the Argent Dawn. They stood above the petty struggles of the Alliance and Horde, and had only one goal: To defeat the Lich King and cleanse Azeroth from all undead.
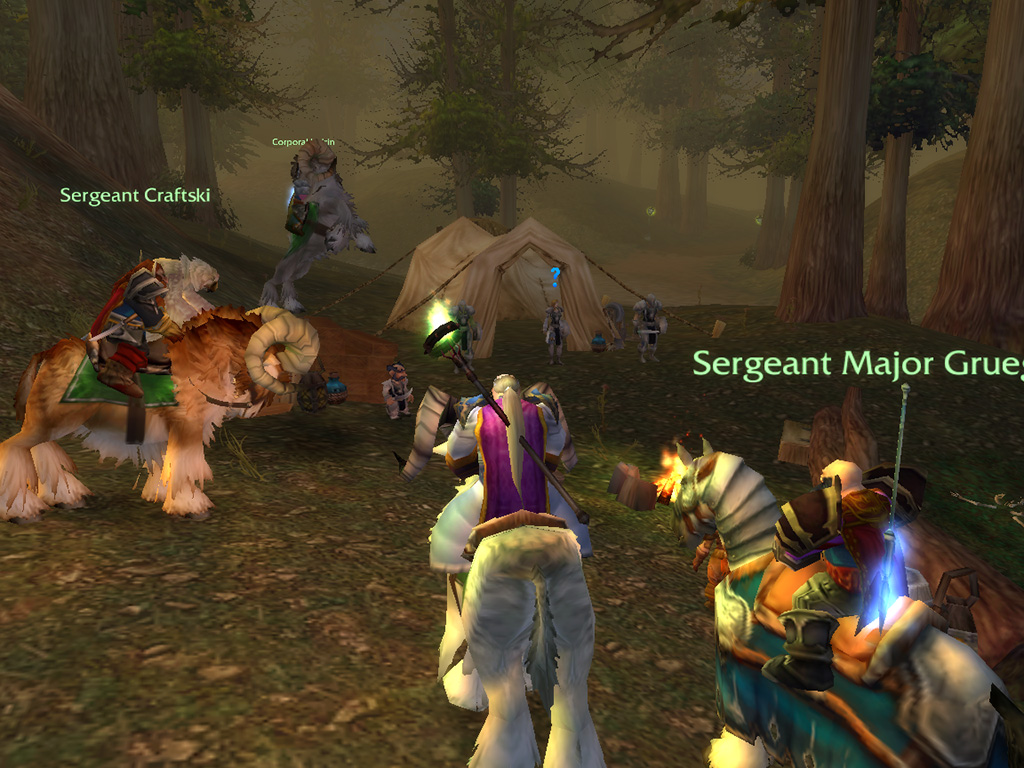
Facing the Plague
F rom the far south we travelled to the north, and after a long flight we landed in Southshore, from where we followed the river to eventually reach Chillwind. The encampment was small, consisting of a few tents and a flightmaster, and it was clear they could use adventurers such as us to fortify their presence. Gruegski reported in to the camp's commander, who asked all of us to gather around. We were presented with a badge, which marked us as agents of the Argent Dawn, and through it, we would be able to gather the marks of the undead, which were called Scourgestones. For his task, Gruegski was asked to gather twenty of these stones, while we were all requested to clear a nearby graveyard of Scourge minions. The small graveyard, called Sorrow Hill, proved to be full of undead Ghouls and skeletal creatures, so it was now time to show our worth! As Orangz kept us safe from unwelcome guests, chaining the Scourge in holy light, the rest of us systematically cleared the graves, making our way towards a tomb in the distance.
The living dead proved to be dangerous spellcasters, so we chose to be careful, advancing slowly. Finally, reaching the tomb, we were sure we had done enough, and unless the dead would rise again, the area would be clear from the living corpses, for now. With the graveyard quiet, we suddenly heard rummaging from the nearby decrepit house, and carefully made our way inside, weary of Horde tricks. To our surprise we didn't run into anything dangerous, but we found a lost spirit, Marlene Redpath... She told us that after the Scourge invasion, magic had kept her anchored to the realm of the living and pleaded us to search for her family, which could be found in Darrowshire, far to the west. We agreed, and hoped our help would relieve her from this fate. Remembering that Gruegski had gathered enough Scourgestones, we returned to the camp, our mission complete.
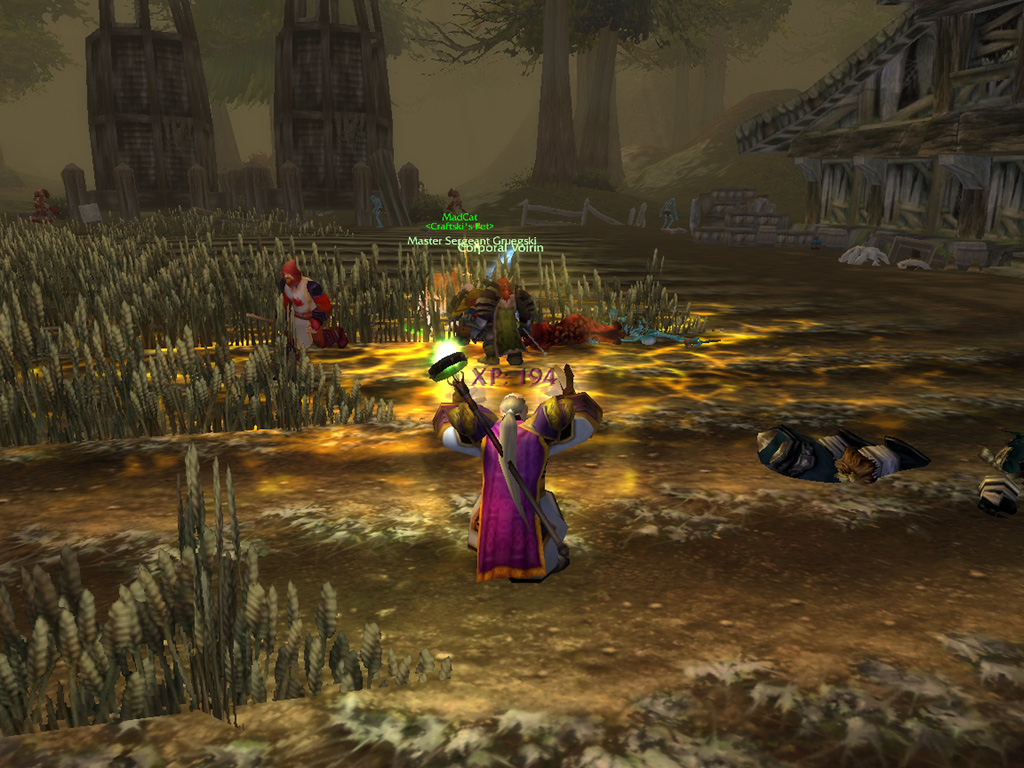
A
s Gruegski returned the collected stones, he was told of their use: Although created by the Scourge, these stones could be purged of their taint, and forged into containers of holy light. He had to visit a nearby priest, who would be able to cleanse the stones into an inert state. Leading the way, Gruegski led us through the graveyard once more, guiding us towards the tomb where we had previously turned back. Making our way inside, we were greeted by a Night Elf, who was tending to a large statue. This proved to be the tomb of Uther the Lightbringer! One of the heroes of the second and third war, and legendary Paladin. Gruegski immediately kneeled for the grave of the founder of his order, and we followed suit, paying our respect. Rising again, Gruegski handed over the Scourgestones, informing the priest of his intent. Offering his help, the priest started to conduct a ritual, which seemed to unsettle the Scourge nearby, drawing them towards the tomb. While we defended the priest form harm and kept the undead at bay, the priest finished his incantation with a flash of light, which sent the Scourge wandering mindlessly again.
The elf gave one of the stones to Gruegski, and kept the rest for other Argent Dawn agents, one stone would be more than sufficient for us. Returning the inert stone, Gruegski now received the same task as Voirin: To gather magic-laden feathers from the Trolls in the Sunken Temple, which would fill the stone with holy power. Although the temple called, it would have to wait, as we were asked to strike against the Scourge once more. We would be sent to neutralize Scourge cauldrons which had been placed throughout the Plaguelands, which spewed poisonous clouds into the air, propagating the plague. We were given a flask to gather a sample of each cauldron brew, which would hopefully lead to a neutralizing agent, allowing the Argent Dawn to cleanse the land from Scourge influence.
The elf gave one of the stones to Gruegski, and kept the rest for other Argent Dawn agents, one stone would be more than sufficient for us. Returning the inert stone, Gruegski now received the same task as Voirin: To gather magic-laden feathers from the Trolls in the Sunken Temple, which would fill the stone with holy power. Although the temple called, it would have to wait, as we were asked to strike against the Scourge once more. We would be sent to neutralize Scourge cauldrons which had been placed throughout the Plaguelands, which spewed poisonous clouds into the air, propagating the plague. We were given a flask to gather a sample of each cauldron brew, which would hopefully lead to a neutralizing agent, allowing the Argent Dawn to cleanse the land from Scourge influence.
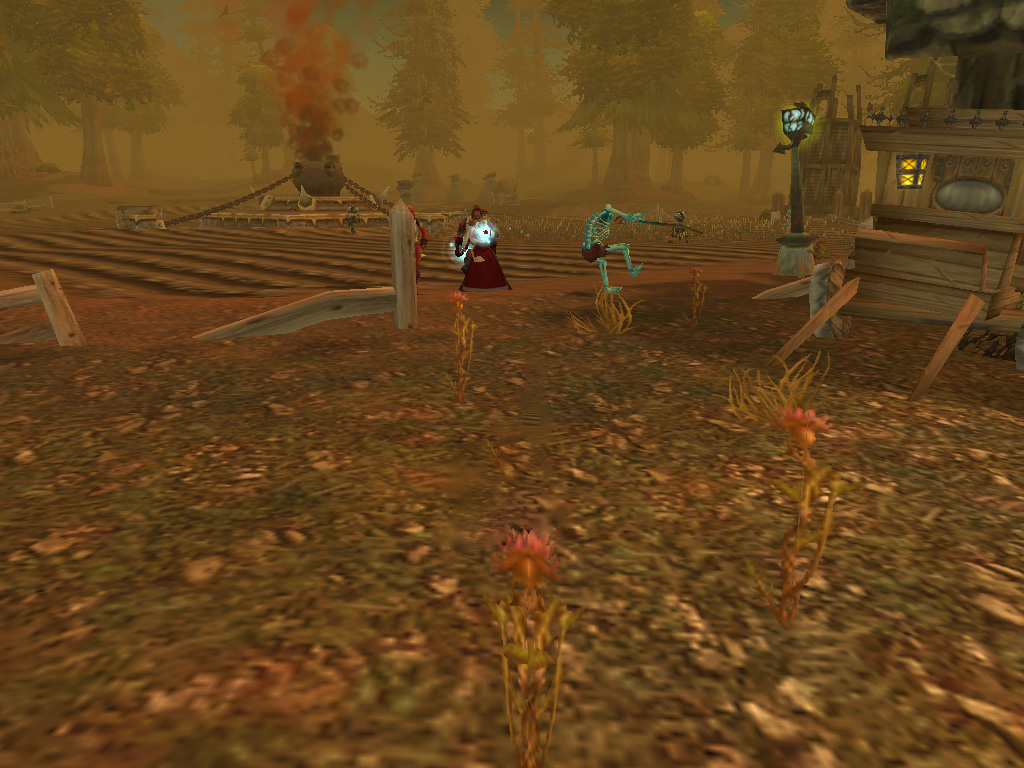
Stirring the Pot
T he cauldrons were easy to locate, as we only had to follow the pillars of poisonous fumes, which drifted over the Plaguelands. The altars they were placed upon where located in the fields of abandoned farms, and well-defended by hordes of undead. We had to take caution approaching these altars, as Ghouls and other undead minions patrolled close by, assisted by invisible shades. As we peeled off layer after layer of defences, we could approach the cauldron, which we found locked by chains, we would require a key to open it up. Thankfully finding the keymaster of the Scourge didn't prove to be difficult, and we identified it as a bulkier Ghoul that wandered nearby. Slaying the creature, we were able to lift the cauldron's lid, enabling us to take a sample of the foul liquid. Before we left, we also investigated the farmhouse, where we found a parcel that had never been sent, addressed to an address in Stormwind. Stowing it away carefully we chose to become mailmen next to just adventurers!
We gathered samples from the three other cauldrons, fighting our way through the various Scourge minions that guarded them. This enabled the Argent Dawn to create a reagent which, using the powers of the Scourge against themselves, neutralized the foul concoction and prevented further spreading of the plague. We applied this agent to all field cauldrons and hoped this would slowly clear the Plaguelands the grip of undead. As we returned to each farm, this time with more time at our hands, we investigated more thoroughly and found a diary in one of the barns. It was written by a certain Mrs.Dalson who had locked her undead husband in an outhouse, and more precisely: The outhouse that stood aside! Knocking on the door, the outhouse started to shake, but the door didn't budge, locked tight. Then, from behind us, a skeletal figure approached and attacked us which we promptly defeated. As we searched its ragged pockets, we found a key which snugly fit into the outhouse lock, releasing Mr.Dalson, now a rabid Ghoul! Gruegski instantly slammed it with a holy valour. And looking through its belongings, we found it had another kind of key in Its claws, which allowed us to open a cabinet in the farmhouse. This cabinet contained the family's riches, which weren't of use to them anymore, but would certainly come in handy for us! Reading someone's diary proved to be worthwhile!
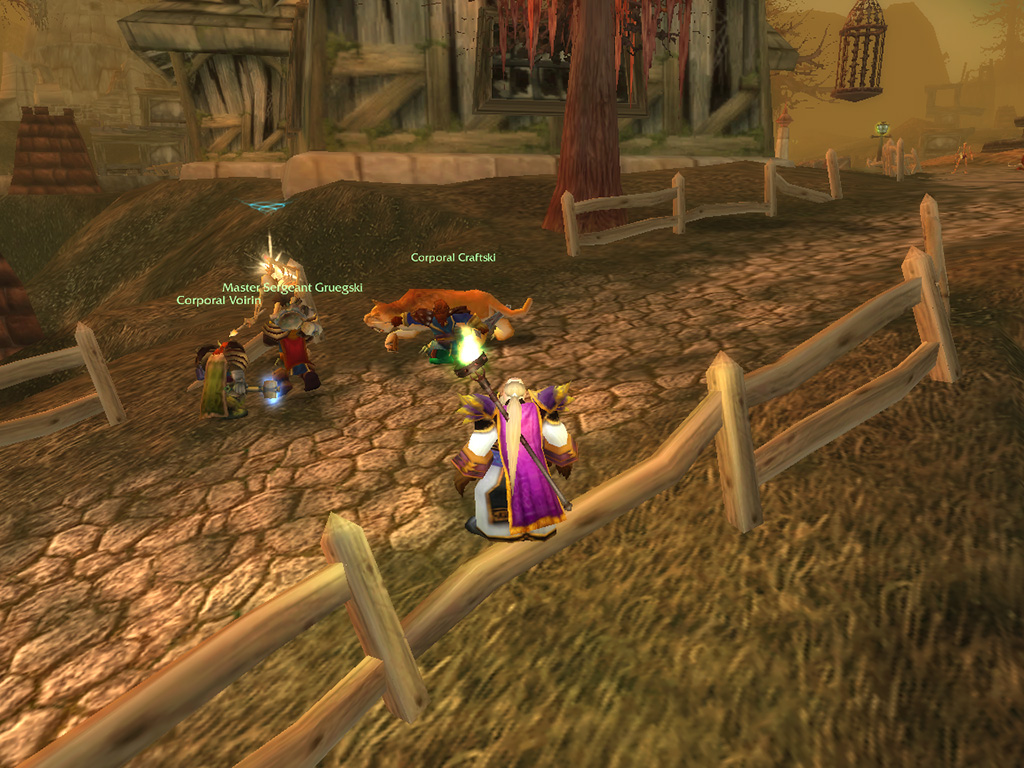
W
ith the cauldrons neutralized, the Argent Dawn could start their next offensive: Retaking the town of Andorhal. This town lay just north of Chillwind Camp, and acted as a chokepoint for incursions further into Plaguelands. Retaking the Andorhal was vital for the Argent Dawn plan against the Scourge, but we had to start small... Our first objective was to map the watchtowers that stood along the town walls, guarded by the restless eyes of the undead. Making sure to not alert the Scourge defences, which were led by a powerful Lich, we infiltrated the town, and scaled the hills along the borders, enabling us to reach the watchtowers easily. Powerful armoured skeletons guarded these towers, which appeared the moment we lit the magical torches that were used to map the tower. But Orangz and knew how to handle the horrors, chaining them in light as we fled the scene, and this way, we were able to mark all the towers we could find. As we returned with word of success, the Argent Dawn felt it was time to take the fight to Andorhal and defeat the undead commander, Araj the Summoner.
We however, didn't feel ready yet, and took up other tasks first: One was to search for a way to enter Scholomance, the dark school for necromancy, located on the nearby isle of Caer Darrow. The other was to head for the Eastern Plaguelands, as the spirit of Marlene Redpath had requested. We headed east first, giving our mounts a stretch, and allowing us to assess the Scourge influence in full. In Darrowshire we found the only remaining family member of Marlene, which was the spirit of her niece: Surely some curse must have befallen this family! We helped the spirit to find her lost doll, which she thanked us for, and sent us back to her aunt near Chillwind Camp.
We however, didn't feel ready yet, and took up other tasks first: One was to search for a way to enter Scholomance, the dark school for necromancy, located on the nearby isle of Caer Darrow. The other was to head for the Eastern Plaguelands, as the spirit of Marlene Redpath had requested. We headed east first, giving our mounts a stretch, and allowing us to assess the Scourge influence in full. In Darrowshire we found the only remaining family member of Marlene, which was the spirit of her niece: Surely some curse must have befallen this family! We helped the spirit to find her lost doll, which she thanked us for, and sent us back to her aunt near Chillwind Camp.
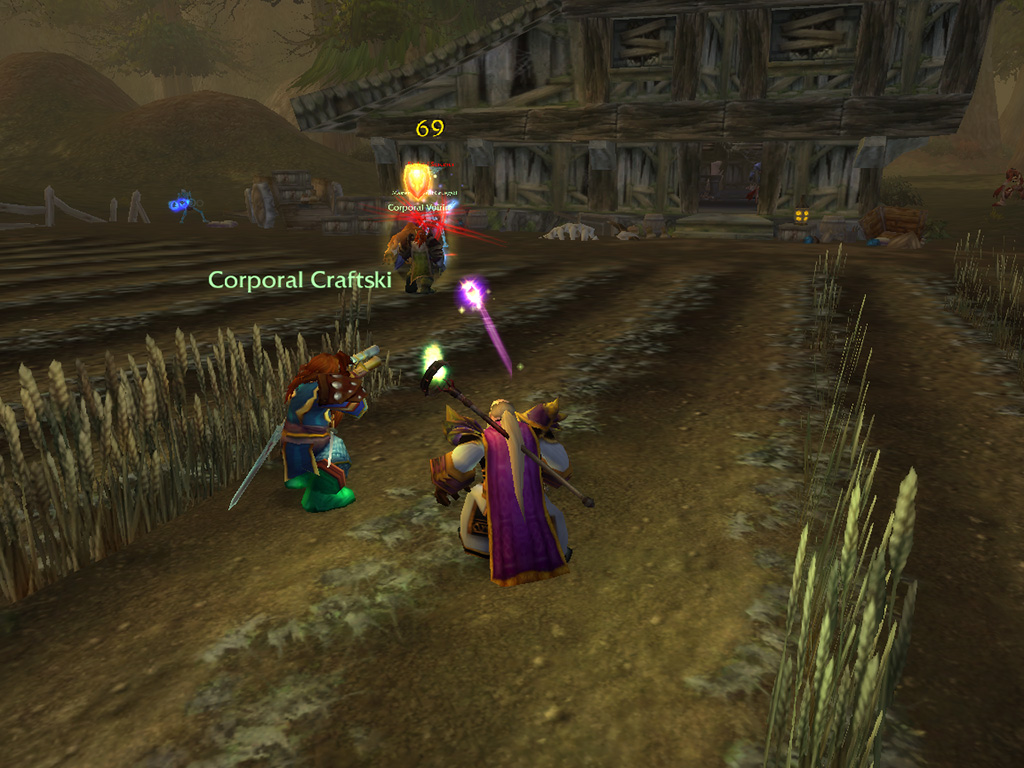
Troubles in the past
W e informed Marlene of her niece's fate, and although she had an inkling of what had happened, saw more harsh methods were required, which would free the spirits from their suffering. She asked us to retrieve her brother's wedding ring, which was buried with his body in a nearby grave, and bring it to a Gnome that dwelled in Andorhal, called Chormie. As the graveyard was clear of enemies, we retrieved the ring easily, and once again made our way into Andorhal. Here we once more fought the undead to make our way into the city, making it possible to complete our first objective required to create the Scholomance key: Gathering skeleton fragments. Chromie lived in a small abandoned inn near the city square and appeared to be no Gnome at all, but a member from the Bronze Dragonflight in disguise! Tasked with the protection of the timelines, the Bronze Dragons had taken an interest in the fate of Darrowshire, and offered us a way to change history.
To mend the past, we had to understand what had happened, and were sent to investigate various temporal anomalies around Andorhal, which ranged from malfunctioning clocks to cleansing temporal parasites. Eventually, we also found a tome containing the annals of Darrowshire, which told the tale of the last stand against the scourge, which had gone horribly wrong. Parts of the book were missing, but with the help from Chromie, we were able to fill the missing gaps, discovering a final member of the Redpath family that was still alive. This Redpath was now a member of the Argent Dawn, stationed at Light's Hope Chapel in the eastern Plaguelands. The dangers along the road prevented us from traveling that far east, so we chose to pay a visit to the final family member another time. As we still had a package to deliver, we returned to Ironforge, and from there, made our way to Stormwind.
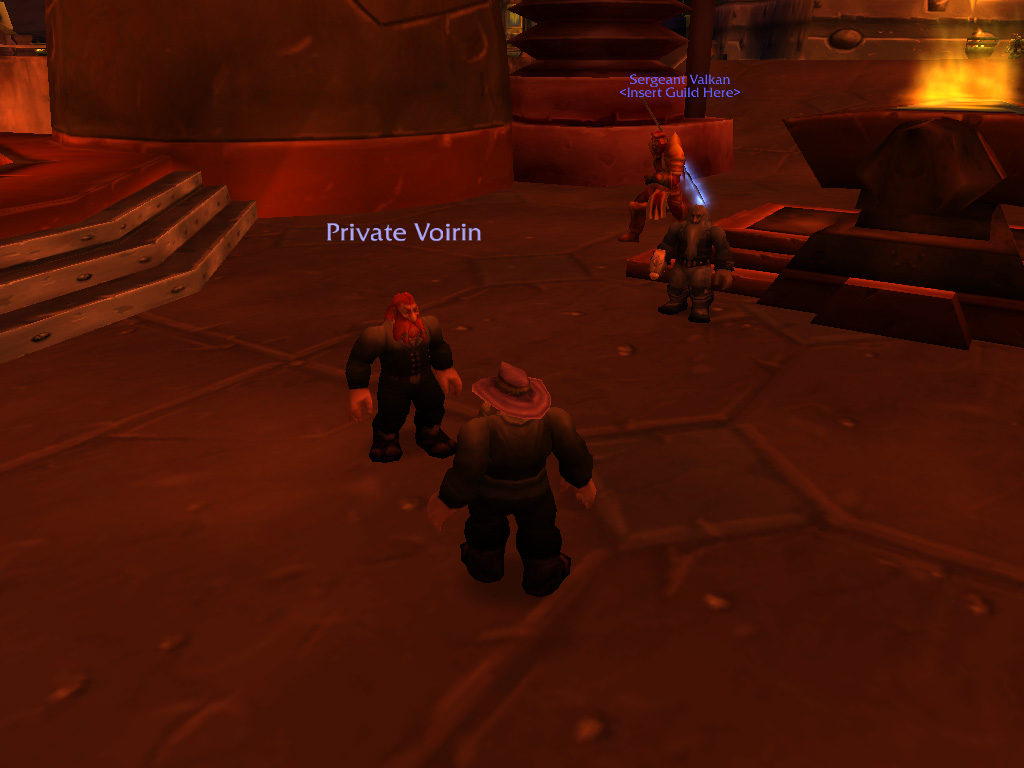
A
rriving in Stormwind, we visited the census archives, near the Cathedral Square, hoping to find a mention of the package recipient, Emma Felstone. Searching the archive, we could find no recent records, with the last known address of this Emma four years old, and were sent along to search among the local population. Asking around, we were directed to find a wandering old lady, better known as 'Ol Emma, who we found walking along the Stormwind canals. To our surprise, she was indeed the Emma Felstone we were searching for, happy to receive a package from her sister, long lost in the undead-overrun north. The package contained various personal items and the deed to the farm in the Plaguelands, which she didn't intend to claim just yet. In return, she asked us to bring her half of a good luck charm back to the north, hoping it would bring some rest to the spirits. We would leave our visit to the Plaguelands for another time, and returned back to Ironforge, restocking our supplies and getting ready for a more heated adventure.
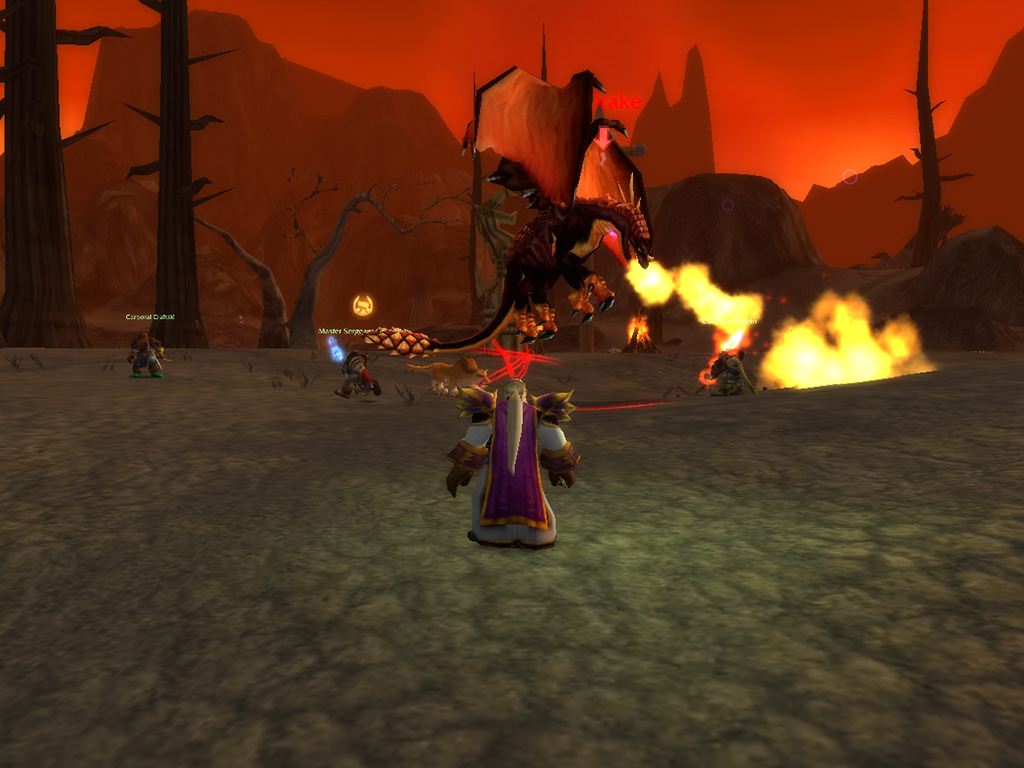
Heated encounters
W e were called to the Burning Steppes, a charred vale north of the Redridge Mountains and south of Searing Gorge. The steppes, filled with the ruins of Orc and Dark Iron Dwarf settlements, were a staging ground for Blackrock Orcs and the Black Dragonflight, who sallied forth from Blackrock Mountain. To track troop movements near the border to Redridge, the alliance had built a small camp near the southern passage, called Morgan's Virgil. There, they needed adventurers to fight the enemies that surrounded them, and we fit the bill perfectly. Flying first to Lakeshire in Redridge, we followed a twisting road north, leading us through the hills, and eventually taking us through a broken gate. A small pathway led into the mountains, marked by torches, leading us to the small encampment, built on the ruins of a former settlement. Here we met the varied inhabitants, ranging from a crazy Dwarf to gnome mage obsessed with dragon eggs, who all had different requests.
The first task sent us straight into the fray, to fight against the Black Dragonflight: To slay their whelps, warriors, dragonspawn and even a drake. The might of these creatures could not be underestimated, as their flames burned hot and the claws were sharp. But with Voirins shield in front of us and Gruegski's warding against fire, we carved a way through the dragons that patrolled the steppes. We stumbled upon a cave, inhabited by a Black Dragonkin, and it didn't seem aggressive towards us. The monster approached us, and asked to present our proof, confusing us: What would the creature want from us? It called us idiots, and asked for the molt we had found in Searing Gorge, making us wonder again: How did this dragon know of our actions? As Craftski presented the piece of hide, the creature's eyes lit up with fire, and snatched it from his grasp. After a quick incantation, the monster returned the molt to Craftski and pointed towards Blackrock Mountain in the distance. It asked us to use to molt to gather the fire from Bael'Gar, a giant dwelling in the Dark Iron City, the Blackrock Depths.
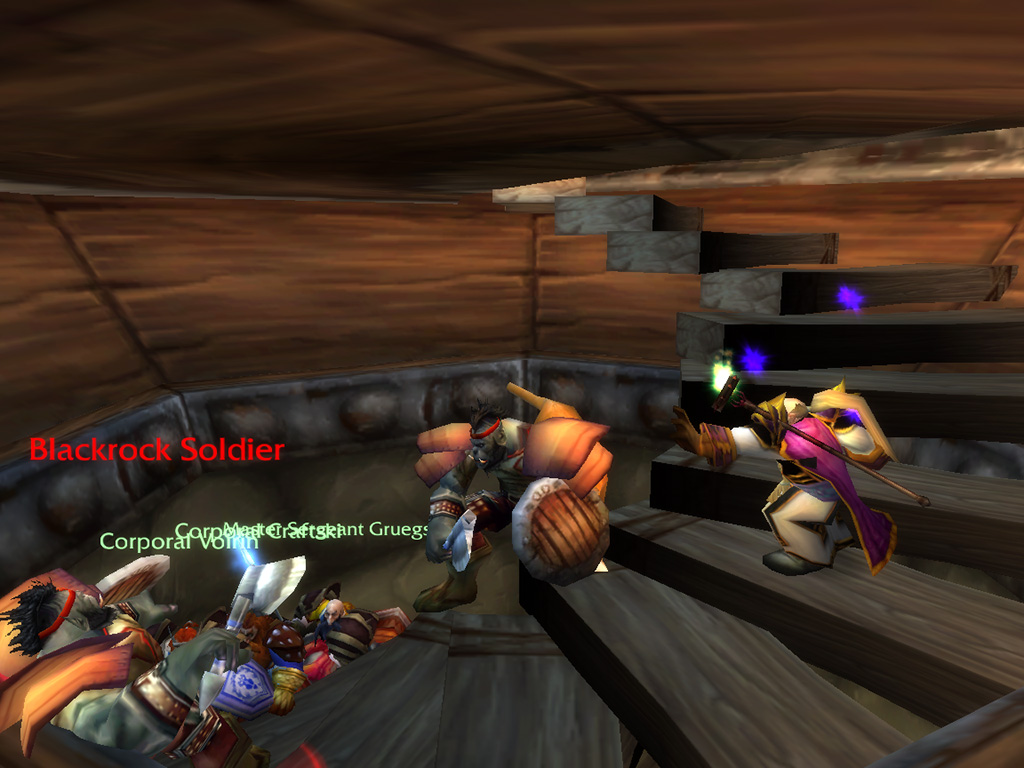
B
ut we couldn't just go and knock on the gates of our arch-enemy's city and ask for entrance, and we weren't planning to risk our lives just for a whim of a dragonkin, so we would stay away from mountain for now. We returned to Morgan's Vigil with news of our success, and as we had showed our worth, we were entrusted with a seemingly simpler but far more delicate task, to do some diplomacy! We would have to travel to Lakeshire and deliver a plea for aid, outlining the dangerous alliance between the Blackrock Orcs and the Black Dragonflight. But first we would finish our work on the steppes, as there were other dangers to fight. As the steppes were mostly controlled by Blackrock Orcs, steps were needed to drive them back into their holds. We were tasked to gather Orc medallions, which they wore as tokens battle prowess, the more we could gather, the better!
We travelled to the west, following the road to Blackrock Mountain, and made sure to pay a visit to every Blackrock camp we encountered. We found small outposts, consisting of burrows and watch towers, but also a vast stronghold nestled at the foot of the mountain. Almost every Orc we fought carried some of these medallions, and our bags quickly filled up. With the task complete, we set our course back to the camp. That was until Gruegski asked for a short detour to visit the ruins of Thaurissan, the remains of a large Dark Iron Dwarf city, their home before it was destroyed and they went into hiding into Blackrock Mountain. We had to make a transcription of an ancient Dark Iron tablet, which told tales of power and riches, and recover information from the relics that were scattered throughout the ruins. The tablet was easily found, a large, marble slab, inscribed with Dwarvish script, but the relics proved to be more elusive.
We travelled to the west, following the road to Blackrock Mountain, and made sure to pay a visit to every Blackrock camp we encountered. We found small outposts, consisting of burrows and watch towers, but also a vast stronghold nestled at the foot of the mountain. Almost every Orc we fought carried some of these medallions, and our bags quickly filled up. With the task complete, we set our course back to the camp. That was until Gruegski asked for a short detour to visit the ruins of Thaurissan, the remains of a large Dark Iron Dwarf city, their home before it was destroyed and they went into hiding into Blackrock Mountain. We had to make a transcription of an ancient Dark Iron tablet, which told tales of power and riches, and recover information from the relics that were scattered throughout the ruins. The tablet was easily found, a large, marble slab, inscribed with Dwarvish script, but the relics proved to be more elusive.
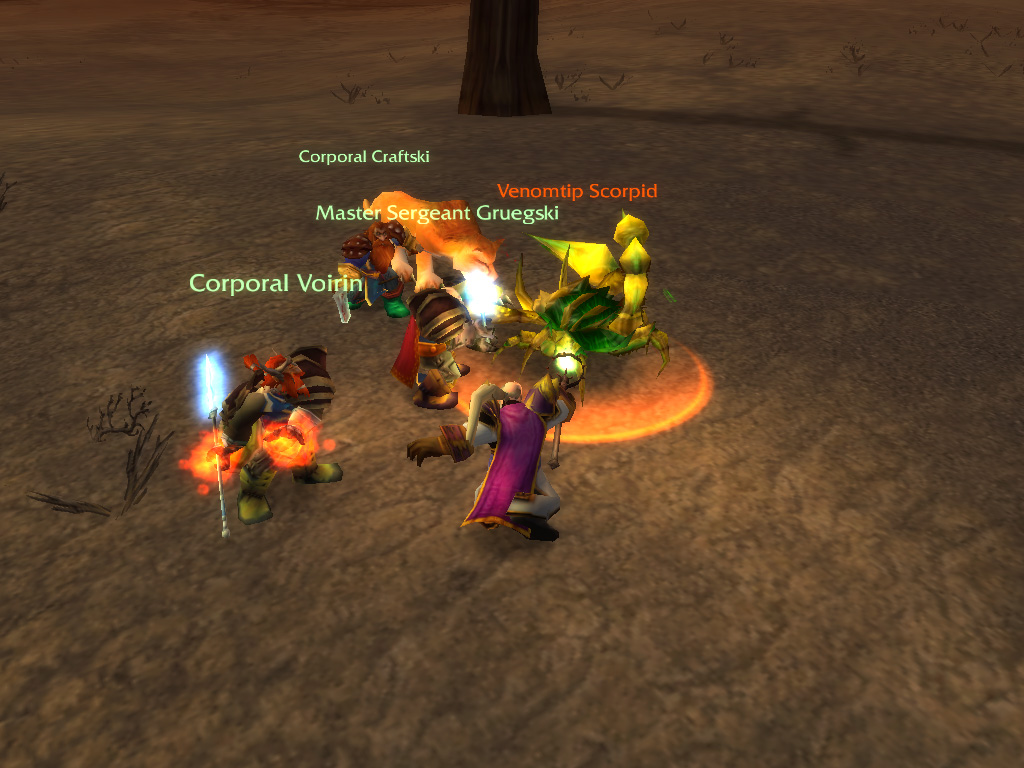
Dark Iron Discoveries
T he relics took more work to find, and were small stone fragment, inscribed with runes. On touch, the relics crumbled into dust, and flashes of memories jumped into our minds. Memories of fire and flame. Still dazed from these visions, we were jumped by a pack of Dark Iron Dwarf assassins, hoping to catch us off guard, and keep protect their secrets. Thankfully we were made of sterner stuff, and deflected the attack, smashing them into the dirt. As we searched more and more relics, we were able to gather a story of what had happened to the city Thaurissan: It was destroyed by the summoning of a gigantic fire elemental, an event that had laid waste to the once lush and fertile fields steppes. Gruegski told us the historians in Ironforge would be quite happy with our findings, guessing there wasn't much else we could discover in the ruins. With our archaeological work complete, we made our way back to Morgan's Vigil to return the gathered Orc medallions.
T he relics took more work to find, and were small stone fragment, inscribed with runes. On touch, the relics crumbled into dust, and flashes of memories jumped into our minds. Memories of fire and flame. Still dazed from these visions, we were jumped by a pack of Dark Iron Dwarf assassins, hoping to catch us off guard, and keep protect their secrets. Thankfully we were made of sterner stuff, and deflected the attack, smashing them into the dirt. As we searched more and more relics, we were able to gather a story of what had happened to the city Thaurissan: It was destroyed by the summoning of a gigantic fire elemental, an event that had laid waste to the once lush and fertile fields steppes. Gruegski told us the historians in Ironforge would be quite happy with our findings, guessing there wasn't much else we could discover in the ruins. With our archaeological work complete, we made our way back to Morgan's Vigil to return the gathered Orc medallions.

T
he Dwarf was pretty happy with our work, and directed us to another danger that was threatening their camp: A den of Ogres nearby! The Ogres, calling themselves the Firegut clan, had made a large camp in the surrounding rocks, building walkways that reached the peaks and excavating tunnels that led into the depths. The plan was to thin their numbers first, sending them reeling and allowing us to strike their leader. We travelled north, and ran almost immediately into Ogre patrols. Staying at a safe distance first, testing their strength, we discovered these monsters proved to be proficient in magic, but didn't shy away from a proper brawl either. In a bloodthirsty rage, they would charge at us, yelling insults in their ragged tongue. As we moved closer together, we were able to make our way to their caves, which were vast fungal-infested tunnels, where there was an Ogre hiding behind every corner. As we cleared the caves, we were sure this would leave an impression on the Firegut, and satisfied with our results, we returned once again to the Alliance camp.
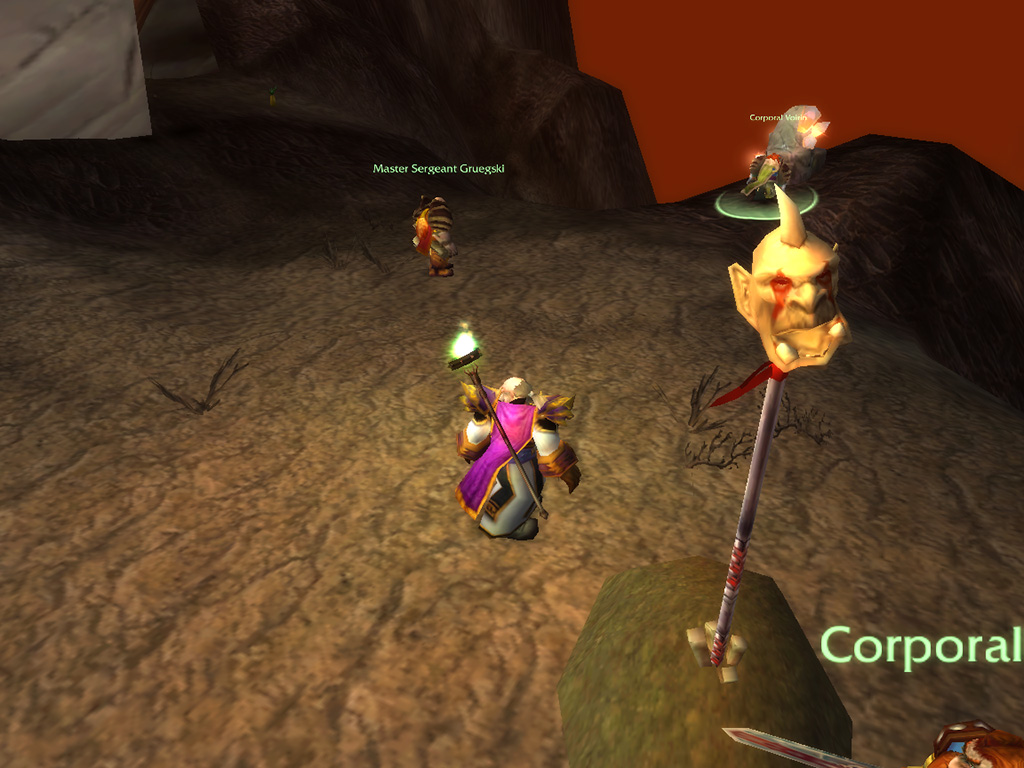
N
ow it was time for the final steps to drive the Ogres back: With their forces weakened, their chieftain, called Gor'Tesh, would now be open to attack. He ruled from an old Orc structure near the cavernous encampment of his minions, and we would pay him a visit. The structure, an abandoned Orc Burrow, was easily found, and although Gor'Tesh was the leader of his clan, we did not encounter any problems with downing him in a few well-aimed attacks. But now, with the leader dead, it was time for the true plan, a quite gruesome task. Chopping off his head, we mounted it on a pike, and with the blood dripping over Orangz's pristine white robes, we carried it to the top of the Ogre settlement. We climbed the wooden bridge climbed carefully and eventually found a fitting spot, overlooking the steppes. There we planted the pike in the ground, their leader's decapitated head for all to see, as a warning. Surely this would bring some safety to Morgan's Vigil? Or would this only lead to vengeance?
But still, people in the encampment were happy with our actions, and with Morgan's Vigil safe for now, we headed south into Redridge, to deliver the news about the dangers of the Black Dragonflight. The Magistrate of Lakeshire vaguely remembered us from our earlier visit, when we saved the town from an Orc invasion, and was interested in our tidings. The contents of the letter we delivered proved to be grim, and action was in order: The Magistrate sent us to Stormwind, to deliver a plea to the ruler of the city, Highlord Fordragon, as the danger posed by the Black Dragonflight was beyond the strength of any militia, or even the armies of Stormwind. This would need the attention of the Alliance combined.
But still, people in the encampment were happy with our actions, and with Morgan's Vigil safe for now, we headed south into Redridge, to deliver the news about the dangers of the Black Dragonflight. The Magistrate of Lakeshire vaguely remembered us from our earlier visit, when we saved the town from an Orc invasion, and was interested in our tidings. The contents of the letter we delivered proved to be grim, and action was in order: The Magistrate sent us to Stormwind, to deliver a plea to the ruler of the city, Highlord Fordragon, as the danger posed by the Black Dragonflight was beyond the strength of any militia, or even the armies of Stormwind. This would need the attention of the Alliance combined.
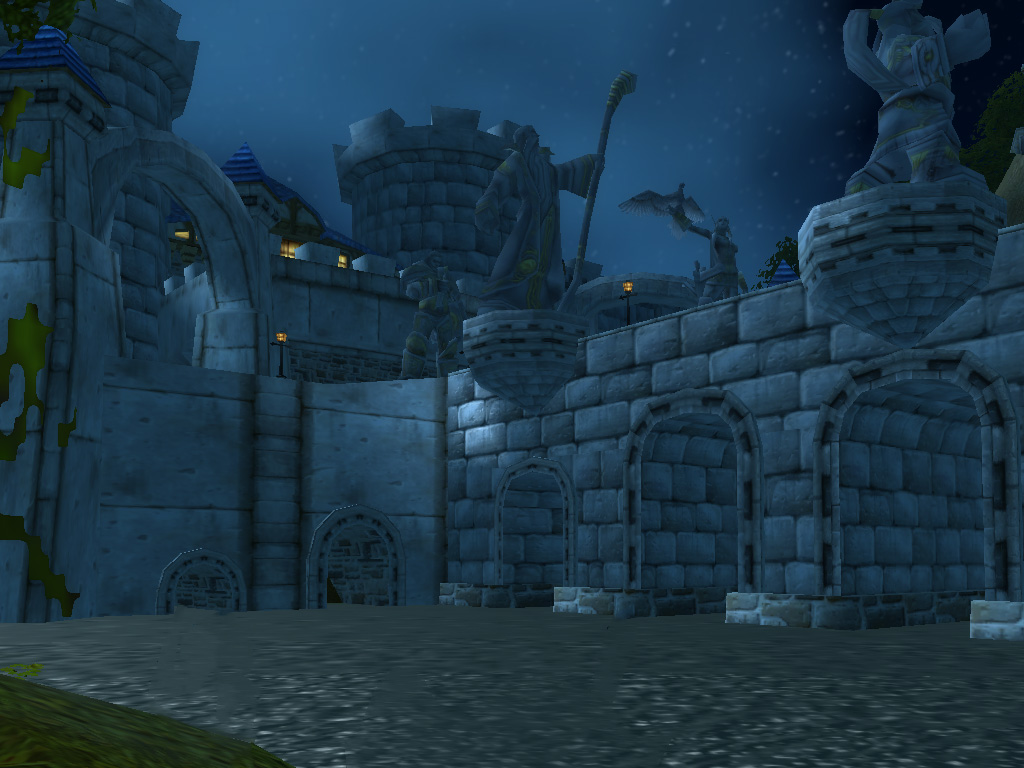
Dwarftastic Delivery
T raveling to Stormwind, we made our way to the keep from where the Highlord ruled over the Human territories, as regent of the King, Anduin Wrynn. We presented the letter from Redridge, which left Fordragon stunned: Dragons? Controlling the Blackrock Orcs and plotting against Stormwind? Impossible! But the proof was not easily dismissed, and for council, he directed us to his advisor, Lady Prestor. She dismissed the idea of the plotting Black Dragonflight, believing it to be the result of a paranoid magistrate and us, foolish adventurers, advising us to find another type of career. Careful to not anger royalty, we thanked her for her time, and informed the Highlord, who in turn promoted us as deputy of Stormwind, and sent us back to Redridge. Returning to the Lakeshire town hall, the magistrate took the news hard, and told us the fate of the town would now rest on our shoulders.
We would have to report to the Marshall Maxwell in the Burning Steppes, to retrieve more information about the Blackrock menace, and to return to Stormwind with undeniable proof. Traveling north, we found ourselves back in Morgan's Vigil where we were informed the information that had been accumulated had been lost with the loss of Marshall Windsor, their former commander. According to an intoxicated Dwarf we interrogated, they had just deflected a Blackrock Orc attack, when Windsor had been captured by Dark Iron Dwarves, and taken to Blackrock Mountain. If Marshall Windsor was still alive, we would have to travel to the Blackrock Depths.
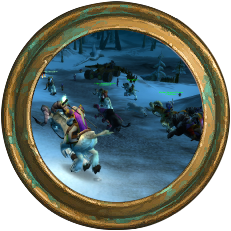
Fighting on the fields of battle such as Alterac Valley and the Arathi Highlands will let you gain fame, honor and magical artifacts.
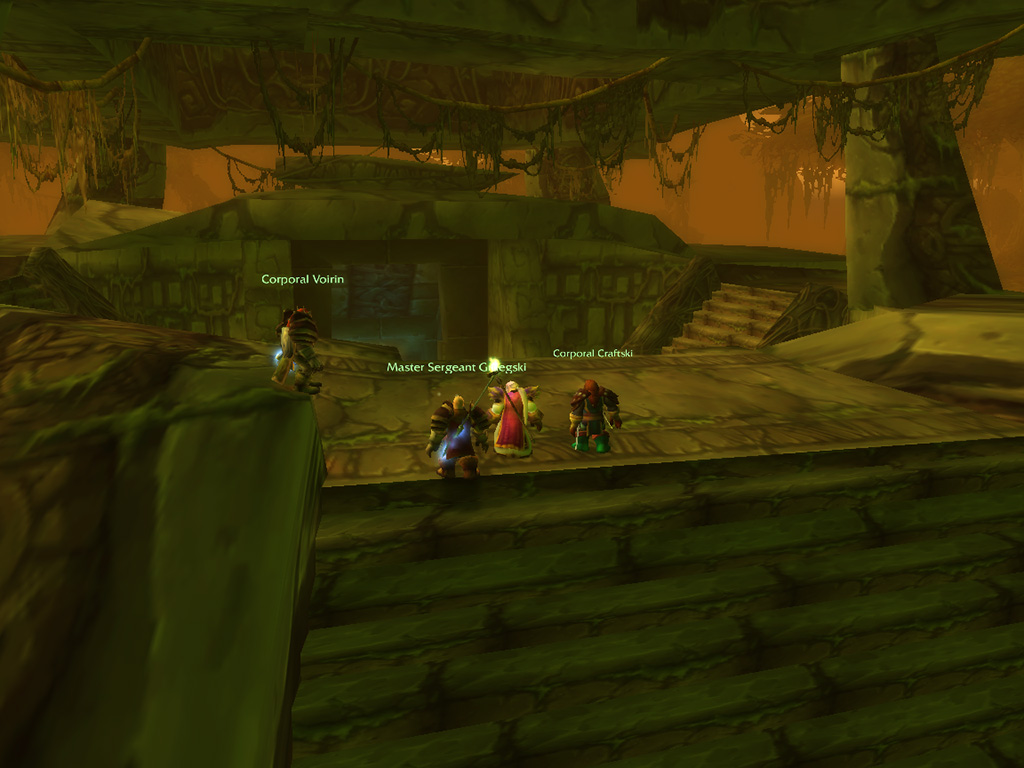
The Temple Calls
T he dangers of such an expedition were far too risky for now, and we didn't even have an idea on how to enter the heavily defended city stealthily. Perhaps in time we could find a way, and we returned to Ironforge to inform the Royal Historian of the fate of Thaurissan. As even the King of Ironforge listened along to our tale, he interrupted, asking if we had perhaps had ran into another Dwarf, Kharan Mighthammer. Our reply that we had met no other Dwarves but Dark Iron Dwarves in the ruins left the king shattered, and he told us his tale. According to him, his daughter Moira had went missing from the steppes, along with Dwarven guards and her own bodyguard Kharan. He feared for Moira's life, and was almost sure she had been taken captive by the Dark Iron Dwarves. So again, we received a request to infiltrate the Dark Iron city, this time to search for Kharan and the princess.
But first we had other things to do: Encouraged by our latest endeavours, we were sure that we would be able to withstand the dangers of the Sunken Temple, and finish the tasks that sent us there. Taking the Deeprun tram south, we flew to the Blasted Lands, and after a short trip through the Swamp of Sorrows, we found ourselves at the edge of a lake, from which the Temple of Atal`Hakkar rose in the distance. After we had warmed ourselves up, we took a dive, and swam across the waters, and climbed the slippery steps, leading us to the top of the temple. We found the top empty, with only a pair of stairs leading downstairs again, into the depths of the temple. It seems we were in for some more climbing!
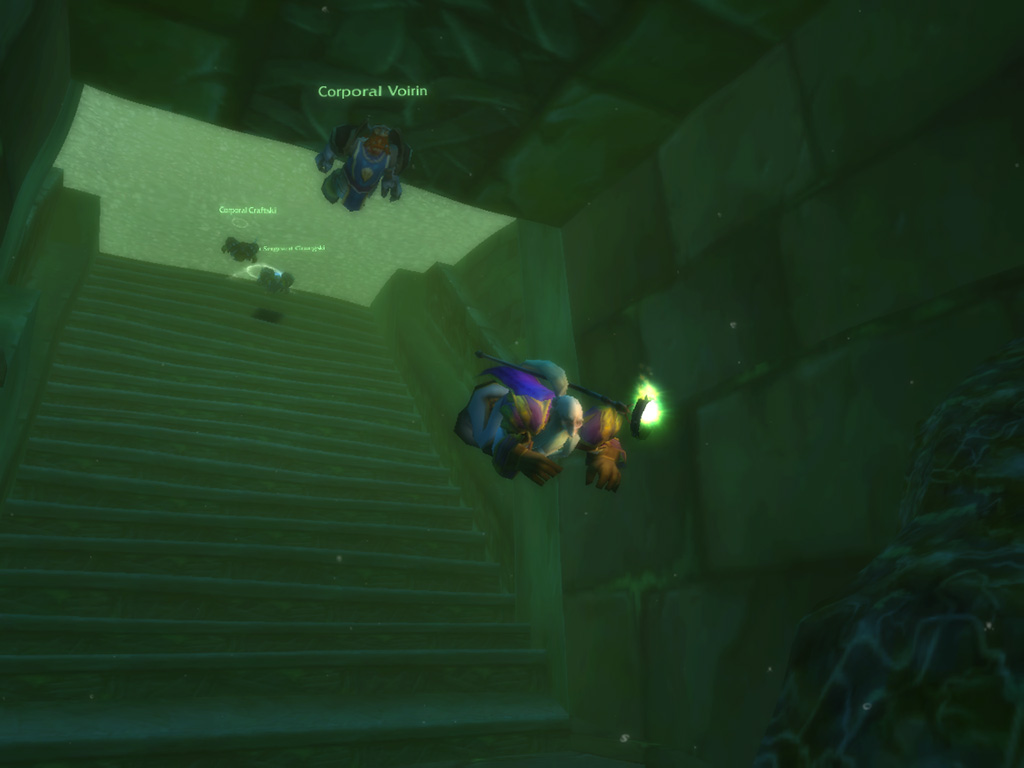
A
s we made our way down, we reached the end of steps, leading into a pool of water. With no other way to go, and as our clothes and armour were still soaked from our previous swim, we dove in and found a dark, underwater tunnel leading onwards. Holding our breaths, we swam onwards, reaching a pair of staircases that led upwards, out of the water. As we resurfaced, we found ourselves in company, as we were confronted by Trolls and their undead mummified ancestors, guarding the paths towards the inner sanctum of the temple. Lone adventurers would probably end up as a meal for the cannibalistic Trolls, but the four of us were a worthy challenge! We tried to navigate the hallways, but we were continuously led us into different directions, with staircases leading us into burial chambers and hallways opening up into rooms full of surprised Trolls. But eventually we found a path that didn't lead us into a dead end, and followed the halls into the depths. There we finally found ourselves in a large chamber, with various tunnels branching into all directions: This temple was turning into one big maze!
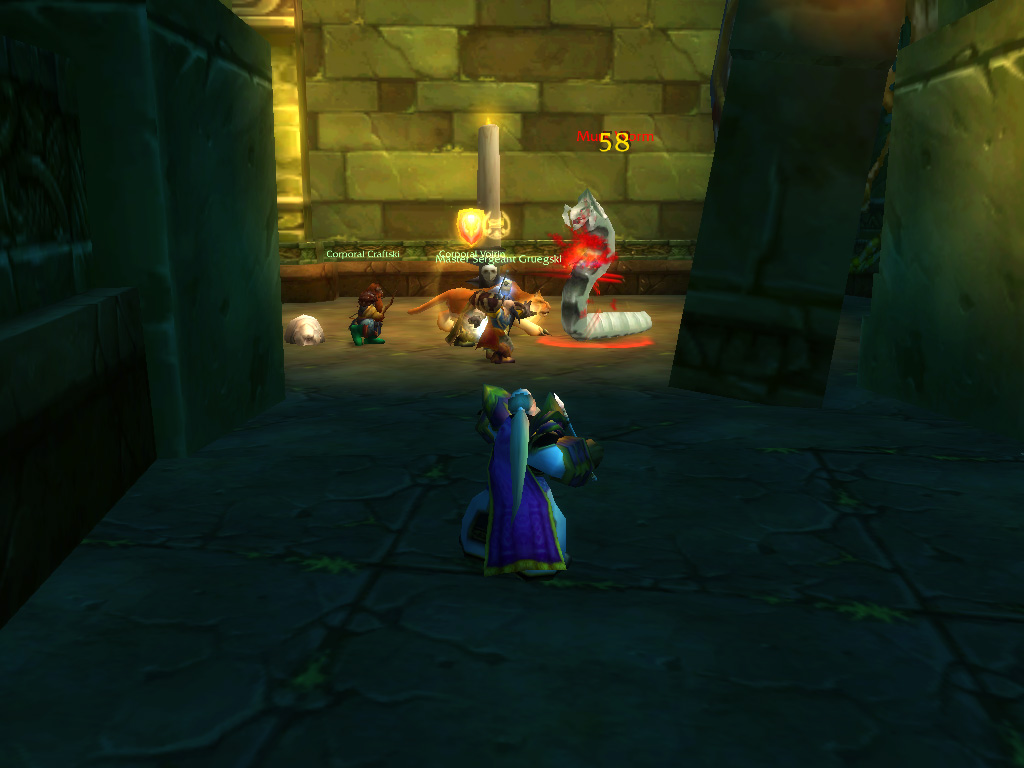
W
e chose to explore the nearest path first, and followed a long spiralling staircase that lead us deeper down into the temple. Here we ran into filthy maggot-like creatures, gigantic worms and bog-monsters, that crawled through the damp stone hallways. Although vile, these monsters were not extremely tough, and together we were able brawl our way through them, ending up in a large pool overseen by multiple balconies. Inspecting the chamber, we found an ornamental altar, which had to be the altar we were sent to investigate by the Goblin from Tanaris! Looking closer, we also found a small indentation which upon trying, made a perfectly fit for the stone token he had given to us. As the token slipped into its place with a click, the room suddenly started to shimmer, being lit by mystical lights on the balconies above, which faded and glowing in a specific order. But nothing else was happing, and there surely wasn't any treasure appearing! We guessed this was another mystery to solve, and as we had reached a dead end, we turned back, and climbed the spiralling staircase upwards.
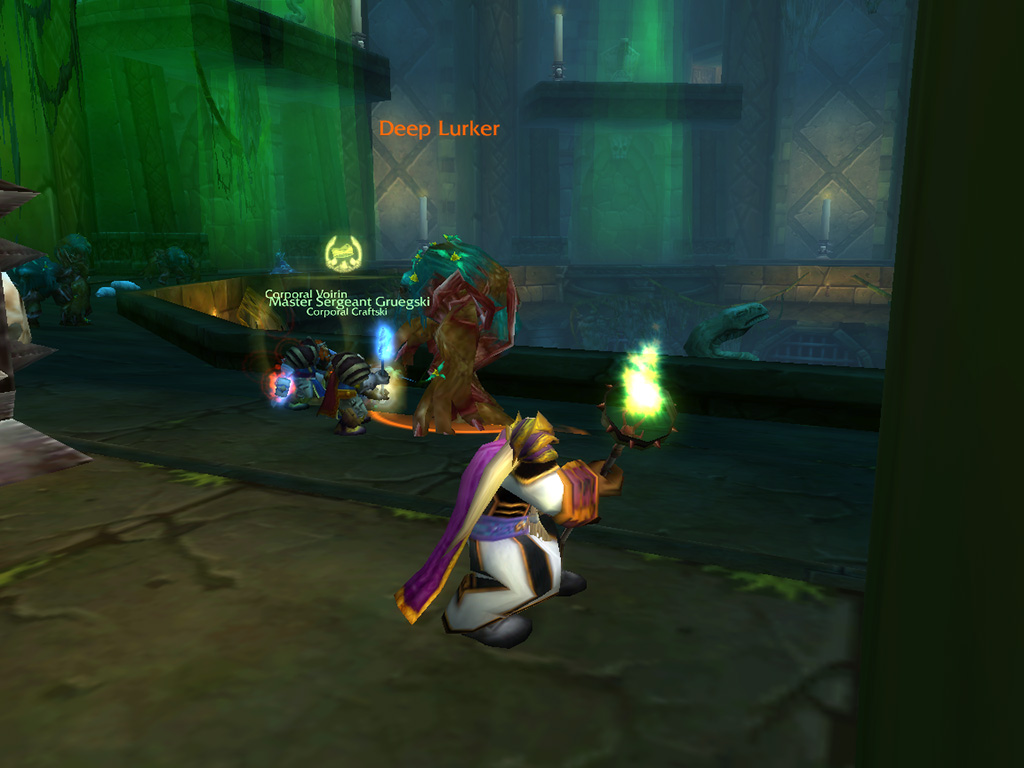
Investigating the Circle
A s the mystical lights were still fresh in our minds, we started searching for a way to access the balconies and look more closely at the ornaments that stood there: Perhaps they would help to solve this riddle? Our search did not take long though, as we only had to move one staircase further, which led us once again downwards into a large circular hallway. Just as the previous halls we had explored, these were once again infested with maggots and bog-monsters, but now the numbers were not in our favour! Large packs of foul creatures crawled along the halls, which attacked us on sight. As we hid behind Voirin to absorb the fetid claws, we made our way along the hall, and cleared the large circular hall of monsters, finally ending up where we started. During our fights, we had found multiple passages in the walls, which led to the balconies we had previously seen from below. And now, with the surroundings clear, we were able to investigate them more thoroughly. On each balcony we found large, serpent-like, ornamental statue, and each balcony was lit by large candles that gave the room a dim glow.
As Orangz approached and touched one of the statues, he was blasted by a shock of magic, sending him flying to the ground: These statues packed a punch! But perhaps we did something wrong: Recalling the lights we had seen before when we touched the altar below, we regained our bearings and made our way to the balcony that was lit first in the sequence. This time the statue was safe to approach, and as we touched it a bright green light appeared with a flash, this time not fading: The secret of solving the riddle was following the sequence! We quickly ran around the halls, activating each statue in order, until a green light shone from each balcony.
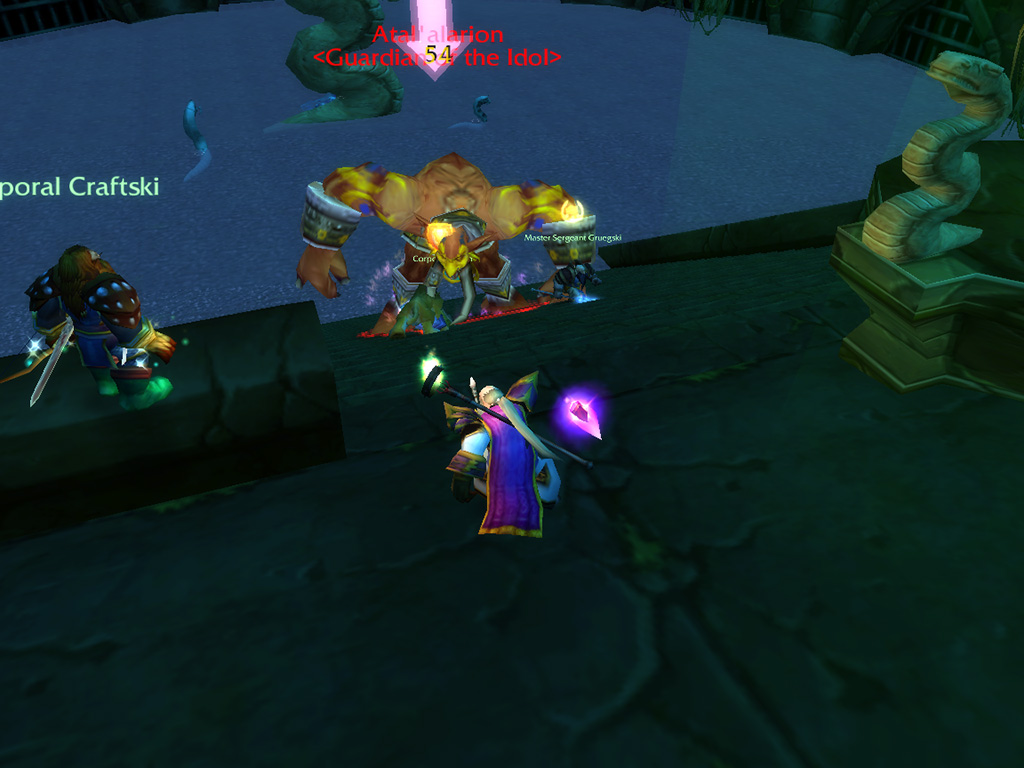
W
hile the light brightened, the ground suddenly started to rumble with a deep noise, combined with a bellowing roar: It appeared something had awakened. Peeking over the edge of the balcony, we noticed a larger version of the of one of the snake-like statues had emerged from the pond below, accompanied by a monstrous, orange, troll. We were too high up to jump straight down, as we knew the pool was shallow, but we did notice a ledge below we could reach first, patrolled by fen-creatures. We grabbed our weapons tightly, and jumped down upon the creatures, driving them back and clearing the way to the edge. From this height, it would be possible to safely descend into the pool, so we jumped down once again, this time straight into the path of the wandering Troll.
The Troll gave us a proper greeting, growling it would feast on our bones, and charged into Voirin, slamming him back into the staircase. Next the creature roared itself into a frenzy, and with a mighty jump, pounded the floor, sending us off balance and tumbling to the ground. We were in for a true fight it appeared! It kept lunging at Voirin and Gruegski, driving them backwards again and again, until eventually Voirin found safe footing against the wall. Now, as the Troll flailed its fists at Voirin's shield, we were able to hit it with full force from behind, slamming it into the floor with Dwarven might. With the Troll out of the way, we were able to investigate the large statue that had surfaced, and found an urn hidden at the base of ornament, which was filled with various magical items. Orangz drained the items of their power, and used the magical properties to embolden our own items. In the end, we were happy that we had solved the riddle, but we it seems we would have to wait for another time to find our riches!
The Troll gave us a proper greeting, growling it would feast on our bones, and charged into Voirin, slamming him back into the staircase. Next the creature roared itself into a frenzy, and with a mighty jump, pounded the floor, sending us off balance and tumbling to the ground. We were in for a true fight it appeared! It kept lunging at Voirin and Gruegski, driving them backwards again and again, until eventually Voirin found safe footing against the wall. Now, as the Troll flailed its fists at Voirin's shield, we were able to hit it with full force from behind, slamming it into the floor with Dwarven might. With the Troll out of the way, we were able to investigate the large statue that had surfaced, and found an urn hidden at the base of ornament, which was filled with various magical items. Orangz drained the items of their power, and used the magical properties to embolden our own items. In the end, we were happy that we had solved the riddle, but we it seems we would have to wait for another time to find our riches!
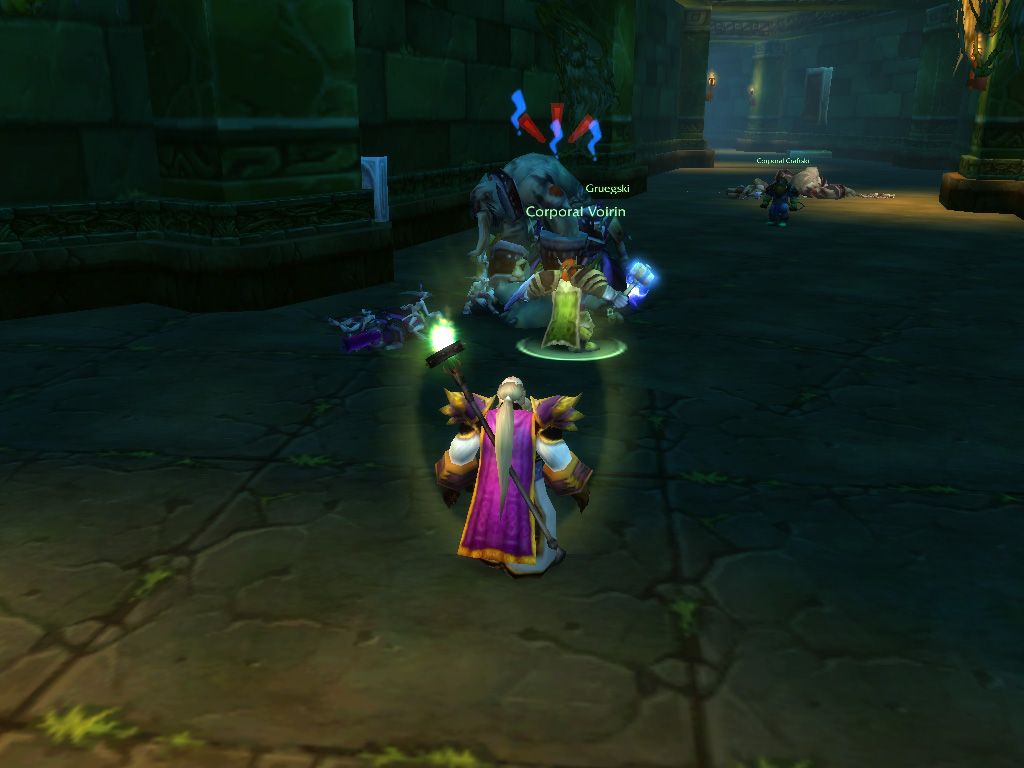
New Trolls Here
M aking our way back to central room again, we ventured into the next hallway, leading us to another staircase upwards. As we reached the top and turned corner, we ran straight into a pack of Trolls, this time accompanied by some undead and demonic allies! As Voirin and Gruegski charged in, we focused our attacks on those wielding magic, while Orangz shackled the undead minions with holy energy. The voodoo magic caused some confusion, as we, and even Craftski's cat, were turned into toads by the Troll incantations. But we had dealt with such powers before, and Gruegski and Orangz were ready to dispel the hex powers, allowing us to gain control of the fight. With this first pack of Trolls down, we found ourselves, just as below, in a long circular hallway, with small doors to the sides. We passed through one of the doorways, and found ourselves on a large balcony, this time overlooking a vast chamber, lit by a skylight high above. The chamber was crawling with green dragonkin, small emerald dragon whelps, and most impressive of all, two large drakes that circled along the walls: Those must be the beasts Craftski and Orangz searched for our trainer tasks!
As we turned our attention back to the balcony, we found ourselves not alone: A large Troll stood on the platform, channelling a spell in deep concentration. As we had not been noticed yet, we used this advantage to launch a sneak attack, disrupting the Trolls spellcasting. The Troll proved to be a strong one, as with one sweep from its claws, it sent Gruegski tumbling backwards, almost falling into the dragon-infested depths below. Taking this as a warning, we moved our fight further away from the ledge, thinking it would be safer to fight with a solid wall behind us. As Voirin absorbed the flailing claws, the rest of us concentrated our attacks, sending the Troll flying to the ground. Investigating the Trolls possessions, we found multiple feathers, tied into a charm: These must be the voodoo feathers Voirin and Gruegski were looking for! Carefully they both removed one of the feathers, and stowed them safely away in their bags.
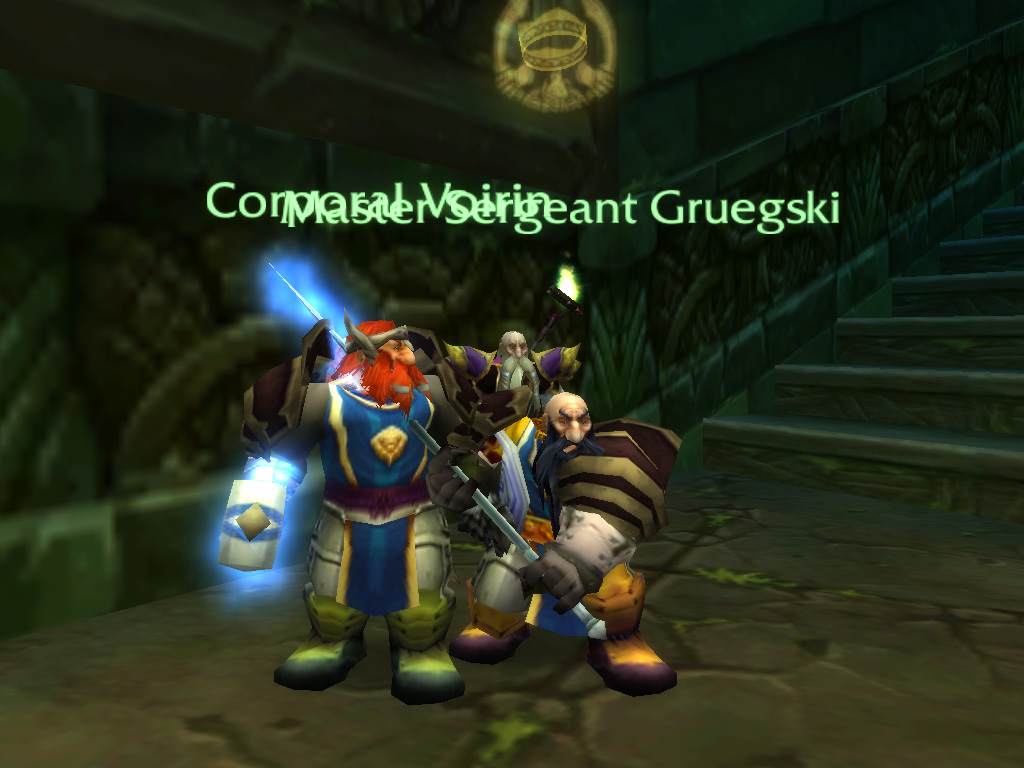
L
ooking across the room, we could see five more balconies in the distance, each one glowing with the green energy of a magic spell: There were five more Trolls to take out! We returned to the hallway and continued fighting our way through the packs of Trolls. Large Troll behemoths barred our way and flying serpents, just like the ones we had encountered in Feralas flew through the halls, surprising us from the rear. But we kept a close formation, moving as one and making sure no Troll or monster could get away and call for aid. As we cleared the hallway, once again ending up at the staircase which had led us to this floor, we turned our attention to the five Trolls that were left channelling on the balconies below. Each Troll gave us a different challenge: One of them summoned multiple demons from the netherworld, and bombarded us with volleys of shadow magic, while another placed a magical totem that kept summoning skeletons, trying to overwhelm us.
Thankfully the Craftski's quick reactions helped, taking out the totem the moment it was placed, while Gruegski was able to take on the demons all by himself. Only his fight with the summoned succubus took a bit longer than expected... The final Trolls proved to be less of a challenge, only delaying their defeat by using healing powers. As the final Troll fell, a surge of magic shuddered throughout the room, it seemed breaking the Troll spell had disrupted something in the chamber below. As Voirin and Gruegski gathered the last feathers, completing their task, we pondered what to do: Would we jump down or make our way down the safe way?
Thankfully the Craftski's quick reactions helped, taking out the totem the moment it was placed, while Gruegski was able to take on the demons all by himself. Only his fight with the summoned succubus took a bit longer than expected... The final Trolls proved to be less of a challenge, only delaying their defeat by using healing powers. As the final Troll fell, a surge of magic shuddered throughout the room, it seemed breaking the Troll spell had disrupted something in the chamber below. As Voirin and Gruegski gathered the last feathers, completing their task, we pondered what to do: Would we jump down or make our way down the safe way?
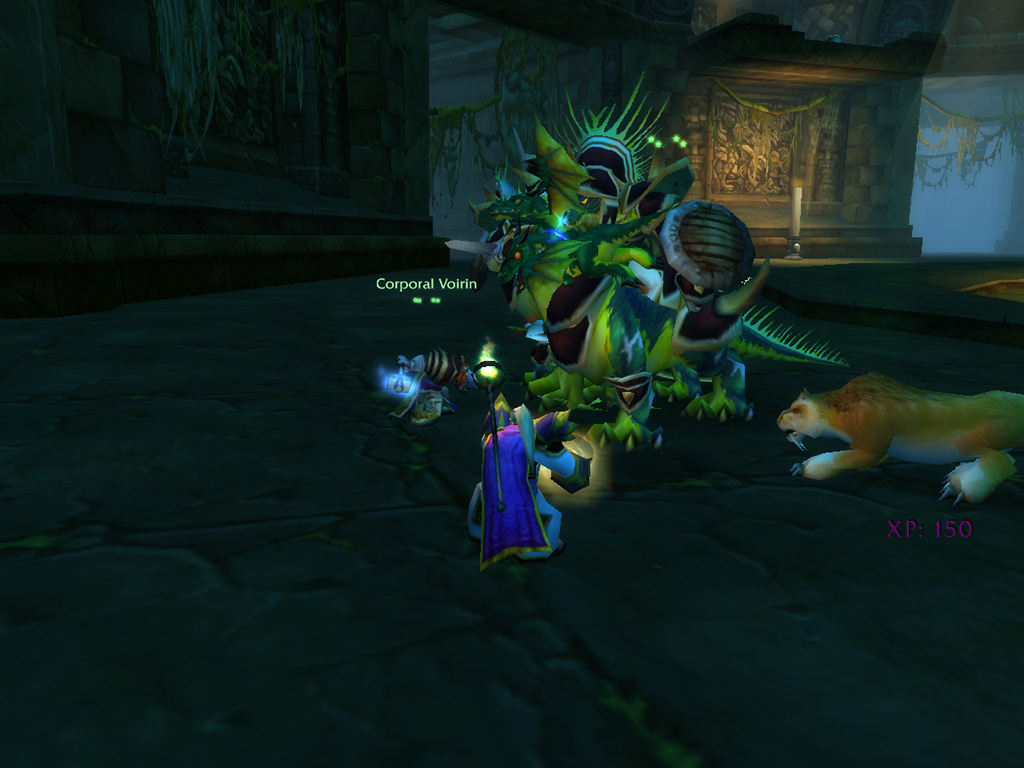
Making the Jump
T hinking there was no time like the present, Orangz shielded all of us, and after finding a spot below which was clear from dragonkin, we jumped from the balcony, into the fray. Our melee started the moment we hit the ground, as a swarm of small whelps flocked around us, snapping their jaws. These small creatures were easy pickings for Gruegski and Craftski, who blasted them away in a hail of holy fire and arrows, allowing us to gain a foothold in the chamber. We moved onwards, finding larger dragonkin in our way that posed a far greater challenge than the smaller minions, monsters that were heavily armoured in shield and plate, able to withstand our blows. As Voirin held his ground against these creatures we were given another surprise: spellcasters would come to the aid of these dragonkin, which ensorcelled us in a dreamless sleep, leaving us defenceless. Thankfully Gruegski and Orangz were able to break the magic, requiring us to adjust our tactics. We would rely on Craftski now, who captured the larger dragonkin in ice, allowing the rest of us to take out the spellcasters, which were now left without their meatshield.
Slowly we made our way through the circular chamber, moving along the walls and taking out the dragon groups one by one. With the room cleared from enemies, we moved towards the hole in the middle of the floor, expecting to jump again. But as we peeked over the edge, we saw the corpse from the orange Troll which we had defeated earlier: It seems we were now standing above the room with the altar! Mapping the location in our heads, we deducted we were now standing on the third floor of the temple, and had cleared the floor above and those below: Would we find our final tasks here, or would there be more hidden floors up ahead?
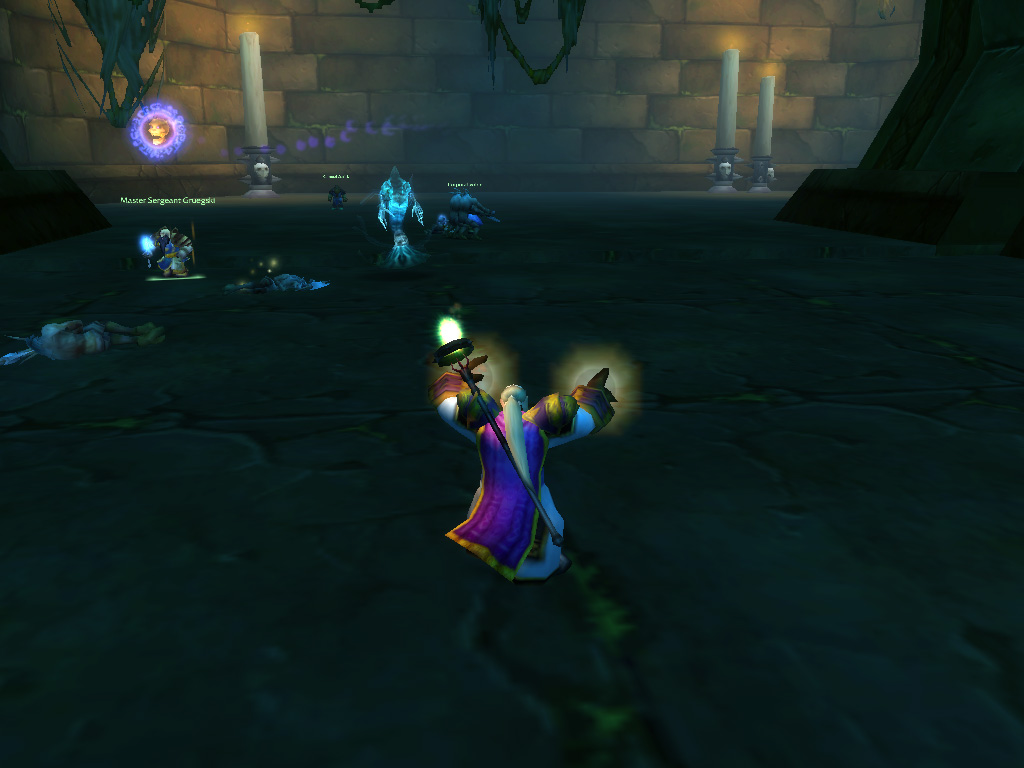
A
s we had cleared the central chamber, it was now time to explore the paths that led into the sides. We rounded the first corner and found even more green dragons, which had passed unnoticed previously, and resumed our attacks, using the same tactics we had used before. With the path ahead free from dragons, we found ourselves in front of a large gateway leading into a high-ceilinged chamber. Here groups of Trolls were attending a ritual, standing in line or sitting on benches, facing a priest behind an altar. We thought it would be best not to disturb such a large group of Trolls, but Craftski mentioned to us the priest was a target he wished to take out: The priest, better known as Jammal'an the Prophet, had a great bounty on its head, offered by a Troll exile in the Hinterlands.
We never would say no to a good reward, so we entered the room stealthy, hugging the walls and grabbing the attention from the Trolls in the back. This technique had worked in the Scarlet Monastery, so we were sure it would work again! Hoping to kill the intruders themselves, the mummified Trolls charged into us with fierce strength. As they pummelled us with powerful blows, these undead monsters proved the be the greatest challenge we had met so far, forcing us run in fear with magical incantations and rising from the dead as immortal spirits, slowly drifting along the floor. Now knowing what to expect, we learned to stay clear from these spirits, which eventually vanished to the netherworld, while Orangz was able to guard our minds against their fear-causing magic.
We never would say no to a good reward, so we entered the room stealthy, hugging the walls and grabbing the attention from the Trolls in the back. This technique had worked in the Scarlet Monastery, so we were sure it would work again! Hoping to kill the intruders themselves, the mummified Trolls charged into us with fierce strength. As they pummelled us with powerful blows, these undead monsters proved the be the greatest challenge we had met so far, forcing us run in fear with magical incantations and rising from the dead as immortal spirits, slowly drifting along the floor. Now knowing what to expect, we learned to stay clear from these spirits, which eventually vanished to the netherworld, while Orangz was able to guard our minds against their fear-causing magic.
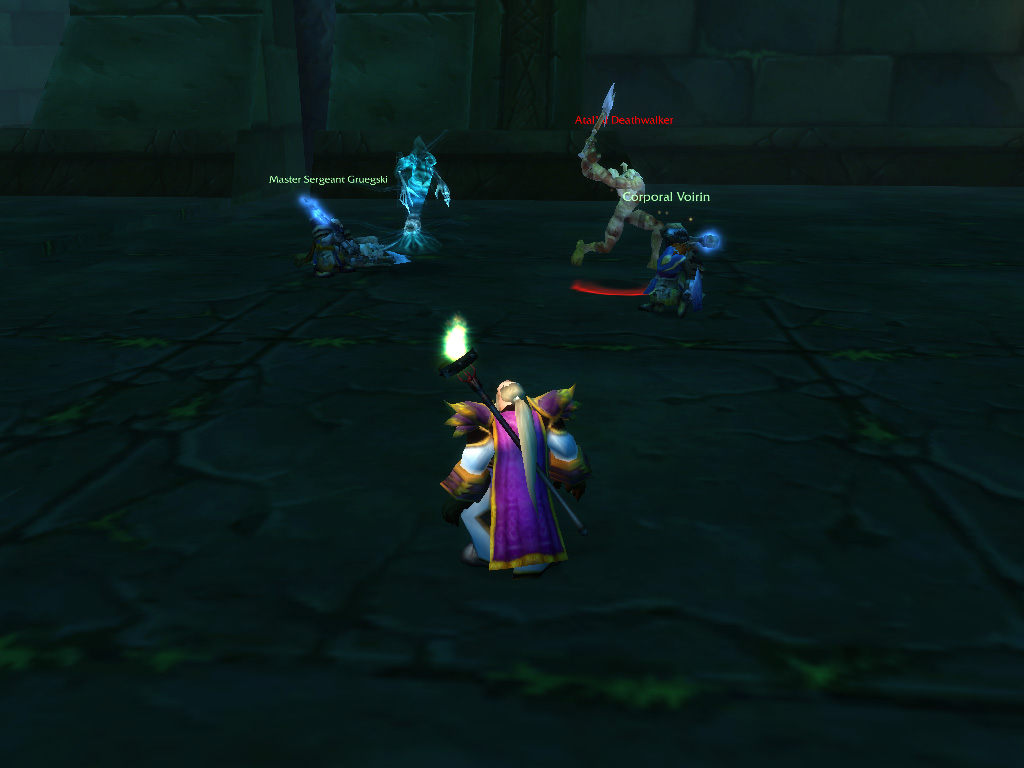
E
mboldened by our success, and seeing there were still quite some Trolls to go, we dared to be more offensive: Both Craftski and Orangz used their traps and spells to lure larger groups, with the remaining Trolls intercepted by Gruegski and Voirin. As the mummified remains collapsed to the ground, we lured the spirits around the room, which left us with enough time to get ready and fight the remaining Trolls, which were by now freed from their traps. With the room now cleared from undead, we were only left facing the priest and his bodyguard, who taunted us as we approached. Yelling that Hakkar would live again, the priest sent in his bodyguard, who started to rain blow after blow upon Voirin. Supporting from afar, the priest invoked incantations, summoning a totem that rooted us on the ground and casting spells that melted the floor with pillars of fire. Both Craftski and Gruegski took care to destroy the totem the moment it was placed, allowing us to stay clear from the smouldering ground. We focussed our attacks on the priest first, seeing the dangers his spells posed, as the hammering blows from the bodyguard could be dealt with through healing.
We rained volley after volley on Jammal'an, until suddenly, invoking hex magic, the priest cursed Gruegski, yelling to join his cause. Gruegski slowly started to burn with dark magic, morphing his very Dwarven shape into something Troll-like! As Voirin would never be able to handle a third Troll to deal with, Craftski sent in his cat on Troll-Gruegski, catching his attention and absorbing the blows. How would we ever get Gruegski back? Unable to dispel the curse, we intensified our attacks on Jammal'an, using every resource we had at our disposal. Then, just as the priest tried to heal himself, his grip over Gruegski faded, who returned to his Dwarven self. Free from the curse, he immediately stunned the Troll, breaking the healing incantation. Now, back at our full strength and the priest already heavily wounded, it did not take long to take the Troll down, and without the magic to support him, the bodyguard followed soon afterwards. Craftski made sure to get a clean decapitation, and stowed Jammal'an head safely in his bag. We hoped the reward would be worth it!
We rained volley after volley on Jammal'an, until suddenly, invoking hex magic, the priest cursed Gruegski, yelling to join his cause. Gruegski slowly started to burn with dark magic, morphing his very Dwarven shape into something Troll-like! As Voirin would never be able to handle a third Troll to deal with, Craftski sent in his cat on Troll-Gruegski, catching his attention and absorbing the blows. How would we ever get Gruegski back? Unable to dispel the curse, we intensified our attacks on Jammal'an, using every resource we had at our disposal. Then, just as the priest tried to heal himself, his grip over Gruegski faded, who returned to his Dwarven self. Free from the curse, he immediately stunned the Troll, breaking the healing incantation. Now, back at our full strength and the priest already heavily wounded, it did not take long to take the Troll down, and without the magic to support him, the bodyguard followed soon afterwards. Craftski made sure to get a clean decapitation, and stowed Jammal'an head safely in his bag. We hoped the reward would be worth it!
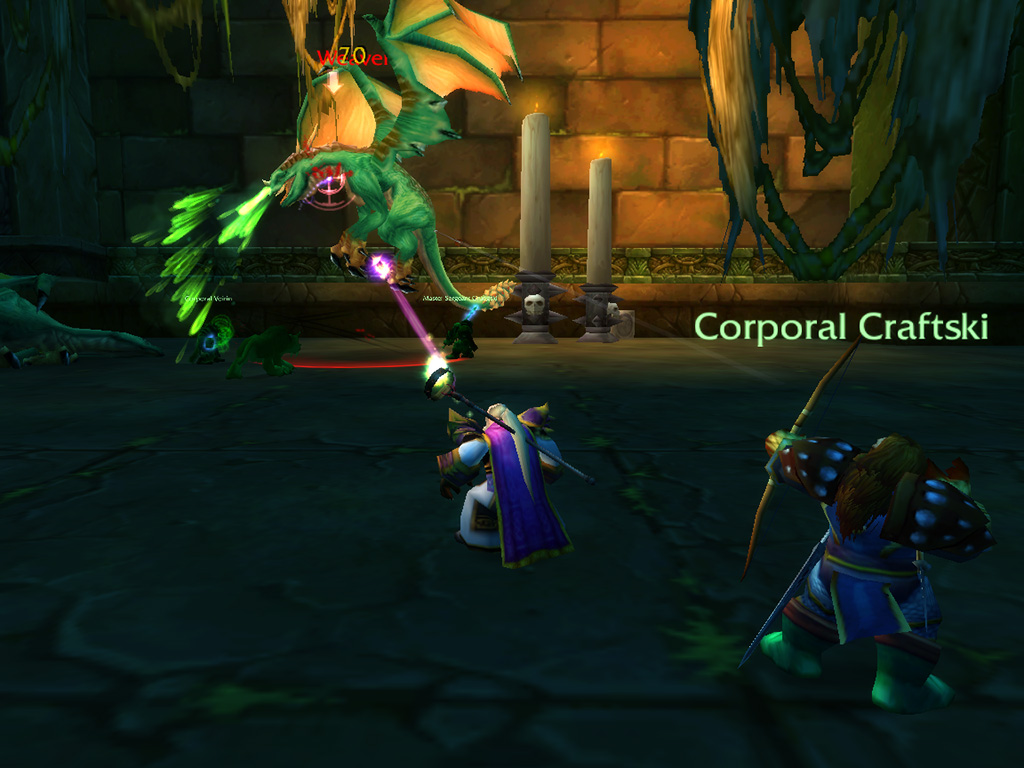
W
ith this wing of the temple clear, we backtracked our steps, walking back to the main circular chamber. Here we received a surprise, as two large drakes swooped down from the ceiling, calling out in a bellowing voice to not awaken the dreamer and attacking us. Defending ourselves and trying to explain that we only were here to capture instead of awaken Hakkar, we were only met with the trashing of claws and gigantic wings, throwing us off balance. As they opened their gigantic maws, Voirin quickly grabbed their attention, and turned them away, keeping us safe from the jets of corrosive acid that blasted from their throats. The acid splattered over Voirin's shield, but made no lasting mark, allowing us to start pushing back. Although the dragons were large, they did not seem that strong, with Voirin holding both of them off, and Orangz able to keep their damage at bay. Craftski and Gruegski focussed on the smaller first, and started dealing damage, made a bit more difficult by the swinging of their tails.
But the hits piled up, and eventually the first drake fell, with the second, larger one, following not long after. Inspecting their corpses, Voirin found a potent ring, bolstering his defence, while Craftski was happy to skin more dragon scales from their hides. Although victorious, we were still searching for the sanctum of the Blood God, where we would be able to capture the essence of Hakkar. We had solved mysteries and had killed Trolls and dragons, we hadn't gotten any closer to our true goal! But there weren't many other places to investigate left, and with this in mind we walked across the circular room, heading for the opposite hallway. Here we encountered multiple wind serpents, which we were quite happy to see: Our quest for Hakkar had started with these creatures, so we expected it would end with them as well.
But the hits piled up, and eventually the first drake fell, with the second, larger one, following not long after. Inspecting their corpses, Voirin found a potent ring, bolstering his defence, while Craftski was happy to skin more dragon scales from their hides. Although victorious, we were still searching for the sanctum of the Blood God, where we would be able to capture the essence of Hakkar. We had solved mysteries and had killed Trolls and dragons, we hadn't gotten any closer to our true goal! But there weren't many other places to investigate left, and with this in mind we walked across the circular room, heading for the opposite hallway. Here we encountered multiple wind serpents, which we were quite happy to see: Our quest for Hakkar had started with these creatures, so we expected it would end with them as well.
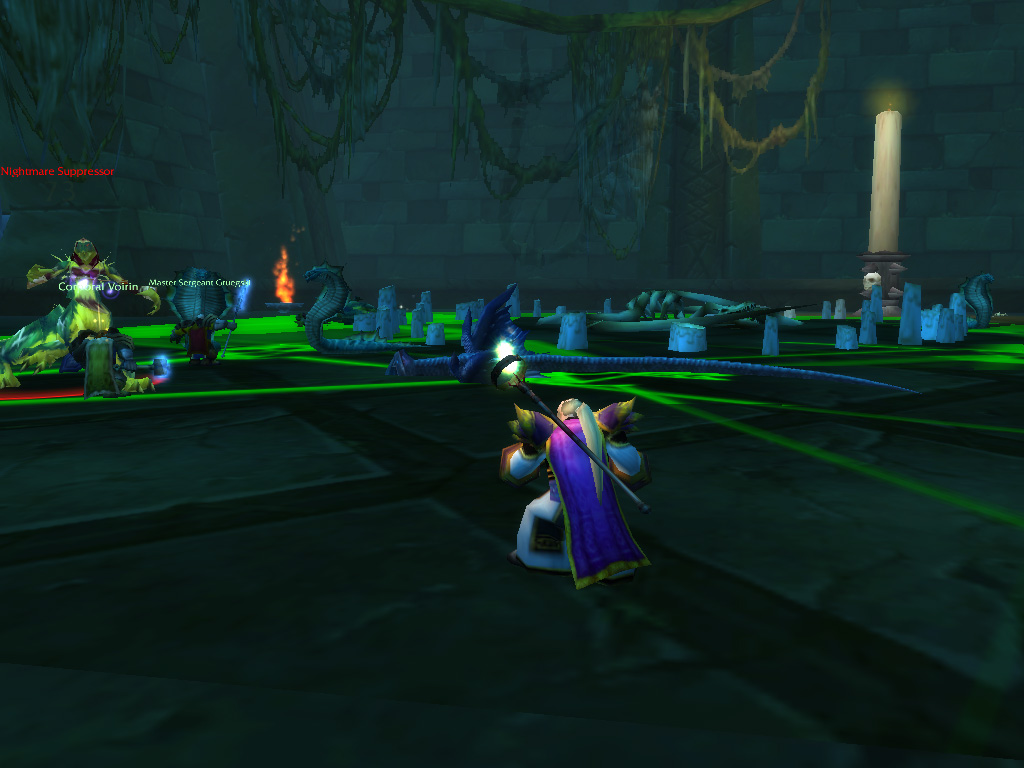
Saying Hello to Hakkar
O pposite of stealing their spirits, as we did in Feralas, we smashed our way through the flying serpents, and ended up in a large room. There on the floor, surrounded by candles, we found the bones of the Soulflayer, waiting to be resurrected by the egg that we had recovered from the Hinterlands. As we cleared the chamber of enemies, we move to the centre, and invoked the power of the egg, following the instructions the Troll in Steamweedle had given us. Drawing the green lines of a large summoning circle in the room, we placed the egg in the middle, and complete the ritual. This had an immediate effect, as the braziers in the corners of the room suddenly ignited and the ghostly shape of a flying skeletal wind serpent appeared, flying aimlessly through the room. We were unable to attack this avatar of Hakkar, but received another surprise, as we were suddenly attacked by snakes that had crawled through cracks in the floor. As Voirin grabbed the attention of the creatures, we slowly backed away into one of the corners of the room, next to one of the blazing flames.
More and more creatures wandered into the chamber, answering the avatars call and soon we were cornered with no way out. Thinking the offense was the best defence, we grabbed the attention of the wandering beasts, engaging the wind serpents that were now flying across the room. The snakes that joined the serpent in its attack were easily cleared by Gruegski and Craftski, which allowed us to focus on the winged creature which was spitting its venom at Voirin. With a well-aimed shot Craftski sent the wind serpent tumbling to the ground, its blood spraying the floor, dousing the flames of the brazier. The ghostly shape in the center of the room called out in an inhuman voice, saying it neared the world of mortals. It seems extinguishing the brazier's flames would bring us closer to capturing the essence of this god!
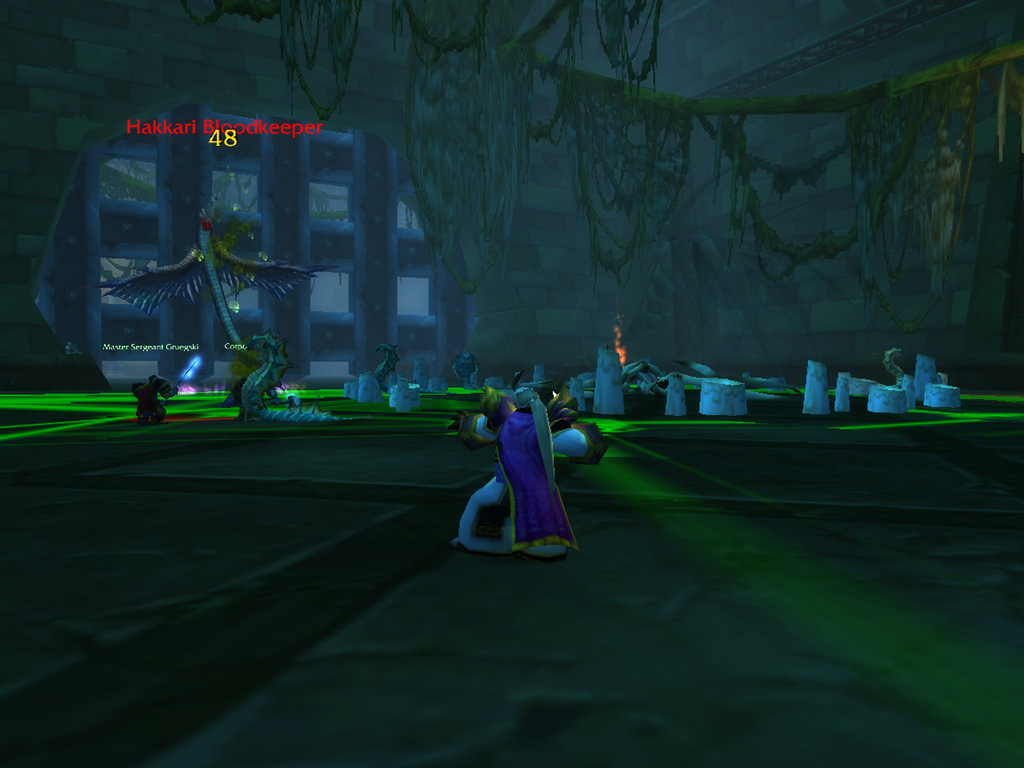
J
ust then, green dragonkin sprinted in the room. And started channelling their powers into the ghostly apparition, hoping to contain it in the realm of the dead. These creatures could not succeed! And we hurried across the room to intercept them, interrupting their spellcasting and taking them down. As the dragonkin hit the floor, we noticed more and more wind serpents soaring across the room, and hoping to douse more braziers using their blood, we lured them into the corner of the chamber. We discovered by trial and error that only the blood from the larger, blueish wind serpents had the potency to overwhelm the flames, and using this knowledge to our advantage, we were eventually able to extinguish all the flames. As the smoke from the braziers slowly dissolved, the skeletal spectre let out a deep roar, tearing through the border to the netherworld and appearing in the land of the living.
We made sure to clear the room of the remaining snakes, and afterwards charged in the avatar of Hakkar, sending bone chips flying. The creature proved to a potent advisory: It's bony talons were razor sharp, and its skeleton was infused with evil magics that twisted our minds turning us on each other. Orangz was the first victim of this power, as he suddenly started to heal the avatar instead of us. Gruegski was able to dispel the controlling magic, but still, the damage was done, and we had been warned! Hoping this would not happen again, we increased our efforts and pushed our abilities to the limit. As we did more damage, the bones began to scatter, and soon the skeletal avatar was sent crashing into the ground: We were victorious! Using the egg, we gathered the essence that had been left behind, stowing it safely away, hopefully captured forever. As he rummaged through the remains, Voirin was able to find a replacement for his plate chest armour, a most welcome surprise!
We made sure to clear the room of the remaining snakes, and afterwards charged in the avatar of Hakkar, sending bone chips flying. The creature proved to a potent advisory: It's bony talons were razor sharp, and its skeleton was infused with evil magics that twisted our minds turning us on each other. Orangz was the first victim of this power, as he suddenly started to heal the avatar instead of us. Gruegski was able to dispel the controlling magic, but still, the damage was done, and we had been warned! Hoping this would not happen again, we increased our efforts and pushed our abilities to the limit. As we did more damage, the bones began to scatter, and soon the skeletal avatar was sent crashing into the ground: We were victorious! Using the egg, we gathered the essence that had been left behind, stowing it safely away, hopefully captured forever. As he rummaged through the remains, Voirin was able to find a replacement for his plate chest armour, a most welcome surprise!
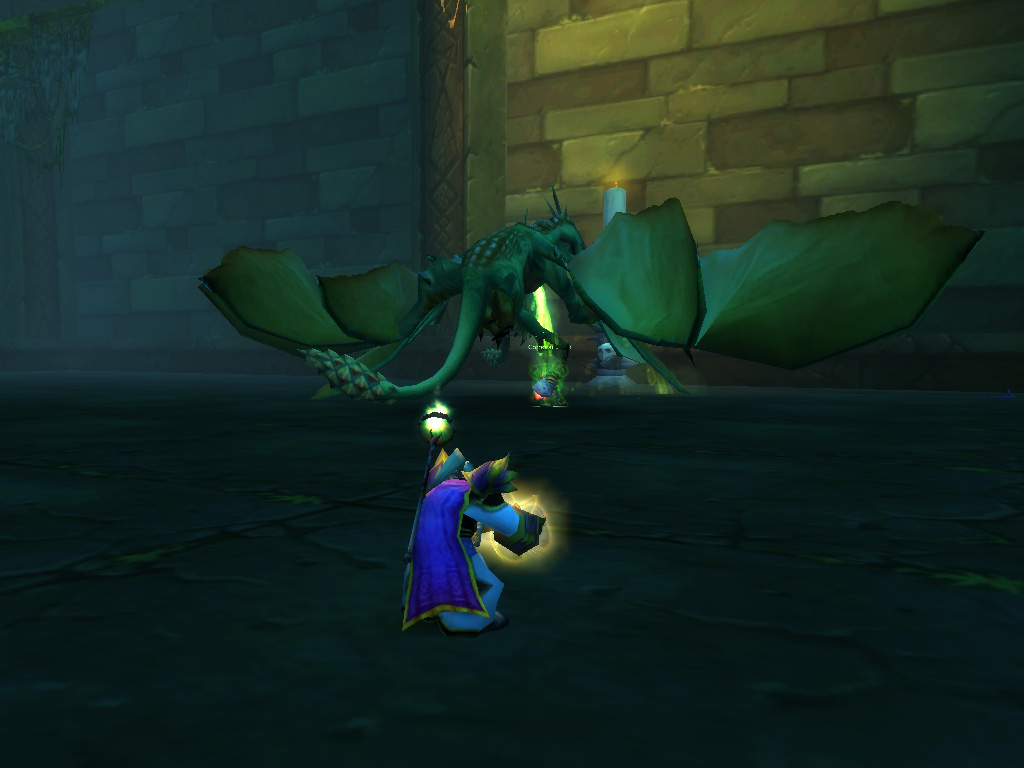
W
ith the filled egg in our possession, we were ready to leave the temple, our main goal achieved. Craftski and Orangz however, still had a task to complete: To slay the dragon Morphaz, which was supposedly wandering the hallways of the temple. Neither of the two previous dragons we had slain was the monster they searched, so we would have to search further. Returning to the circular chamber, we headed into the final hallway we had left unexplored, and soon reached another vast room. Here two large dragons were flying along the walls, chasing each other in an endless loop. Craftski recognizable one of the dragons as Morphaz, able to spot small differences between the creatures with his sharp eyesight.
Charging in when they flew close, Voirin grabbed the attention of both beasts, gathering them around his shield and fending off their claws and teeth. With the dragons busy, the rest of us started to pour in the damage, wielding polearm, bow and wand. We focussed on Morphaz first, hoping to save Voirin from the stream of acid that was pouring over his plate armour, and as we downed the beast, directed our attention to the other dragon. This beast, called Dreamscythe, proved the be easy to defeat, as it was now alone, and soon joined Morphaz on the floor. As Orangz and Craftski rummaged through the carcasses, they both retrieved trophies they searched: Taking a tooth and a vial of blood as proof of their deeds. With both dragons downed and the path ahead clear, we travelled across the chamber seeing the faint outlines of something large up ahead.
Charging in when they flew close, Voirin grabbed the attention of both beasts, gathering them around his shield and fending off their claws and teeth. With the dragons busy, the rest of us started to pour in the damage, wielding polearm, bow and wand. We focussed on Morphaz first, hoping to save Voirin from the stream of acid that was pouring over his plate armour, and as we downed the beast, directed our attention to the other dragon. This beast, called Dreamscythe, proved the be easy to defeat, as it was now alone, and soon joined Morphaz on the floor. As Orangz and Craftski rummaged through the carcasses, they both retrieved trophies they searched: Taking a tooth and a vial of blood as proof of their deeds. With both dragons downed and the path ahead clear, we travelled across the chamber seeing the faint outlines of something large up ahead.
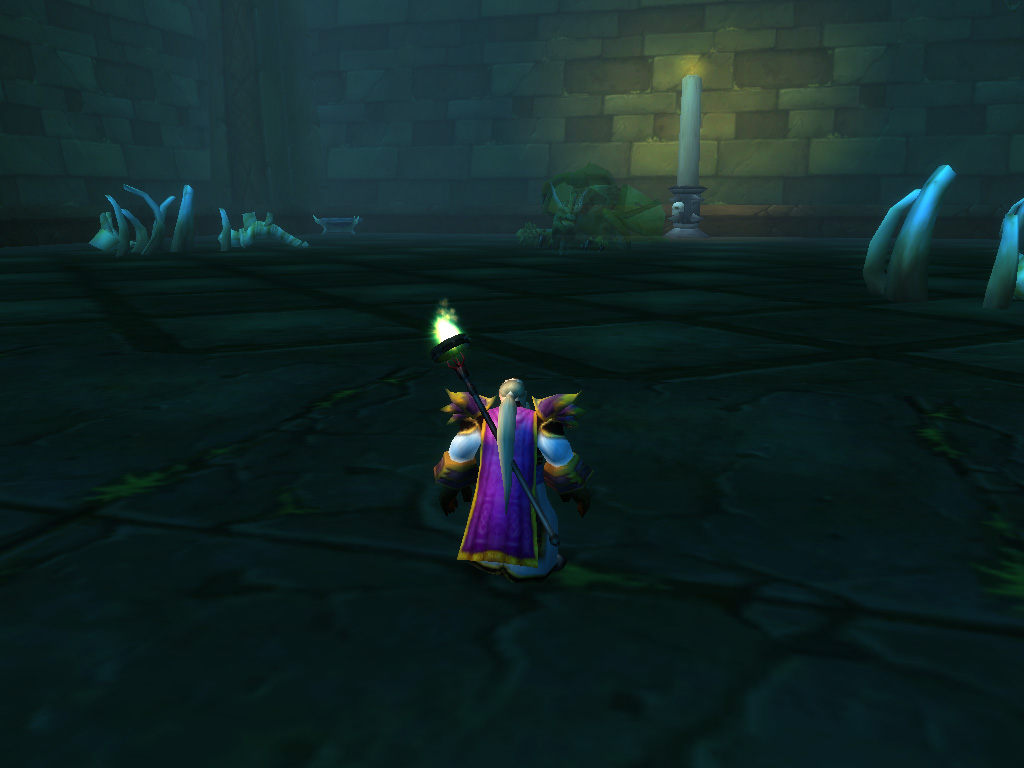
Waking the Dreamer
M oving stealthily, we got closer, and discovered an enormous dragon, which seemed to shimmer in and out of existence. Thankfully the monster was asleep, and as we tiptoed closer, we looked around the room, hoping to find any treasure it might guard. However, we must have disturbed the creature, as it suddenly woke with a deep roar, turning its gaze upon us. Both Gruegski and Voirin jumped into the fray, grabbing the attention of the beast deflecting its swiping tail. But it's sharp spikes and claws weren't the only danger, as the dragon's started to glow green, and Voirin was placed into a deep enchanted sleep! With one Dwarven nuisance out of the way, now the creature turned its attention to Gruegski, who without a shield had to rely on his polearm to parry the dragon's attacks. Thankfully he wasn't alone, as Orangz focussed his healing magics, keeping pace with the wounds that the monster started to inflict.
While the three of us were busy, Craftski had started to unload arrow after arrow into the thick scaly hide, finding weak spots in its armour and shredding its weak wing membrane. The enchantment that Voirin had been placed under thankfully didn't last long, and soon he was able to draw the dragon's ire again, relieving Gruegski from the barrage of attacks. As Voirin now deflected the monster's claws with his shield, Orangz was able to swing his wand at the monster, sending bolts of magic it's way and intensifying our attacks. But we would our tenacity tested further, as once again Vorin was placed under a sleeping spell, and Gruegski had to play bodyguard one more time.
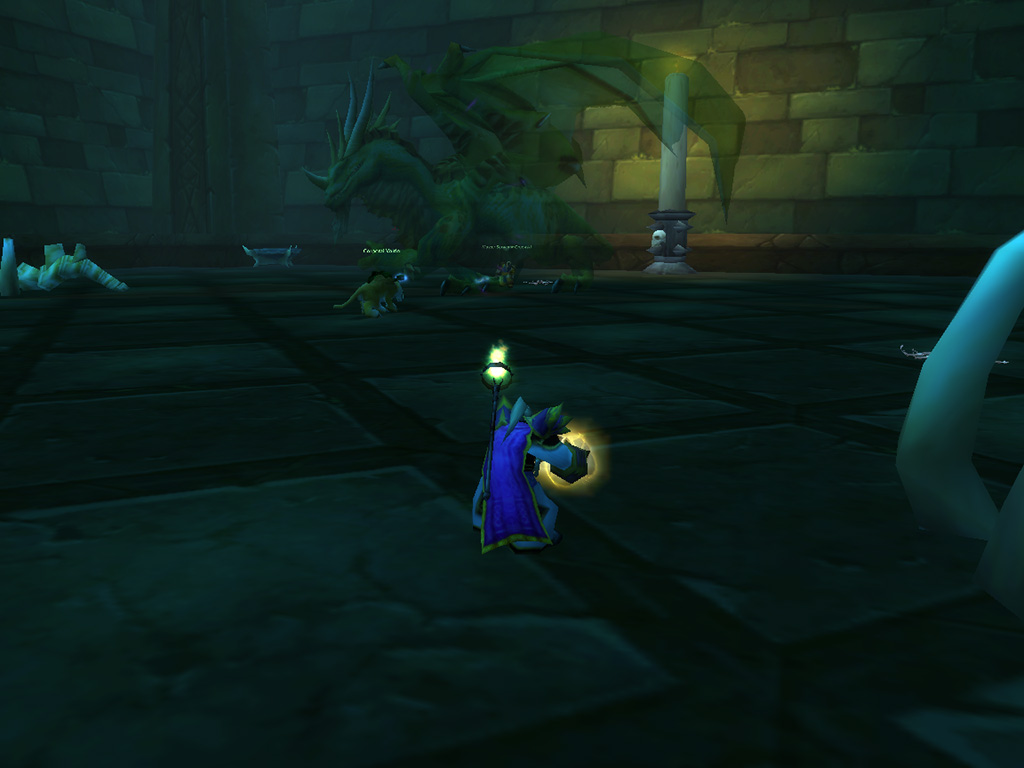
B
reaking free from the spell, Voirin was able to take over from Gruegski, and although we got more and more exhausted, we began to see the results of fight. The dragon started to slow, and spiritual essence started to drift from its wounds. Seeing this as the moment to strike, we gave all we had, with even Voirin going into the offensive, slinging his shield on his back. The final hits started to connect, and with a defiant roar, the dragon tumbled to the ground, it's spiritual shape now motionless. As we were now able to look closer, we found a green gem, levitating in the centre of the spirit, swirling with cloudy energies. Touching it, our minds were filled with a grumbling voice, a type of voice we had heard before. It was a dragon's voice.
The spirit we just had defeated spoke to us, calling itself Eranikus and thanking us for freeing it. It asked for a favour, as it had been corrupted by the evil powers that dwelled in the temple. It led us to a nearby brazier and asked us to place the gem inside. According to Eranikus the magics of the Green Dragonflight would purging the stone of corruption, and send Eranikus spirit free into the Emerald Dream. As we placed the gem in the brazier, a shockwave of magic sent us flying backwards, and an inhuman scream could be heard in our minds: The magic had failed, and had sent the dragon's spirit into a dark limbo of agony. Suddenly this simple request had turned into something else, it had turned into a dragon rescue! (one which had until recently had been trying to kill us).
The spirit we just had defeated spoke to us, calling itself Eranikus and thanking us for freeing it. It asked for a favour, as it had been corrupted by the evil powers that dwelled in the temple. It led us to a nearby brazier and asked us to place the gem inside. According to Eranikus the magics of the Green Dragonflight would purging the stone of corruption, and send Eranikus spirit free into the Emerald Dream. As we placed the gem in the brazier, a shockwave of magic sent us flying backwards, and an inhuman scream could be heard in our minds: The magic had failed, and had sent the dragon's spirit into a dark limbo of agony. Suddenly this simple request had turned into something else, it had turned into a dragon rescue! (one which had until recently had been trying to kill us).
The wand can be stronger than the fist! Although weaker than the sharp sword or leaden bullet, the wand does count when you to maximize damage!
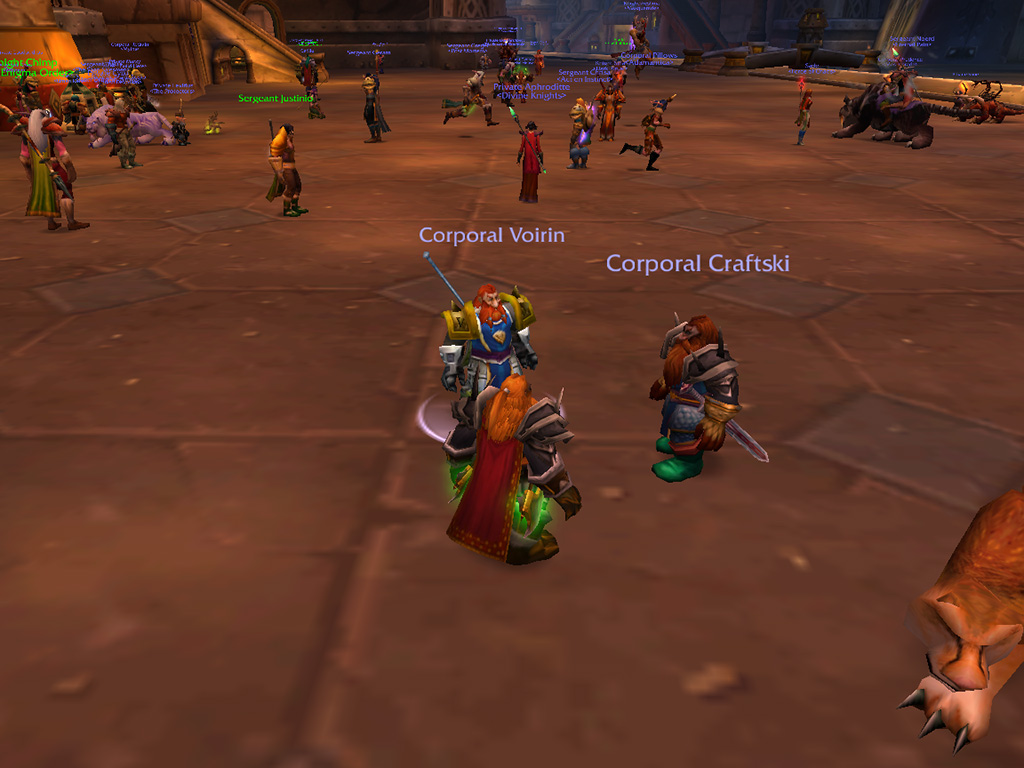
A Gift from an Admirer
U nsure of what to do with the gemstone, we stowed it away in our bags, hoping we would once run into an emissary of the Green Dragonflight who would be able help us. Now it was time to finally leave this accursed temple: Our boots were soggy, our armour scarred and torn and we could use a rest. Using our hearthstones, we travelled back to Ironforge, where we could warm ourselves near the tavern's hearth. As we went about our business, we were approached by a fellow Dwarven adventurer, a hunter named Fedor, accompanied by a bright pink bird. He told us he had heard of our adventures, and was a bit of an admirer of our endeavours.
During his travels, fighting dangerous enemies together with his pet called Barbarella, he had found a powerful magical artefact, a piece of plate armour that was of no use to him. But he believed these shoulder plates would be most helpful in our adventures, and handed over a pair of shining gold spaulders to Voirin, asking to use them well. He asked for nothing in return, but hoped we would join him in an adventure sometime. After thanking him heartily, with both priestly blessings and some of Gruegski's brews, Fedor left us with a bow.
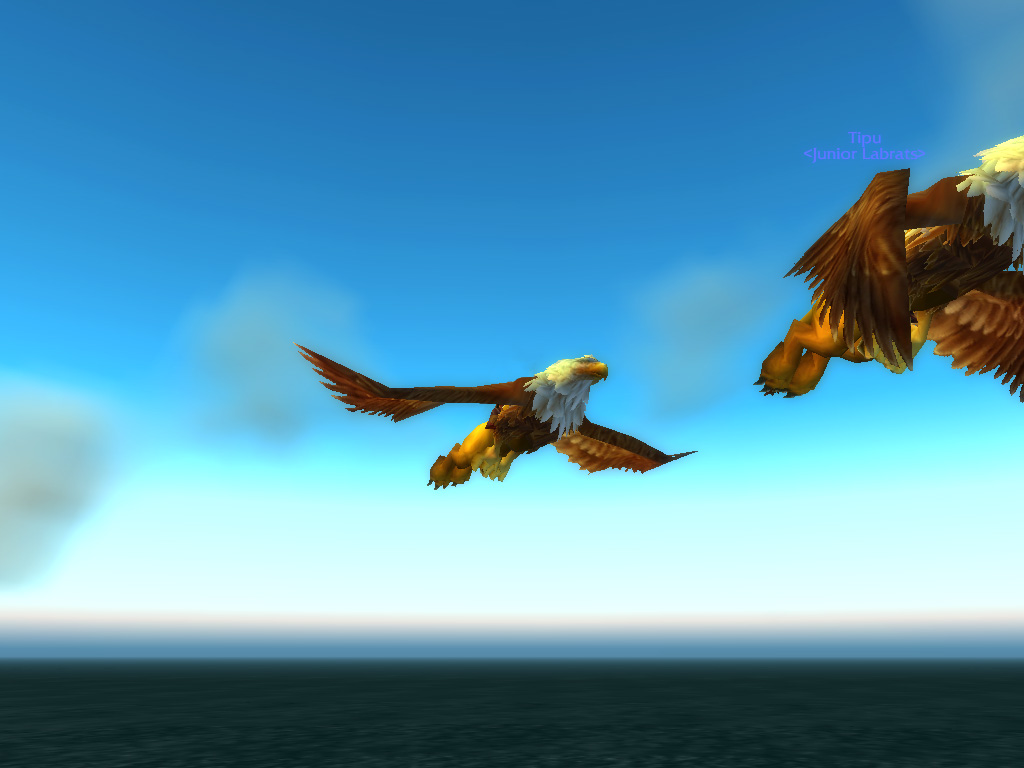
V
oirin looked more dazzling than ever with these golden shoulder plates, and he hoped to be able to test them out soon. But first we had other tasks to finish! As we had spent so much time in the temple, we also had plenty results! We followed Vorin back to the Badlands, where the Orc spirit rewarded Voirin for his feat of strength, and afterwards travelled to the Plaguelands where Gruegski forged his mightstone, an item able to burn away the taint of undead in a blaze of holy fire. As Gruegski chose a powerful relic from the paladin's order coffers as another reward, he reminded us to visit the nearby Hinterlands, where we delivered the head of the Troll prophet for its bounty, finding the Troll who promised the reward near the large temple we had climbed when we were searching for Sharpbeak. This reward was worth the visit, and as we left with our purses full of coin, we headed out to Menethil, to cross the ocean.
Landing in Theramore, we followed Craftski to Azshara, where he delivered the tooth of the dragon Morphaz. Proving his mastery as a hunter, and endowing him with a powerful trinket. Orangz however had to travel to Felwood, north of Ashenvale forest, delivering the blood of the dragon that would be used as reagent for a powerful antidote, countering the forest's corruption. As he had given the Elves the means to let the forest slowly heal, Orangz was rewarded with blessed prayer beads, containing powerful healing magic.
Landing in Theramore, we followed Craftski to Azshara, where he delivered the tooth of the dragon Morphaz. Proving his mastery as a hunter, and endowing him with a powerful trinket. Orangz however had to travel to Felwood, north of Ashenvale forest, delivering the blood of the dragon that would be used as reagent for a powerful antidote, countering the forest's corruption. As he had given the Elves the means to let the forest slowly heal, Orangz was rewarded with blessed prayer beads, containing powerful healing magic.

A Druid Delivery
A s we were now close to the Druid retreat of Moonglade, we rode further north, traveling through the scarred landscape that had been laid to waste by the Burning Legion. Multiple times we were attacked by monsters along the road, forcing us to fend off fen monsters and daemons as we progressed. Finding an entrance in the mountainside, we made our way through the winding tunnels, which were guarded by Furbolgs, friendly this time. Eventually we reached the emerald-lit forests of Moonglade, where we returned the seed of life we had received from Zaetar in Maraudon to his brother, Remulos. The Son of Cenarius thanked us for returning the seed, which he saw as a token of his brother's sacrifice, strengthening his belief in hope and redemption.
Now we only had to travel to the south, to Steamweedle port in Tanaris and return the egg which now contained the essence of Hakkar. The Troll was ecstatic, feeling the essence of the god trapped inside the egg, and rewarded us with powerful magical artefacts, which bolstered the powers of Voirin and Orangz. After rewarding us, the Troll forgot about us instantly, fully preoccupied with the egg. As we made our way to leave, we were hailed by a Dwarf of the Explorer's League. He had been investigating the prophecies of Hakkar as well, and felt the Troll wasn't telling us the whole story. He asked us to search and retrieve another series of tablets, which were kept under guard by Troll tribes in the Plaguelands and Blackrock Spire. Together, these tablets would complete the prophecy and uncovering the truth.
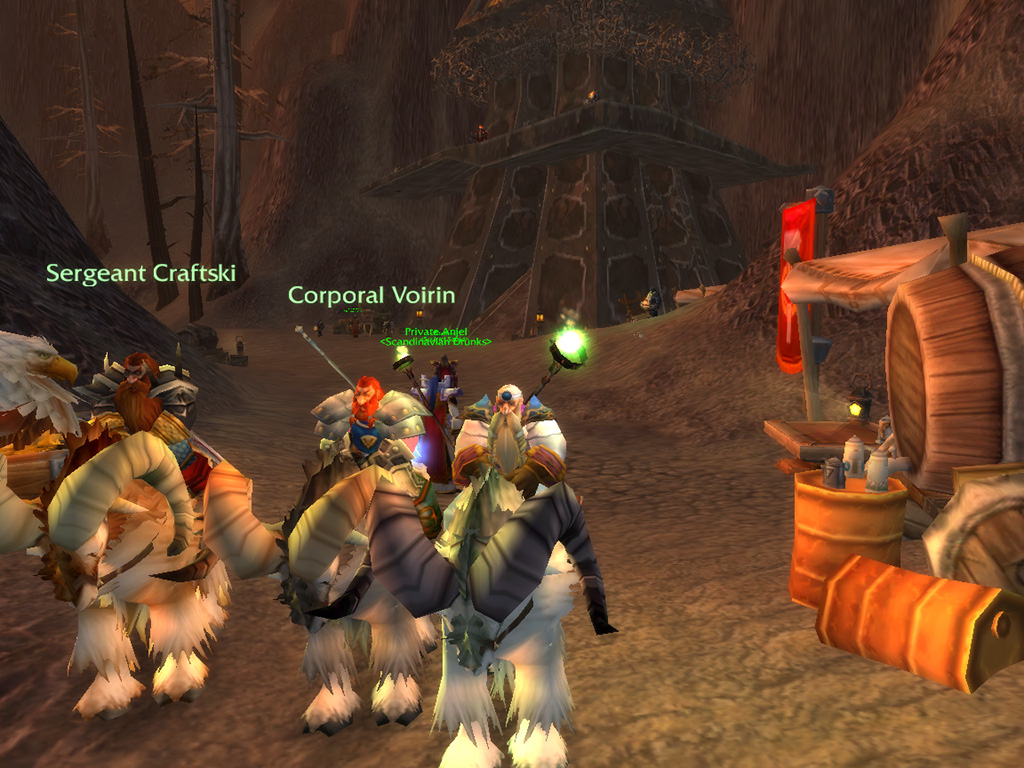
A Dark Reunion
H aving honed our skills and our powers strengthened by powerful magical artefacts, we now felt we could take on the big task that had been waiting for us: To finally infiltrate the Dark Iron Dwarf City of Shadowforge. We made our way to Blackrock Mountain, heading out from Thorium Point, telling the Thorium Brotherhood we were going to pay their former brothers in arms a visit. While we were preparing, Voirin told us we had been enlisted for some more tasks, hoping we would be successful in entering the Dark Iron home. Within the depths of the mountain two Flame Elementals dwelled, who commanded the elemental forces in the Searing Gorge and Burning Steppes. We were asked to banish them back to the Elemental Plane, leaving the minions leaderless.
Also, the city was rumoured to hold vast riches, and were told to be on the lookout for a fabled gem, called the Heart of the Mountain, and perhaps retrieve it if we had the chance. Stealing the crown jewel from the Dark Irons did sound like quite a challenge! From the Kharanos Dwarves we had also received a request, asking us to retrieve a stolen beer recipe and destroying all their kegs. Lastly, we were told to gather Dark Iron packs, worn by their soldiers, which contained tools and other devices and trinkets.
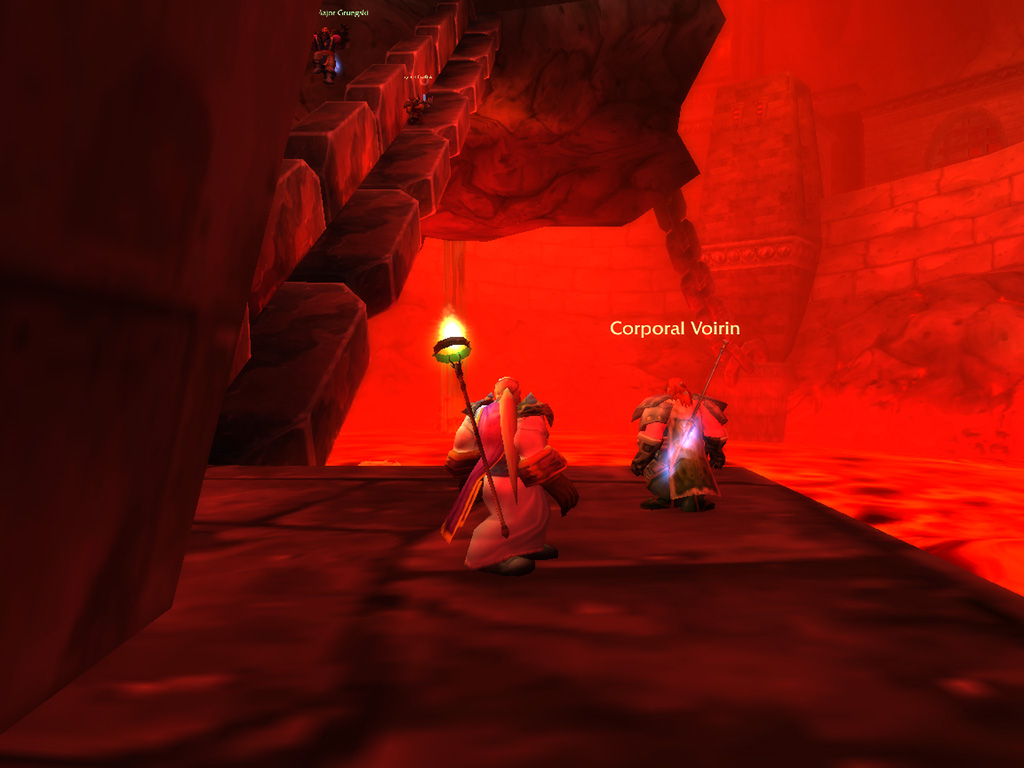
M
aking our way across the Searing Gorge, we entered the vast doors of Blackrock Mountain, on the lookout for a way to enter the Dark City. We knew the upper regions of the vast fortress, known as the Blackrock Spire, were held by the Blackrock Orcs, who had taken over control from the Dark Iron Dwarves during the First War. The Dwarves had retreated to the depths, into Shadowforge, hoping to one day reclaim their former homes. The tunnel led us inside the volcano, a vast hollow chamber where black dragons soared above and lava bubbled below. In the middle of the volcano, held tightly in place by vast iron chains, was an enormous rock, which hovered above the lava. A wide walkway was constructed along the walls of the mountain, which led to stronghold excavated from the mountainside. Here we found no guards, but we could see Orcish runes carved in the walls, and warding totems belonging to the Blackrock Clan. If were searching for Dark Iron Dwarves, we wouldn't find them here!
We would have to find a way to descend into the depths, and as we peered over the edge of the walkway, we noticed one of the iron chains leading into an alcove below. These chains could easily hold a Dwarf, and were wide enough that even Orangz could walk safely along them. We found a chain that we could climb with the help of scattered rocks, and carefully made our way downwards, to the rock that was held in the middle of the mountain. Here we found a small Dark Iron building, with small stairs leading inside. The inner chamber gave us a surprise, as it held a large tomb, Inscribed with the name of one of the greatest Dwarven builders of all time: Franclorn Forgewright! We were given a startling surprise as a ghostly shape appeared before us, the spirit of Forgewright himself!
We would have to find a way to descend into the depths, and as we peered over the edge of the walkway, we noticed one of the iron chains leading into an alcove below. These chains could easily hold a Dwarf, and were wide enough that even Orangz could walk safely along them. We found a chain that we could climb with the help of scattered rocks, and carefully made our way downwards, to the rock that was held in the middle of the mountain. Here we found a small Dark Iron building, with small stairs leading inside. The inner chamber gave us a surprise, as it held a large tomb, Inscribed with the name of one of the greatest Dwarven builders of all time: Franclorn Forgewright! We were given a startling surprise as a ghostly shape appeared before us, the spirit of Forgewright himself!
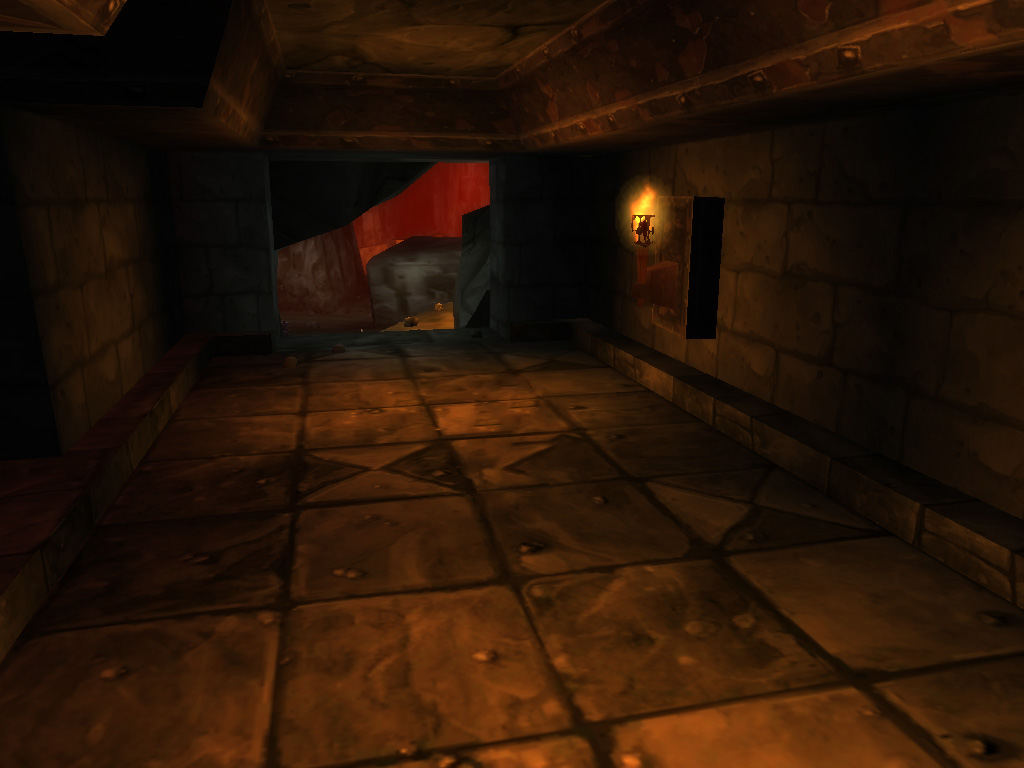
F
orgewright asked for aid: As Master Architect he had helped the Dark Iron Dwarves create wonderous constructions, but he feared the power he had left them with would only lead to destruction. The new Master Architect, Darkvine, wielded Forgewrights former hammer, Ironfel, and was too inept to harness its true power. But this only was only a respite, as one could rise that would be able to wield the true might of Ironfel, which would lead to disaster. We were asked to retrieve the hammer and place it in the grasp of the Forgewright statue, located in Shadowforge city, and would be granted the master key of the city as a reward. The agreement was easily made, a key to open all doors in our arch-enemies city? That was well worth the risk! We bode farewell to Forgewright and continued our search, leading us to a wall that had been hewn out of the chamber, sending us back into the volcano.
From there another chain allowed us reach the alcove at the bottom, where a passage led us to a vast underground quarry. This was where the Dark Iron dwarves mined their ore, which even caught the attention of Voirin. We moved stealthily onwards, as we now had entered Dark Iron territory, and hoped to find an entrance to their dark city. Up ahead, we found a blazing fire elemental overseeing the Dwarves, which was keeping a close eye on the surroundings, as if it was guarding the chasm behind. This had to be one of the elementals we were searching, Overmaster Pyron! Jumping from our hiding place, we attacked the Elemental, and laid waste to its Dark Iron guards. Now without help, the elemental started bombarding us with fireballs and resorted to burning us all in a nova of fire. But as Gruegski invoked his fire warding, the flames sizzled out the moment they reached us, allowing us to banish the elemental back the elemental plane. With the way clear, we headed into the chasm it was guarding, leading deeper into the mountain depths.
From there another chain allowed us reach the alcove at the bottom, where a passage led us to a vast underground quarry. This was where the Dark Iron dwarves mined their ore, which even caught the attention of Voirin. We moved stealthily onwards, as we now had entered Dark Iron territory, and hoped to find an entrance to their dark city. Up ahead, we found a blazing fire elemental overseeing the Dwarves, which was keeping a close eye on the surroundings, as if it was guarding the chasm behind. This had to be one of the elementals we were searching, Overmaster Pyron! Jumping from our hiding place, we attacked the Elemental, and laid waste to its Dark Iron guards. Now without help, the elemental started bombarding us with fireballs and resorted to burning us all in a nova of fire. But as Gruegski invoked his fire warding, the flames sizzled out the moment they reached us, allowing us to banish the elemental back the elemental plane. With the way clear, we headed into the chasm it was guarding, leading deeper into the mountain depths.
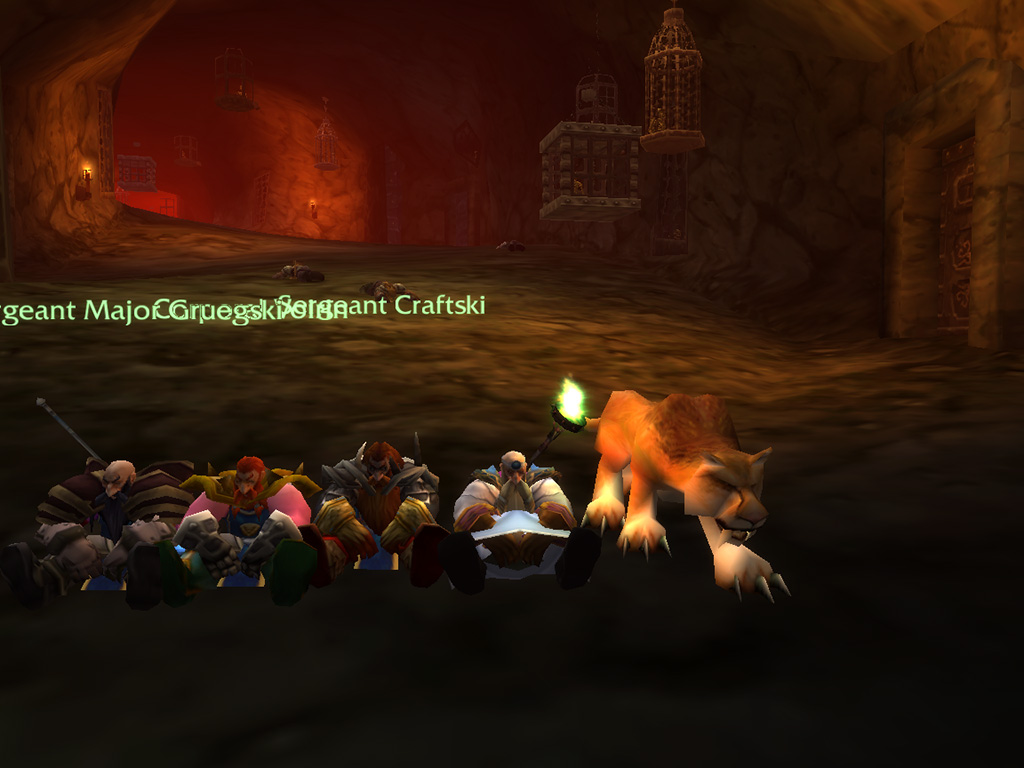
Prison Break!
I t seems we were on the right path, as we entered a long chamber which was guarded by Dark Iron soldiers. To the sides stood metal gates, which were locked tight, so we would have to fight our way through the soldiers to continue. The guards were accompanied by demonic Darkhounds that sniffed us out from afar, so we would have to be careful, preventing alerts, and choosing battles in our favour. As we cleared groups of watchmen, we found ourselves in the prison complex of Shadowforge, with rows upon rows of prisons lining the walls and cages hanging from the ceiling. Hopefully this would be the last place where the Dark Iron Dwarves expected intruders! Remembering our tasks, we also knew that, if alive, we should be able to find Marshall Windsor and Kharan Mighthammer here. As we slowly made our way through the prison complex, we investigated each cell, tapping the door and hoping for a response. Although we received mostly roars or other inhuman screams as replies, we finally were answered by a Dwarven voice: We had found Kharan!
Telling us to retrieve a key from the prison's interrogator, we set out for the warden's quarters, which we found nearby. The interrogator was a surprise, a human bearing a mark of Twilight Hammer, who wielded powerful dark energies. But we withstood her dark magics, guarding ourselves against her fear-causing inactions, and with swift attacks we were able to retrieve the keys from her belongings, allowing us to enter Kharan's cell. Kharan asked us to listen to his story first, telling us he and his guards had been ambushed and the princess had been taken captive. Even worse, the princess had orchestrated these events herself, bewitched by the magic of the Dark Iron Emperor, Dagran Thaurissan, himself. And there was only one way to break the spell: We would have to Kill the Emperor. We swore an oath to Kharan to rescue the princess, and helped him sneak out of the prison complex safely.
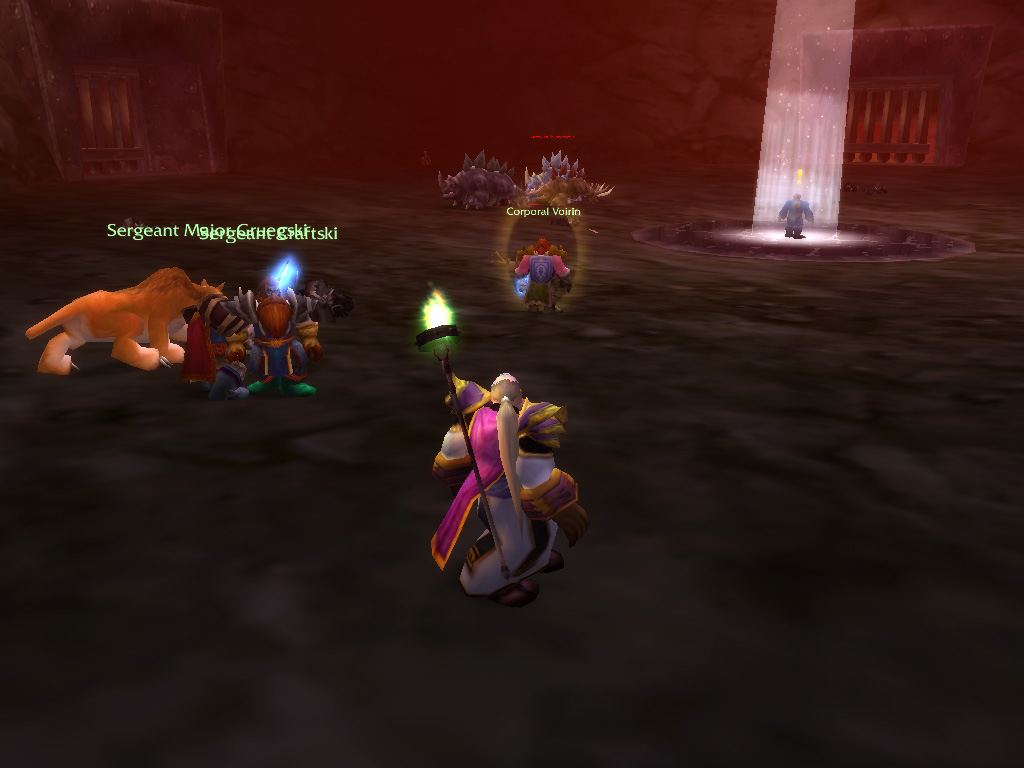
N
ow it was time to search for the other captive, Marshall Windsor, who we hoped to find nearby. But first we ran into trouble: Rounding the corner we were suddenly faced by a rock elemental, which towered over us and smashed into Voirin. The crash sent pebbles scattering into all directions, and from around us Dark Iron Dwarves came running in to aid the elemental. But Voirin held strong, holding his shield high, absorbing the attacks of both Dwarf and elemental, aided by Orangz magic. With all the enemies gathered around us, Gruegski and Craftski lighted up the floor in holy fire and a hail of arrows, and as the dust settled, all that remained were Dark Iron bodies and glassy shards of rock. With the path ahead clear, we continued our house call, opening the cell doors with the key we had retrieved.
Most cells were empty, or filled with skeletal remains, but eventually we came across a human, dressed in rags and surprised with our visit. Upon asking he was curt, confirming he was Marshall Windsor, but telling us our work was in vain, and all precious information had been lost. Cursing upon the Highlord of Stormwind, he sent us back to the Burning Steppes, and told us to leave him be. We dared not to anger the Marshall, knowing of his prowess in battle, and bade him farewell. As the tunnels were now empty of enemies, he would perhaps find a way out himself. As we had cleared the prison complex, we turned our attention to the tunnels up ahead, passing through a gateway and finding ourselves in the middle of a large arena, with Dark Iron spectators shouting from up above. The entertainment had arrived.
Most cells were empty, or filled with skeletal remains, but eventually we came across a human, dressed in rags and surprised with our visit. Upon asking he was curt, confirming he was Marshall Windsor, but telling us our work was in vain, and all precious information had been lost. Cursing upon the Highlord of Stormwind, he sent us back to the Burning Steppes, and told us to leave him be. We dared not to anger the Marshall, knowing of his prowess in battle, and bade him farewell. As the tunnels were now empty of enemies, he would perhaps find a way out himself. As we had cleared the prison complex, we turned our attention to the tunnels up ahead, passing through a gateway and finding ourselves in the middle of a large arena, with Dark Iron spectators shouting from up above. The entertainment had arrived.
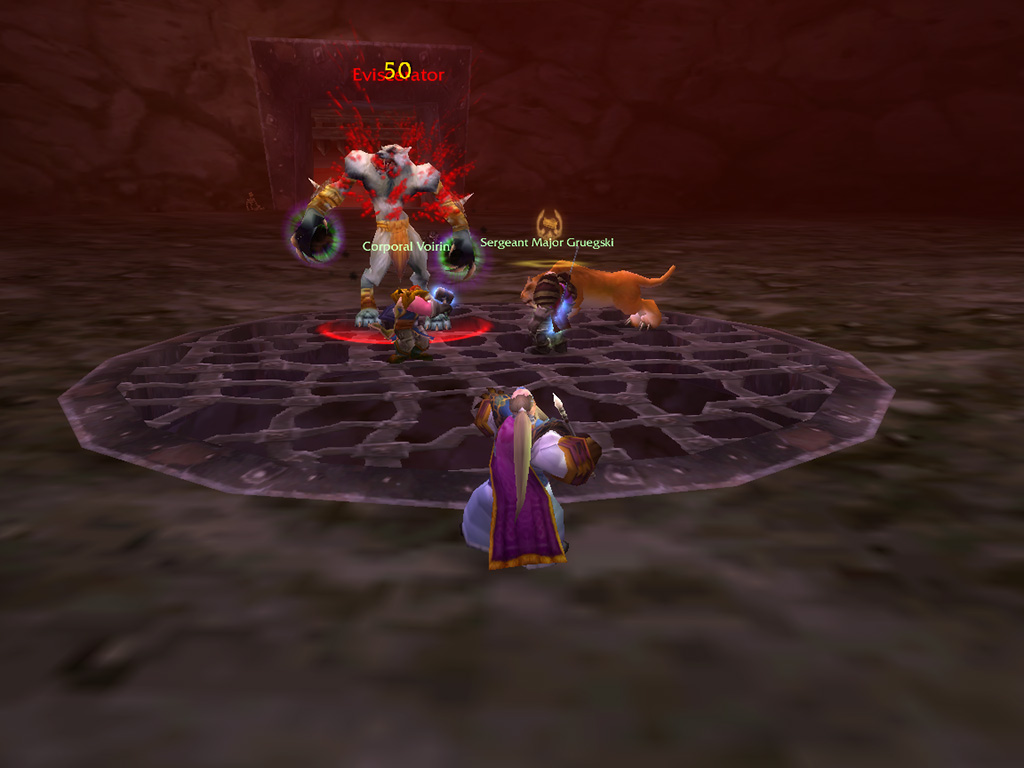
Breaking the Law
T he gate behind us slammed shut, locking us inside, and a Dark Iron speaker approached, calling out to us to get ready for judgement, making the crowd roar with laughter. As the speaker moved away, one of the gates along the walls slowly rose, and the ground started to quake. A pack of Thunderlizards appeared from the gate, stampeding into us. Gruegski and Voirin withstood the charge, and we started to fight back, bringing them down easily. Expecting more surprises from the gates, Craftski trapped them, and on cue, the speaker appeared again, congratulating us on our work. But he told us it was far from over, as another gate opened, this time filled with spiders. Craftski's trap did excellent work, and the spiders were softened up by the time they reached us, making our fight swift and decisive. By now the crowd wasn't too happy with us, and could hear murmuring in the stands. As the speaker entered the arena once more, he called out for the final challenge, one that would truly pass judgment, and the last gate started to open.
A large white Worgen, sprinted from the gate, running towards us on all fours. And closed in, the creature started to flail its sharp claws, leaving deep gashes in Voirin's armour. We started a counteroffensive, with even Orangz slinging magic at the monster. But his magical attacks were suddenly negated, as the Worgen shielded itself in a shell of anti-magic power, turning any magic that we threw at it harmless. The creature even seemed to absorb the magic, as it started to hurl bolts of shadow magic back at us. But we could withstand the attacks, and returned the favour, as Gruegski and Craftski slowly brought the monster down. Rummaging through the remains of the creature, Craftski found a pair of chainmail bracers, which he took as his own, making his arrows even more deadly!
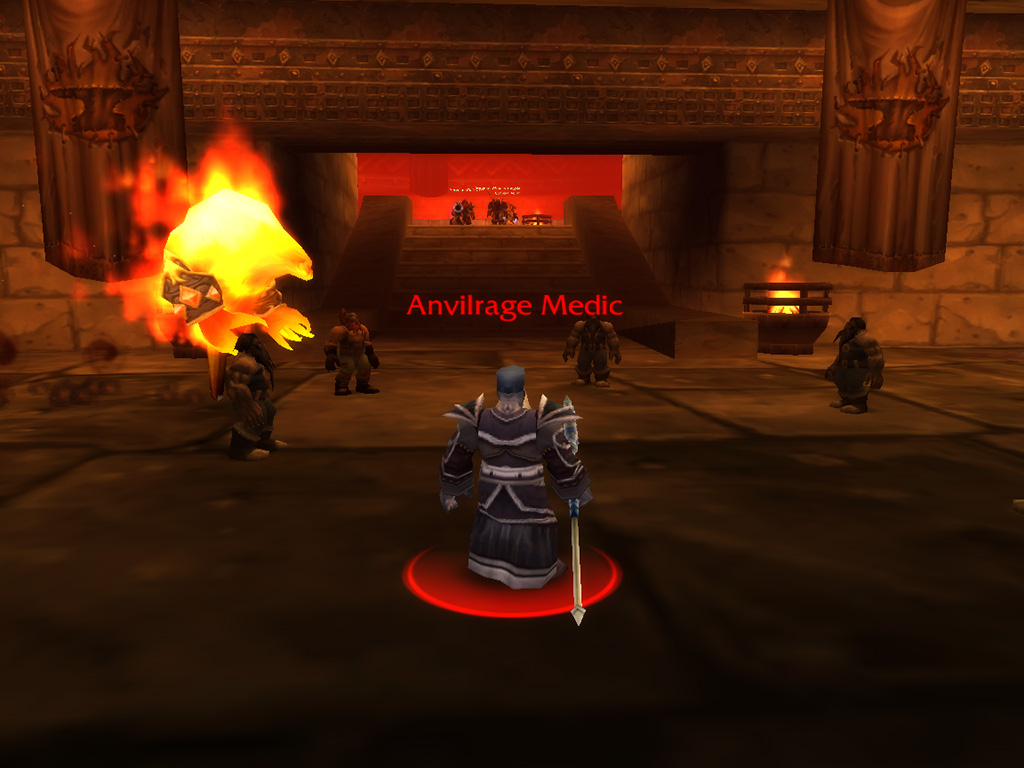
I
t appeared we had caused some commotion, and could hear yells from the stands, as insults rained down from above. To the side of the arena a gate slowly opened: We had passed the judgement of the Dark Iron Dwarves. The gate led us to a small hallway, allowing us to reach the stands above the arena. Most of the spectators had already left by the time we had reached the top, and those left seemed to ignore us, grudgingly accepting our victory. We made our way past the arena, finding the exit guarded by a large group of Dark Iron Dwarves, these seemed to be militia, unarmoured but still dangerous, as they were supported by a priest. Just as we wanted to engage in battle, a large fire elemental entered the hallway, patrolling slowly. Thankfully the creature had not noticed us, so we held back, waiting for it to leave the hall again.
With the elemental finally gone, Voirin lured the group of Dwarves up the stairs: This way we would be safe from the elemental if it would return! Voirin was swarmed in a group of brawling Dark Iron citizens, but could easily hold them off, while the rest of us took care of the priest, making sure to interrupt his healing incantations. By the time we had taken down the priest, Voirin had taken down the Dwarves, who seemed to be less powerful than we had expected. We could see the statue of Forgewright at the end of the hallway, guarded by more Dwarves, but we left it for later, as we hadn't retrieved his hammer yet.
With the elemental finally gone, Voirin lured the group of Dwarves up the stairs: This way we would be safe from the elemental if it would return! Voirin was swarmed in a group of brawling Dark Iron citizens, but could easily hold them off, while the rest of us took care of the priest, making sure to interrupt his healing incantations. By the time we had taken down the priest, Voirin had taken down the Dwarves, who seemed to be less powerful than we had expected. We could see the statue of Forgewright at the end of the hallway, guarded by more Dwarves, but we left it for later, as we hadn't retrieved his hammer yet.
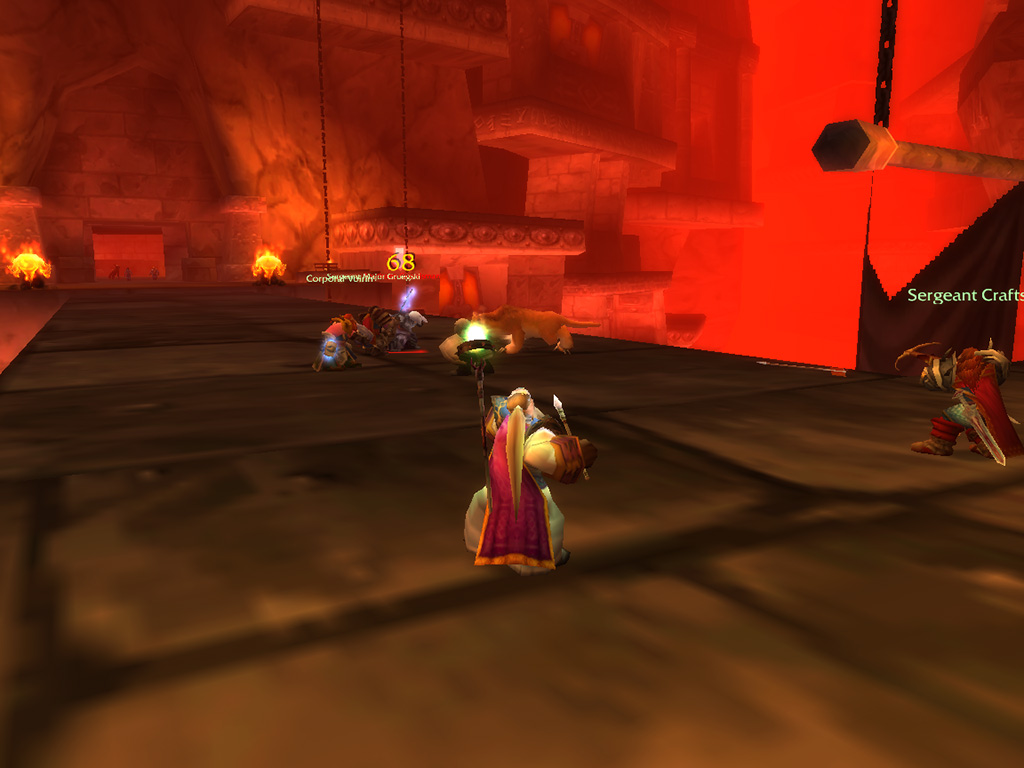
Welcome to Shadowforge City
N ow we waited for the fire elemental to return, hoping to catch the creature of guard. In anticipation, Gruegski raised his fire warding, as he noticed the elemental reappearing from the distance. As the best defence is an offence, we charged in, hoping to quickly send the creature back to the Elemental Plane, just as we had done with Pyron. But this elemental proved to be more than a match for our abilities, immolating Voirin with searing heat blasting him with bolts of fire. We held fast, enduring the searing heat, as Orangz shielded Voirin from the creature's flaming claws. Sweaty, but determined, we finally banished the elemental back to its realm, leaving only the bracers that bound it behind.
With the path clear, we followed the tunnel, which led us into a vast cavern, that was coloured red from the fires that blazed below: Buildings and windows studded the walls, reaching as high as we could see: It seems we had reached the Dark Iron capital of Shadowforge City. A wide bridge ahead led across a deep chasm, bridging a stream of lava that ran far below. We would have to cross it, and to cross it we would have to fight the patrols of Dark Iron Dwarves that guarded it. As we moved slowly ahead, we made sure to catch the attention of one of the Dwarf patrols, luring them away and taking them down, hoping to not cause any commotion. Searching their belongings and collecting the packs the Dwarves carried, we also noticed we had acquired quite a few keys, but we had no idea which locks they would open. Perhaps the promised master key would not be needed after all?
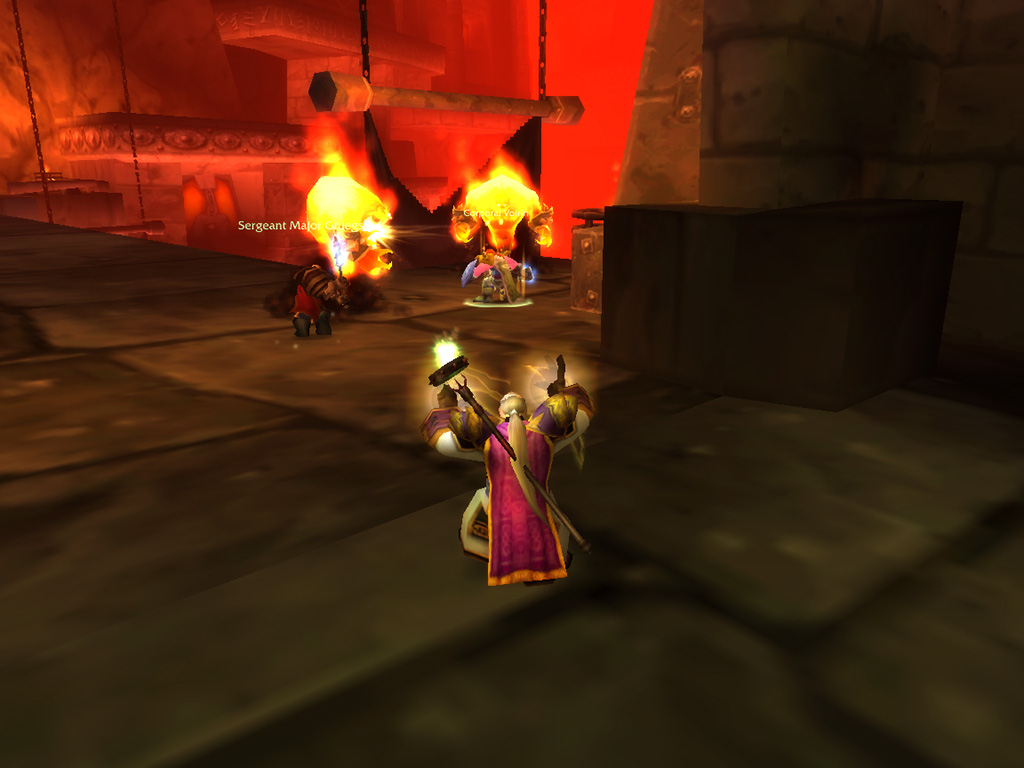
W
ith the bridge almost free for us to cross, we encountered other patrols, which looked more dangerous than those before: Now the patrols of Dark Iron citizen militia were accompanied by well-trained guardsmen, supported by their medics. But even worse, at the end of the bridge stood two fire elementals, which guarded the path leading deeper into the city. Remembering the danger they posed, and our struggle with just a single elemental, we dreaded fighting two of them. Advancing over the bridge, we improved our tactics against the Dark Irons, as Orangz used his new-honed powers to control the minds of enemies from afar. Dominating the mind of the Dark priests, he turned their supporting magics against them, after which Voirin could intercept the troops which were left, allowing us to defeat them easily.
With the bridge clear, we faced the elementals, which Craftski engaged after setting his trap. cunningly splitting them by freezing one in a block of ice. Although the heat of the elemental started to thaw the trap the moment it was caught, we still managed to destroy the first elemental as the second one broke free from its imprisonment. As we downed the remaining elemental with our combined efforts, we were able to pass the elemental guards, entering the domicile of Shadowforge City.
With the bridge clear, we faced the elementals, which Craftski engaged after setting his trap. cunningly splitting them by freezing one in a block of ice. Although the heat of the elemental started to thaw the trap the moment it was caught, we still managed to destroy the first elemental as the second one broke free from its imprisonment. As we downed the remaining elemental with our combined efforts, we were able to pass the elemental guards, entering the domicile of Shadowforge City.
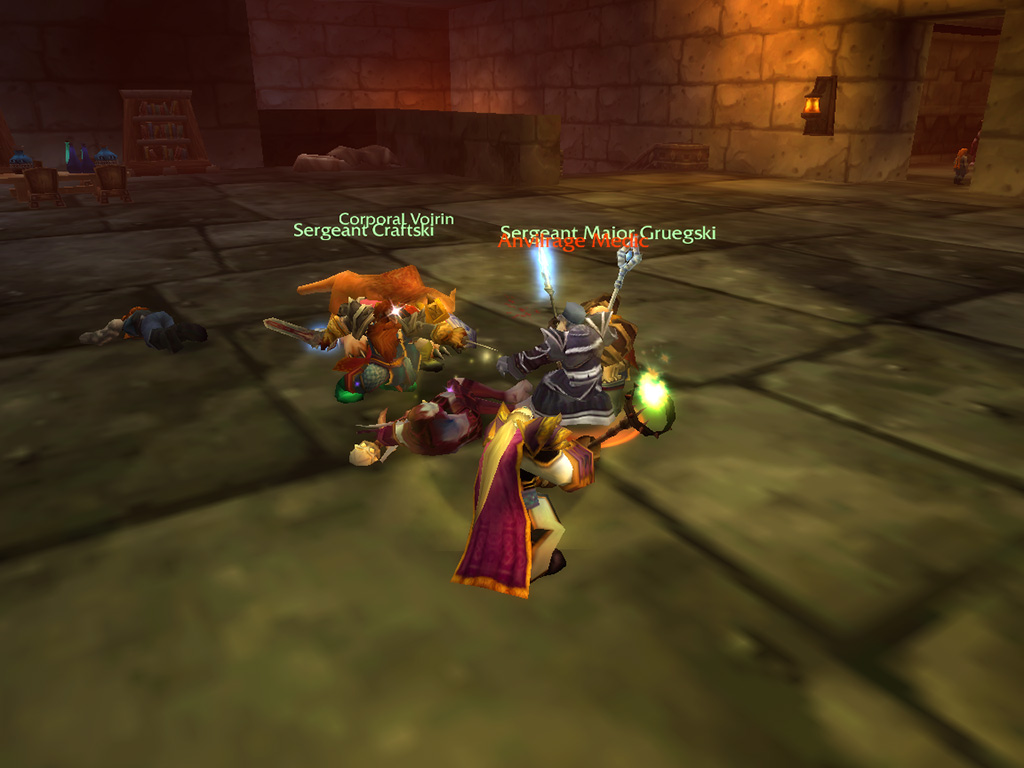
T
he living quarters of the Dark Iron Dwarves weren't that much different from our own: A warm hearth burned in the corner, and kegs of ale stood against the walls. The walls were ornamented with stone carvings and from the ceiling hung banners, bearing the mark of a flaming anvil. Around us we could hear murmuring, coming from beyond closed doors and the end of hallways. We sneaked past, noticing Dark Iron citizens in their daily routine, not wanting to disturb them. But these hallways were still patrolled by soldiers, and we had to take care to catch them off guard. Using a storage room as our staging ground, we were able to lure a patrol that passed inside, and took them out of action. As we used every empty room we found for a quick rest, we continued with ambushing patrols, finally able to reach the exit of the Shadowforge domicile.
The exit led us outside, to one of the central chambers of Shadowforge: Below, we could see the fabled Black Anvil, guarded by a fire elemental that could only be Lord Incendius, and we could hear the cheers of Dwarves, enjoying a good pint on the other side of the lava stream. But we had no way to cross or descend safely, so we had only one path ahead of us left: To fight the Dark Iron citizens which were waiting in front of what appeared to be the city's bank. Taking them by surprise, we managed to overwhelm them, and took their deposits for our own.
The exit led us outside, to one of the central chambers of Shadowforge: Below, we could see the fabled Black Anvil, guarded by a fire elemental that could only be Lord Incendius, and we could hear the cheers of Dwarves, enjoying a good pint on the other side of the lava stream. But we had no way to cross or descend safely, so we had only one path ahead of us left: To fight the Dark Iron citizens which were waiting in front of what appeared to be the city's bank. Taking them by surprise, we managed to overwhelm them, and took their deposits for our own.
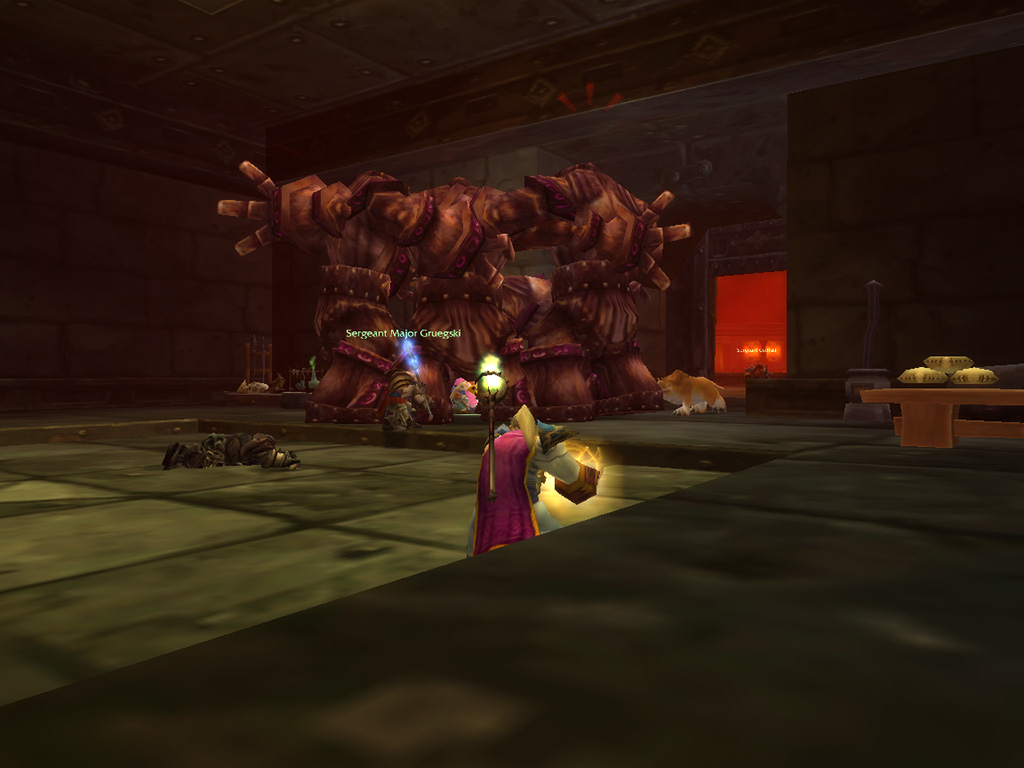
Entering the Vault
K nowing the riches held in the bank of Ironforge, we knew we couldn't pass up exploring the vaults of the Dark Iron Dwarves, especially as we remembered we were asked to steal one of the Dark Iron crown jewels. If this fabled Heart of the Mountain was locked away somewhere, it must be here! Entering the archway, we saw four large golems standing inside, inactive, and we were greeted by the warden of the bank, accompanied by a vicious Darkhound. He acknowledged our resourcefulness, but told us our adventure would end here, sending his hound in for the attack. Getting ready for the worst, we were surprised by an easy victory, as the warden quickly slumped to the ground with a smirk, what did he know that we did not?
With the bank now free to plunder, we started to inspect the vaults, where we discovered the use of the keys we had acquired. Each key opened one of the large vault doors, allowing us to take the valuables locked inside. Inside the cases we found gems, gold and other riches, and we stuffed our packs with everything we could find. As we opened the last large vault door, a Dark Iron Dwarf appeared in the doorway, raising the alarm, and the four golems had stood motionless suddenly stirred to life.
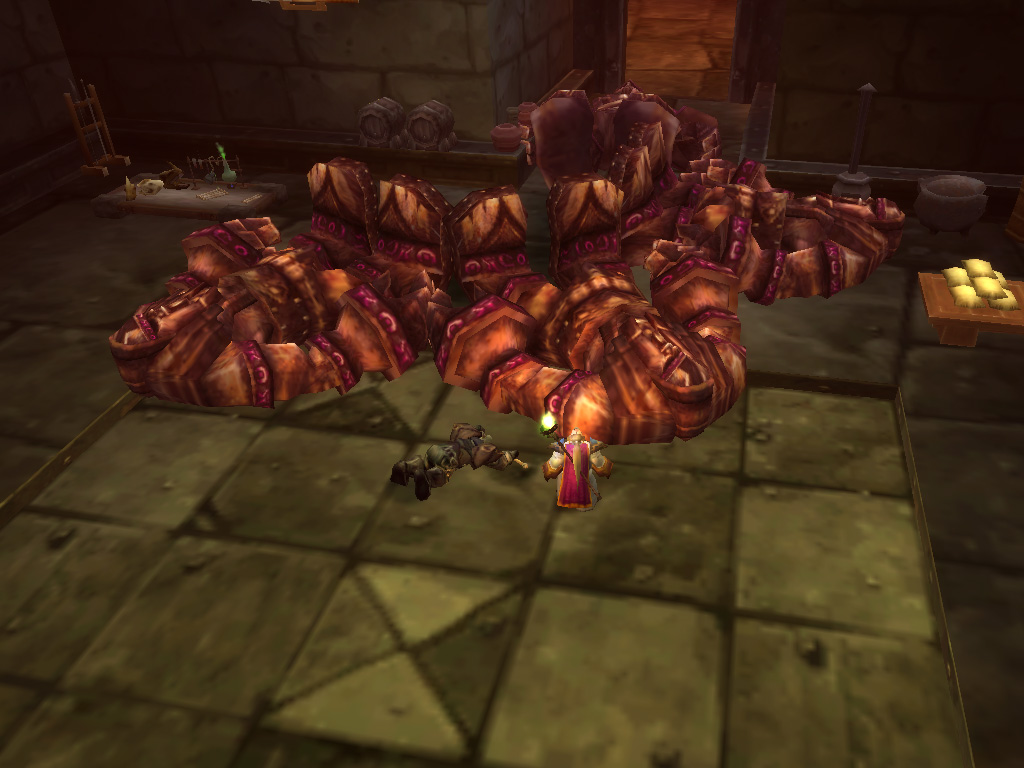
T
hankfully, Voirin was alert, and managed to draw the attention of the heavily armed Dwarf, helped by the pink shirt Orangz had recently crafted for him. He dragged the golems along, gathering them all in a corner while the rest of us focussed on taking the Dwarf down. With Voirin hidden behind a massive bulk of golems, it was up to Gruegski to draw the ire of the Dark Iron Dwarf, which was just up his alley, as both wielded large two-handed weapons. Parrying strikes, and dodging swings, Gruegski learned the craft of tanking an enemy, while Craftski took good care, making each arrow count. Without the help from his golem guards, the Dwarf proved easy pickings, sending him tumbling to the ground, and allowing us to help Voirin, who had been soaking all the golem attacks.
While he was holding off the golem attacks, Voirin had focused on wearing down the golem armour, which paid off now the rest of us joined him in the fight. Craftski and Grugski once again set the floor ablaze with arrows and consecrated ground, allowing them to blast through the weakened golems, sending them crumbling to the ground. Now, there was only one vault left: A small door which we weren't able to open with any of the keys we had found, which meant the way of opening the lock must be found somewhere else! Hanging on a nearby wall, we discovered a portrait of Keeper Pelver, who was supposed to live in the Shadowforge domicile we had passed earlier. According to the inscription, Pelver carried with him the Dark Keeper's key, the key that would be able to open the final vault!
While he was holding off the golem attacks, Voirin had focused on wearing down the golem armour, which paid off now the rest of us joined him in the fight. Craftski and Grugski once again set the floor ablaze with arrows and consecrated ground, allowing them to blast through the weakened golems, sending them crumbling to the ground. Now, there was only one vault left: A small door which we weren't able to open with any of the keys we had found, which meant the way of opening the lock must be found somewhere else! Hanging on a nearby wall, we discovered a portrait of Keeper Pelver, who was supposed to live in the Shadowforge domicile we had passed earlier. According to the inscription, Pelver carried with him the Dark Keeper's key, the key that would be able to open the final vault!
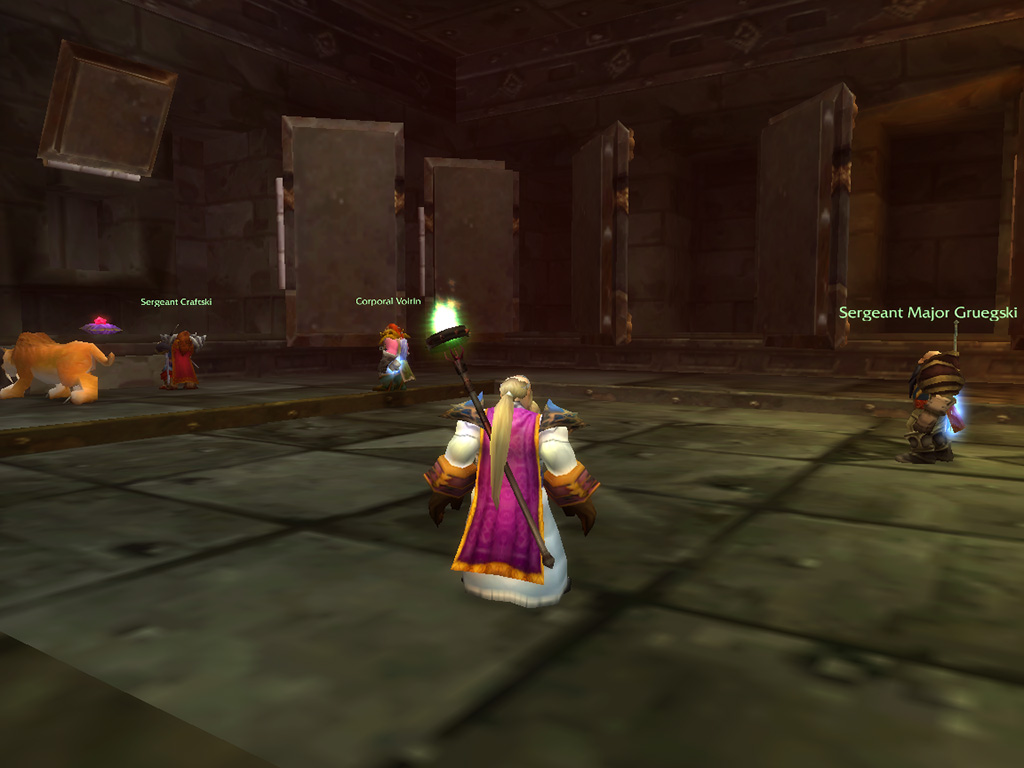
Finders Keepers
W e left the bank, retracing our steps back to the Shadowforge living quarters, keeping an eye out for the portrayed Dark Iron Dwarf. The path we had followed was still clear, allowing us to quickly and safely peek around the corners of the living rooms. We found Pelver eventually, but not where we expected, as he was hiding out in a storage room, the very same we had been using as a staging ground not too long ago! After our big fight against the golems, a lone Dwarf didn't pose much of a challenge, and soon we were able to check his pockets, finding the key we searched for. We returned to the bank, and opened the final vault. Inside we found some forged Alliance documents, a potent magical ring, which Craftki could put to good use, plate bracers for Gruegski and finally the Heart of the Mountain, a fist-sized ruby and priceless heirloom of the Dark iron Dwarves. Stowing it safely away in our pack, we felt vindicated, as we had hit the Dark Irons where it would hurt.
As Gruegski brewed new potions, fortifying our stamina, we took a short moment to rest, drink and prepare for our next endeavour: the bank had only been a detour, and the passage ahead led deeper into Shadowforge. Refreshed, we continued along the path, entering a stone-walled hall lined with unfinished golems. Here Dwarves were working tirelessly, creating Dark Iron machines of war, carving them from the walls. Advancing, we fought our way through the activated golems that patrolled the corridors and the craftsmen that were working on the constructs. Reaching a ramp leading downwards, we could now see the entire operation from high above, and spotted a stylishly dressed Dwarf yelling instructions to his underlings, who referred to him as Master Darkvire. We had found our architect, and were one step closer to the master key!

I
f we would want to halt the Dark Iron golem production and disrupt the Dark Iron war effort, this would be the place to strike. We made our way down the ramp, taking care of any Dark Iron craftsmen we encountered and sending the patrolling golems crumbling to the ground. Darkvire had noticed something was off, and started to walk our way, while we hid behind an unfinished golem, waiting for him to pass. Now close enough to engage, we charged into Darkvire, who raised his large hammer in expectation. Although he was unarmoured and dressed only in a black suit, Darkvire proved to be extremely resilient, almost as if he was one of our stone brethren, the Earthen.
Wielding Forewright's old hammer, Ironfel, he returned blows with vigour, but as we outnumbered the Master Architect, he wasn't able to hold out long. With our combined attacks, we sent Darkvire tumbling to the ground and were able to claim Ironfel from his grasp, now we would only have to return it to Forgewright's statue! Searching Darkvire's belongings, Orangz was able to find a pair of shorts which, although they were not very fashionable, would enhance his healing powers. Leaving the golem production in shambles, we moved onwards, and soon arrived at the large anvil we had spotted earlier from above, where we could see Lord Incendius waiting for us.
Wielding Forewright's old hammer, Ironfel, he returned blows with vigour, but as we outnumbered the Master Architect, he wasn't able to hold out long. With our combined attacks, we sent Darkvire tumbling to the ground and were able to claim Ironfel from his grasp, now we would only have to return it to Forgewright's statue! Searching Darkvire's belongings, Orangz was able to find a pair of shorts which, although they were not very fashionable, would enhance his healing powers. Leaving the golem production in shambles, we moved onwards, and soon arrived at the large anvil we had spotted earlier from above, where we could see Lord Incendius waiting for us.
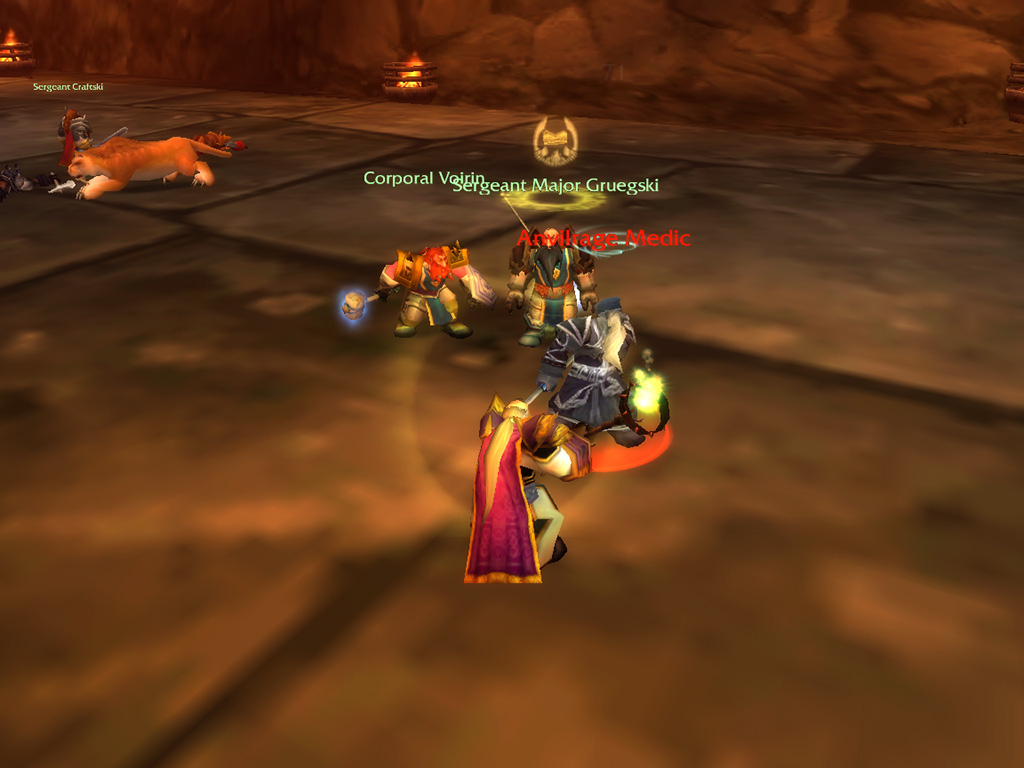
A
s Gruegski warded us from the fiery heat, we moved in, fighting the elemental on top of the anvil it guarded. Suddenly we were engulfed by flame, which negated the powers of Gruegski, and all around us pillars of fire erupted from the ground. Dancing through the fire, which singed our beards and cloaks, we tried to evade the flames, as we resumed our attacks on Incendius. More pools of fire appeared around us, forcing us to run around the anvil, as we made sure to stay at a safe distance from the lava below us. Thankfully our tactics proved to be effective: While our attacks intensified, the elemental's powers seemed to weaken, and soon Gruegski's fire warding was back to its full effect.
Concentrating our attacks, it was now it was time for the final stretch, as Craftski rained arrow after arrow onto the elemental, damaging the bracers that bound it to this world. Finally, Incendius exploded in a pillar of flame, leaving shattered bindings on the floor, and banishing it to the Elemental Plane. Slaying their lord, we hoped fire elementals in the Burning Steppes and Searing Gorge would now be thrown in disarray. Continuing from the anvil, the road widened, leading us into a hallway guarded by fire elementals, which we were able take down with the help from Craftski's traps. Passing under a large portcullis, the road led us over bridge, crossing the lava river that flowed below, and leaving Shadowforge city.
Concentrating our attacks, it was now it was time for the final stretch, as Craftski rained arrow after arrow onto the elemental, damaging the bracers that bound it to this world. Finally, Incendius exploded in a pillar of flame, leaving shattered bindings on the floor, and banishing it to the Elemental Plane. Slaying their lord, we hoped fire elementals in the Burning Steppes and Searing Gorge would now be thrown in disarray. Continuing from the anvil, the road widened, leading us into a hallway guarded by fire elementals, which we were able take down with the help from Craftski's traps. Passing under a large portcullis, the road led us over bridge, crossing the lava river that flowed below, and leaving Shadowforge city.
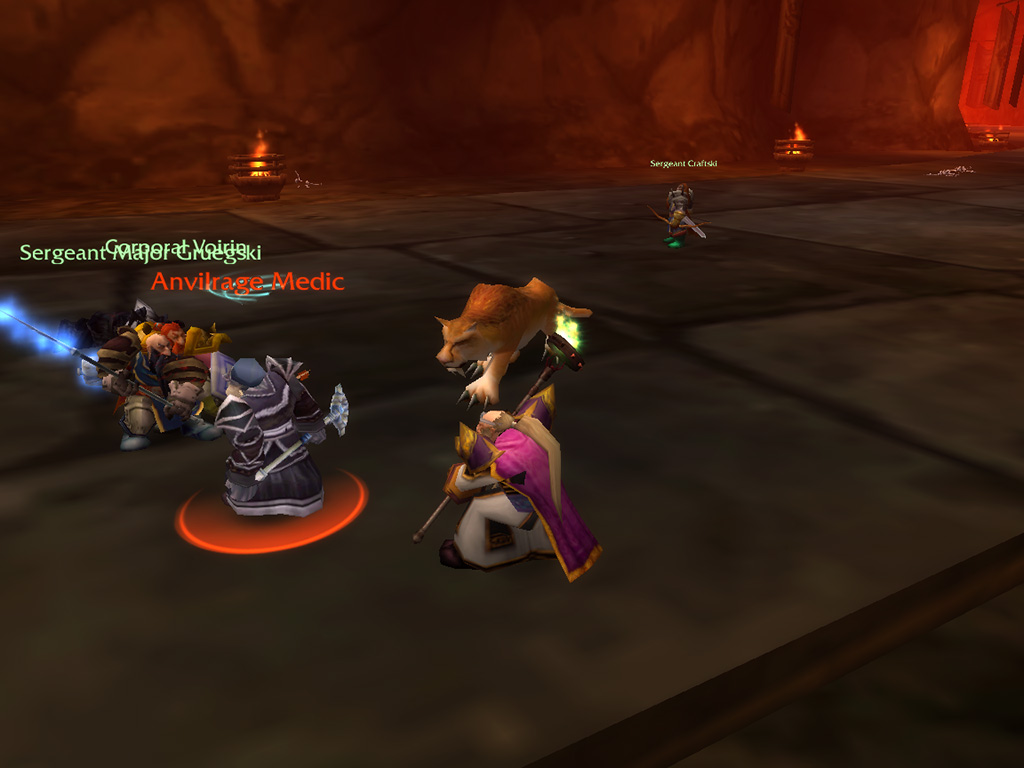
Our Way or the Highway
A head we found a vast gate that stood ajar, and passing through, found it decorated with the heads of Dark Iron emperors of the past. Although seemingly unmanned, we could spot lookout gates and murder holes up above, and took care to not draw any attention. Hopefully we would be able to stealth our way past! The enormous cavern we entered echoed with shouts from Dark Iron Dwarves, while up ahead we could see small regiments marching back and forth, following the stone road, which curved out of view. We rested, and took time to observe the Dark Irons, hoping they would perhaps to march out? That would save us some trouble! But it seemed they were only practicing, and if we would want to make our way through, we would have to fight them!
Making sure to not catch the attention of the other regiments, we stealthily moved closer, as Orangz used his mind-domination trick once more. Thinking they were betrayed, the Dark Irons turned on each other, taking out their own priest, and afterwards turned on us for vengeance. These warriors proved to be well trained and extremely dangerous, and some even had surprises up their sleeve, shielding themselves in divine magic similar to Gruegski. But the group was weakened without aid from a priest, and we soon stood victorious. Advancing slowly, and fighting the Dark Iron patrols one at a time, we finetuned our tactics, using the Dark Iron priest's powers to fortify our own.
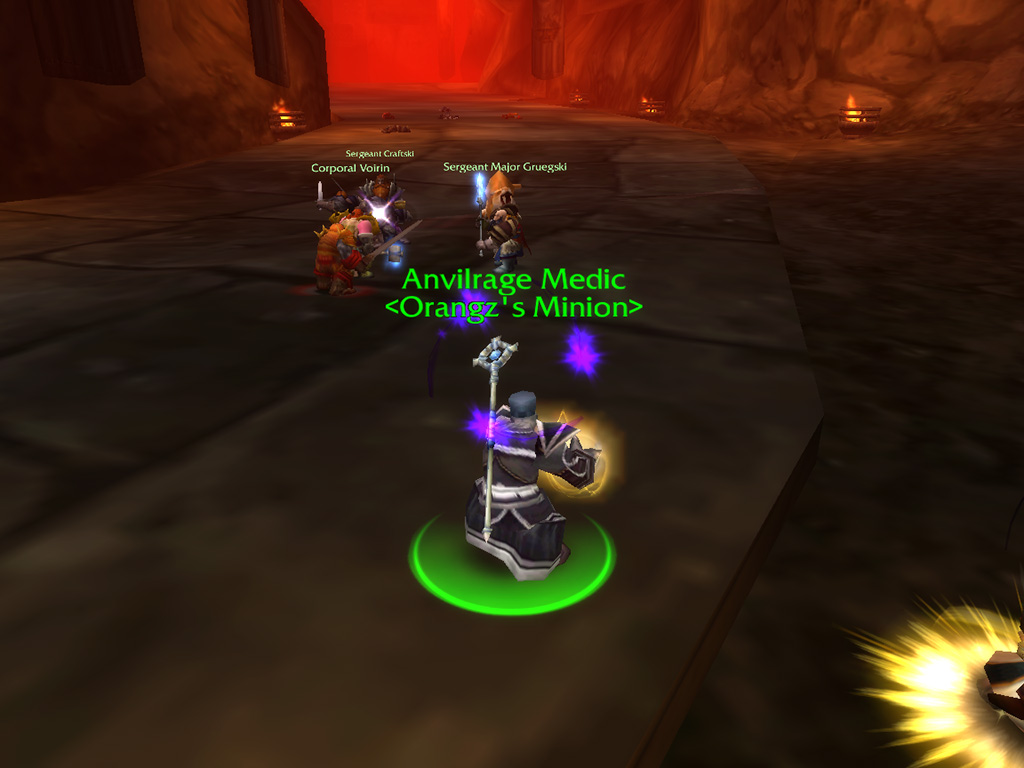
R
ounding the corner, we could see the road leading to a large door in the distance, but that wasn't the only thing that caught our attention: In front of the door stood a vast molten giant, pulsing with fire from within, guarding the door with in eternal watch. This had to be Bael'Gar, the giant the dragonkin had told us about, who had asked us to capture its essence. More Dark Iron regiments stood between us and the giant, which we cleared slow and steady, as we kept the advantage on our side. As we advanced, we passed a small gate we had encountered before from the other side, which we now were able to unlock, opening a path back into the prison section. Now we at least had a way back out!
With the path to Bael'Gar clear, we approached the giant, who quickly took notice of us and started striding towards us. Rumbling to a halt in front of us, the giant started the fight by smashing the ground, sending us tumbling backwards. Absorbing the next hit, Voirin moved in, raising his shield high, as the rest of us started to attack it with polearm, wand and bow. Enraged at our defiance, the giant let out a deep bellow, and fire started to whirl around its fists as it casted an incantation. The ground cracked apart, sending flames to the surface, and a glob of lava appeared, slowly inching towards us.
With the path to Bael'Gar clear, we approached the giant, who quickly took notice of us and started striding towards us. Rumbling to a halt in front of us, the giant started the fight by smashing the ground, sending us tumbling backwards. Absorbing the next hit, Voirin moved in, raising his shield high, as the rest of us started to attack it with polearm, wand and bow. Enraged at our defiance, the giant let out a deep bellow, and fire started to whirl around its fists as it casted an incantation. The ground cracked apart, sending flames to the surface, and a glob of lava appeared, slowly inching towards us.
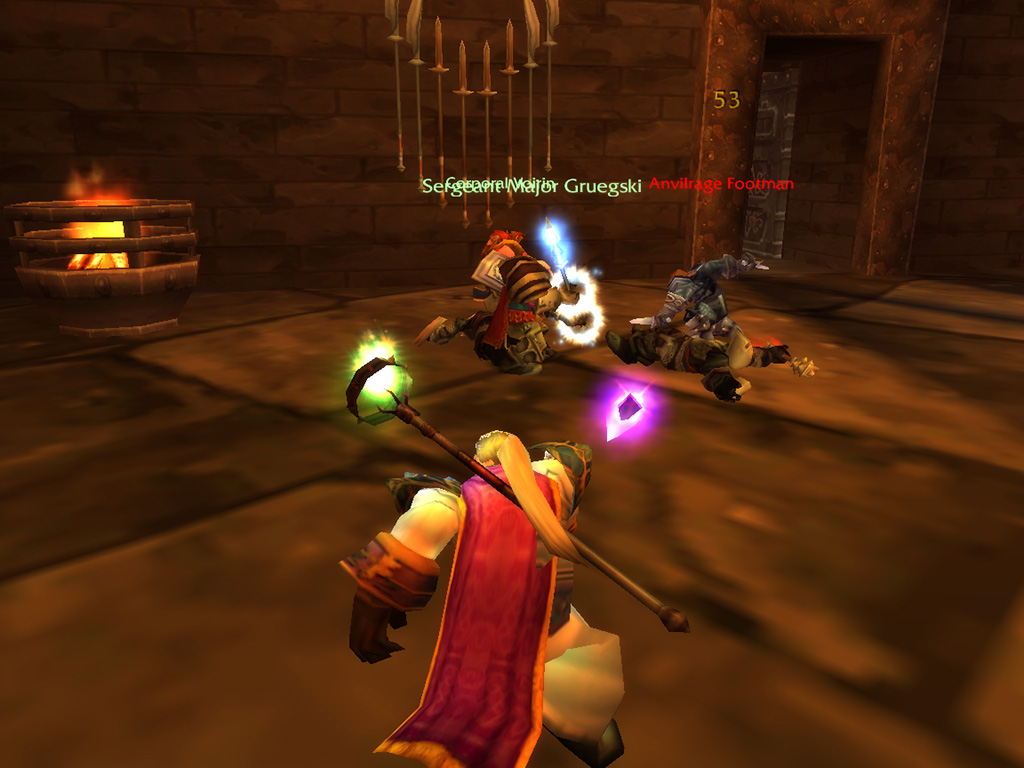
W
e slowly moved Bael'Gar away from the chasing lava creature, while we kept chipping away at the giant's obsidian skin. As we moved to stay clear from the living lava, another fiery crack appeared behind us, from which a second creature moved towards us. We didn't see the giant falling anytime soon, so we chose to split our strength, as Craftski and Orangz turned their attention to the spawns, making sure we would not get outnumbered. The spawns didn't prove as dangerous as we feared, and we took them down from afar, safe from their fiery heat. Returning our attention to Bael'Gar, we could see that more and more lava and fire was bleeding from the cracks Gruegski and Voirin had made, allowing Craftski's arrows to pierce the giant's stone skin. Larger chucks of stone started to crumble down from above, until finally Bael'Gar's knees gave way, sending the giant smashing into the ground.
While the giant's fire dimmed, we quickly retrieved the Black Dragonflight molt, which upon touching the stone skin of the giant, flared up with searing heat, draining Bael'Gar's fire. We waited for the molt to cool down, and stowed it away in our pack, another delivery complete. Using the unlocked gate to reach the prison complex where our adventure had started, we once again made our way through the arena, this time taking a different turn, which led us to the statue of Forgewright. As we placed Ironfel into the raised hand of the statue, a small compartment, hidden in the pedestal, revealed our reward: The master key to Shadowforge City.
While the giant's fire dimmed, we quickly retrieved the Black Dragonflight molt, which upon touching the stone skin of the giant, flared up with searing heat, draining Bael'Gar's fire. We waited for the molt to cool down, and stowed it away in our pack, another delivery complete. Using the unlocked gate to reach the prison complex where our adventure had started, we once again made our way through the arena, this time taking a different turn, which led us to the statue of Forgewright. As we placed Ironfel into the raised hand of the statue, a small compartment, hidden in the pedestal, revealed our reward: The master key to Shadowforge City.
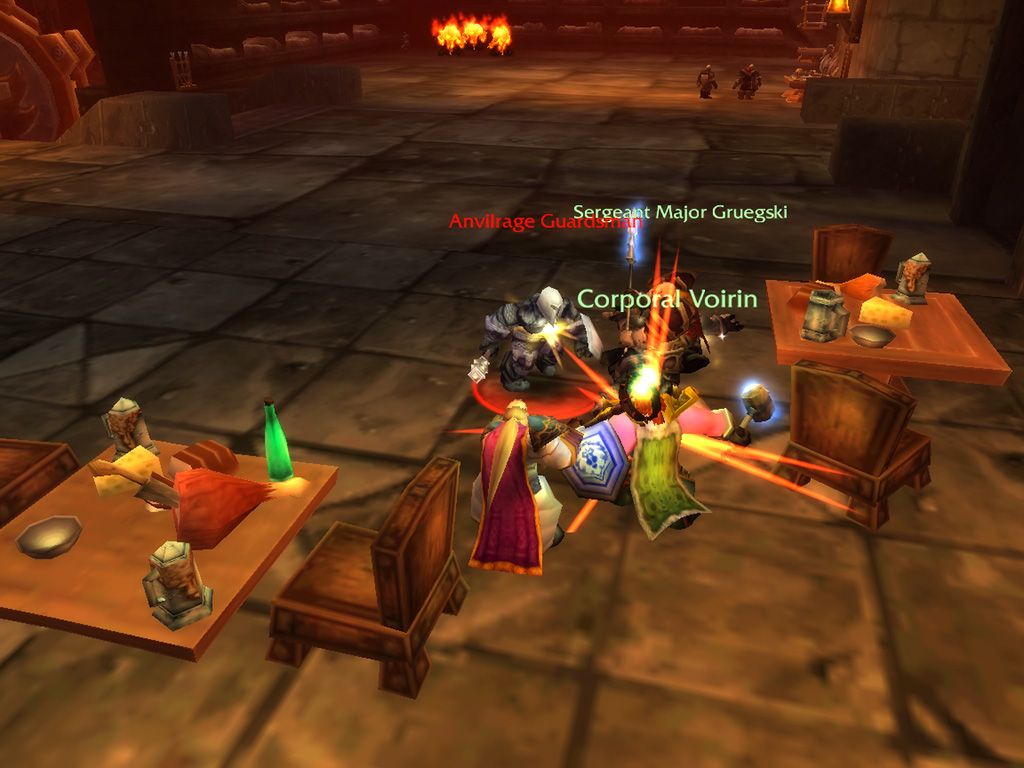
Unlocking the Doors
W ith the key in our possession, we could finally open the doors that previously barred our way, hopefully allowing us a way to reach the emperor and save Moira. We took a short break, during which Orangz used the materials we had found to finish crafting his Mooncloth outfit, making him look more and more like a true priest. At the same time, Craftski instructed his cat to stealth back outside, back to Thorium Point, and after making sure it got out safely, called over his new pet, an owl named Wingdings, to give it some combat training. Ready to head out again, we headed over to the locked door we had encountered earlier, close to the prison. The master key made a perfect fit and turned smoothly, opening the door to a chamber overlooking the large gates through which we had left Shadowforge.
From the ceiling hung an enormous gear, held in place by mechanism and guarded by a group of Dark Irons. As they hadn't noticed our presence, we launched a surprise attack, while Craftski used his frost trap to capture one of the guards. These guards proved to be easy pickings compared to our earlier fights, and soon we were able to inspect the gear up close. We found a keyhole to the side of the mechanism, and after inserting and turning the key, it lowered, allowing the cog to spin wildly. We heard a loud, scraping noise behind us, and through the windows could see the vast gates were slowly closing.
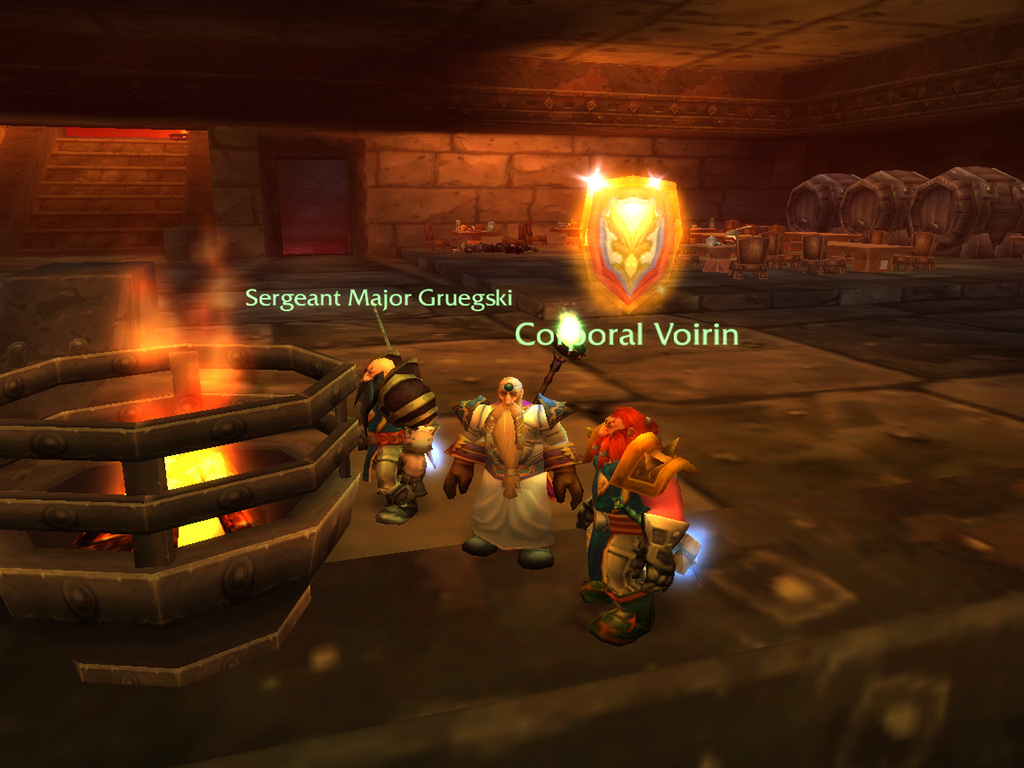
L
ooking for valuables, Gruegski had been inspecting the belongings of the Dark Iron guards we had slain, and had come across something strange: A scrap of paper which, although barely legible, mentioned the name of Marshal Windsor and referred to a broken Alliance. Even more important: It was signed by the emperor himself, Dagran Thaurissan himself! This had to be important, and remembering we had left Windsor in the prison complex, we headed his way, hoping he had not sneaked out by now.
We found Windsor muttering in his cell, which was still open with him free to go, and handed over the note. While he was reading, his eyes lit up with newfound energy. It appears we had found some vital, and there was the possibility that Windsor's findings were not lost after all. The note mentioned two high-ranking Dark Iron Dwarves were working on decrypting Windsor's information, Golem Lord Argelmach and General Angerforge, so there was a high possibility the information was in their hands. Windsor asked us to retrieve this information, as he prepared our next steps.
We found Windsor muttering in his cell, which was still open with him free to go, and handed over the note. While he was reading, his eyes lit up with newfound energy. It appears we had found some vital, and there was the possibility that Windsor's findings were not lost after all. The note mentioned two high-ranking Dark Iron Dwarves were working on decrypting Windsor's information, Golem Lord Argelmach and General Angerforge, so there was a high possibility the information was in their hands. Windsor asked us to retrieve this information, as he prepared our next steps.
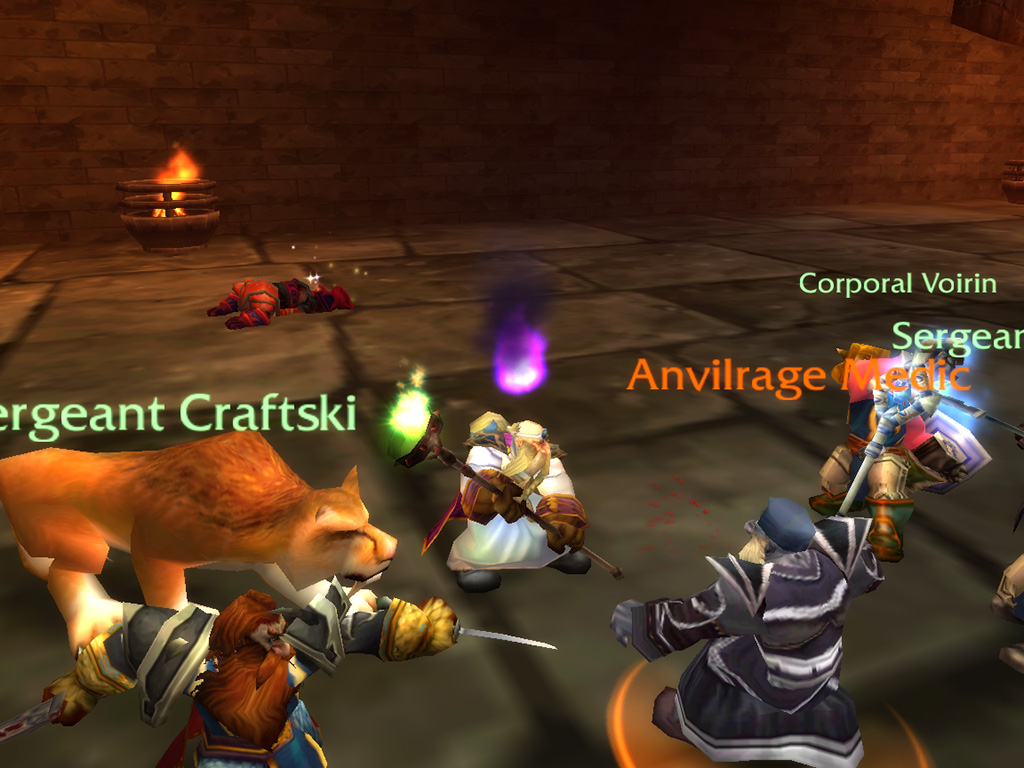
Finding Information
B ut where would we find these Dwarves? We had travelled through Shadowforge, and ended up where we started, and even the door unlocked by the master key had not opened up any new paths, as we ended up next to the arena. But we perhaps the closed gates had opened a new pathway, so, we once again travelled to the arena, this time following a path that might lead towards the gate. The path led to a long, narrow, hallway, littered with supplies and weapons, and was patrolled by soldiers and smaller fire elementals. The path even passed through the closed gate itself! We'd be in for a nasty fall if we had left them open! Fighting our way past the guards, we reached the other side, where we arrived in a small garrison. The garrison was similar to the other side, with another room overlooking the Shadowforge gates.
But instead of finding another large cog, we found a Dwarf commander accompanied by his troops... Suspecting this might be general Angerforge, we made our way down the staircase and charged straight in. Gruegski seared the ground with holy fire, blasting the general's minions, leaving him to fend us off on his own. As we started our offensive, the Dwarf started to counter, swinging his two-handed axe wildly, denting Voirin's armour, but not able to pierce the thick plate. Knowing he couldn't hold us off on his own, he yelled for reinforcements, who came running down the stairs to assist their commander. These reinforcements were accompanied by priests, which could pose a problem, as they could mend Angerforge!
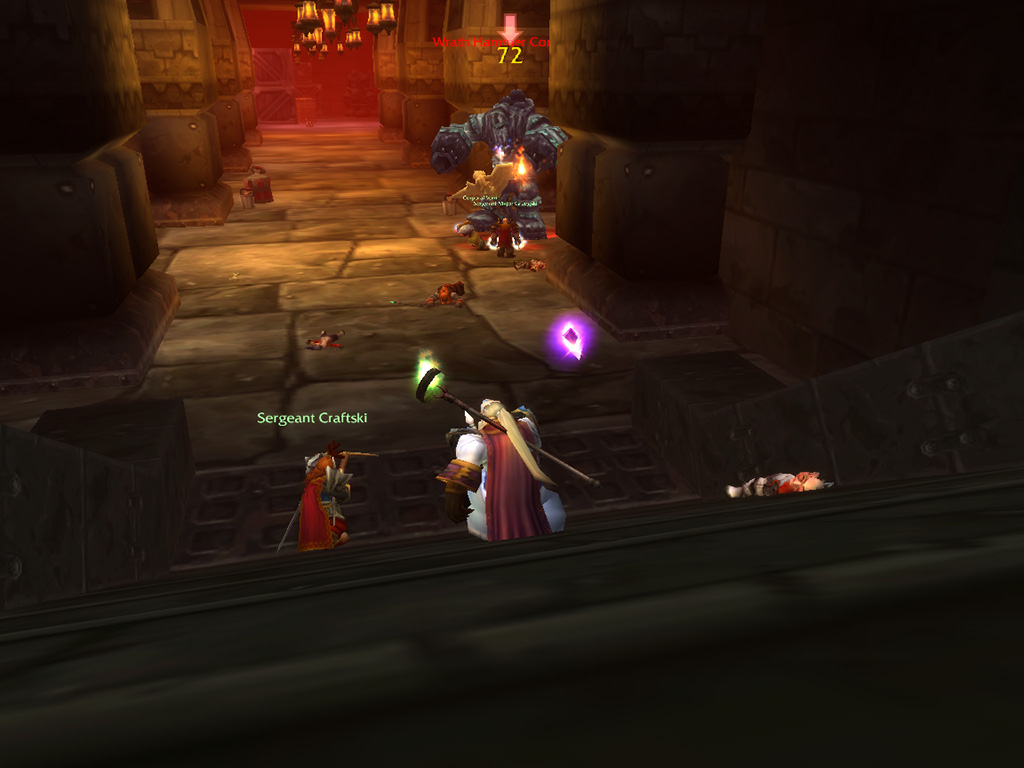
B
ut we kept our focus on the general, as Voirin intercepted the Dark Iron militia and Craftski sent in his owl, drawing the priests to the other side of the room. Noticing their commander was close to defeat, the priests tried to heal his wounds, but their incantations were broken by Orangz, who let off a psychic scream, making them run in dread. Without help, Angerforge slumped to the ground, defeated, allowing us to engage the priests as they regained their senses, and dealing with them swiftly. Searching the generals remains, we found a tablet, inscribed with unknown glyphs, which had to be a part of the information Marshal Windsor had lost. And Voirin was also pleased, as he found a trinket which would strengthen his defences.
With one piece of information retrieved, we started our search for the other piece, for which we had to find the Dark Iron golem lord. And we expected a long search, but as we made our way upwards, heading into the garrison, we found ourselves facing a golem workshop. We probably would be able to find a golem lord there? The previous golem facility we had found was used to sculpt the golems, but this one appeared to be used to bring them alive, with machines hanging from the ceiling, charged with energy. We started to scouting the workshop, and received another surprise, as it was manned by traitorous Gnomes!
With one piece of information retrieved, we started our search for the other piece, for which we had to find the Dark Iron golem lord. And we expected a long search, but as we made our way upwards, heading into the garrison, we found ourselves facing a golem workshop. We probably would be able to find a golem lord there? The previous golem facility we had found was used to sculpt the golems, but this one appeared to be used to bring them alive, with machines hanging from the ceiling, charged with energy. We started to scouting the workshop, and received another surprise, as it was manned by traitorous Gnomes!
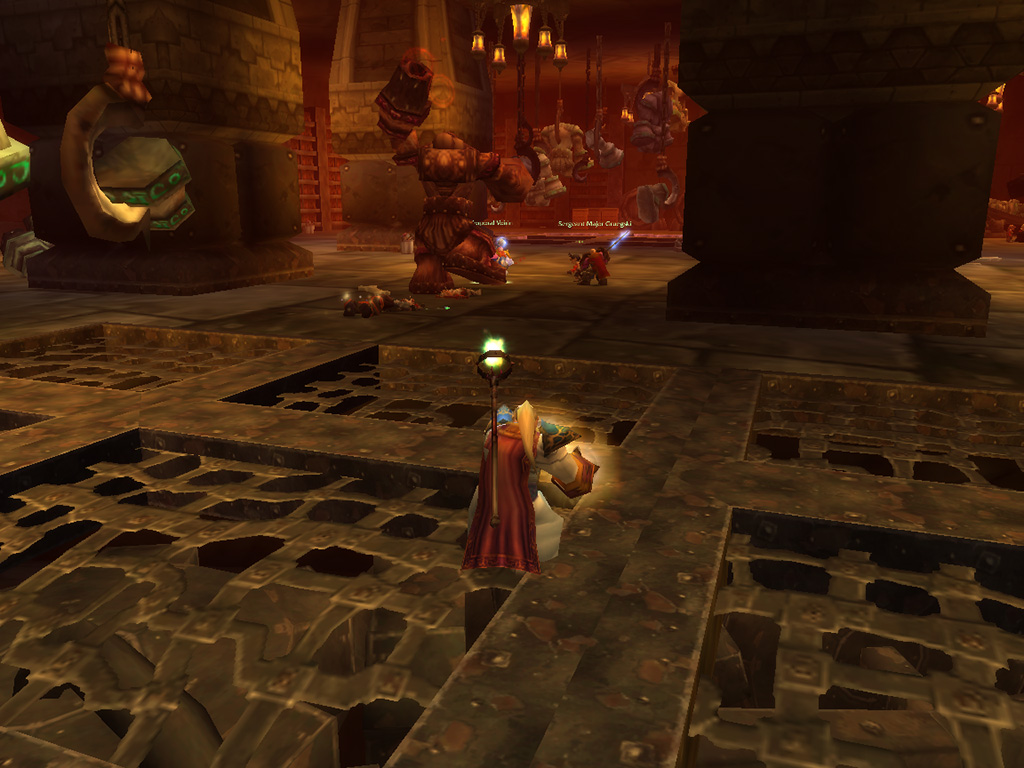
Golems and Gnomes
O Assisted by Dark Iron overseers, the Gnomes assembled the golems and sparked them to life, send them off to the battlefield. Various golems patrolled the workshop, as the Gnomes rummaged about, moving from workbench to workbench. Using the construction noise as a cover, we slowly made our way inside the factory, where we fought our way through the engineers. The Gnomes were not skilled in combat, and threw their tools at us, hoping to keep us at bay. But we had faced bigger foes, and soon had the largest part of the factory cleared, allowing us to ambush the last patrolling golems. Now we could move freely to the last remaining alcove, where the manufactory overseer, Golem Lord Argelmach, was inspecting his materials, guarded by two golems.
Upon noticing us, he invoked a shield of lightning, and went running around the workshop, hoping to rally his minions to join him in his fight. As the golem lord was running, now noticing we already had defeated his minions, we engaged the two golems that were thundering towards us, as they crashed into Voirin's shield. Craftski started to rain arrows on both targets, stringing two arrows at a time in his crossbow and using volatile acids to burn away their steel shell. Meanwhile Gruegski had intercepted the golem lord and had drawn him towards Voirin, using his consecration to burn the surrounding enemies. With our attacks combined, we were eventually able to defeat the golems, leaving us with only Argelmach. But he wouldn't go down easily, as his lightning shield sent shocks through Gruegski's and Voirin's armour, and invoking the power of thunder, he sent arcs of lighting flying through the room.
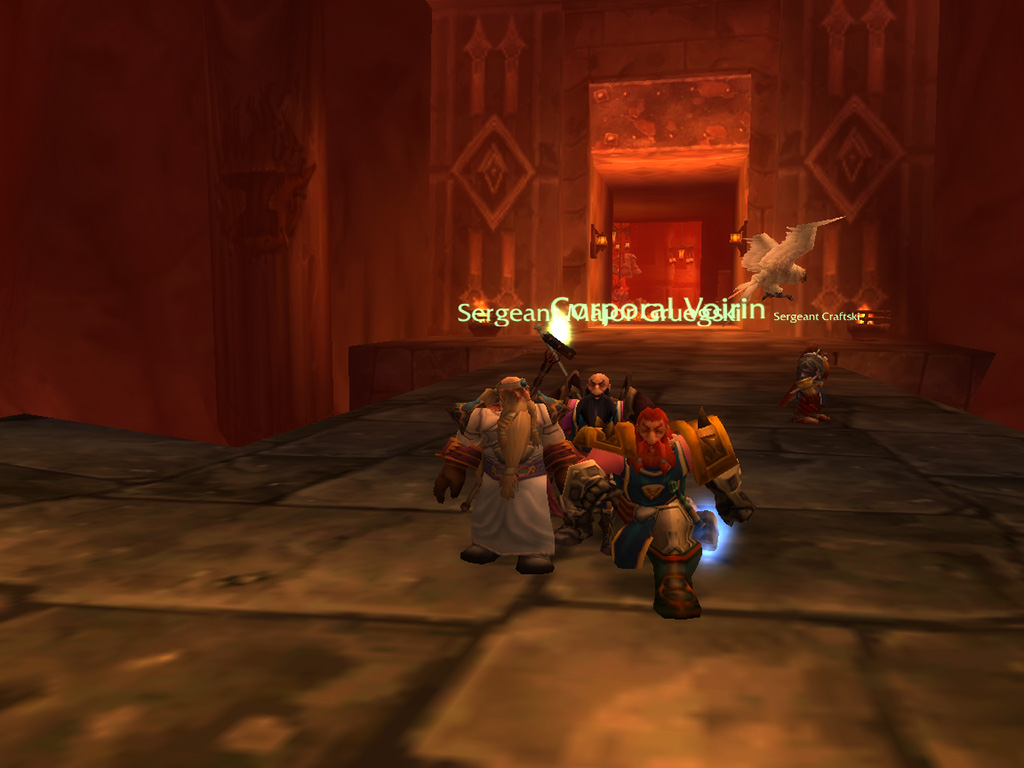
A
s the fight went on, his shield of lightning slowly began to dim, allowing us to intensify our attacks, as we were now safe from repercussions. Without his golems to guard him and the magical shield faded, we started to gain the upper hand, as Argelmach's attacks began to slow. And finally, with a blow from his shield, Voirin sent the golem lord tumbling the ground, defeated. Rummaging through his robes, Voirin found a powerful warding ring, and even more important: The second tablet! With all information now retrieved, we could have returned to the marshal, but gave priority to save the princess, we would return to him after we had defeated the emperor!
As we had spotted an open doorway while we were fighting Argelmach, we knew which direction to take, which led us to a bridge, guarded by fire elementals. Using our tried and tested tactics, we drew one of the elementals into Craftski's freezing trap, giving us enough time to defeat the remaining elemental while the trap slowly thawed. From the bridge we could once more see the spectacle of Shadowforge City, as living quarters were studded along the mountainside, reaching as high as we could see, and long banners, adorned with the Shadowforge emblem hung from the walls. We crossed the bridge, defeating another group of fire elementals, and reached a doorway from where we could hear the sounds of cheers and slamming of mugs inside.
As we had spotted an open doorway while we were fighting Argelmach, we knew which direction to take, which led us to a bridge, guarded by fire elementals. Using our tried and tested tactics, we drew one of the elementals into Craftski's freezing trap, giving us enough time to defeat the remaining elemental while the trap slowly thawed. From the bridge we could once more see the spectacle of Shadowforge City, as living quarters were studded along the mountainside, reaching as high as we could see, and long banners, adorned with the Shadowforge emblem hung from the walls. We crossed the bridge, defeating another group of fire elementals, and reached a doorway from where we could hear the sounds of cheers and slamming of mugs inside.
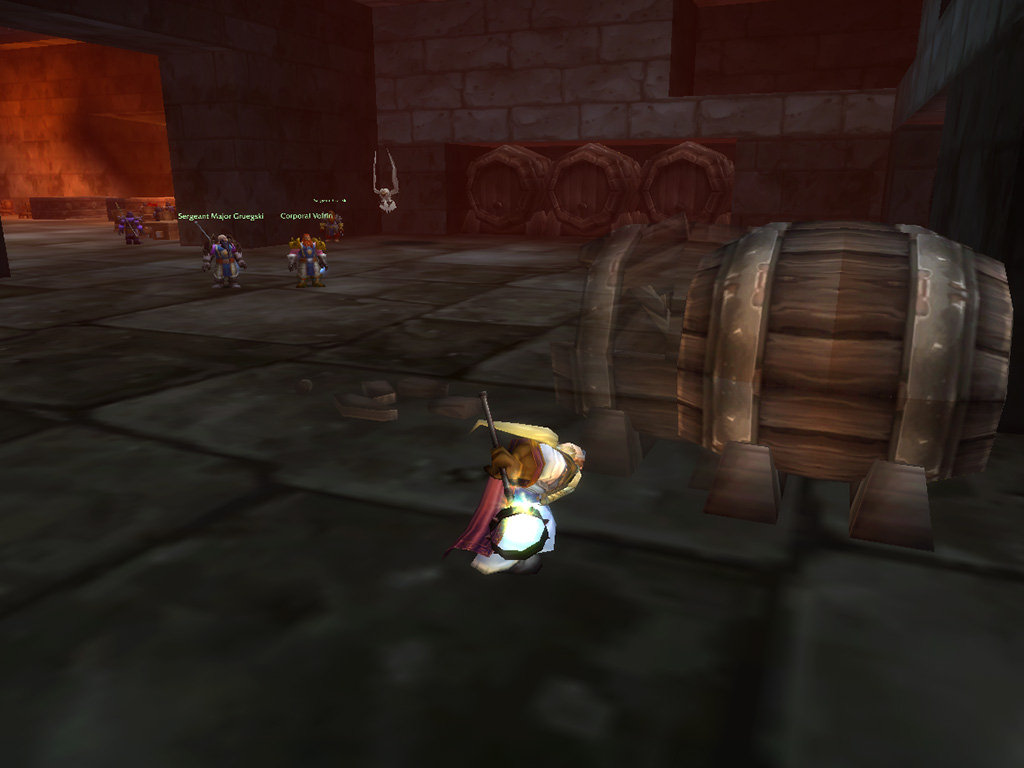
Time for a Beer
G oing inside, we found ourselves in a bar filled with Dark Iron citizens, drinking and laughing, and although noticing us, leaving us be. It appeared the Dark Iron citizens didn't have such a grudge against their Ironforge brethren like their military did. We headed for the counter, getting a brew for ourselves, looking forward to try out one of the Dark Iron ales. Taking a swig, we got quite a surprise, as we knew this ale: It was Thunderbrew, straight from Kharanos! We knew the Dark Irons had stolen the recipe, but it also appeared they had mastered the brewing process: We would have to act and safeguard the secret! Keeping an eye out where the barman went to get new kegs, we discovered a room to the side of the inn, stashed full of kegs, marked with "Thunderbrew!".
With pain in our hearts we started smashing the barrels, not able to save a single drop, although Gruegski certainly gave it a try. Smashing the final barrel to splinters, ale splashing all over the place, it appeared we had caused a bit of commotion. Behind us a Dwarf had appeared, together with a group of cronies, closing in to us, yelling to keep our hands of his kegs. Suspecting this was the Dark Iron brewmaster, the thief of the Thunderbrew recipe, we asked for the return of the recipe, upon which he went straight for the attack. His minions were easily taken care of, as Craftski let loose a hail of bolts, and without his support, it didn't take long to take down the thief himself. Retrieving the recipe from his pockets, the Thunderbrew secret was safe once more, which left us to find a way out of the bar.
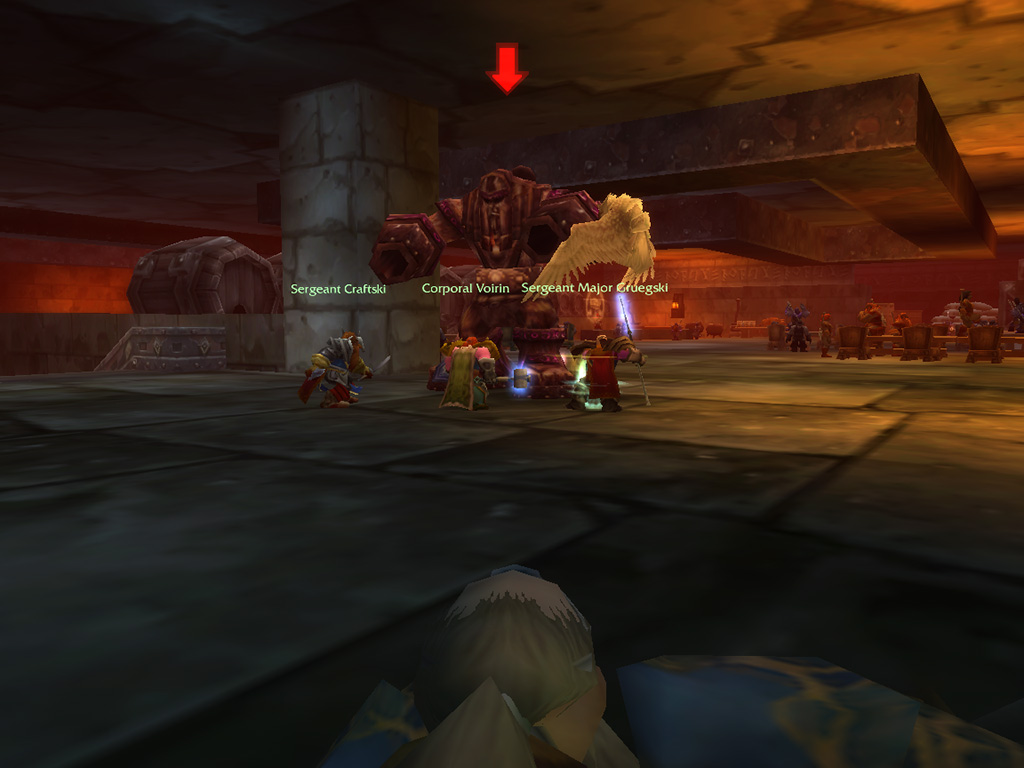
A
s all other rooms were a dead end, there was only one door left that could lead us further, which was locked tight. Even the master key did not fit, as the door was probably added much later, when Shadowforge was completed and Forgewright long dead. The door was guarded by a golem bouncer, who didn't have the intention to open it just for us. We would have to find another way, and this is where Gruegski came in. Having been in a few bar brawls, he knew what to search for, and started buying extra drinks for an already extremely drunk Dark Iron, getting him more and more wasted. Eventually, the Dwarf headed for a large keg, opposite of the closed doorway, and tried to pry open the nozzle. Smacking the keg, it suddenly burst open, blowing the dwarf straight through the door, ending up on the pavement beyond.
We didn't get a clear answer as we asked Gruegski if this was what he had intended, but at least the doorway was open! But we couldn't get through that easily, as the golem jumped in to guard the open doorway, and attacked us when we neared. The nearby Dwarves were merely amused by all the commotion and let us fight, hacking away at the iron construct. We had already fought plenty of golems, but this one was a bit different, launching fireballs from its arms, and stomping the ground with mighty force. But as we had fought many, we also knew the weak points, and without too much effort, the machine fell over, it's energy core depleted. With the path clear, we stepped through the door, ending up a familiar part of Shadowforge city.
We didn't get a clear answer as we asked Gruegski if this was what he had intended, but at least the doorway was open! But we couldn't get through that easily, as the golem jumped in to guard the open doorway, and attacked us when we neared. The nearby Dwarves were merely amused by all the commotion and let us fight, hacking away at the iron construct. We had already fought plenty of golems, but this one was a bit different, launching fireballs from its arms, and stomping the ground with mighty force. But as we had fought many, we also knew the weak points, and without too much effort, the machine fell over, it's energy core depleted. With the path clear, we stepped through the door, ending up a familiar part of Shadowforge city.
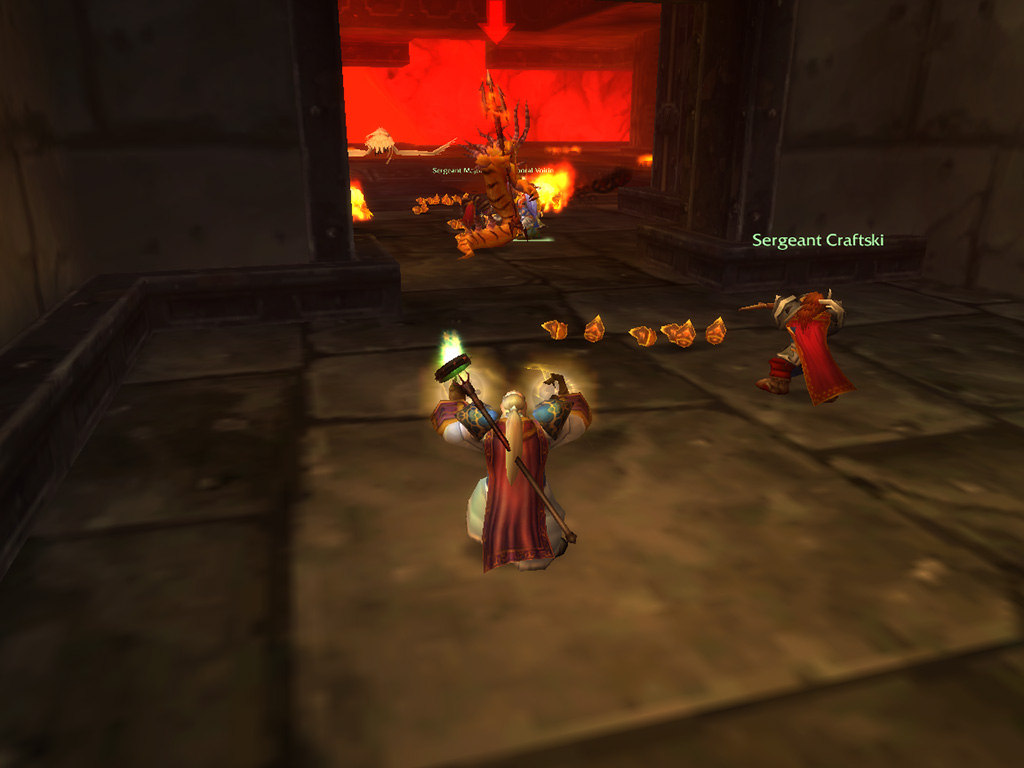
An Emissary of Fire
W e found ourselves across the bank, standing high above the Black Anvil, confirming our suspicions, the sounds we had heard when we were plundering the bank came from the bar! A small walkway led us downwards, towards the other half of the city square, where militia was stationed. We however had already been spotted, and they closed ranks, getting ready for our attacks. But the militia was only supported by few well trained soldiers, and were no match for our combat prowess. Surely the Dark Iron army would be able to field more powerful soldiers? Passing the doorway they had been guarding, we followed a ramp downwards, entering a large room with a metal grated floor. In the centre of the room stood a creature we had never seen before, a snake-like humanoid with large horns, which was basking in the surrounding heat.
As we entered the room, fires ignited in the corners, waking the serpent monster which slithered towards us, its trident held high. As Voirin accepted the charge, the rest of us moved into the room, staying clear from the fires that blazed around us. Calling flames to its aid, small fire elementals rose from the burning flames, and started moving across the floor, towards their master. But Craftski was quick on the draw, blasting them away in a flurry of bolts, and saving us from getting overwhelmed. Fighting the monster, Voirin was more than a match in close combat, and skilfully parried the strikes from the flaming trident, while the rest of us searched for weak spots in its armour. With a final strike, the flames doused and the serpent fell to floor, its power broken, as the fire beneath the grates cooled. Unknown where the creature came from, and its connection to the Dark Iron Dwarves a mystery, but we assumed there were some intricate plots involved.
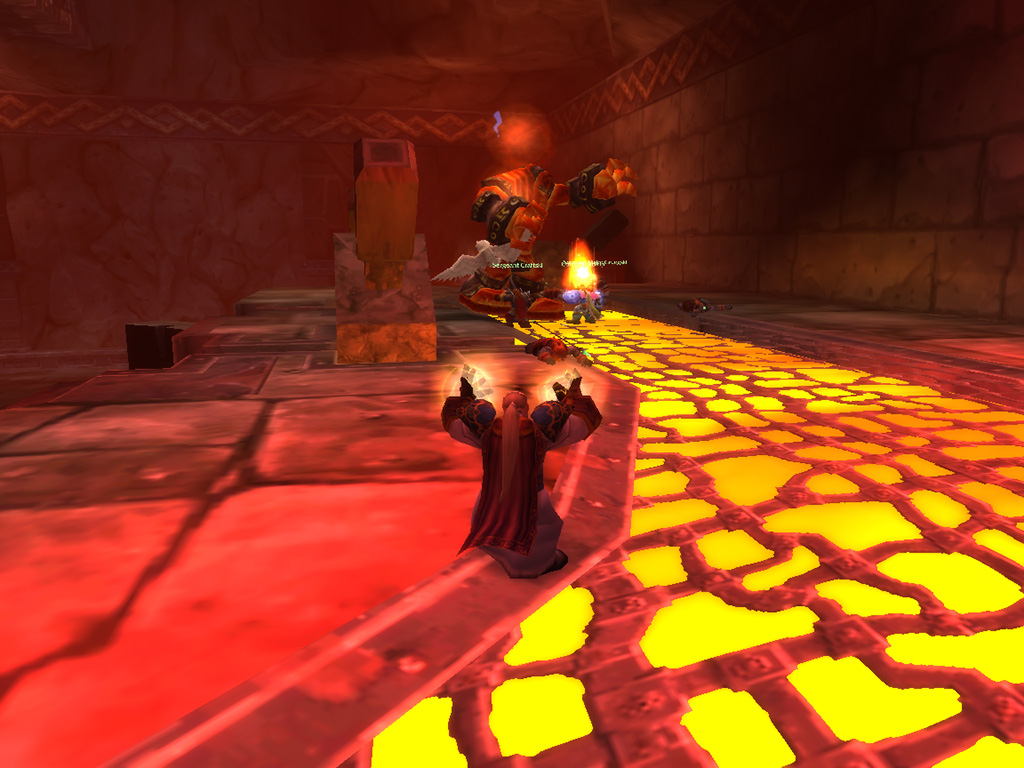
A
head of us more fires blazed, as the doorway opened up to another golem factory. This appeared to be the foundry, where moulds of lined the walls, each mould red-hot from their casting. Furnaces blazed around us, and from the ceiling hung a vast crucible, which dripped molten metal unto the floor. Recently casted, but not yet tempered golems wandered through the room, while Dark Iron engineers were working tirelessly to construct more and more of these war machines. This was the final step of golem production, and we would have to shut it down!
The craftsmen attacked us as we came closer, bombarding us with fire from the forge, and calling in the help of nearby golems. With the golem skin unhardened, these constructs proved easy to take down, and their attacks were easily deflected, as our weapons pierced the soft metal. More golems joined the fight, supported by their Dark Iron masters, but these labourers were no warriors, and we easily fought our way through. Emerging on the other side of the foundry, we passed through a doorway and were led into a large room filled with seven tombs.
The craftsmen attacked us as we came closer, bombarding us with fire from the forge, and calling in the help of nearby golems. With the golem skin unhardened, these constructs proved easy to take down, and their attacks were easily deflected, as our weapons pierced the soft metal. More golems joined the fight, supported by their Dark Iron masters, but these labourers were no warriors, and we easily fought our way through. Emerging on the other side of the foundry, we passed through a doorway and were led into a large room filled with seven tombs.

The Seven Dwarves
T he tombs were large stone constructions, inscribed with Dark Iron runes, and each tomb was placed in a small alcove, decorated with a large sculpted Dwarven visage. From the mouth of each stone face, lava flowed, dropping into molten sea in the caves below. As we inspected the closer, we thought our eyes deceived us, as we saw the shimmering figures of Dwarven ghosts, standing before each tomb. Their eyes tracking us, standing immovable in eternal guard. Perhaps the Dark Iron Dwarves would come here, looking for council from their ancestors, as only those with great power and knowledge would receive such a burial. Each Dwarf gazed intently at us, not returning a word, as we passed through the chamber, finding the large door on the other end locked tight. As we touched the handle a deep voice echoed through the chamber, asking who had dared to challenge the seven, upon we replied: I guess that's us?
Suddenly the door through which we had entered shut with a loud clang, and one of the spirits jumped to life, slinging bolts of shadow our way. Intercepting the ghost, and interrupting its incantations, we held back it's sorcerous powers, allowing us to banish the Dwarven figure. But as soon as the ghost vanished, the next spirit joined the battle, this time closing in for a fight with double daggers. Voirin evaded the swift strikes, and we started to return the favour, hoping to banish the spirit quickly and cleanly. This continued many more times: as soon as a ghost fell, another spirit joined the fight, wielding shadow magic or sharp steel. But we kept on fighting, our tenacity tested, until there was finally one last spectral Dwarf left...
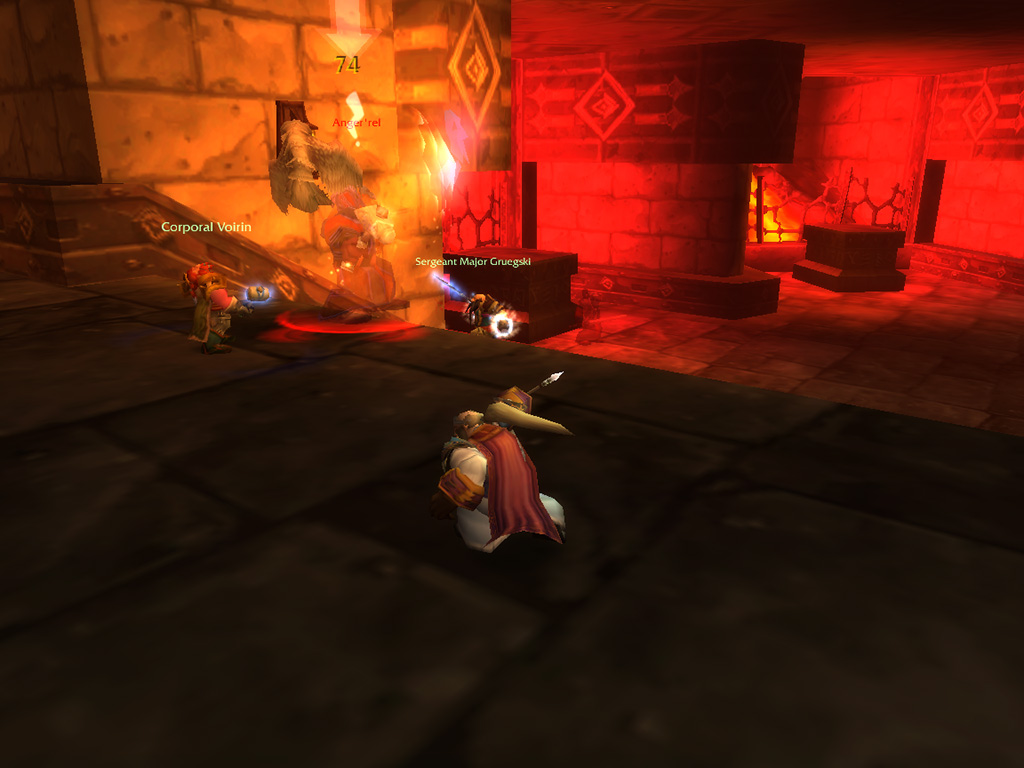
T
he final Dwarf spirit called out for our demise, and summoned Void Walkers from the Twisting Nether to its aid, which attacked us from all sides. As the demons were collected by Gruegski, using his holy exorcism keep them at bay, the ghost advanced towards us, sending out volleys of shadow magic. Wingdings flew ahead, screeching loudly, but was set ablaze, flames dancing around it's feathers, which Orangz had to ward off with a holy shield. Voirin stood fast, fearing the spirit might pass through him, but thankfully the ghost made a heavy impact on his shield. Meanwhile, Gruegski and Craftski had banished all the demons back to the nether, and joined the rest of us fighting the last of the seven Dwarves.
Without its minions to help, the ghost resorted to weakening our attacks, placing a curse upon us and draining our strength. But there still was strength in us, as our spells were unaffected! Both Gruegski and Orangz started smiting the ghost with holy magic, and as soon as the curse lifted, were joined once again by Craftski and Voirin. Now, able to combine our attacks, we landed one final blow, and reduced the Dwarf to a small puddle of ectoplasm. With the final Dwarf slain, we heard the creaking of hinges behind us, and as we turned around, found the large door that barred our way open.
Without its minions to help, the ghost resorted to weakening our attacks, placing a curse upon us and draining our strength. But there still was strength in us, as our spells were unaffected! Both Gruegski and Orangz started smiting the ghost with holy magic, and as soon as the curse lifted, were joined once again by Craftski and Voirin. Now, able to combine our attacks, we landed one final blow, and reduced the Dwarf to a small puddle of ectoplasm. With the final Dwarf slain, we heard the creaking of hinges behind us, and as we turned around, found the large door that barred our way open.
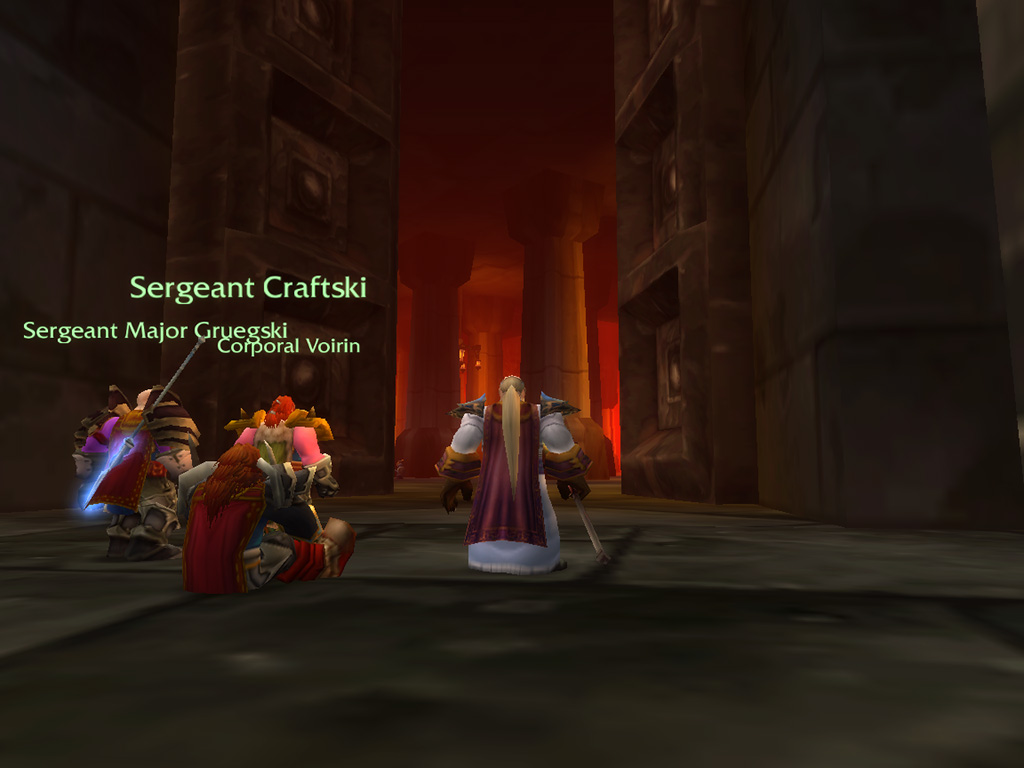
W
e were led to a small staircase, where we found ourselves facing another door, which was locked once more. But this time the master key made a snug fit, and turned slowly, the doors swivelling outwards. The open doors revealed a vast chamber, filled with pillars as far the eye could see, and its walls hidden in the distance. Shouts echoed through the room, and patrols of Dark Iron Dwarves marched back and forth across the chamber. We had reached a staging room of the Dark Iron Dwarf army, and to reach the emperor, we feared we had to cross it. Catching the attention of one of the patrols, we lured them around the corner and swiftly dealt with them, hoping to clear the way. Using the same approach, we ambushed another regiment, allowing us to infiltrate into the room further and further.
But the doors on our side of the chamber opened, and more soldiers marched forth, charging into us, and blocking our way out. As we fought, other soldiers joined the fray, called into action by the disturbance, and we were getting overwhelmed. In the distance, beyond many more regiments of Dwarves, we could see the doors leading onwards, but we would never be able reach them, which left us with only one option: To retreat. We slowly backed away, holding off the Dark Irons who lunged at us, and were able to reach the doors through which we had entered. In a swift motion we slammed the door shut, keeping out Dwarves, but we knew it wouldn't hold. Running as fast as we could, we sprinted our way back, past the bar, past the golem factory and past the prison, only catching a breath when we were well clear of Blackrock Mountain. We had failed. We had not been able to save Princess Moira and had been unable to return the information to Windsor.
But the doors on our side of the chamber opened, and more soldiers marched forth, charging into us, and blocking our way out. As we fought, other soldiers joined the fray, called into action by the disturbance, and we were getting overwhelmed. In the distance, beyond many more regiments of Dwarves, we could see the doors leading onwards, but we would never be able reach them, which left us with only one option: To retreat. We slowly backed away, holding off the Dark Irons who lunged at us, and were able to reach the doors through which we had entered. In a swift motion we slammed the door shut, keeping out Dwarves, but we knew it wouldn't hold. Running as fast as we could, we sprinted our way back, past the bar, past the golem factory and past the prison, only catching a breath when we were well clear of Blackrock Mountain. We had failed. We had not been able to save Princess Moira and had been unable to return the information to Windsor.
Events such as Noblegarden, Hallow's End and the Lunar Festival will send you all over the world, searching magical trickets and enchantments.
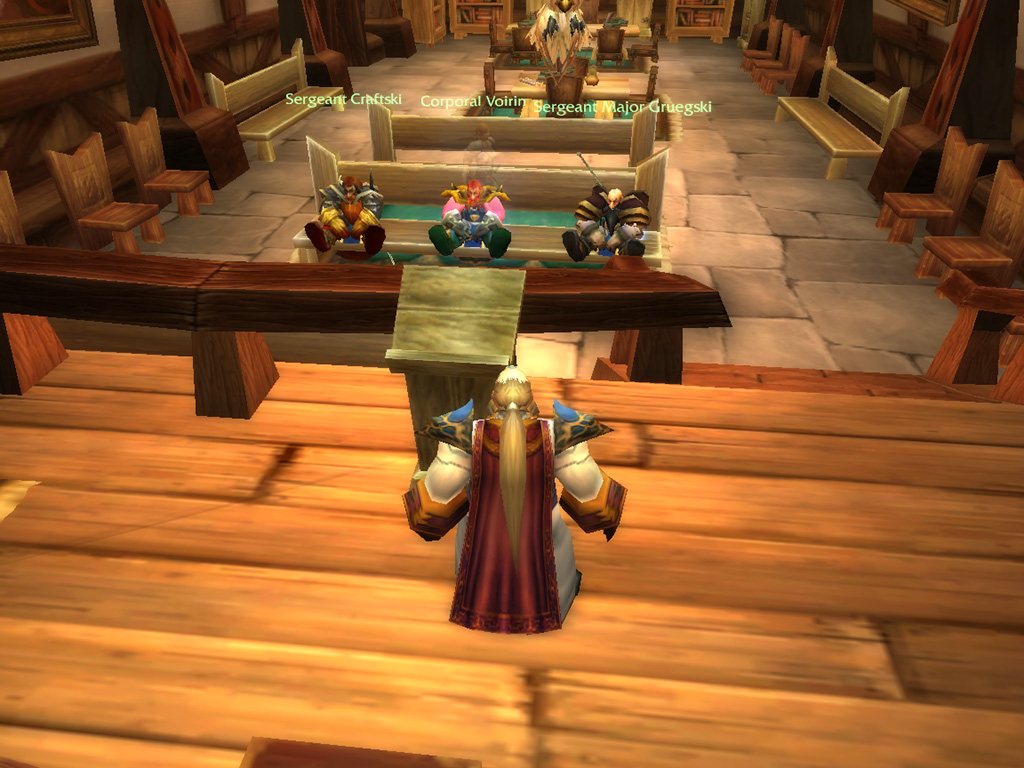
Time for a Prayer
C restfallen, but hungry for revenge, we vowed to return another day, and recalled that regardless of failing our most important task, we still had accomplished plenty. Returning to the Burning Steppes, we brought the fiery molt back to the Dragonkin, who, after shoving some magical trinkets in our hands, snatched the dragonskin away, ensorcelled by its blazing heat. The Heart of the Mountain was said to be worth its weight in gold, but in comparison we were rewarded pocket change for its theft! Thankfully the vaults of Shadowforge had contained plenty of valuables, so we couldn't complain. The coin we received for the Dark Iron fanny packs was much better, as we had to go through little trouble to get them, but it didn't speed up our savings (as we hoped to be able to buy faster rams soon). Lastly, we returned to Dun Morogh, visiting the town of Kharanos and returning the Thunderbrew recipe, and informing them that all stashes the Dork Irons possessed had been taken care of.
This time our reward was a good one, as we received some kegs of Thunderbrew, and were honoured as saviours of the still, receiving free mugs of ale whenever we visited! After a good rest at the inn, we headed for Ironforge, where we continued our training, stocked up on supplies and crafted new potions and trinkets. Orangz insisted on visiting a local church, hoping to instil us with renewed vigour, but most of us were feeling quite sleepy by the time he had finished. We would have to come up with a clever plan to get past the Dark Iron armies, so we agreed to take some time to think, and head out for other adventures in the meantime. As we still had unfinished business, and a good luck charm to return, we chose to head north, back to the Plaguelands, to fight the undead once more.
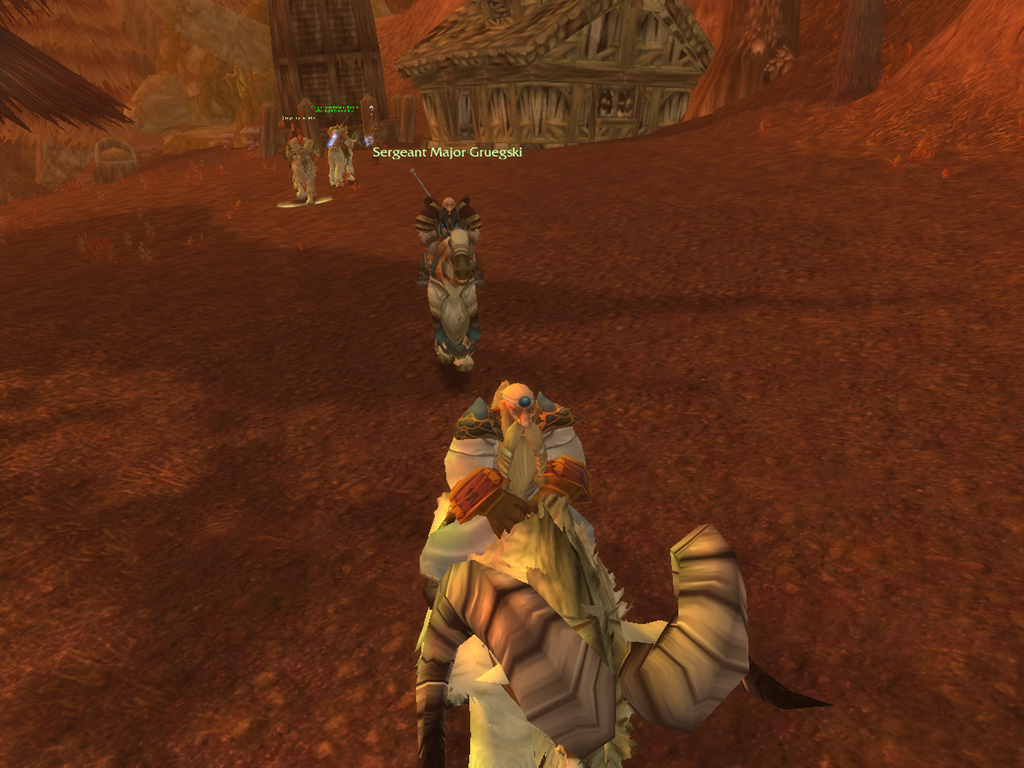
Delivery to the Dead
W e left Ironforge by gryphon, and flew to Chillwind point, hoping to find the Plaguelands in better shape than we had left them. But although we had destroyed the cauldrons, the Scourge presence remained strong, the skies still clouded with corruption. If we hoped to free Lordaeron from the undead grasp, we would have to travel to the eastern Plaguelands. But first we headed further north, to Felstone farm, where we reunited the lost Felstone spirit with the remaining part of her good luck charm. As we merged the parts together, the ghost vanished from our eyes, lifting her burden.
With our tasks in the western part of the Plaguelands complete, we set out to travel to the east, where we hoped we would find the remaining Redpath family member. Following the road, and crossing a river, we found ourselves in even more blighted lands, where poisonous mushrooms grew along dead trees, and all grass had withered. As we traversed the bridge, we spotted a small dilapidated farmstead in the distance, and chose to pay a visit, perhaps we would find another spirit dwelling inside? Or soldiers of the Scourge? We did not find either: As we approached a grizzled old man called out to us, asking what business we had in this forsaken place.
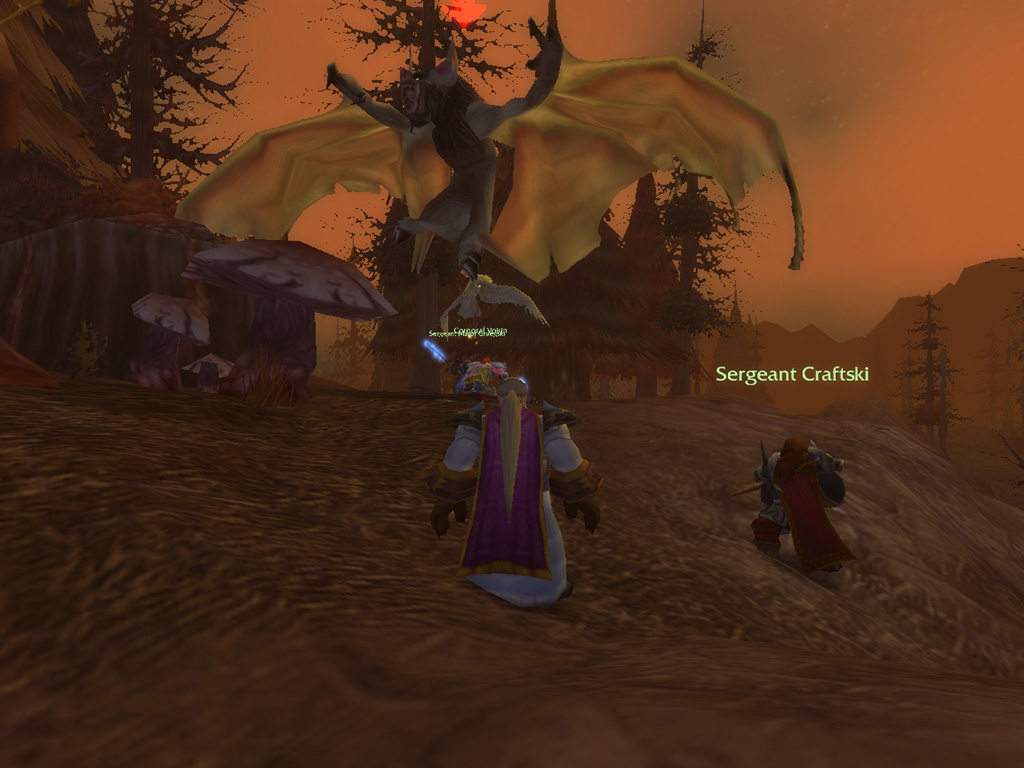
A
As we told the hermit about our search, his eyes lit up for a moment, and he quickly changed the subject. He asked us to gather some supplies for him, as he was low on food, and to take care of the dangers that lurked in the forests nearby. We questioned his tastes, as he requested meat from grub-like carrion worms, but suspected that living in these lands would change your appetite. Heading out, we found the lands crawling with monsters, just as the old man had told us. In the forests we found plagued hounds and gigantic bats, and these creatures required quite a bit of work to take down, as we had to take stay clear of their diseased claws and poisonous fangs. Moving slowly, we combed the hills, clearing it of monsters, hopefully leaving the farmstead safer than it was before.
Collecting the grub-meat proved to be harder, as Craftski cursed that the creatures left hardly any tracks and were difficult to find. Hoping to have better luck underground, we descended into a canyon, finding it full of these creatures. Gathering the meat was now easy, and we hoped we had sliced of the edible parts. Returning to the hermit, he was pleased with our endeavours, and revealed to us that he had not been entirely truthful.
Collecting the grub-meat proved to be harder, as Craftski cursed that the creatures left hardly any tracks and were difficult to find. Hoping to have better luck underground, we descended into a canyon, finding it full of these creatures. Gathering the meat was now easy, and we hoped we had sliced of the edible parts. Returning to the hermit, he was pleased with our endeavours, and revealed to us that he had not been entirely truthful.
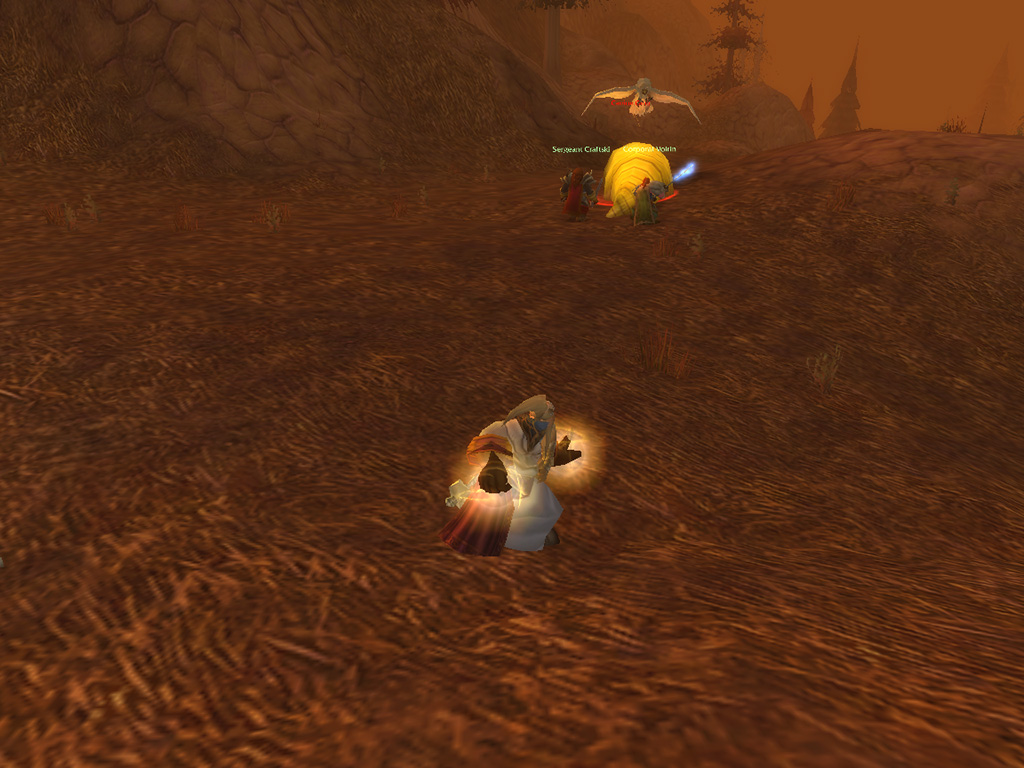
T
elling his tale, he revealed he wasn't just a hermit, but was Tyrion Fordring, once the proud governor of Hearthglen, a nearby settlement. But he had been banished from the Alliance, and marked as an exile, as punishment for aiding an Orc during the second war. He remained to live in these lands to watch over his son, who succeeded him as governor, but had joined the ranks of the Scarlet Crusade, becoming their Highlord. He asked us to help him, to free his son from the Crusade, and to make his son remember what was noble and honorable. And we agreed to do so. He asked us to search the Undercroft, a nearby tomb where Tyrion had a false grave, and where his son had buried a toy hammer. Perhaps this relic from the past would help his son remember.
Leaving slightly saddened from the story, we chose to travel to the far east, where we were told to find an Argent Dawn outpost. This proved to be a small chapel, defended by warriors from all types. Undead, Humans, Orcs, all defended this last bastion against the undead together. We reported in as agents of the Argent Dawn, and immediately received orders: To safeguard the borders and retake a series of watchtowers, and to clear a tomb filled with undead Trolls, which sounded a bit familiar. At the chapel we also found the remaining Redpath family member, who was stunned to hear of our tale, and told us of his recurring nightmares about the battle of Darrowshire. He asked us to search for spirits of fallen soldiers in the vicinity, and hoped it would bring him, and his fallen brethren, finally some rest.
Leaving slightly saddened from the story, we chose to travel to the far east, where we were told to find an Argent Dawn outpost. This proved to be a small chapel, defended by warriors from all types. Undead, Humans, Orcs, all defended this last bastion against the undead together. We reported in as agents of the Argent Dawn, and immediately received orders: To safeguard the borders and retake a series of watchtowers, and to clear a tomb filled with undead Trolls, which sounded a bit familiar. At the chapel we also found the remaining Redpath family member, who was stunned to hear of our tale, and told us of his recurring nightmares about the battle of Darrowshire. He asked us to search for spirits of fallen soldiers in the vicinity, and hoped it would bring him, and his fallen brethren, finally some rest.

A Tomb full of Trolls
A fter discussing our next step, we chose to head out towards the rumoured Troll tomb, even though we felt we had run into far too many undead, mummified Trolls lately. As we travelled along the road, we passed through the abandoned and haunted village of Corin's Crossing, which proved to be the perfect stop to find the spirits of fallen Darrowshire soldiers. Ghosts dwelled in the abandoned buildings, who after banishing them from the mortal realm, sometimes seemed to acknowledge us, thanking us for freeing them from their torment. As we cleared the town, we were sure that there had to be fallen soldiers from the Darrowshire siege among these spirits, and hoped we had helped to lift Redpath's burden.
Now we were free to continue our trip to the Troll tomb, which proved to be the same tomb that Fordring had asked us to visit. Fordring's grave consisted of a small stone cairn, overgrown with moss and dead branches. We cleared the ground and started to shovel through the dirt, and soon found an intricate crafted hammer, which although it showed its age, was still in excellent condition. With the item retrieved, we now turned our attention to the Trolls that dwelled nearby. The Trolls proved to be as tough as the ones we had encountered in the Sunken Temple, although thankfully, their spirits didn't linger to chase us after they had fallen. We descended into the tomb, fighting our way past the scattered sarcophagi and the remaining undead, until we reached the lowest floor.
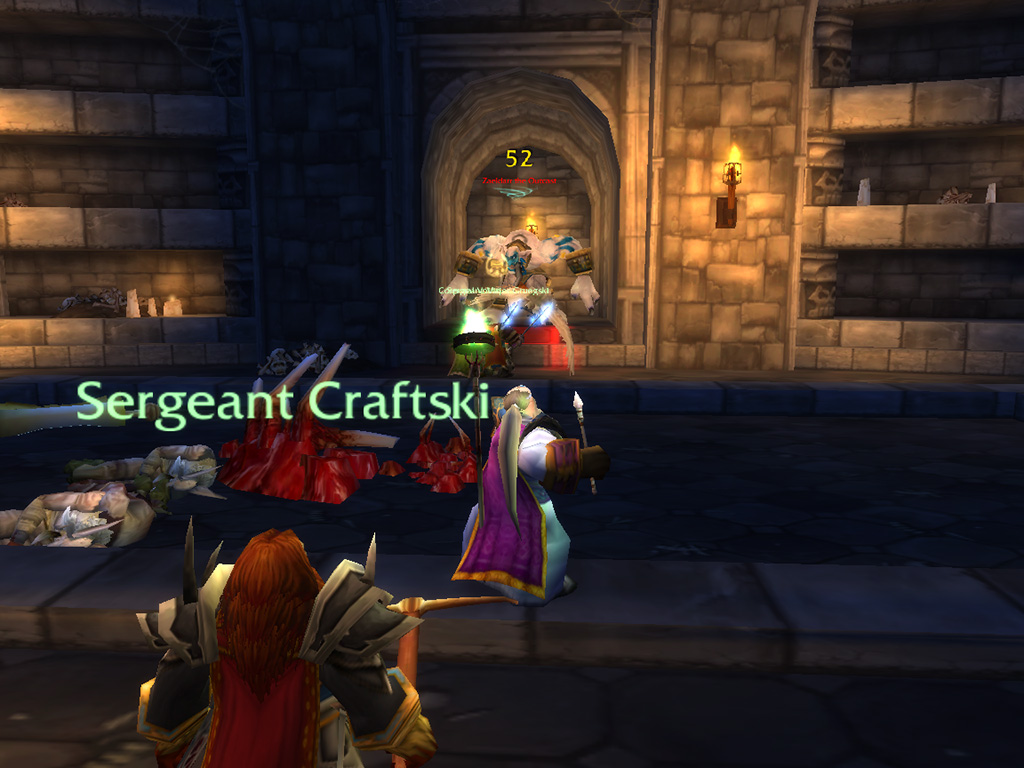
H
ere we found a hulking Troll waiting for us, who we guessed was the leader of this undead Troll clan, who went straight into the attack when as we descended the final steps. With mighty strength it swung its fists at Voirin, who parried with his polearm, deflecting the force, giving us an opening. Combining our attacks with wand, crossbow and spear, we used our advantage and downed Troll without too much trouble, stashing the monster's head in a bag as proof of our deed. As we rummaged through the tomb, hoping to find some valuables, we came upon a note from a Troll named Hameya, who warned the reader of the Scourge, as the Troll was falling victim to the undead plague. Revealing there was a stash of hidden treasure nearby, but locked away safely by a key in his possession, Hameya told us to find him in another Troll settlement in the Plaguelands: Zul'Mashar, to the north. Gruegski suddenly recalled that this pace could perhaps hold the missing tablets we had been asked to find, which would help to complete the prophecy of Hakkar!
We returned the toy hammer to Fordring, who thanked us for our kindness and sent us out again to find another item, a banner of the Order of the Silver Hand, that had once been carried by his son, but had been renounced by him during the siege of Northdale, a small town to the north. But first, we travelled to the northeast, delivering the head of the Troll chieftain to the Argent Dawn outpost of Light's Hope, letting them know the Troll troubles were over. We also informed the Redpath brother of our endeavours, who asked us to continue with our efforts to bring peace to Darrowshire, and sent us to retrieve items once held by the town's defenders. Our business done, we turned towards the mountains behind to the east, where after following a well-hidden path that ran through a canyon, we were led to a valley where a large Troll temple stood.
We returned the toy hammer to Fordring, who thanked us for our kindness and sent us out again to find another item, a banner of the Order of the Silver Hand, that had once been carried by his son, but had been renounced by him during the siege of Northdale, a small town to the north. But first, we travelled to the northeast, delivering the head of the Troll chieftain to the Argent Dawn outpost of Light's Hope, letting them know the Troll troubles were over. We also informed the Redpath brother of our endeavours, who asked us to continue with our efforts to bring peace to Darrowshire, and sent us to retrieve items once held by the town's defenders. Our business done, we turned towards the mountains behind to the east, where after following a well-hidden path that ran through a canyon, we were led to a valley where a large Troll temple stood.
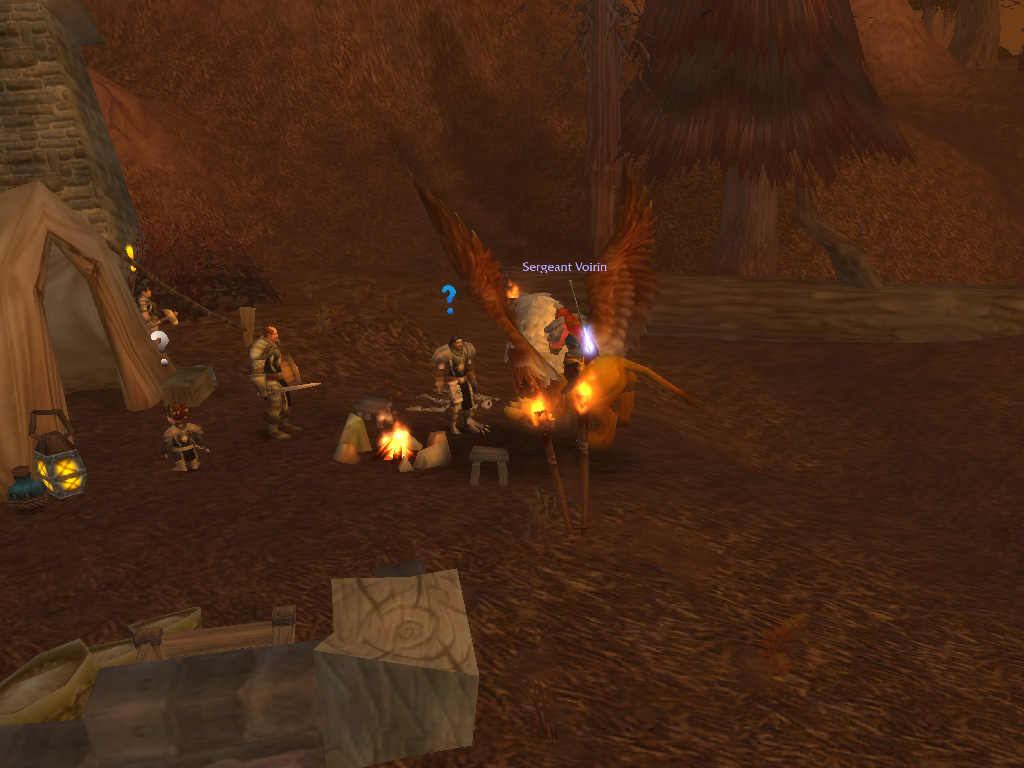
A Plagued Temple
I t appeared the Scourge had done its work, as the temple inhabitants were all undead Trolls, wandering around through the valley. We quickly learnt that the undead called to their allies when cornered, and had to be careful to not get overrun by reinforcements. Slowly and carefully we cleared the way, reaching the base of the temple allowing us to climb to the top. Here we found the tablets we had been looking for, looking quite similar to the ones we had found Zul'Farrak so long ago, and stashed them away safely to return to Steamweedle across the ocean. From high above we could see more packs of undead Trolls, and agreed to chase them, hoping to find Hameya among them. As we cleared the vicinity of undead, we were able to retrieve a rusty key from one of the Trolls, and hoped this would allow us to retrieve the treasure that had been hidden back at the tomb.
Heading back out of the valley, we made a detour past the watchtowers which we were sent to take, but found these already in control by the Alliance. It seems fellow adventurers had done our work already! The road led up past the ruins of Northdale, where we found ourselves spied upon by Scourge shades, which jumped from the shadows whenever undead reinforcements were near. But thankfully these places were where the holy powers of Orangz and Gruegski shone, burning the aberrations in holy fire, or shackling them in holy light while we made our escape. As we got closer to the town square, we finally found the banner of the Silver Hand, covered in dirt and soaked in blood. Taking care to not tear the cloth, we carefully wrapped the banner into a bundle, and turned west to return it safely to Fordring.
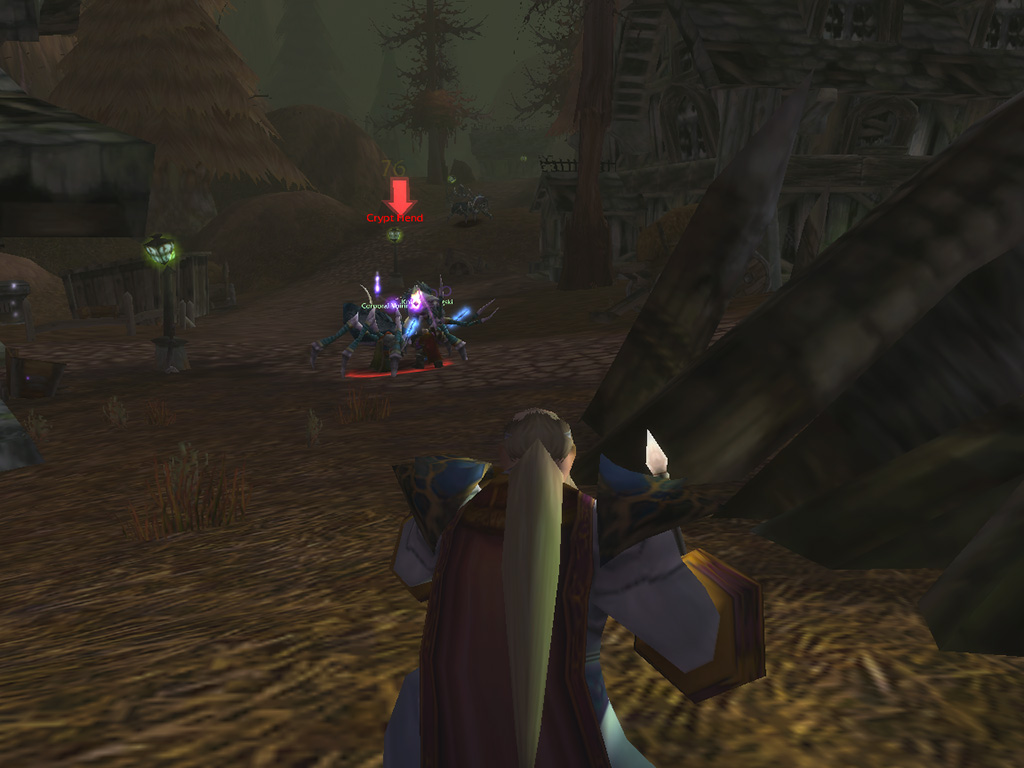
W
With the banner and toy hammer in his possession, Fordring asked us to find one final item, which would help his son remember who he used to be, which would hopefully set him free from the path of the Scarlet Crusade. When he was still governor of Hearthglen, a painting was made of his family, posing on the shores of the island Caer Darrow. A perfect moment in time, captured in oils forever. Fordring wasn't sure if the painting still existed, but sent us to the now ruined island, in the western part of the Plaguelands to search for its whereabouts, or find a trace of its painter. Before traveling west, we visited the Undercroft, where we found a strongbox buried behind the tomb, that swung open as we inserted the rusty key we had found. Inside we found a few Troll relics, but most important, a razor-sharp dagger, which was probably worth a good penny.
Now we headed west, but before traveling to Caer Darrow, we started our search for the defender's relics, finding the shield from one of the Darrowshire warriors nearby a small farmstead. We had visited this farm before, when we had cleared it from one of the polluting cauldrons, but back then had missed this relic, as it looked like an any other shield. The next item we needed was a paladin's libram, which was held in Hearthglen, a town held by the Scarlet Crusade. Knowing we could not fight our way in, we went for the surprise, and performed a quick raid, riding our mounts straight into the town hall where the book was kept, and held their warriors at bay while we searched the cabinets. As Voirin and Orangz sent Scarlet Crusaders running through pure grit and psychic manipulation, Craftski and Gruegski scanned the tomes, and were able to retrieve the libram quickly. Now we only had to retreat as fast as we could, and stretched our legs until the last crusader gave up the chase.
Now we headed west, but before traveling to Caer Darrow, we started our search for the defender's relics, finding the shield from one of the Darrowshire warriors nearby a small farmstead. We had visited this farm before, when we had cleared it from one of the polluting cauldrons, but back then had missed this relic, as it looked like an any other shield. The next item we needed was a paladin's libram, which was held in Hearthglen, a town held by the Scarlet Crusade. Knowing we could not fight our way in, we went for the surprise, and performed a quick raid, riding our mounts straight into the town hall where the book was kept, and held their warriors at bay while we searched the cabinets. As Voirin and Orangz sent Scarlet Crusaders running through pure grit and psychic manipulation, Craftski and Gruegski scanned the tomes, and were able to retrieve the libram quickly. Now we only had to retreat as fast as we could, and stretched our legs until the last crusader gave up the chase.

C
aer Darrow was our next stop, but all we found there were rubble and ruins, and a large looming castle, its gate tightly locked. Delving through the town's remains, we hoped to find some kind of trace of the lost painting, but feared it had been destroyed as the houses had been burned. But as we spent more time in the ruins, we noticed shimmering figures, spirits wandering through the remains, talking gibberish about the all the fallen and the terrors that had razed Caer Darrow to the ground. But one voice stood oud, asking for Tyrion to help. As Orangz communicated with the spirit, he found out this was indeed the artist we searched, named Renfray, who recalled the artwork, and had kept it safe in the fallen city of Stratholme. Perhaps we would still find it there, in the city's Scarlet Bastion, disguised as a different painting. Perhaps retrieving the painting would bring her peace as well.
But as it was far too dangerous to venture into the Scourge-held city of Stratholme for now, and we had to choose to continue our tasks to save Darrowshire instead, returning to Light's Hope Chapel with the items we had found. With the items of the heroes retrieved, it was now time to find items belonging to the raiders of Darrowshire, the Ghoul Lord Horgus and the Death Knight Marduk. Horgus had been defeated shortly after the razing of Darrowshire, by an Alliance army battling in the northern Plaguelands, and we were asked to find its skull. As we searched for the remains of the battlefield, we found it flooded with water, guarded by poisonous elementals, attracted to the lingering sorcery. Fighting our way through these creatures without too much trouble, we retrieved the skull, which still glowed with unholy power, and turned our attention to the relics of Marduk.
But as it was far too dangerous to venture into the Scourge-held city of Stratholme for now, and we had to choose to continue our tasks to save Darrowshire instead, returning to Light's Hope Chapel with the items we had found. With the items of the heroes retrieved, it was now time to find items belonging to the raiders of Darrowshire, the Ghoul Lord Horgus and the Death Knight Marduk. Horgus had been defeated shortly after the razing of Darrowshire, by an Alliance army battling in the northern Plaguelands, and we were asked to find its skull. As we searched for the remains of the battlefield, we found it flooded with water, guarded by poisonous elementals, attracted to the lingering sorcery. Fighting our way through these creatures without too much trouble, we retrieved the skull, which still glowed with unholy power, and turned our attention to the relics of Marduk.
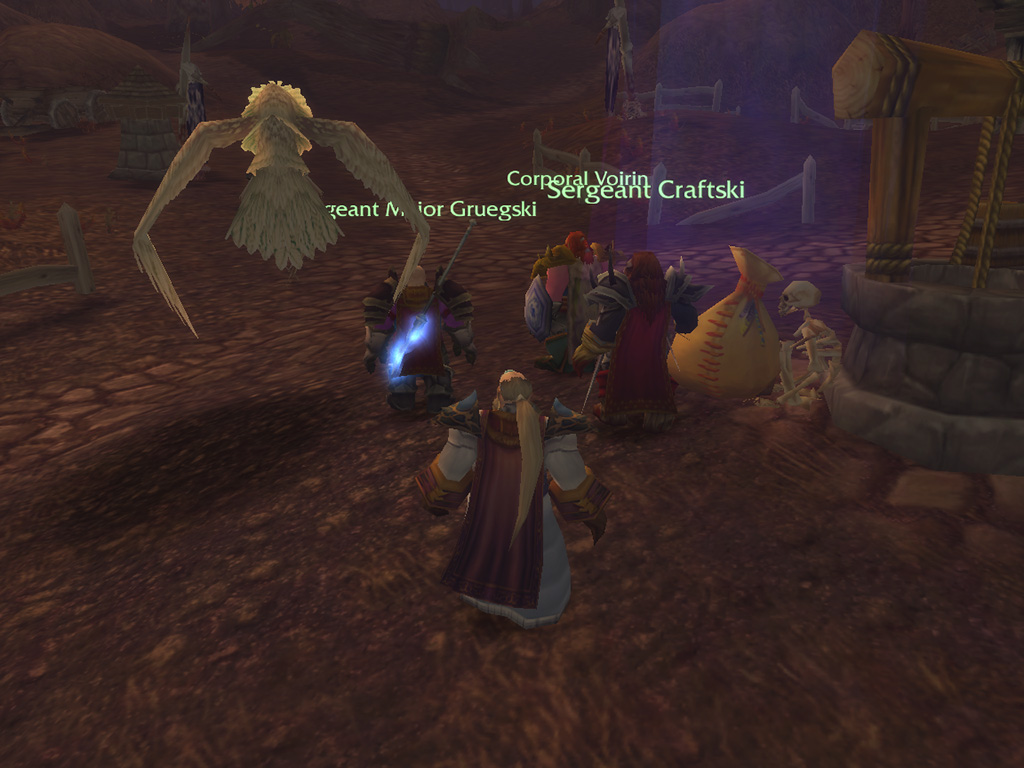
Aiding Redemption
M arduk had never been defeated in combat, but his blade had been lost, shattered and discarded in a ravine. This ravine lay near Corin's Crossing, the same town where we had earlier freed the spirits of the Darroshire defenders. Descending carefully, we were able to find the blade easily, as here as well, creatures had been attracted to the artefacts lingering power. Skeletal minions wandered around the shards, in eternal guard, and attacking us as we neared. But these minions proved to be weak, and as we had been hardened in battle against the Scourge, we soon had the blade's pieces all to ourselves. With the evil relics retrieved, we returned to Redpath and handed over these items. Now we only needed a catalyst for the spell that would invoke memories of the battle, for which we needed to find the skulls of Scourge minions that had taken part in the fight. Presenting us with a bag filled with relics we had found, Redpath asked for this final favor and sent us back to Chromie.
We fought all the undead we could find while traveling west, towards the city of Andorhal, where, after finding enough skulls, we presented our retrieved items to Chromie. She arranged the items on the floor and started her incitation, reciting in dragon-tongue, and weaving a powerful spell that would hopefully change history. With the spell complete, she returned the items into the bag and asked us to save the Redpath family from their fate. We would have to travel to the town of Darrowshire, place the bundle at the city square and wait for what would happen. If all went according to plan, the ghosts of the past would rise, allowing us to reenact the battle, and change history forever.
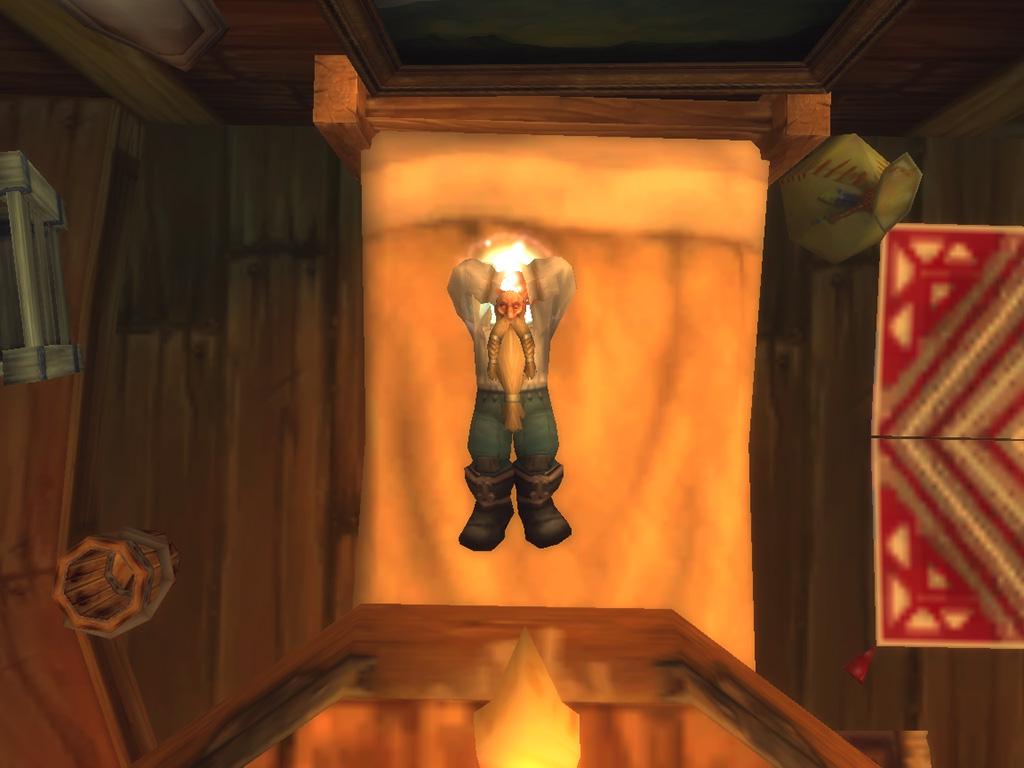
A History too Far
R iding back to the east, we revisited the ruins of Darrowshire, where we placed the bag at the town's well. The spell from Chromie had immediate effect, as all around us a misty haze gathered, and spirits rose from the ground. Soon we were surrounded by the specters of armed soldiers, wandering through the village. Along the borders of the town, the siege had already started, as ghostly Scourge minions had engaged the defending warriors. We joined the defenders in battle, fighting against the advancing undead and driving them back. But it seemed we were underestimating our enemy, as they came from all sides! While we had defeated one of the undead attacks, we had missed the two other attacking Scourge warbands! As more and more spirits vanished, we were now surrounded, we had to search for a way out.
This was easier done than we expected, as Gruegski grabbed the bag of relics and closed it tight. Suddenly the haze lifted, and all spirits vanished into thin air, returning us to present day Darrowshire. We had tried, but failed, and would have to return more cunning, skilled and powerful to change the past. With a slight dead end in the Plaguelands, we chose to finish the other tasks we had completed, for which we had to travel back to Kalimdor! After a short Gryphon flight to Menethil harbor, and a calm trip across the seas, we set course for Tanaris, where we delivered the Troll tablets we had found. The Dwarf in Steamweedle still remembered us, and was quite thrilled to see that we had retrieved the next part of the prophecy. But sadly it was still incomplete, and we would have to search for more tablets, hopefully the last ones, in the Orc-held fortress of Blackrock Spire.
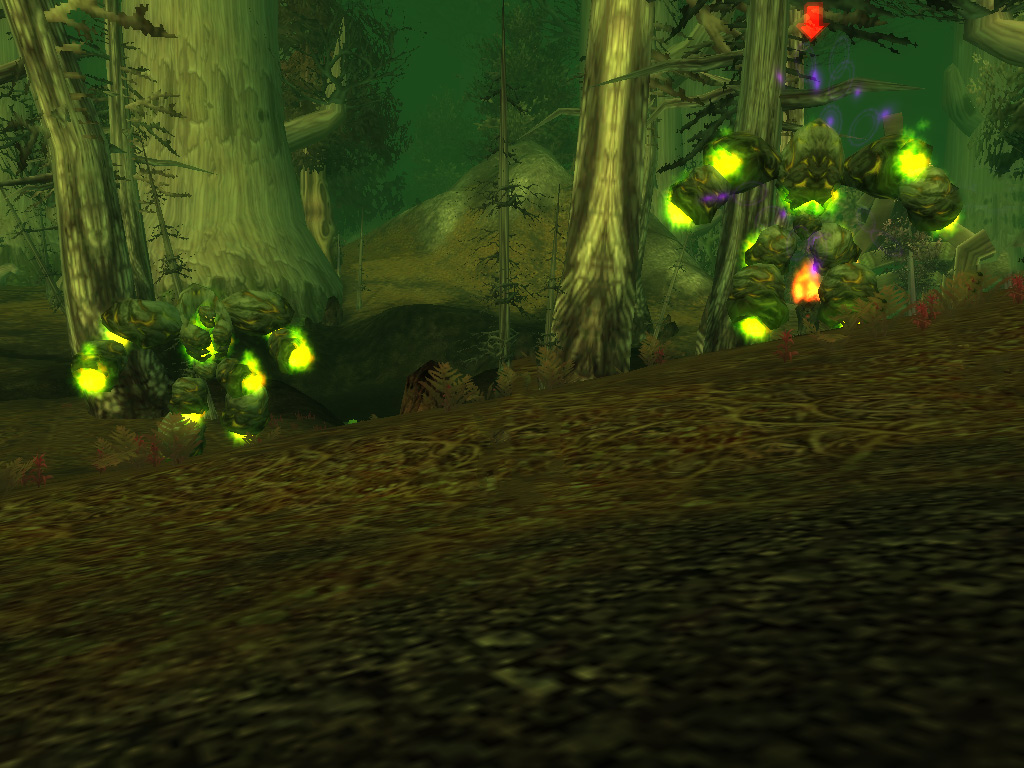
The Cleansing of Felwood
A s we had visited most of the lands in the Eastern Kingdoms, we now set out to explore the remaining lands in Kalmidor, starting with Felwood. Previously Orangz had contributed to the cleansing of the forest, but druids of the Cenarion Circle still required aid battling the demonic forces that roamed the woods. We flew by Gryphon, passing through the Barrens and Ashenvale forest, landing at the Emerald Sanctuary we had visited previously. Here the druids enlisted us to travel to the north, to investigate a rumored fresh water spring and fight the Satyr cults that had taken hold of the lands. We headed out, fighting our way through the monstrosities that stirred in the shadows, but found no trace of fresh water, as all pools had been corrupted by fel creatures and demonic Infernals.
But the Satyr proved to be easy targets: Their cult, the Jadefire, had made small camps along the forest's edge, believing they were safe from retribution. But using our rams, we charged in defiantly, trampling through the weaker minions before dismounting and advancing towards the hut of their leader. This Satyr, Xavaric, had terrorized Night Elves hoping to revitalize the forest, and had hunted the remaining wildlife, and we came to bring justice. The demon stood no chance against four stout Dwarves, routing his forces as they squabbled leaderless. Among the belongings of the Satyr we found a crudely carved wooden flute, which emitted an aura of sorrow and dread, which felt like it was playing tricks on us. We hoped the Elves would know more of this instrument, and we stowed it in our bags for them to inspect.
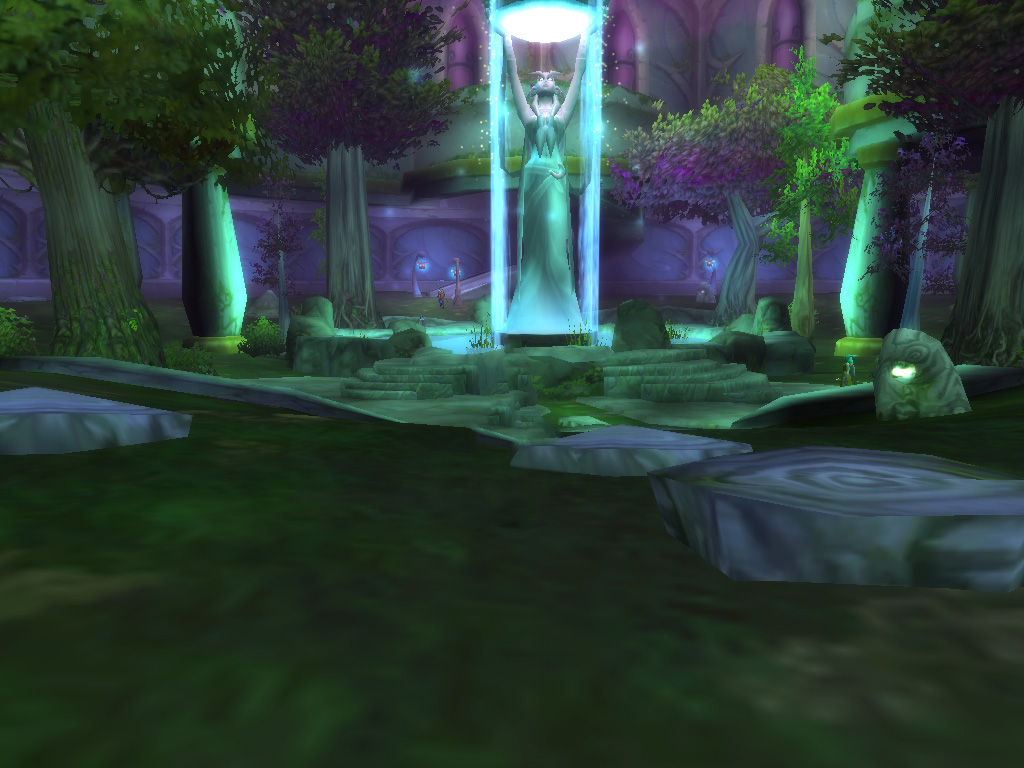
I
nitially saddened by the absence of fresh water, the druids were absolutely horrified by the flute, and explained to us what we had found. The instrument was carved from the wood of an Ancient, a sentient tree, and ally of the Night Elves. The Satyrs had bound the Ancient spirit to the flute, capturing it in eternal torment. Asked to break the binding, we were given a vial, which we would have to fill with water from the well in the Temple of the Moon, in Darnassus. Finding ourselves near a Hippogryph master, we set out for a long flight, taking us to Teldarassil, the World Tree where upon Darnassus was settled. Our Hippogryphs strafed through the trees, allowing us to see the damage the demonic corruption of Felwood from high above.
We cleared the forest, and continued our flight high over the Veiled Sea, already spotting Teldarassil in the distance. Landing on a platform at the roots of the gigantic tree, we made our upwards, to the temple, which we knew from our previous visit, when we had brought news from the Silithid invasion. We found ourselves the only visitors in the temple, and after stating our intentions, we were allowed to fill the vial with the water from the moonwell. The flight back to Felwood proved to be uneventful, and we handed over the vial, which appeared to glow from within, to the Cenarion Circle druids. Cleansing the flute with an incantation using the moonwell's water, there was only one more task to complete: To summon forth the Ancient, and set it free among the spirits of the forest.
We cleared the forest, and continued our flight high over the Veiled Sea, already spotting Teldarassil in the distance. Landing on a platform at the roots of the gigantic tree, we made our upwards, to the temple, which we knew from our previous visit, when we had brought news from the Silithid invasion. We found ourselves the only visitors in the temple, and after stating our intentions, we were allowed to fill the vial with the water from the moonwell. The flight back to Felwood proved to be uneventful, and we handed over the vial, which appeared to glow from within, to the Cenarion Circle druids. Cleansing the flute with an incantation using the moonwell's water, there was only one more task to complete: To summon forth the Ancient, and set it free among the spirits of the forest.
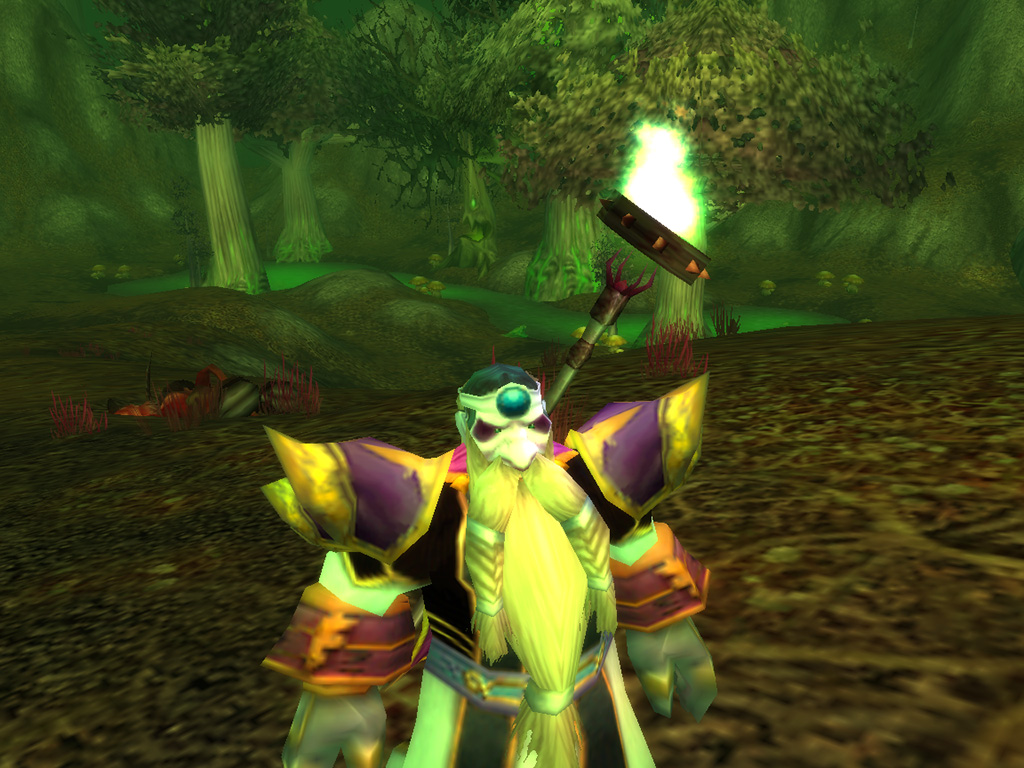
Spiritual Aid
A s the corruption of Felwood still ran deep, we were sent to the Irontree Woods to the south, where we would find ruins of an old Elven settlement. Perhaps there we would find enough lingering magic that together with the flute, could aid us in summoning the spirit. We rode to the woods, passing crumbling statues of the past, malformed trees, and groups of crazed treeants. We entered a small clearing where we, as good as we could, played some notes on the flute (proving Craftski was the most musical of us), and shimmering before us, suddenly stood the spirit of an Ancient Protector, a powerful tree elemental, that were often called upon by the Night Elves to defend their borders.
The spirit, named Arei, asked for our aid, as it still was weakened from its imprisonment. We would have to join it in a journey south, to Ashenvale, where it would be safe from the power of the fel, to which we agreed. Striding along the gigantic tree elemental, we encountered many corrupted tree spirits, attracted the cleansed energy of Arei, hoping to drain it of its new-found power. But aided by the spirit, we were able to hold these creatures off easily, and after crossing the river into Ashenvale, and fighting one last incursion of corrupted treeants, Arei was safe to dwell among the wisps once more.
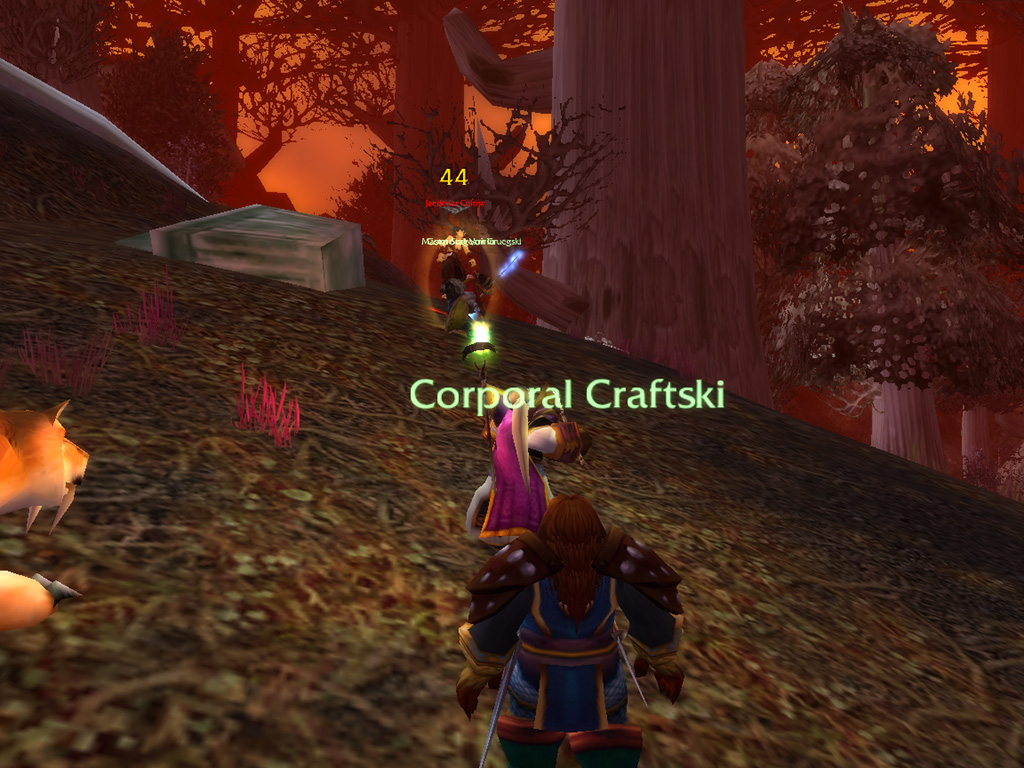
T
he spirit safe, we returned to the Emerald Sanctuary, where the druids had prepared another task for us. With the Satyr forces routed, it was time to turn our attention to the other dark force that had taken hold of Felwood. The Shadow Council, agents of the Burning Legion, had taken hold of the Jaedenar barrow dens, making it their lair, and using it as a staging ground for the demonic corruption of the woods. Although we were unable to strike at the heart of their organization, we were asked to battle the Jaedenar cultists, weakening their ranks and drawing their attention. Searching for a method to break the powerful protective braziers that lined the barrow dens, we were also asked to retrieve the corrupted water from one of the nearby moonwells, which when purified, could perhaps douse the brazier fires.
We traveled to the north, and found the Jaedenar enclave swarming with Shadow Council minions and warriors. Cultists wielding the power of fel magic immolated our robes and sent bolts of shadow magic flying our way. Hiding behind Voirin, we paved our way forwards, as Craftski sent Wingdings screeching after the assaulting demonic and mortal forces. Forcing our way through their perimeter, we came upon a cavern complex ancient as the forests of Felwood themselves, which had once been inhabited by Night Elven druids. But for now, we would only do some reconnaissance, and refrained from entering the caverns, making sure the surroundings were cleared of enemies. With the approach to Jaedenar safe, we were able to approach the nearby corrupted moonwell, and filled our canteens with the foul greenish water, which hopefully would be a key to cleansing the barrow dens.
We traveled to the north, and found the Jaedenar enclave swarming with Shadow Council minions and warriors. Cultists wielding the power of fel magic immolated our robes and sent bolts of shadow magic flying our way. Hiding behind Voirin, we paved our way forwards, as Craftski sent Wingdings screeching after the assaulting demonic and mortal forces. Forcing our way through their perimeter, we came upon a cavern complex ancient as the forests of Felwood themselves, which had once been inhabited by Night Elven druids. But for now, we would only do some reconnaissance, and refrained from entering the caverns, making sure the surroundings were cleared of enemies. With the approach to Jaedenar safe, we were able to approach the nearby corrupted moonwell, and filled our canteens with the foul greenish water, which hopefully would be a key to cleansing the barrow dens.
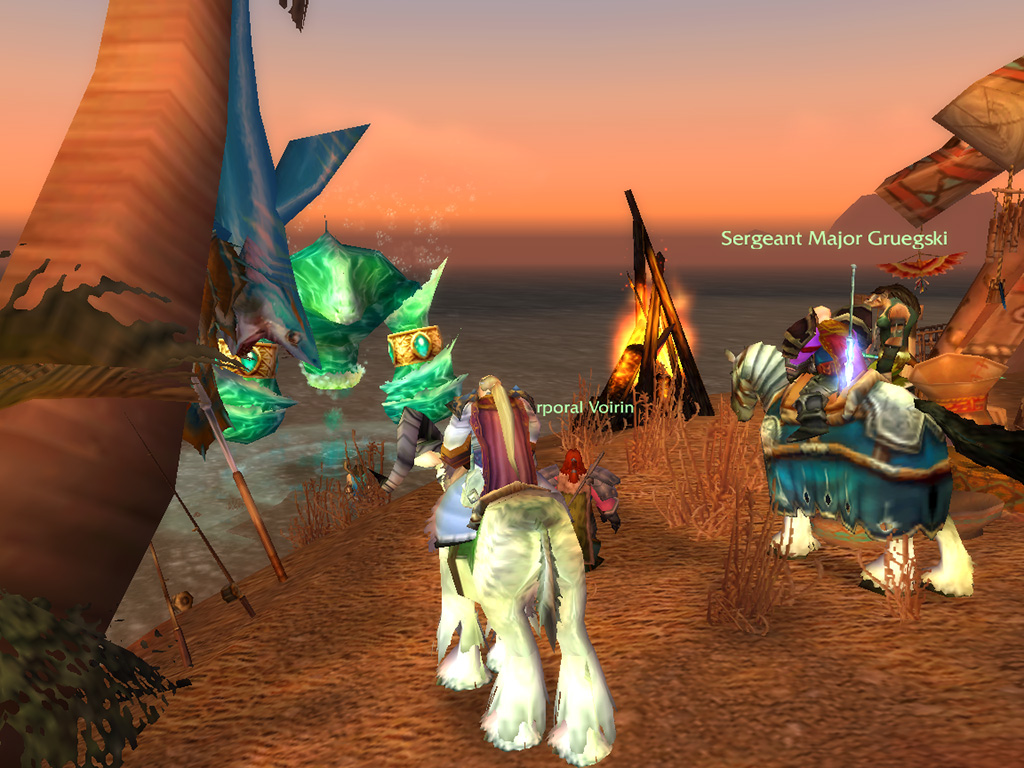
A Sparkling Errand
W ith our canteens full, we returned to the sanctuary where the druids seemed pleased with our result. And even though there were no Dwarven druids, we certainly were becoming some kind of honorary druids ourselves! We were told our next step would be easy, there would be not a single drop of blood or fighting involved, as would only have to do a bit of travelling! But it would not be easy at all, as we were sent straight into the Barrens, Horde territory, to visit a shaman called Islen. We knew we could travel to Theramore by flightmaster, but this was a long a tedious flight, so we chose to travel through the Barrens by ram. Knowing most powerful Horde soldiers were fighting in contested area's such as the Alterac Valley, Arathi Highlands and Warsong Gulch, we hoped to remain undetected before the Horde noticed our presence.
Our progress was swift, trampling through the forests of Ashenvale and we entered the Barrens following a small river. We remained close to the coast, as we would find the shaman, close to the Goblin-held town of Ratchet. We encountered some Horde adventurers along the way, but let them be, as they were mostly lesser trained initiates and citizens, and we were not looking for conflict. Eventually we reached the small camp of Islen, on a peninsula along the coast, hidden nearby a pirate settlement. We told her of our task, and asked if she would aid us, to cleanse the corrupted water of its pollution. Knowing of the dire situation in Felwood, Islen agreed to help us and started a ritual to summon the spirits of the water. As the ritual progressed, the waters slowly began to swirl until suddenly...
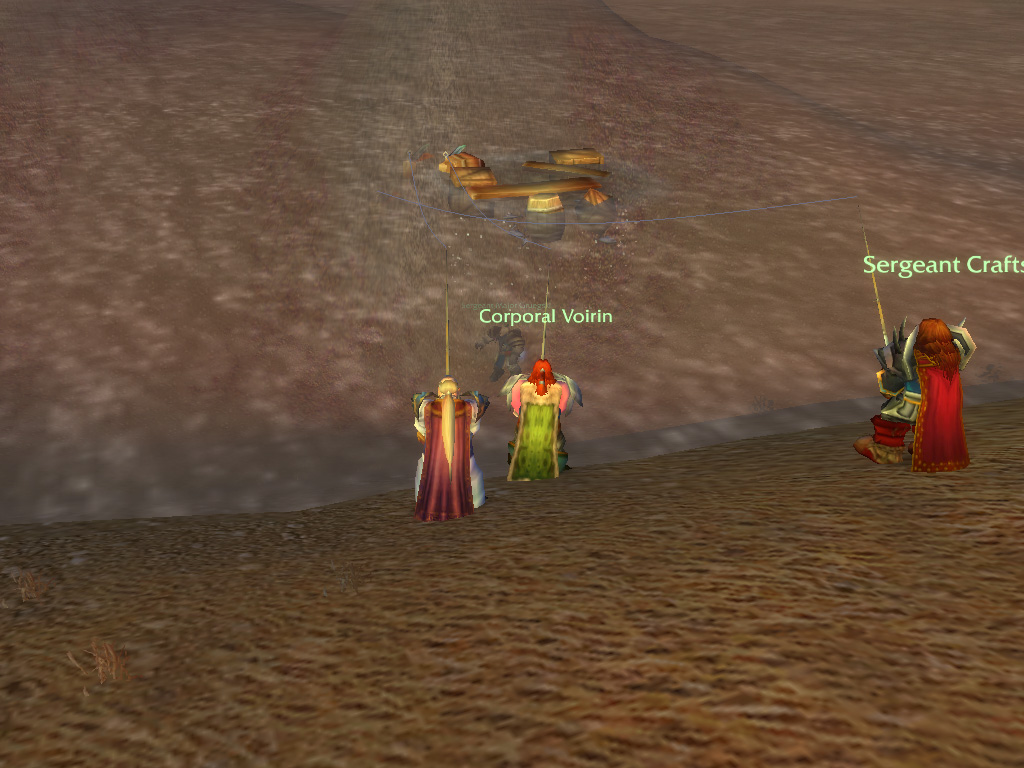
A
large water elemental appeared from the ocean, facing Islen who in turn kneeled and made her plea. She asked for the elemental to cleanse the waters, as our intentions were noble and the request of great importance. The elemental answered in a booming voice, in a tongue we could not decipher, but it appeared our request had been granted. As the Elemental disappeared into the waves, Islen handed over our canteen, the water now purified from its taint, and bode us well for our return travels. She warned us of the dangers the Shadow Council posed, but hoped we would succeed in our task. Thanking her for her blessings, we went on our way, this time with less of a hurry. Along the coast we had noticed various patches of driftwood and flotsam, which perhaps would hold valuables! Grabbing our fishing rods, we started to fish among the patches, and were able to retrieve cargo of passing or wrecked ships.
Although we didn't find a treasure chest, it was still worth our while, as Craftski cooked us a hearty meal of fish, while we rested at a campfire on the beach. It had been some time since we had such a rest, and waited for the sun to set, as we exchanged and remembered our tales and adventures. As the fire died, and the sun had disappeared, we made way to our mounts and started our return journey to Felwood, and feeling a bit emboldened, followed the Horde roads! Charging our way through the Horde outpost near Ashenvale, we found ourselves back in Friendly territory, and only a short trip away from the Emerald Sanctuary in Felwood. We delivered the canteen of water to the druids, who dosed the water in small vials, each one enough to douse a magical fire within the Shadow Hold of Jaedenar. Now it was time to infiltrate the Shadow Council stronghold.
Although we didn't find a treasure chest, it was still worth our while, as Craftski cooked us a hearty meal of fish, while we rested at a campfire on the beach. It had been some time since we had such a rest, and waited for the sun to set, as we exchanged and remembered our tales and adventures. As the fire died, and the sun had disappeared, we made way to our mounts and started our return journey to Felwood, and feeling a bit emboldened, followed the Horde roads! Charging our way through the Horde outpost near Ashenvale, we found ourselves back in Friendly territory, and only a short trip away from the Emerald Sanctuary in Felwood. We delivered the canteen of water to the druids, who dosed the water in small vials, each one enough to douse a magical fire within the Shadow Hold of Jaedenar. Now it was time to infiltrate the Shadow Council stronghold.
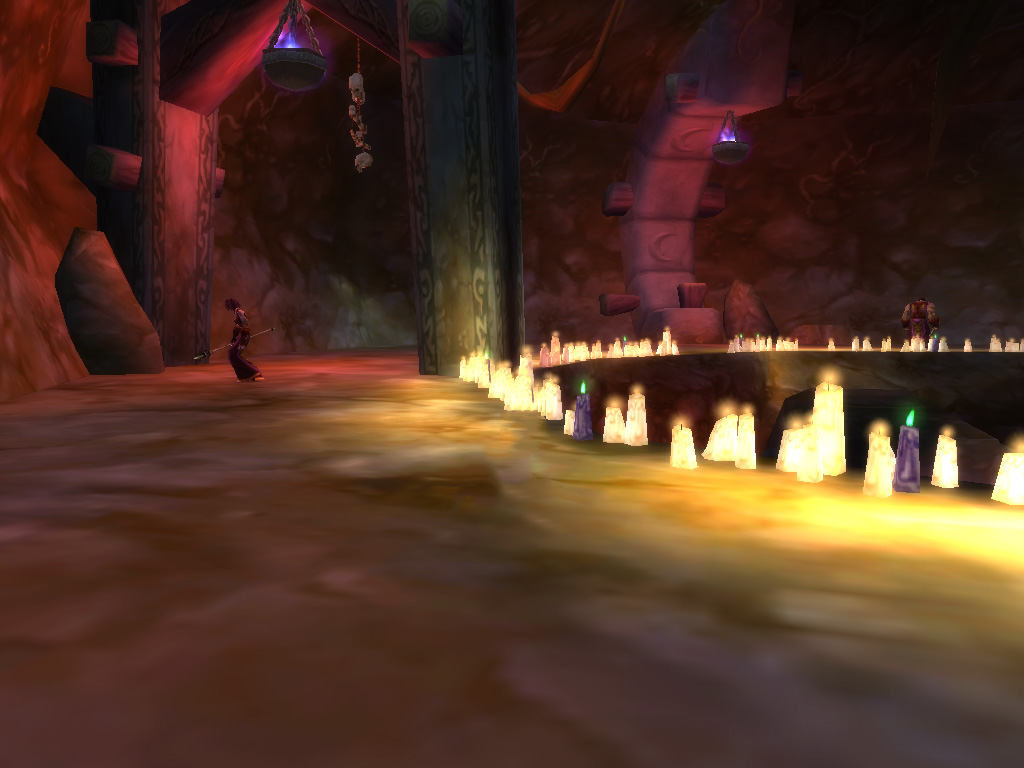
The Shadow Hold
N ow, with the power to break the Shadow Council protection, we were sent to douse the flames and defeat their leader, a powerful warlock known as Shadow Lord Fel'Dan, together with his Succubi servants. Returning to Jaedenar, we headed straight for the barrow dens, taking care of the guards that were posted outside and descending into the depths. The twisting tunnels, lined with tree roots and gigantic brambles opened up to dimly lit chambers, filled with Shadow Council warlocks and their demonic minions. Spotting the first brazier in the room ahead, we were suddenly ambushed by a large Satyr, attacking us with its twin blades. Voirin jumped in and rebuffed its attack, while we quickly took it down with our combined efforts. With the room clear, we uncorked the first vial, and doused the fire, which sent enchanted fire in all directions.
Only then did we suddenly noticed a cage in one of the corners, where slumped against its sides a Night Elf was sitting. She didn't react to our calls, and seemed be in a deep trance. Hammering the lock didn't help either, as it was shut tight, resilient to our blows. Hoping to find a way to set her free up ahead, we continued following the path, and found the second brazier not much further ahead. After taking care of the brazier with our second vial, we pushed on, fighting our way past more warlocks accompanied by Imps, Succubi and Felhunters. We followed a long winding pathway leading us to another room, which was filled foul water and slime creatures, where we found the final two braziers. Dousing them sent a shockwave through the tunnels, breaking the magic and announcing our presence!

W
e could be certain the Shadow Council minions were now on full alert, but that didn't stop us! Dredging through the filthy water and clearing it of ooze monsters, we climbed out on the other side, where the path led us into a large chamber. The Shadow Council minions were conducting some kind of ritual there, as we could spot a body lying on the sacrificial altar, surrounded by burning torches. Noticing it was a human lying on the altar, we charged into the room, fighting off the groups of Jaedenar cultist, which were spurred on by their Succubus commander. As Gruegski and Craftksi did their magical area-of-effect tricks, banishing the Succubus back to the nether and sending her minions to the ground, we soon stood alone in the room. Orangz hurried to the human figure that was lying on the altar, but was powerless, as he was long dead. After a short prayer we continued onwards, following the winding tunnels once more, until we entered a chamber fit for a leader, guarded by powerful demonic Felguards.
There, flanked by his two Succubi, we found Fel'dan, guarded by the remaining cultists and ready for a fight. Just as before, we charged in, showering the minions with a hail of holy fire and razor-sharp arrows, while Orangz and Voirin engaged the Fel'dan himself. Although an adept in magic, we were surprised by how weak the cult leader was, as he fell to the hands of Voirin easily, managing only to get a few spells off, as the rest of us were still fighting his cultist. On his remains we found a small red key and wondered: Perhaps this would open the Elf's prison? Wrapping the head of Fel'dan in a bundle as proof, we headed back towards the Shadow Hold entrance, where, arriving at the cage, gave the key a try...
There, flanked by his two Succubi, we found Fel'dan, guarded by the remaining cultists and ready for a fight. Just as before, we charged in, showering the minions with a hail of holy fire and razor-sharp arrows, while Orangz and Voirin engaged the Fel'dan himself. Although an adept in magic, we were surprised by how weak the cult leader was, as he fell to the hands of Voirin easily, managing only to get a few spells off, as the rest of us were still fighting his cultist. On his remains we found a small red key and wondered: Perhaps this would open the Elf's prison? Wrapping the head of Fel'dan in a bundle as proof, we headed back towards the Shadow Hold entrance, where, arriving at the cage, gave the key a try...
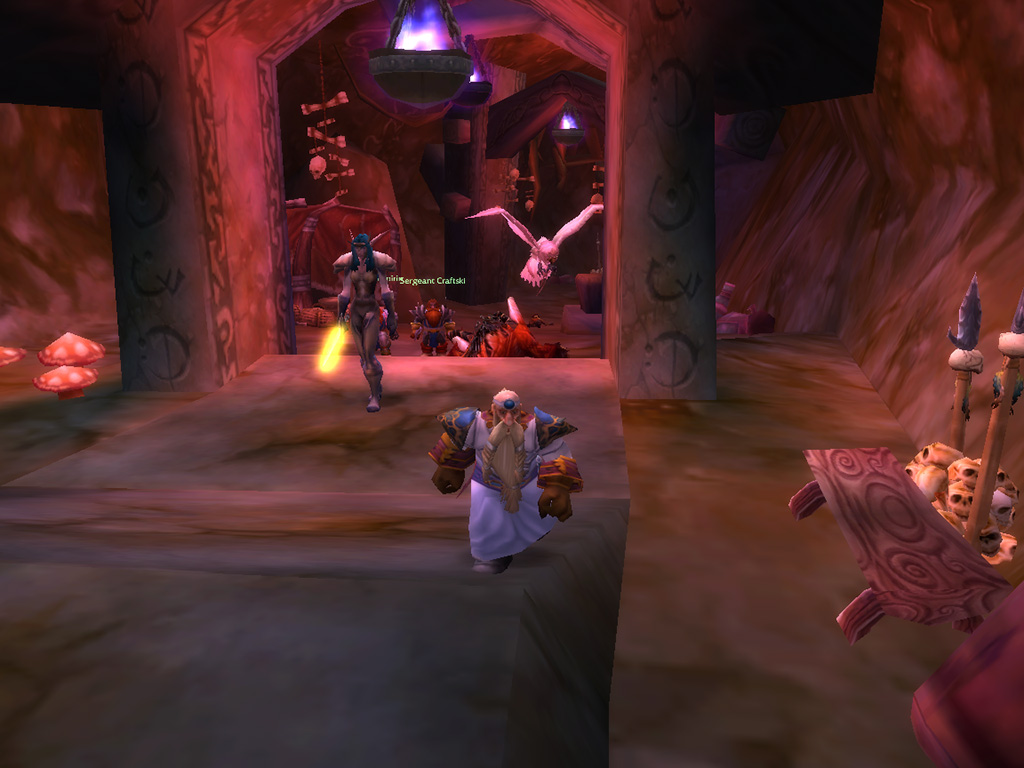
Escape from the Cult
T he Elf woke up the moment we turned the key, which was a perfect fit, and was surprised by our presence. Although weakened from her imprisonment, she quickly to her feet, and told us her name was Arko'narin, and had been captured when she, together with her allies, had infiltrated the Shadow Hold. One of her companions, Trey Lightforge, had been taken away, deeper into the hold, and they had taken away her belongings. Before escaping, she requested us to retrieve her armor, and a magical sword Lightforge, making sure the relics would not remain in the hands of the Shadow Council. We headed deeper into the barrow dens again, following Arko'narin, who seemed to know where to go. Along the way we encountered Shadow Council reinforcements, who seemed to emerge from somewhere deeper in the hold, looking for revenge.
As we passed through the room with the altar, Arko'narin hurried to the body lying upon it, struck with grief. It appeared the human we had stumbled upon earlier was Trey Lightforge, who had been tortured to death by the Shadow Council. We told her we had slain the succubus responsible, that justice had been served. Asking for a moment, she requested us to carefully gather the paladin's remains, not allowing the body to remain in such a corrupted place. Turning her attention to the chamber, she noticed a chest in the corner, and after opening it with some force, was able to find her suit of armor and the missing longsword. We accompanied her on the way out, fighting off the ambushing Cultists and demons that remained inside, and together we were able to make our way outside, emerging from the dark dungeon.
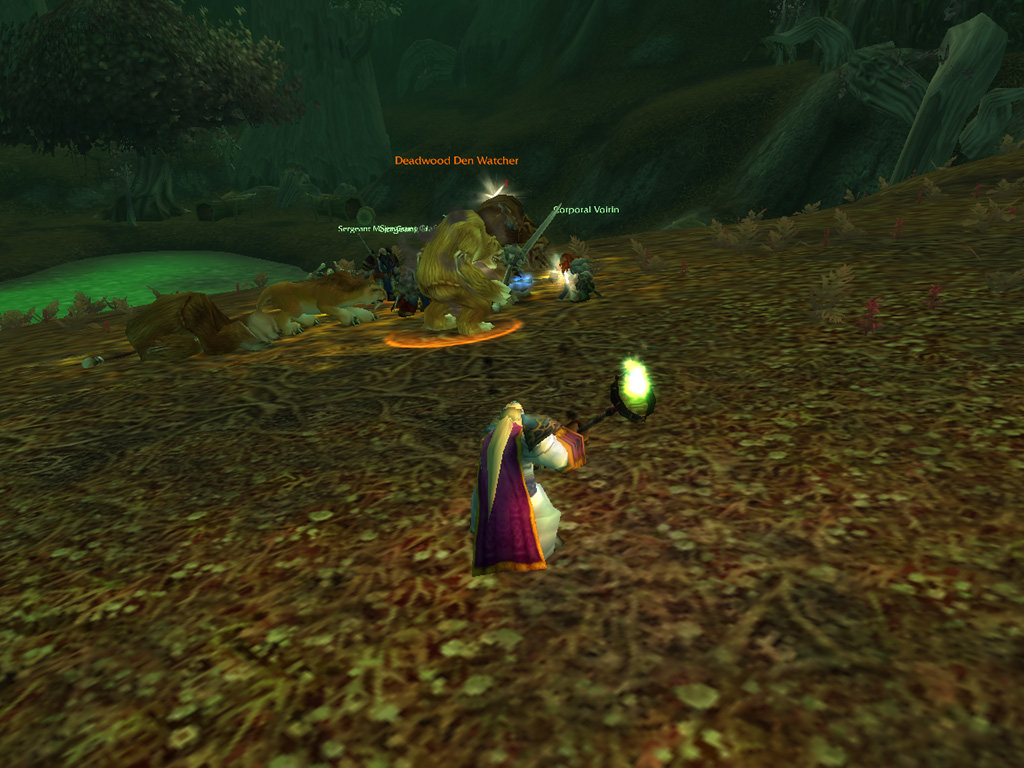
B
ut we were not safe yet: A ghostly image appeared before us, wielding the same blade Arko'narin carried: The spirit of Trey Lightforge had been corrupted and twisted by the Shadow Council, and charged in for the attack, calling us betrayers. Striking back with holy fire, and the power of the Lightforge blade, the spirit soon succumbed, vanishing in thin air. We hoped that by retrieving Trey's remains, and the banishment of his spirit, we would be able to give him rest, with Orangz preparing a short sermon while we made our way back to the Emerald Sanctuary. Arko'narin thanked us for the rescue, and chose to return to Darnassus, needing time alone. We bode her well, and reported to the druids, who were pleased with the results. With the Satyr and Shadow Council forces defeated, the cleansing of Felwood could now finally truly commence.
With Felwood now in the hands of the druids, it would need time and care to heal, quite unfit for adventurers such as us, so we were told to seek passage to the north, to find the path to Winterspring and investigate the mysteries surrounding the Moonkin and fight the Furbolg menace. We found Furbolg dwelling near the tunnel leading into Winterspring, and made sure to finish our work before heading into the cold. Although we were hardened Dwarves, we were getting used to the lush lands of the Elves! Raiding the camps of corrupted Furbolg, we retrieved relics for cleansing and found enchanted Furbolg totems which were in demand by the Timbermaw, a Furbolg clan that lived nearby, which had been spared from the corruption.
With Felwood now in the hands of the druids, it would need time and care to heal, quite unfit for adventurers such as us, so we were told to seek passage to the north, to find the path to Winterspring and investigate the mysteries surrounding the Moonkin and fight the Furbolg menace. We found Furbolg dwelling near the tunnel leading into Winterspring, and made sure to finish our work before heading into the cold. Although we were hardened Dwarves, we were getting used to the lush lands of the Elves! Raiding the camps of corrupted Furbolg, we retrieved relics for cleansing and found enchanted Furbolg totems which were in demand by the Timbermaw, a Furbolg clan that lived nearby, which had been spared from the corruption.
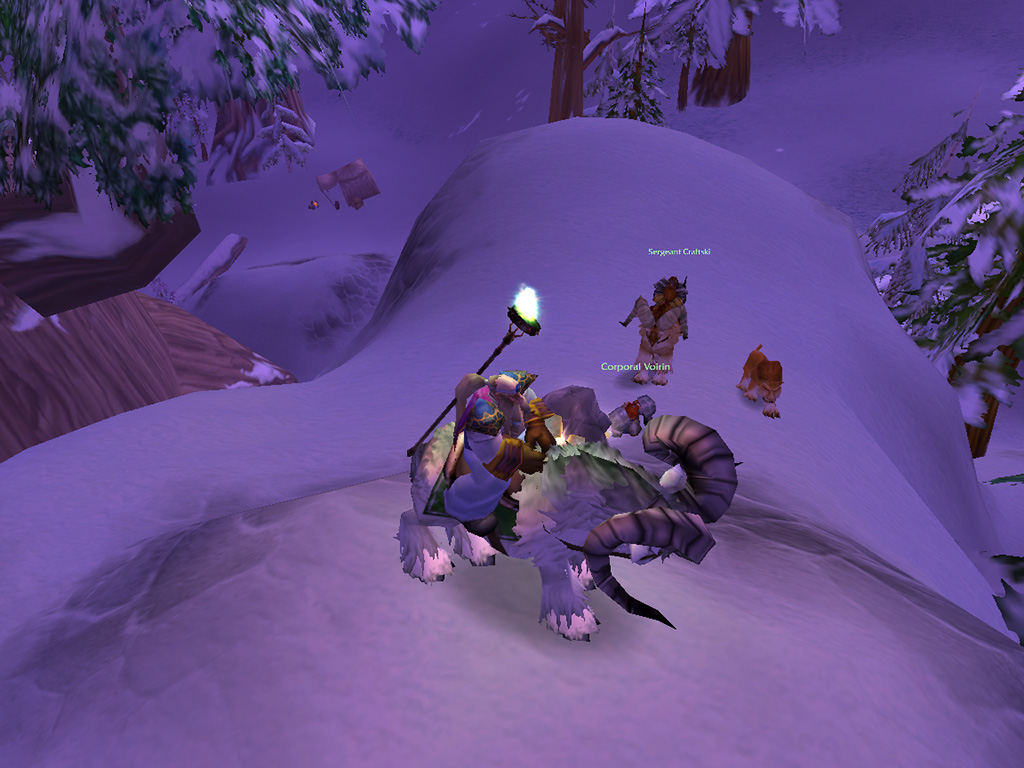
Winter is Coming
T he Timbermaw requested our aid to fight the corrupted Furbolgs, the Deadwood in Felwood and the Winterfall in Winterspring, and to keep their hold safe from their encroaching forces. Traveling through the Timbermaw tunnels, which slowly ascended to great height, we were able to reach the snow-covered lands of Winterspring, one of our final desitnations. Here we met a Dwarf named Donova that had made a small camp near one of the hot springs that was scattered throughout the lands, and was researching the cause of the Winterfall corruption. She sent us towards one of their camps, to investigate the relation between the Furbolg and the hot springs, which they were drawn to, and hoped we would find any clues. As we fought off the groups of bear-creatures, we found an empty vial, with a trace of green liquid, and hoped this would bring some new insights.
Donova was interested by our findings, and asked us to investigate further, sending us to Felwood, where the liquid seemed to originate from. It appeared there was some kind of connection between the Deadwood and Winterfall Furbolg which we would have to uncover. Traveling back to Felwood, we once again visited the Deadwood camps, and noticed a similarity between the green liquid we had found and the concoction that bubbled in the Deadwood large cauldrons. It seems these Furbolg were trading some kind of potion! Returning to Donova, she sent us to intercept one of the runners that transported the goods, hoping this would confirm our suspicions.
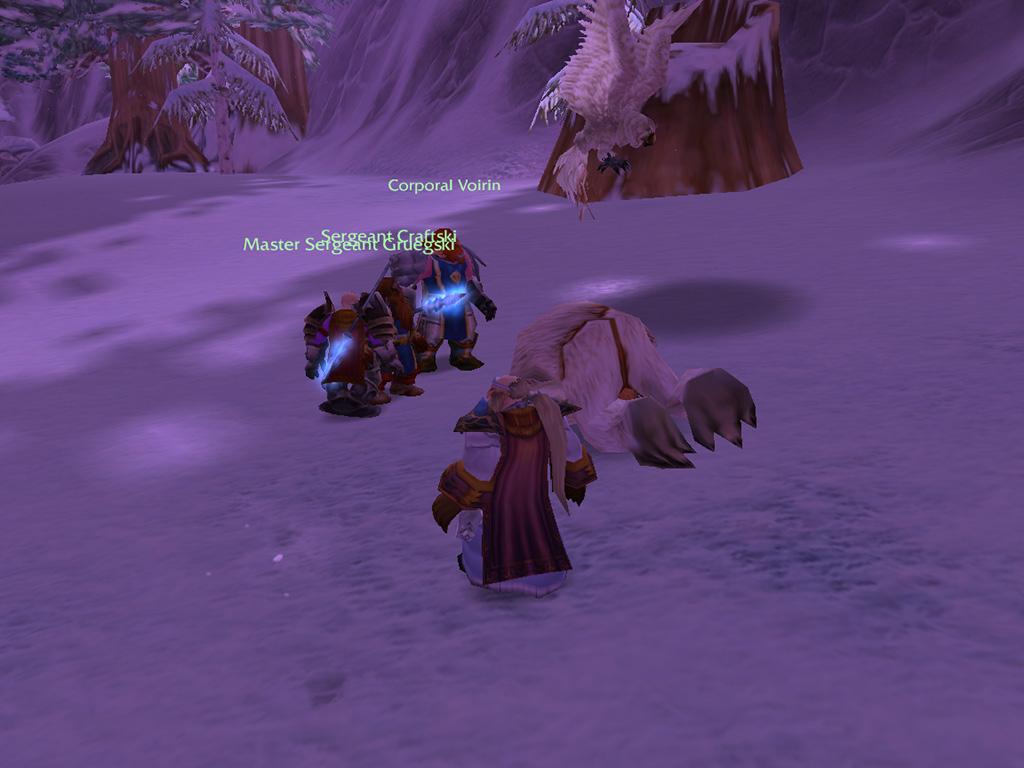
P
atrolling along the roads leading to the east, we were able to spot a pack of Winterfall wandering on the road, and hid in the trees for an ambush. The moment the Furbolg came near we sprung our trap, charging in from all sides and defeating the guards that accompanied the runner. Slaying the runner, we retrieved the large crate it carried, and returned it to Donova. Cracking it open, she found it filled to the brim with vials, all filled with the Deadwood liquid, and pondered about their use. Knowing the Winterfall as a peaceful tribe, she mentioned that the Furbolg lately seemed to grow larger and larger, and this potion perhaps made them more aggressive and powerful. But these were just effects: It would be the chieftain of the clan which had set this change in motion, and would have to be taken care of. Donova sent us to the east, where we would find the Winterfall village, and asked us to defeat their chieftain, hoping this would prevent further conflict.
As we followed the road, we passed the largest settlement in Winderspring, the Goblin settlement of Everlook, and visited the alliance Gryphon handler just outside of town. This would make future traveling all the easier! We arrived at the gates of Winterfall, and chose to limit the bloodshed: We charged in on our rams, and followed the path upwards, past the small wooden huts and heading for the cave at the top of a ridge. Riding into the cave, we found High Chief Winterfall, prepared for our arrival, but no match for our strength, and quickly dispatched him. We retrieved a crudely written tome from the cavern before we mounted up again, and fled the village, returning to Donova with the news, who hoped the tensions between Furbolg clans would diminish. She would send the tome we had found to the druids of Felwood, and hoped they would be able translate its writings.
As we followed the road, we passed the largest settlement in Winderspring, the Goblin settlement of Everlook, and visited the alliance Gryphon handler just outside of town. This would make future traveling all the easier! We arrived at the gates of Winterfall, and chose to limit the bloodshed: We charged in on our rams, and followed the path upwards, past the small wooden huts and heading for the cave at the top of a ridge. Riding into the cave, we found High Chief Winterfall, prepared for our arrival, but no match for our strength, and quickly dispatched him. We retrieved a crudely written tome from the cavern before we mounted up again, and fled the village, returning to Donova with the news, who hoped the tensions between Furbolg clans would diminish. She would send the tome we had found to the druids of Felwood, and hoped they would be able translate its writings.
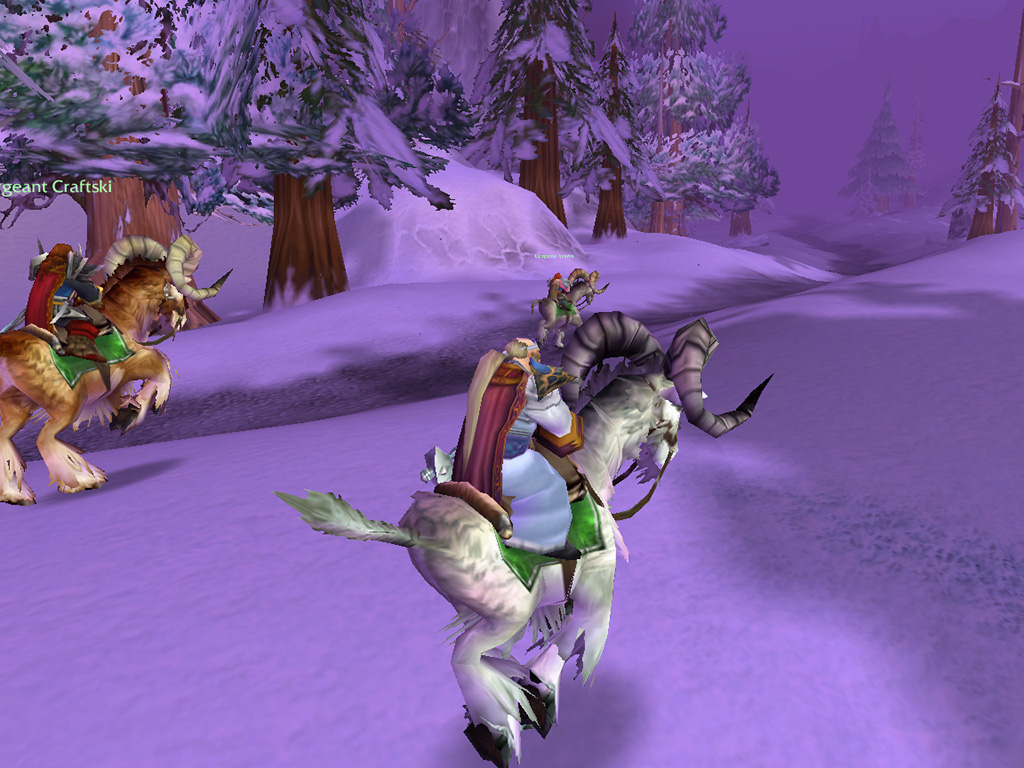
Secret of the Wildkin
W ith the Furbolg incursions taken care of, we resumed our journey, and gave Everlook a visit, where we restocked our supplies and spent some time at the inn, learning to appreciate Goblin cooking more and more. The locals directed us to a nearby village, called Starfall, as its inhabitants had been looking for adventurers. Not passing up an adventure, we made a short trip north, and arrived at a small Night Elf lodge, where next to Elves, we also found Dwarven members of the Explorer's League. The Dwarves asked us to investigate a camp to the south, which was rumored to have been raided by rampant Wildkin.
We led our rams south, where we found a lone Dwarf along the road, a survivor of the raid, who asked us to investigate the camp's remains, and hoped we would be able to find his belongings, a toolbox and an amulet, which he had left behind. The camp was not far away, but we found nothing salvageable, as everything had been smashed to rubble. Craftski's keen eyes noticed an abandoned wagon not too far ahead, which upon closer inspection, contained a toolbox which probably belonged to the Dwarf, but we found no trace of the amulet. There was the possibility the Wildkin had took it, so Craftski took the lead, tracking the creature's footprints, which led us far off the road...
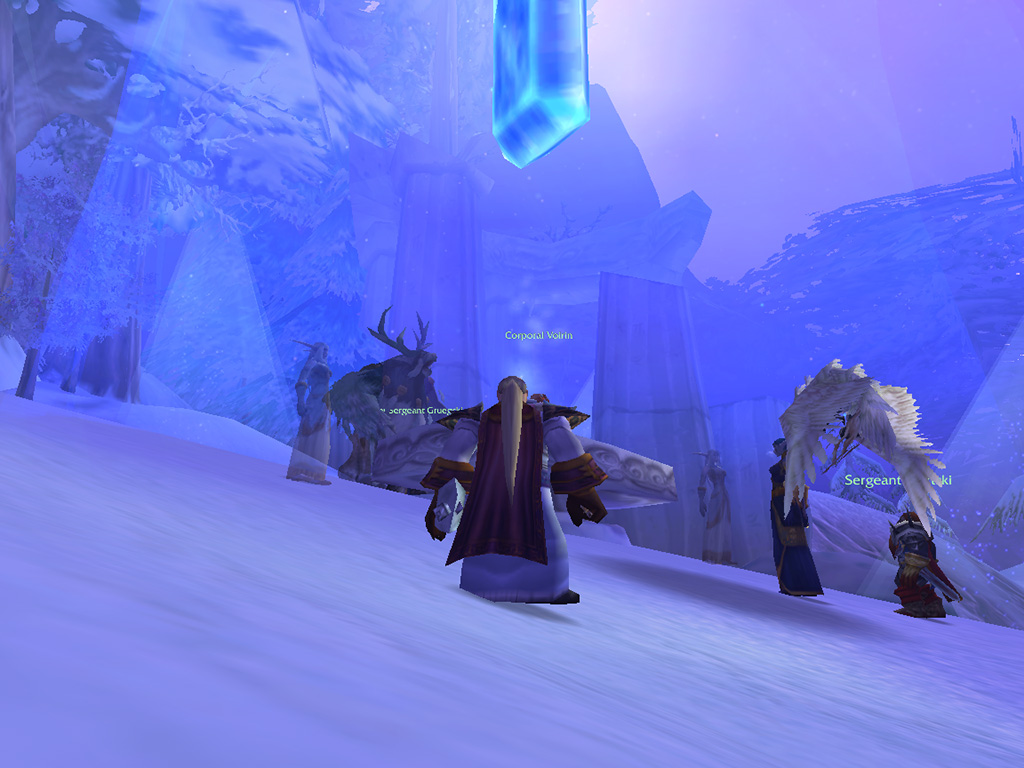
T
racking the prints in the snow was almost impossible, but Craftski seemed to know where to go. We followed him deeper into the forest until we were hailed from up ahead: There, in a small clearing stood a Night Elf, beckoning us closer. The Elf, introduced herself as Ranshalla, and was researcher of the Wildkin, and had stumbled on something mysterious. An altar could be found nearby, which seemed to draw Wildkin from afar, and made fiercely territorial. Ranshalla wanted to find out why, and asked us to escort her, while she had to perform various incantations and light torches, lifting the spells that shrouded the altar in mystery. As we were hunting Wildkin, we agreed to help, and headed out towards the caves. Here we saw plenty Wildkin, and made our way past the creatures, fighting those that came too near, and not disturbing the rest.
Ranshalla lighted the torches one by one, which seemed to attract the attention of the Wildkin, drawing the creatures into a frenzy and attacking us. Fighting off a large group of the beasts, we found a small feathered amulet we suspected belonged to the Dwarf we had passed, as it was inscribed with the mark of the Explorer's League. We stowed it away safely and continued escorting the Elf higher up the mountain, until finally, the final torch was lit and the path to the altar opened. The altar was surrounded by the remains of a large Elven structure, its crumbled pillars reaching for the skies. Ranshalla approached, the altar, started her final incantation, when suddenly the spirit of an Elven priestess appeared.
Ranshalla lighted the torches one by one, which seemed to attract the attention of the Wildkin, drawing the creatures into a frenzy and attacking us. Fighting off a large group of the beasts, we found a small feathered amulet we suspected belonged to the Dwarf we had passed, as it was inscribed with the mark of the Explorer's League. We stowed it away safely and continued escorting the Elf higher up the mountain, until finally, the final torch was lit and the path to the altar opened. The altar was surrounded by the remains of a large Elven structure, its crumbled pillars reaching for the skies. Ranshalla approached, the altar, started her final incantation, when suddenly the spirit of an Elven priestess appeared.
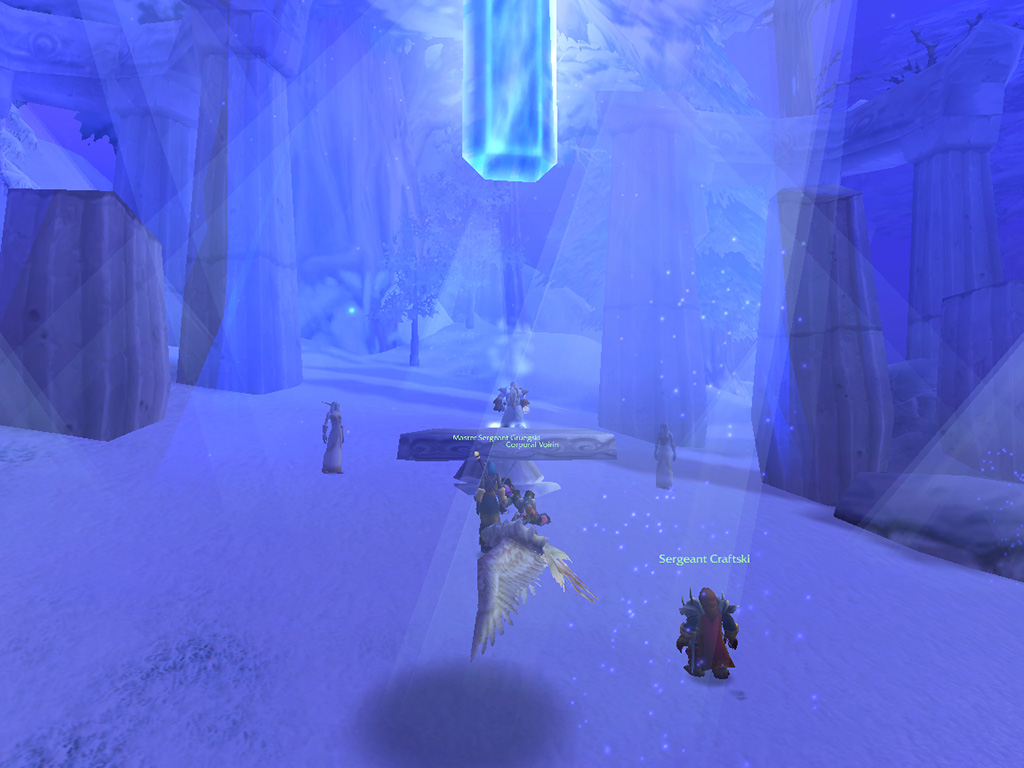
T
he spirit called out to us, asking for our intentions, upon which Ranshalla asked her for an answer to her mystery. Up in the air a gigantic gemstone appeared, which according to the spirit was once used to communicate with the Elven goddess, Elune. As Elune needed protectors for this gemstone, the Wildkin were created, sworn defenders of its power and secrets, with the wisdom of an owl and strength of a bear. As the gem weakened, and its power was lost, the altar fell into disarray, and the Wildkin grew more feral. Still, the creatures were drawn to places that they were once sworn to protect, defending it with all their might. Wherever you would find Wildkin, you could be sure some ancient power dwelled nearby.
Upon this, the priestess disappeared, and the gem glittered for one final time before dissolving as well. Ranshalla asked us to return word of what we had found back to Darnassus, and chose to remain behind, needing time to dwell on what we had uncovered. Making our way down the mountain safely, we returned to the road and made our way to the Dwarf, handing over his amulet and toolbox. He rewarded us generously, thanking us many times before we parted ways. We returned to Everlook from where we flew to Darnassus, for an audience with the Arch Druid himself, Fandral Staghelm. Making our way through Darnassus and presenting our findings to Staghelm, he told us it wasn't much news, as this had been known by the druids for a long time. So there went our hopes to be immortalized in the Hall of Explorers!
Upon this, the priestess disappeared, and the gem glittered for one final time before dissolving as well. Ranshalla asked us to return word of what we had found back to Darnassus, and chose to remain behind, needing time to dwell on what we had uncovered. Making our way down the mountain safely, we returned to the road and made our way to the Dwarf, handing over his amulet and toolbox. He rewarded us generously, thanking us many times before we parted ways. We returned to Everlook from where we flew to Darnassus, for an audience with the Arch Druid himself, Fandral Staghelm. Making our way through Darnassus and presenting our findings to Staghelm, he told us it wasn't much news, as this had been known by the druids for a long time. So there went our hopes to be immortalized in the Hall of Explorers!
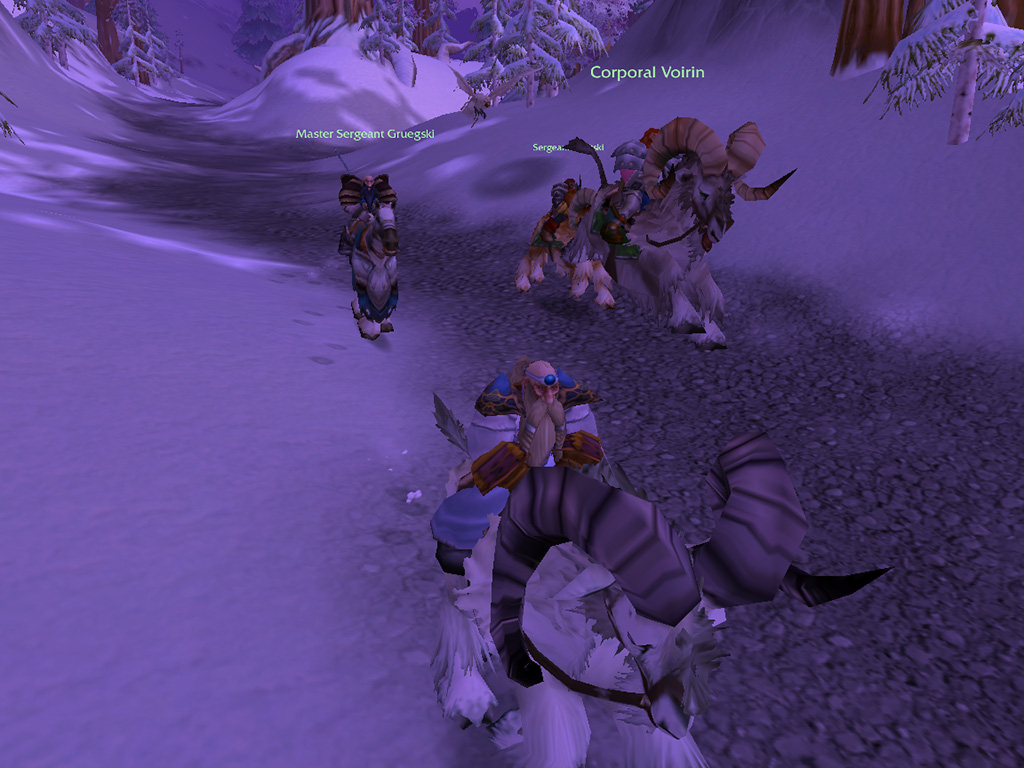
Victory at Last
F or now, we had seen enough of the Elven lands, and returned to Ironforge, where we got quite a surprise: It seemed our trainers were content with what we had learned, and our long training was finally over. Now, as masters of our skills, we would have to take fight to all enemies that threatened the Alliance, from the Scourge in the fallen city of Stratholme, to the Orcs dwelling in Blackrock Spire. But even if we would be able to brave those, there were rumors of Dragons to the west, and a mystery of the powerful elementals dwelling far below Blackrock Mountain.
It felt our journey had only just begun.


With our friends at 60, what will happen next? Stay tuned for the continued adventures of the Dwarftastic Four! Otherwise, get in touch!